This section contains how-to content for pricing maps in Theatre Manager.

The following how to guide demonstrates setting up a new Pricing Map.
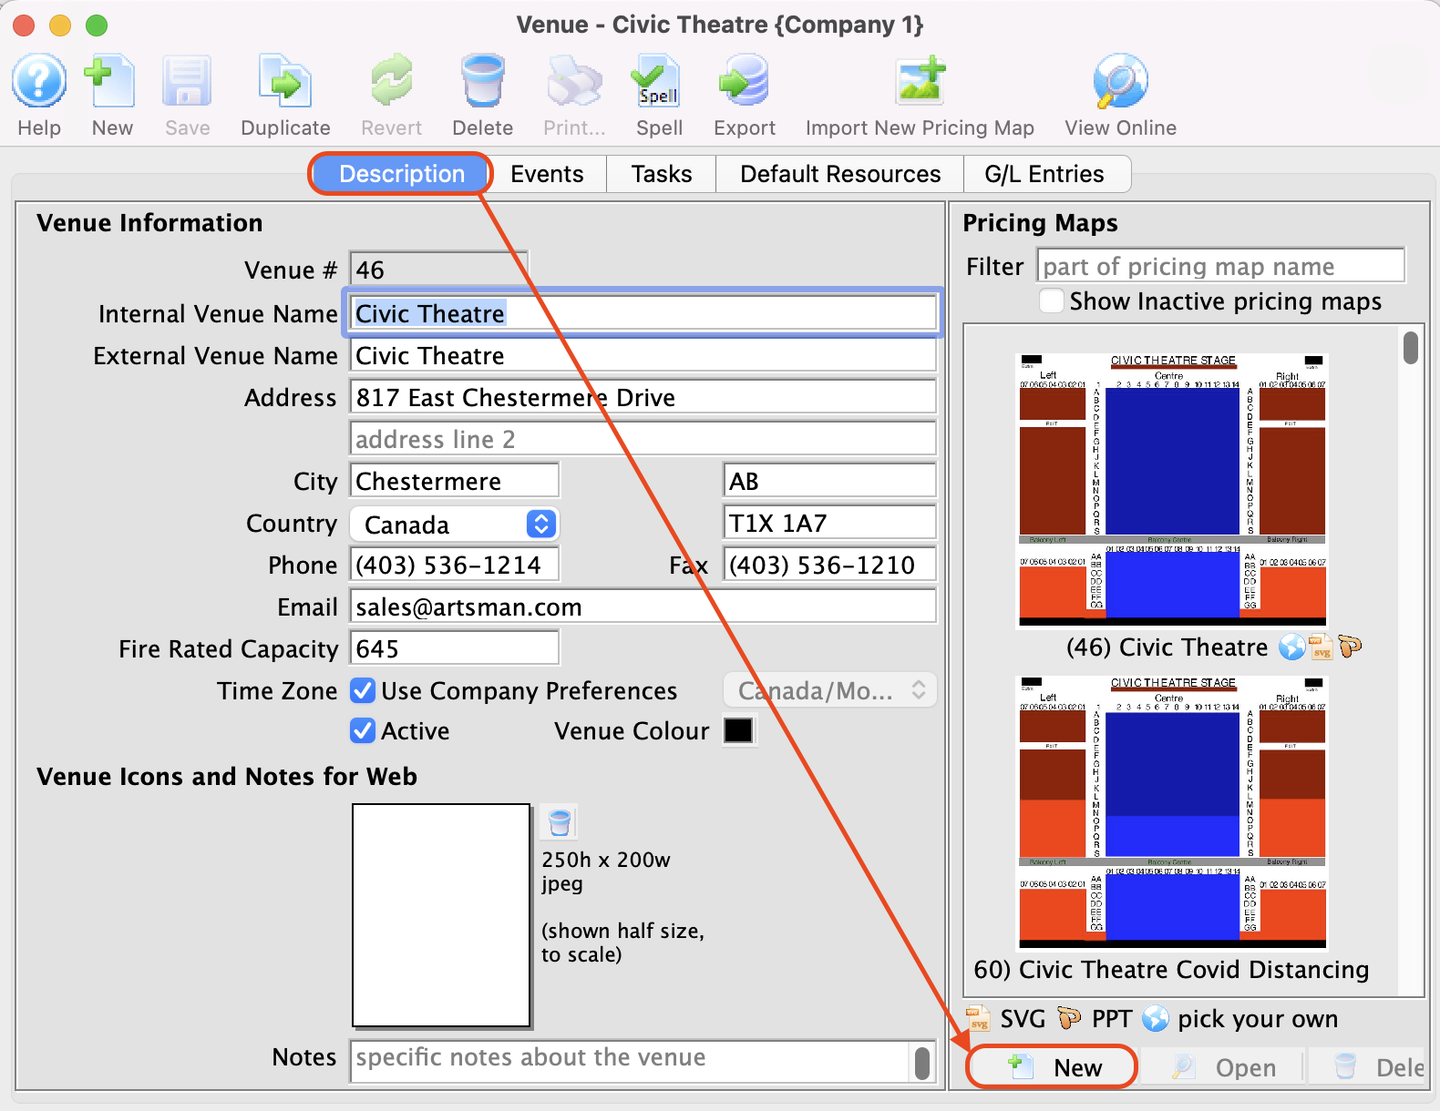
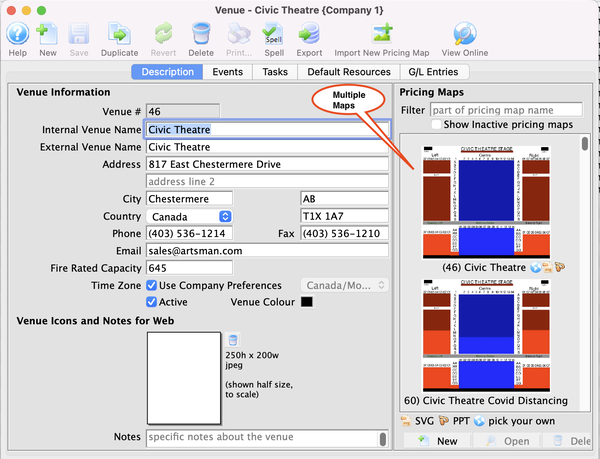
1. Click the New Button in the Description Tab of the venue window
- The new button is located in the lower right conner of the Description Tab venue window.
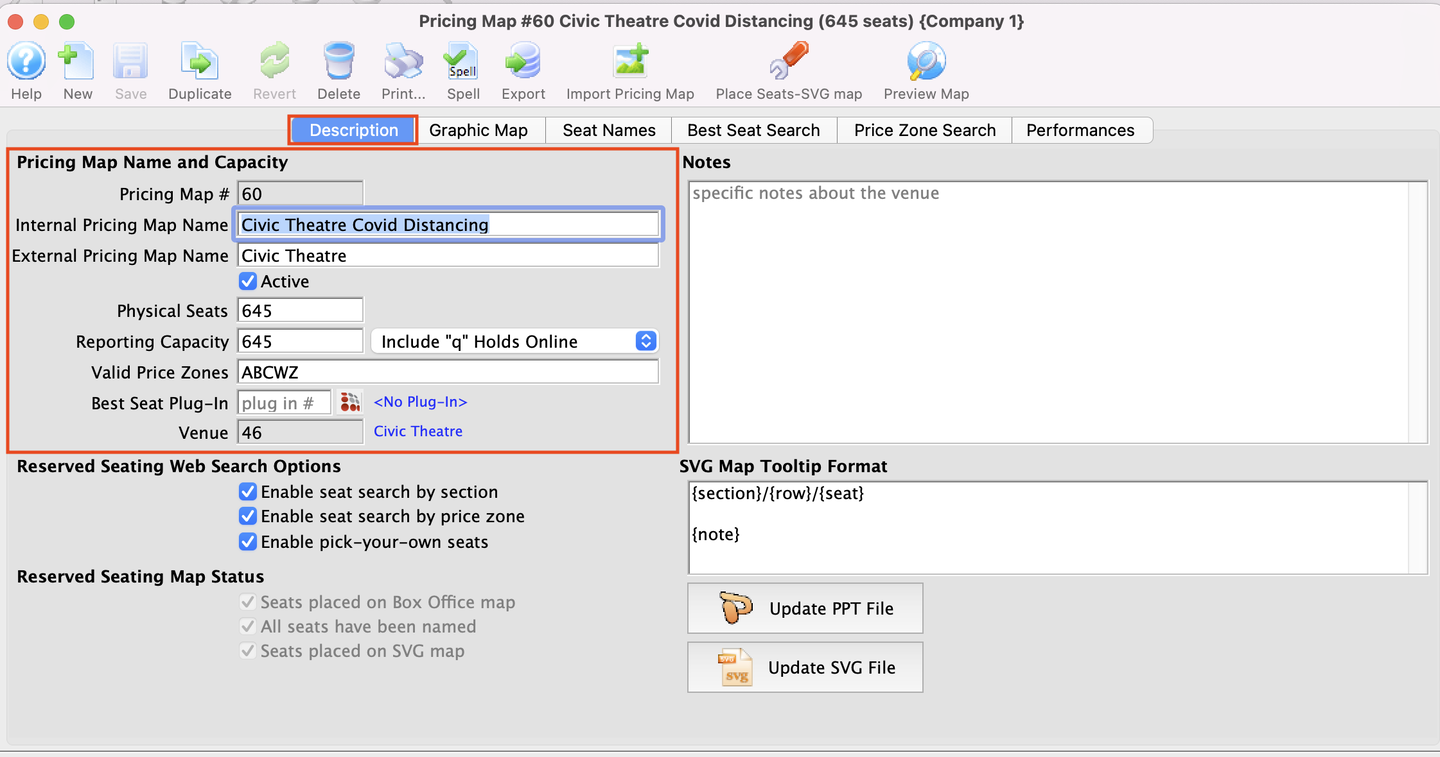
2. Enter Pricing Map Name and Capacity Information
- On the Pricing Map Name and Capacity Information section You'll need to input informations such as; Pricing Map #, Internal Pricing Map Name, External Pricing Map Name etc.
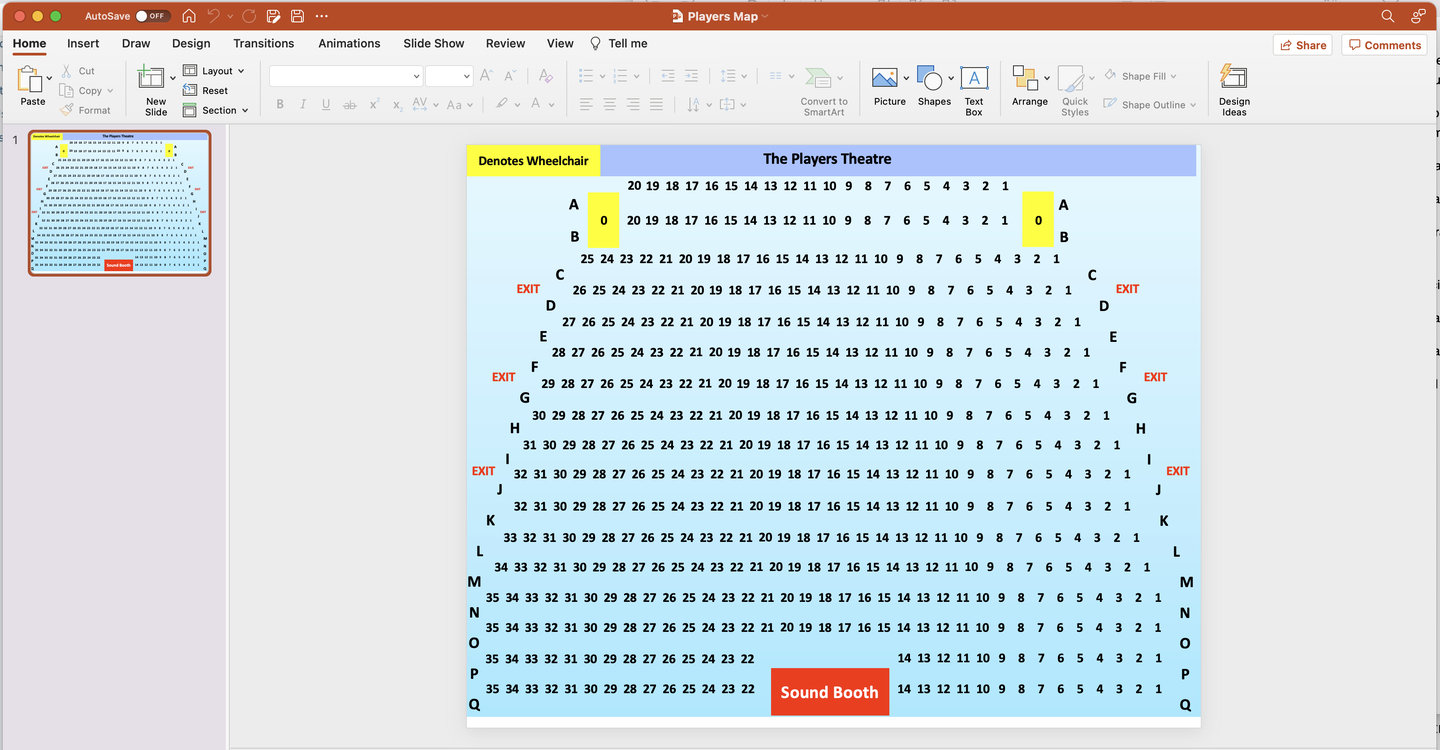
3. Creating a Graphic for the Map
- Graphic for the map should be created only in Power Point, saved as PPT file before converting to SVG file
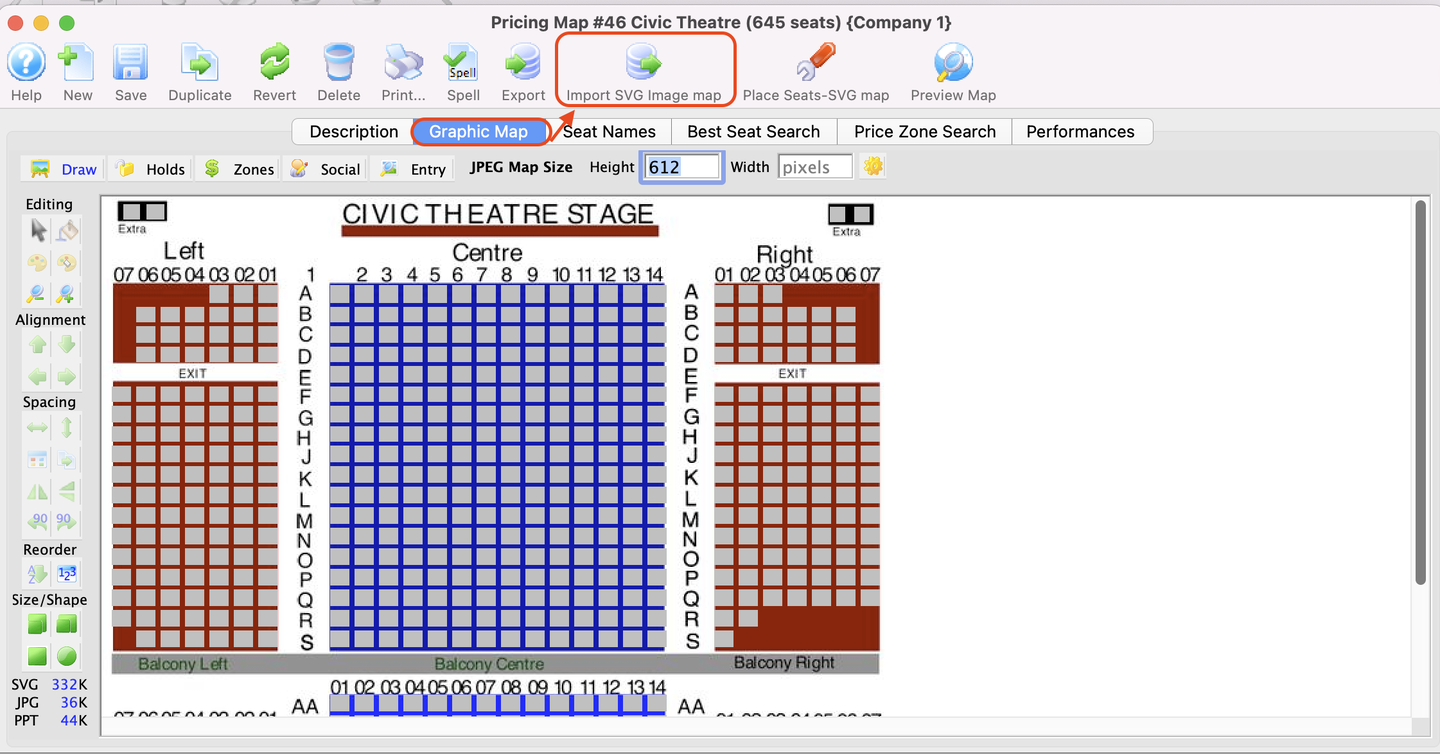
4. Import the SVG file
- Click the Graphic Map tab Import the SVG file into TM via the uising the import SVG image map button at the top the window Or you can simply drag drop your SVG file from you machine into the graphic map tab. Learn more about adding graphic maps to your pricing map.
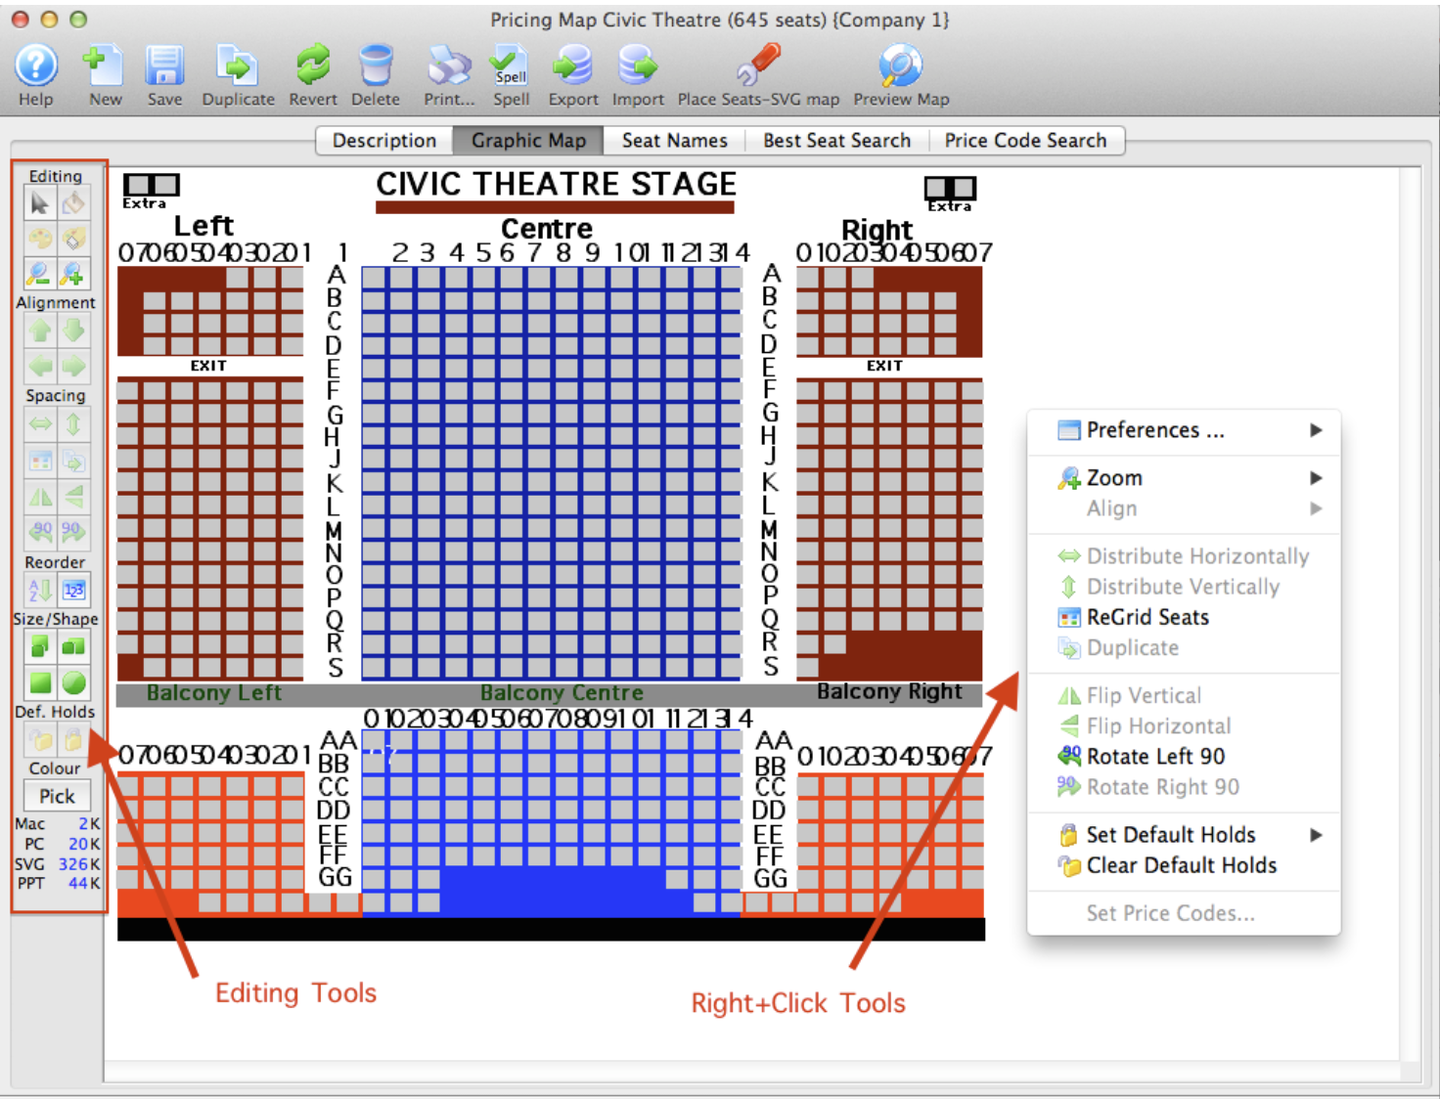
5. Place Seats on the Pricing Map
-
Still in the Graphic Map Tab, you have two options of seats shape (square or circular). Circular/Round seats typically indicate "wheelchair" or ADA access seats.
-
Select the appropriate shape button. Learn more about placing seats on a map.

- Click on the Add Grid of Seats button. This will open the Add Block of Seats window to add a section of seats. The Add Seat button adds single seats to the map. This will open the Add Block of Seats window to add a section of seats. The Add Seat button adds single seats to the map.
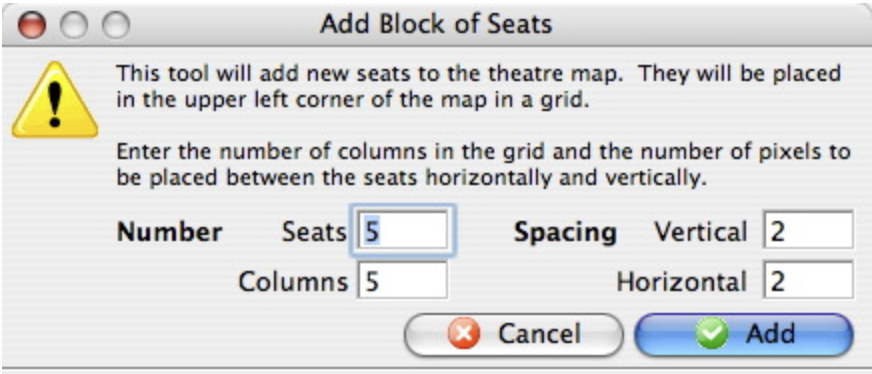

- Click the Add button. This will place a grid (block) of seats in the upper left corner of the theatre map. Click on one of the added seats and drag the grid of seats into the appropriate place on the theatre map. Continue adding seats (grid by grid) until the total number of seats have been placed on the graphic representation.
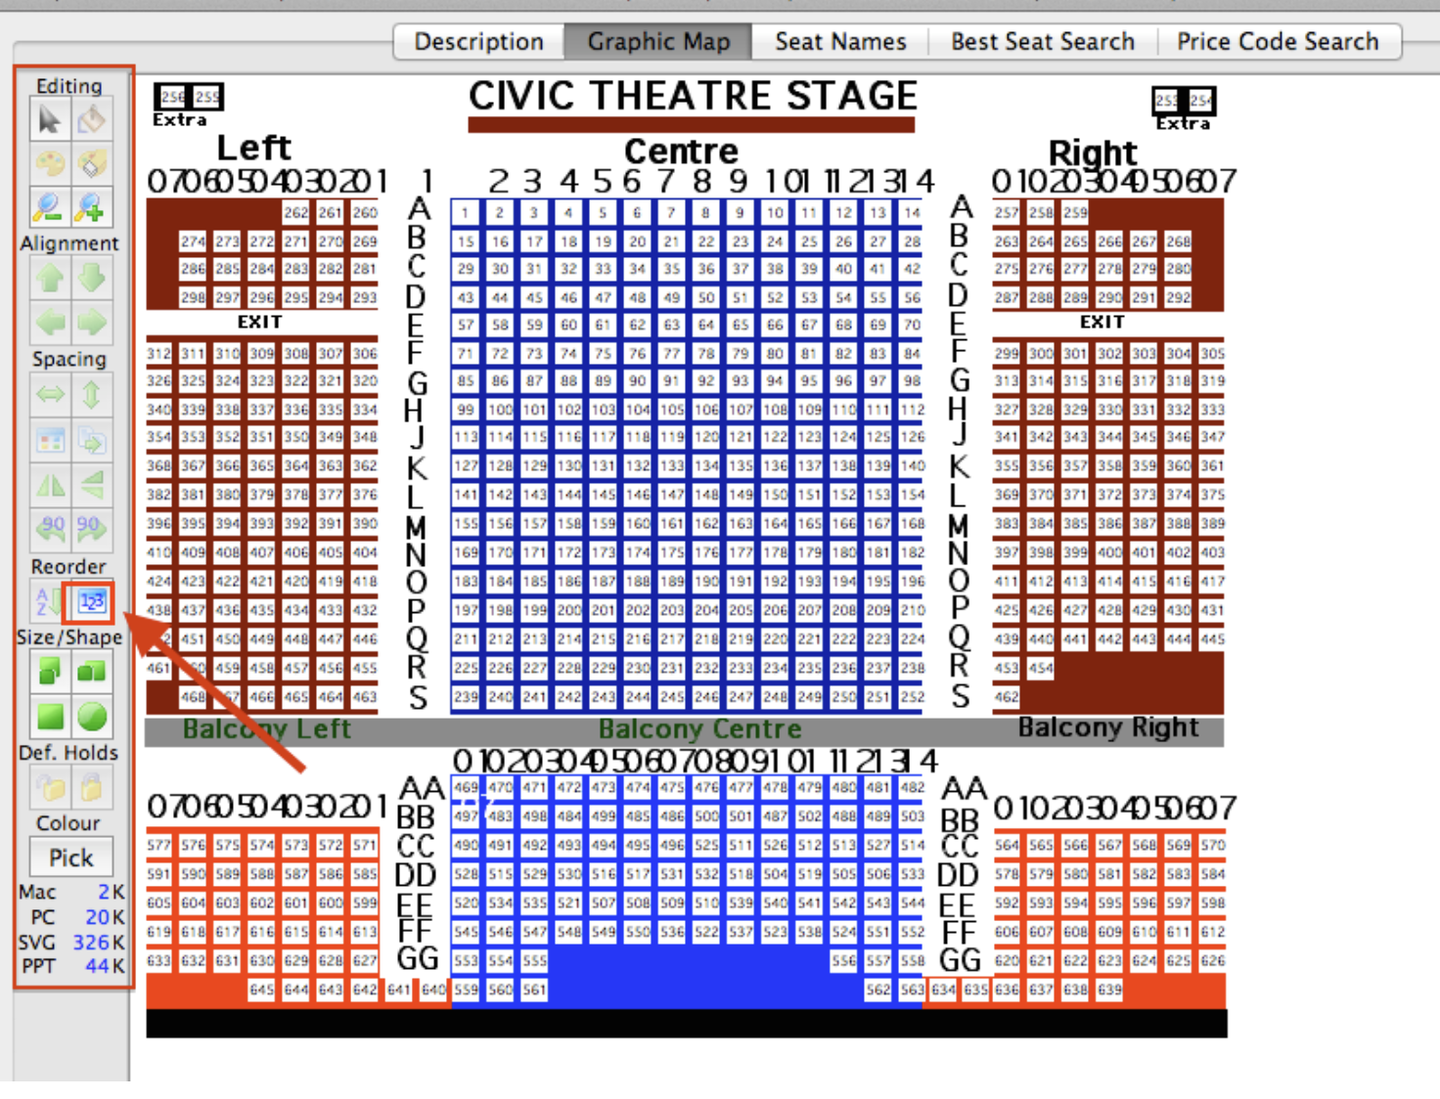
6. Create the logical seats
To change the logical seat numbers, you perform the following steps:
-
Click the 123 Button on the left of the map.
-
Select a section of seats to reorder.This is done by clicking the mouse outside of a section of seats, holding down the mouse button and dragging a box around the section. Hold the Shift key on the keyboard while dragging a box to select multiple sections. If there are multiple sections in the space, it may be easier to reorder the sections one at a time. If the space is arranged in rows and columns, and is roughly rectangular, it can be reordered all at once.
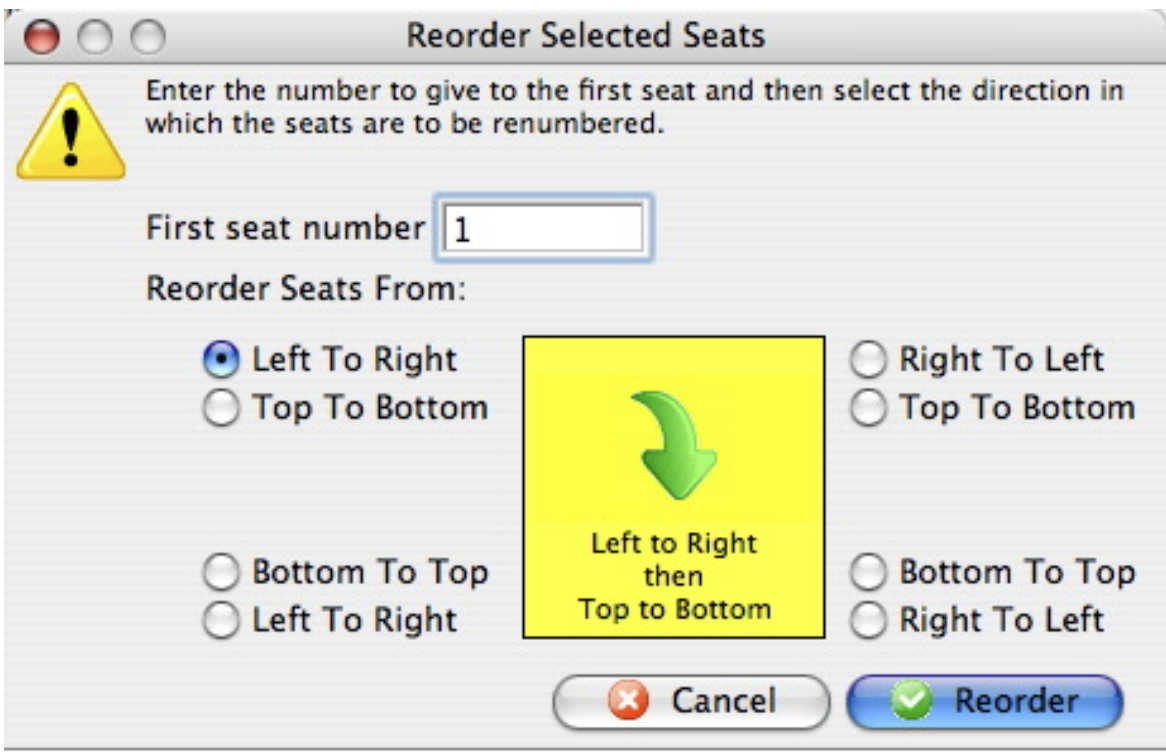

- Click the Az Reorder button. The reorder routine works horizontally and vertically, so seats must be in even rows and columns to work correctly. If a seat is above another seat, it will be assigned a non-sequential number based on the direction that is being reordered from.
For venues that have seating on angles, each row may need to be reordered individually to ensure each seat within each row gets the next sequential number.
-
Decide which direction to reorder the seats.
-
Enter the first seat number for the section being reordered. If reordering the first section, start with seat # 1. If reordering a section, after having already reordered other sections, make sure the seat number is the next sequential number from the last seat in the section previously reordered. This will ensure logical seat numbers are not taken from seats that have already been reordered.
-
Click the Reorder button.
7. Naming Seats
- Ensure all seats are in logical sequence.
- Click the Seat Names Tab.
- The Initial Seat Setup confirmation window will appear.
- Click the Yes button.
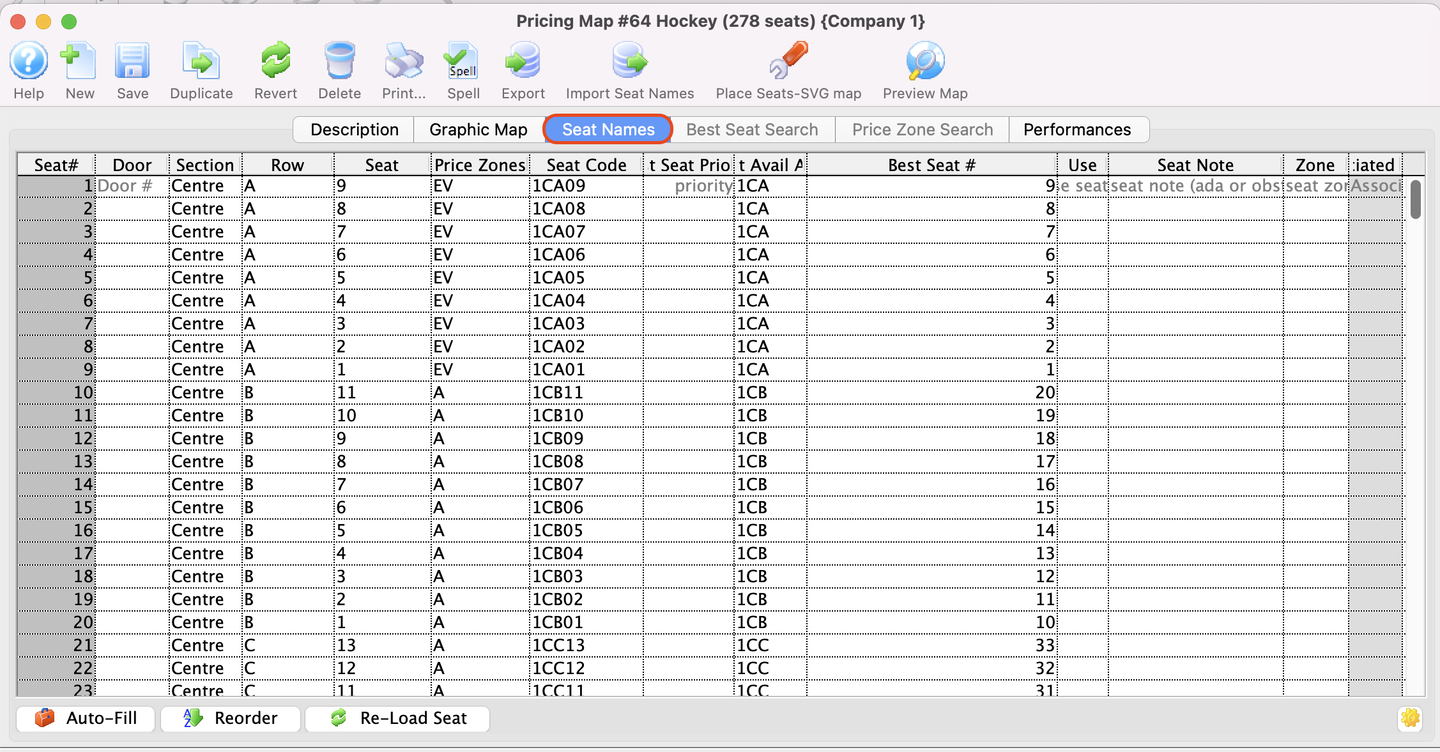
- Next, The Seat Names window will populate.
There are two options for inputting seat names:
a) Export the data out of Theatre Manager to a file and open the data in a spreadsheet program such as Microsoft Excel, edit and save the document in a tab-delimited format and import them back into Theatre Manager.
b) Click into each field in Theatre Manager and enter the data manually. Theatre Manager will assist in populating some of the data using predefined equations.
- Enter values for Section, Row and Seat Code.
- Indicate which price codes are valid for the seat.
- Enter the Best Available Area and Best Available #.
- Click the Save button .

8. Click on the Best Seat Search Tab

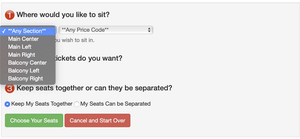
- Use the Best Seat Settings tab, to create a list of sections for patron's to choose from on your website.
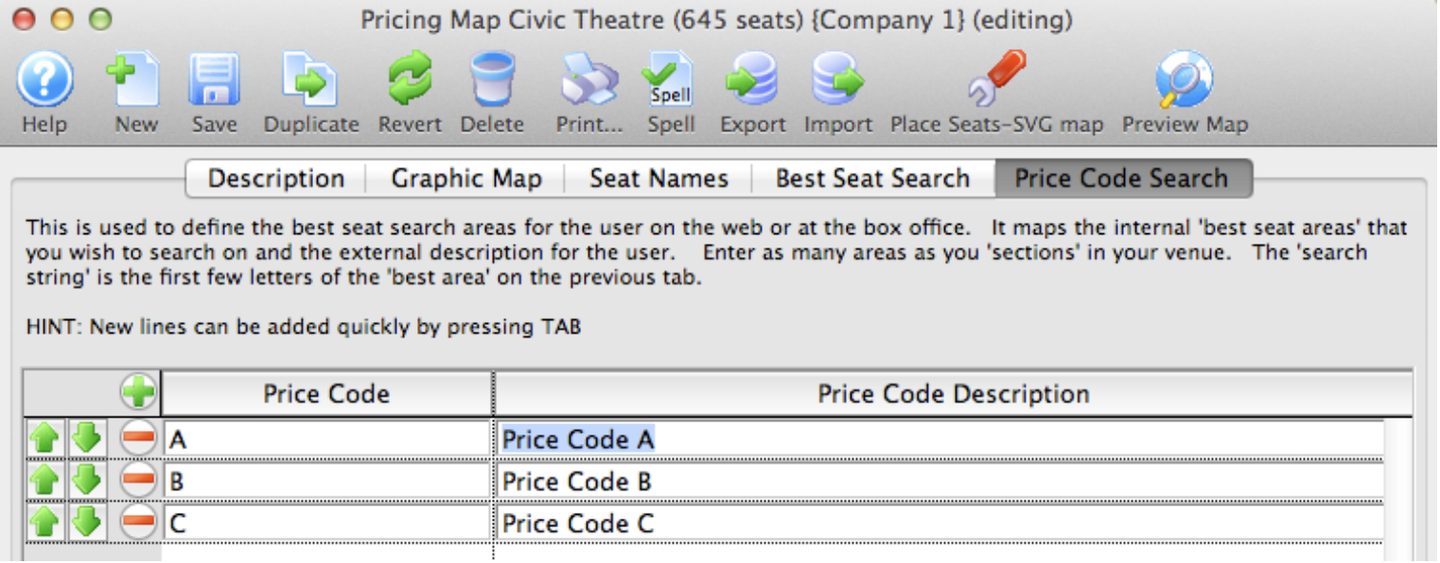
9. Click on Price Code Search Tab

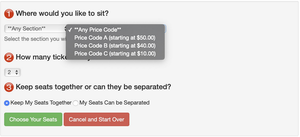
- If applicable, use the Price Code Search tab to create a list of price code sections that a patron can use to limit searching for seats on your web site.
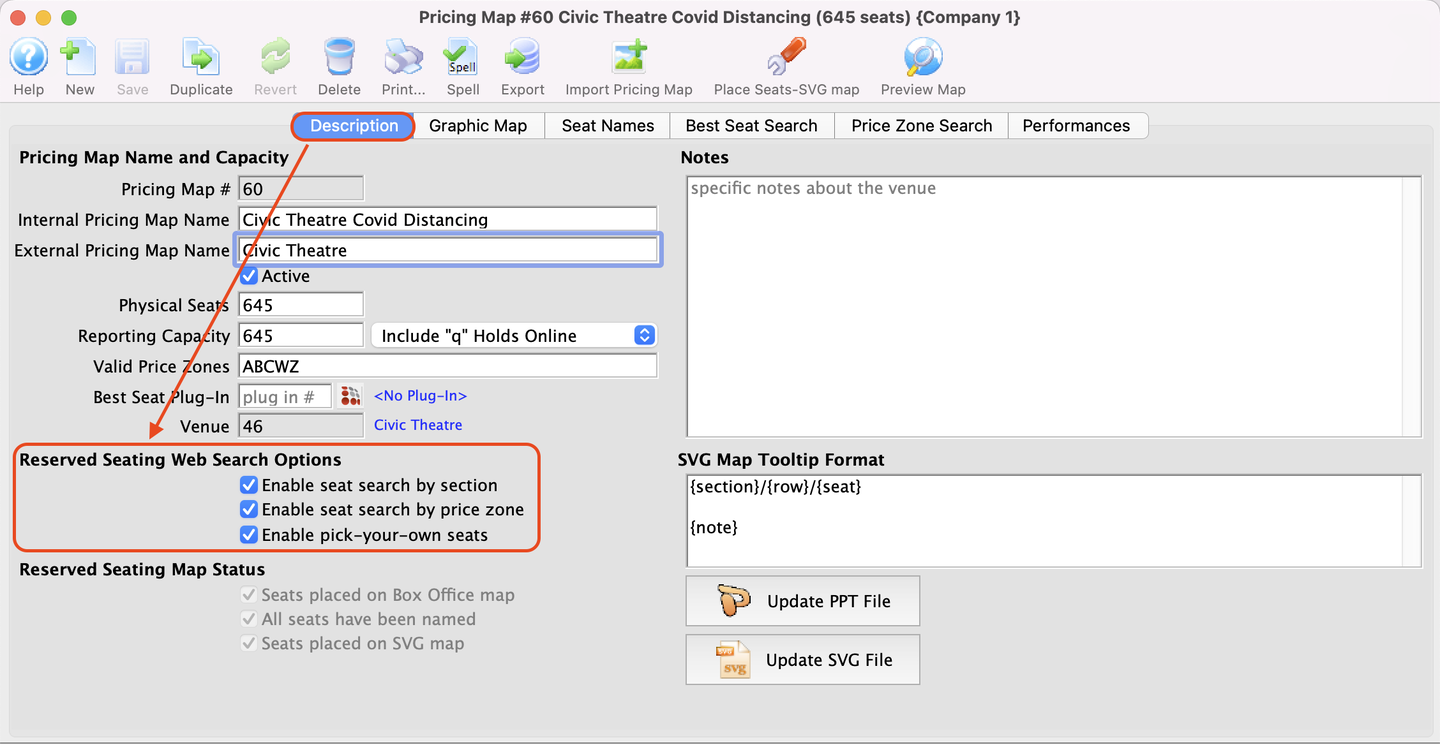
10. Enable the Reserved Seating Web Options if applicable
-
These options are located in the Description Tab of pricing map reserved seating web options section at the lower left of the window
-
Enabling thses options allows ptrons to search by section, search by price code and pick your own seats online.
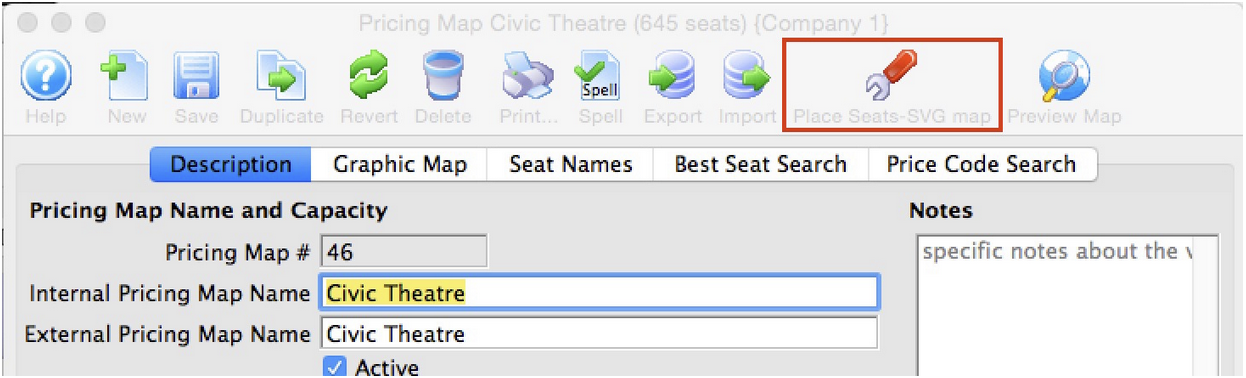
11.Click on the Place Seats SVG map Wizard Button
- Clicking this wizard button enables you to merge the map with the rest of the programming code that will actually make it work. Fortunately, this is automated and is a quick process.