In the creation of the graphic map, the image is actually performing many roles which are;
- Allowing you Draw and move seats (in this mode, they are gray)
- Set default Holds for the venue
- Show price zones which also allows you to set the Highlight color for price codes and sold seats at the box office.
- Set Social Distance seating
- Set Entry zones into the venue
When selling seats, the display color of the seat is determined when the map is created. You can determine the color of the sold seat by either:
- The Sales Promotion group used to sell the seat
- The Price Code used to sell the seat
If you add/change Map Display Letters on a Sales Promotion, you may want to update the map colours as described below. If you do not, the standard sold color of a yellow background having a text color of black will occur for the new/changed items.
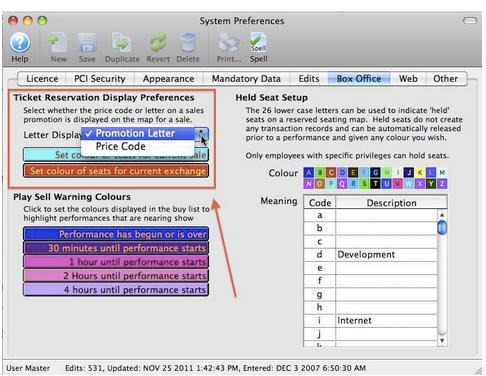
The setting that determines which parameter the colour will be based on is found in Setup -> System Preferences -> Box Office tab, in the Ticket Reservation Display Preferences area.
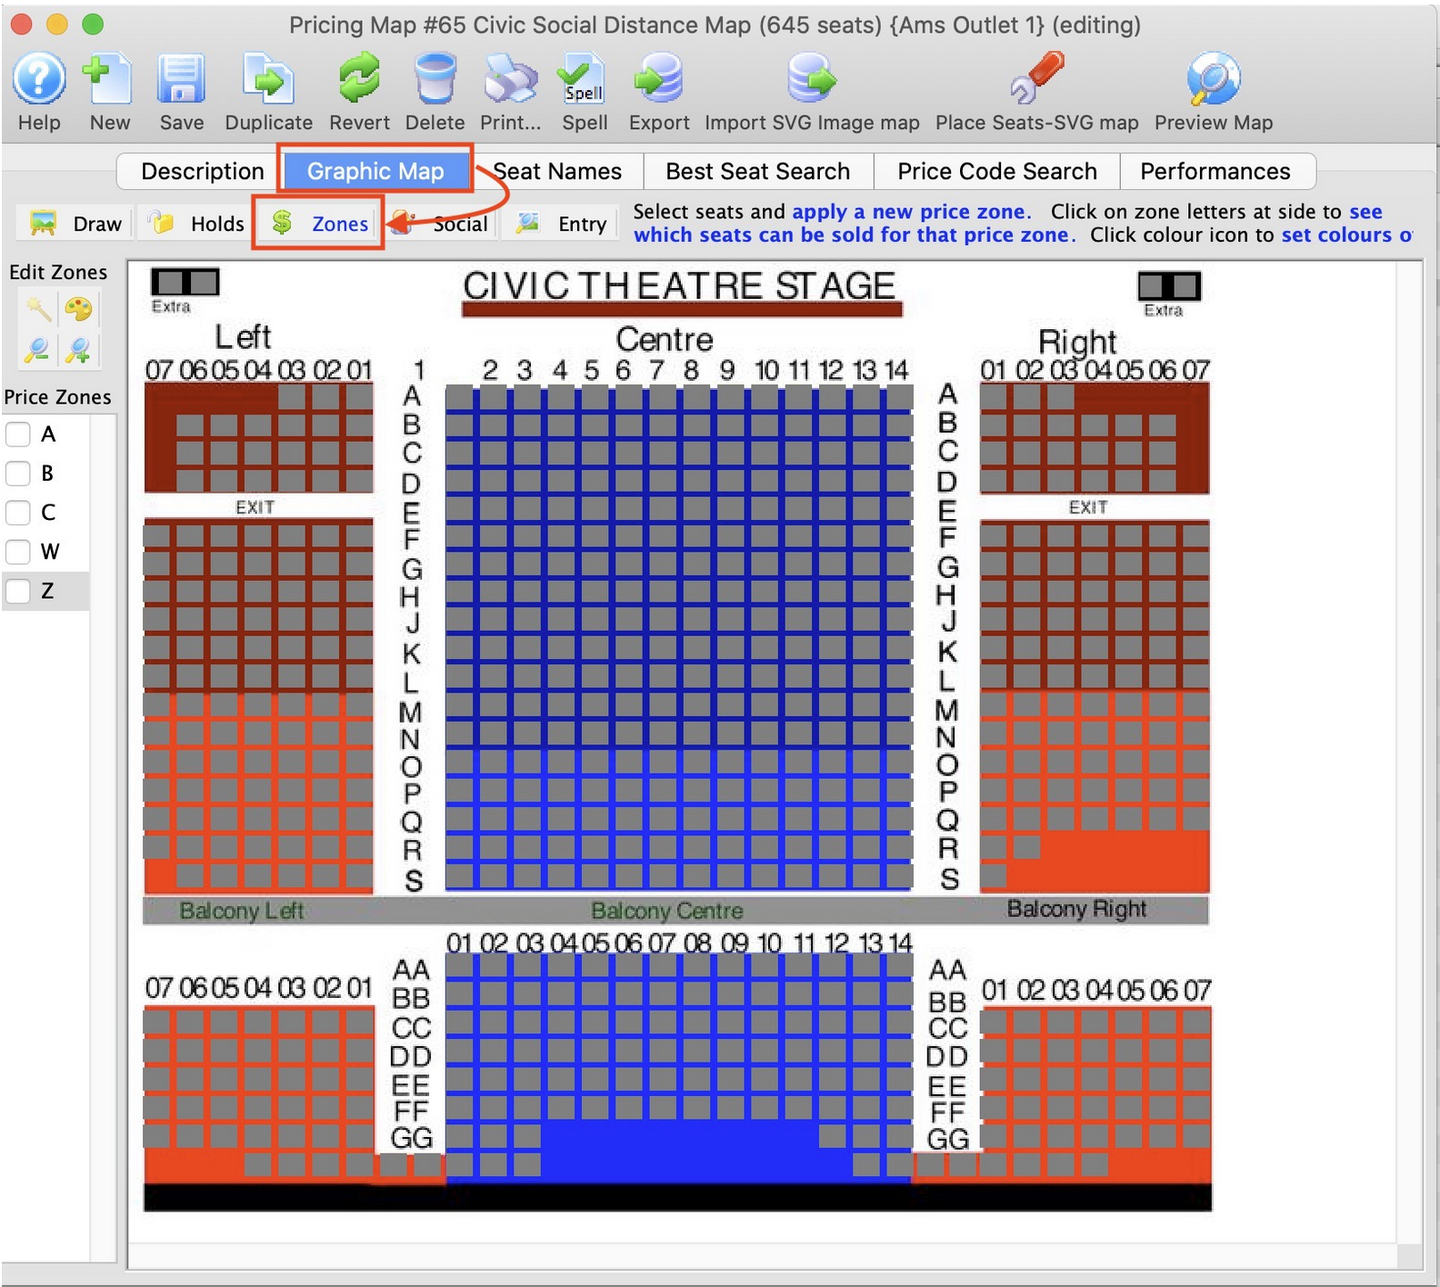
Click Zones under the Graphic Map tab
Initially, when you show the Pricing Zones on the map, all the seats are displayed as grey
To Set The Colours For Sold Seats Top
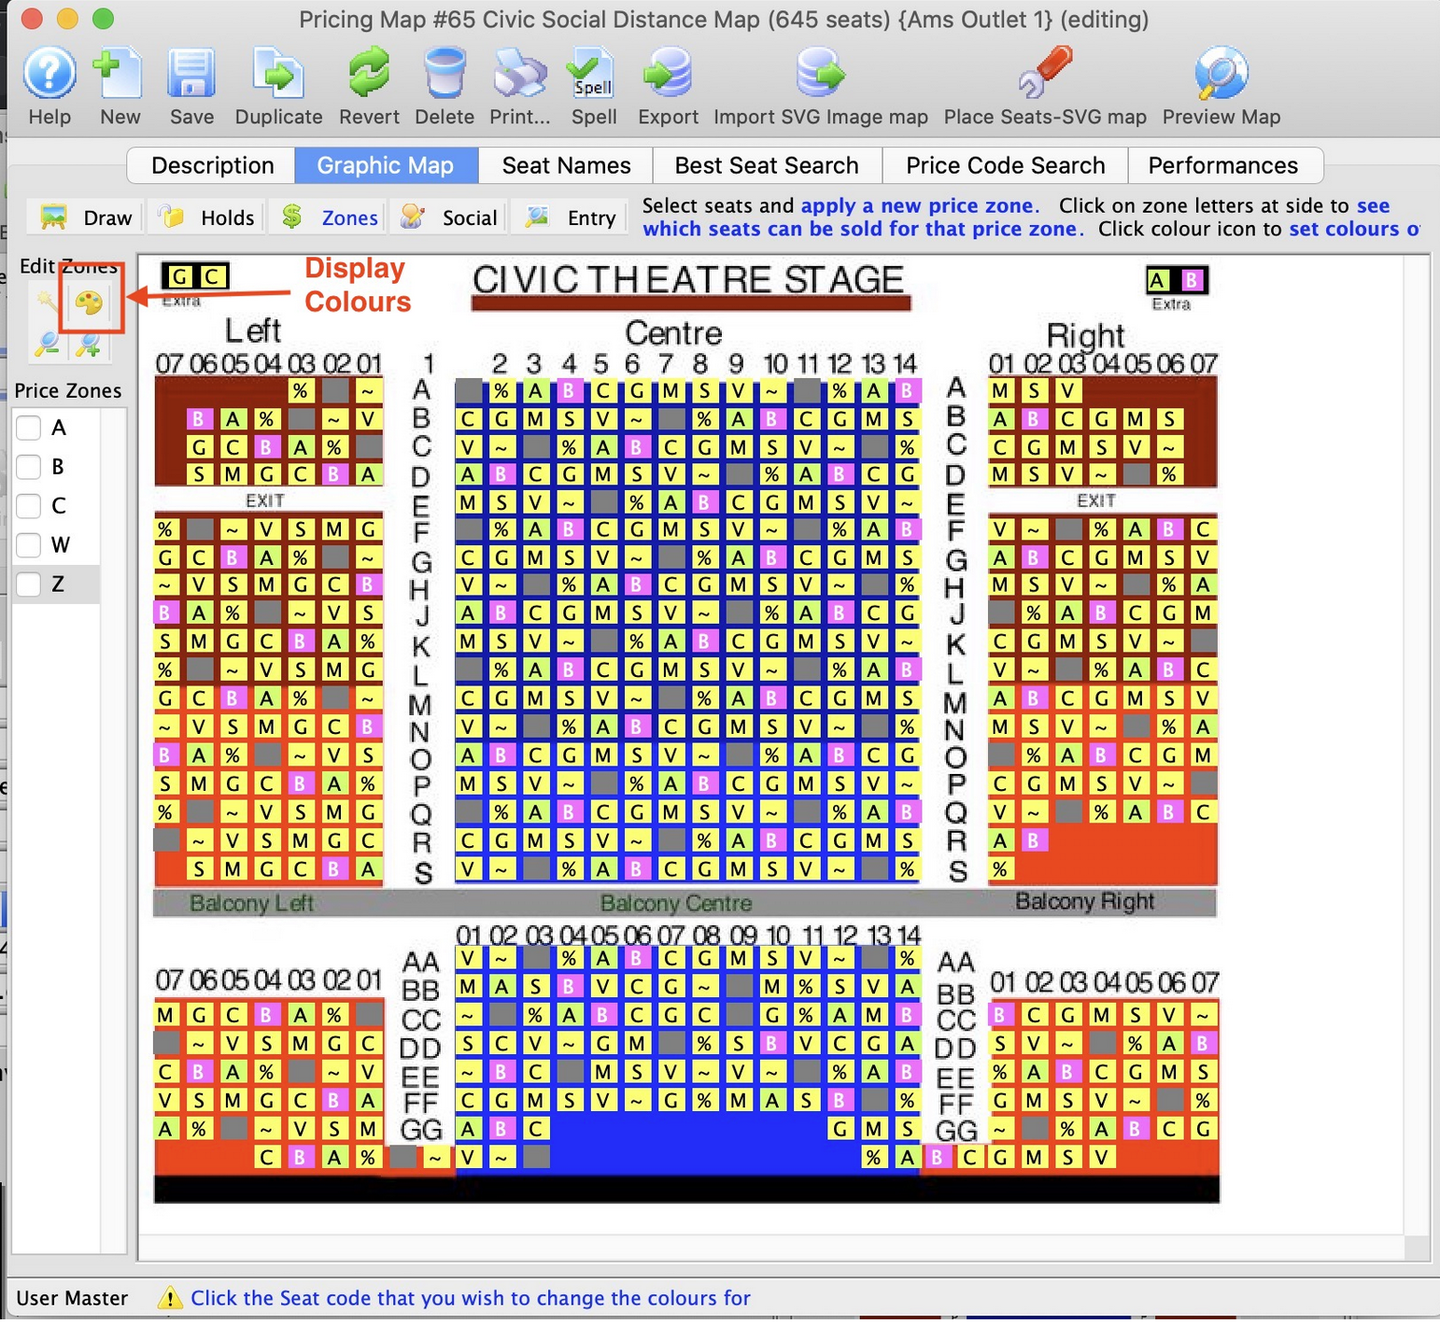
1. Click the colour button at the top right corner of the tool bar to change the colours. Theatre Manager gets all the letters from the price codes or sales promotions (depending on what you show on the map) and places them in a random fashion on the map.
2. Click on a seat to change the color for that Sales Promotion Letter/Price Code when that letter is displayed on the map in sale mode.
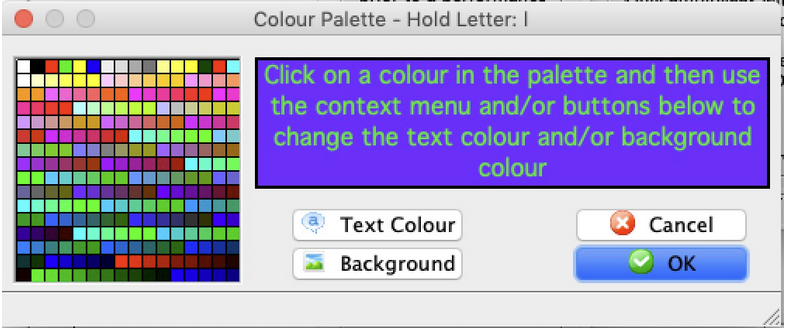
3. Choose a colour from the colour palette.
4. Click
 button to finish 'pick' mode. All seats will return to gray.
-
You can use the same process to change the 'unsold' seats from their default gray to another color. Simply click on a gray seat while in 'Pick' mode and set the color to your desired choice.
-
The actual colors are not visible to the user until the seat is sold, even though it is set in design mode.
{% end %}