General Steps Top
You may want to export a graphic file that has already been imported in Theatre Manager for editing.
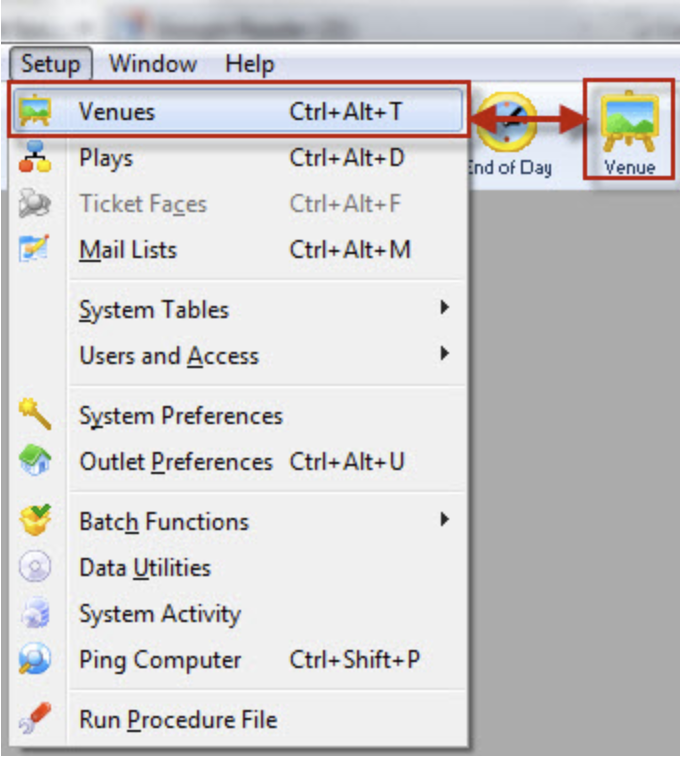
1. Theatre Maps is accessed through the Setup >> Theatre Maps menu.
- Alternatively you can click on the theatre maps button on the main Theatre Manager toolbar / ribbon bar.
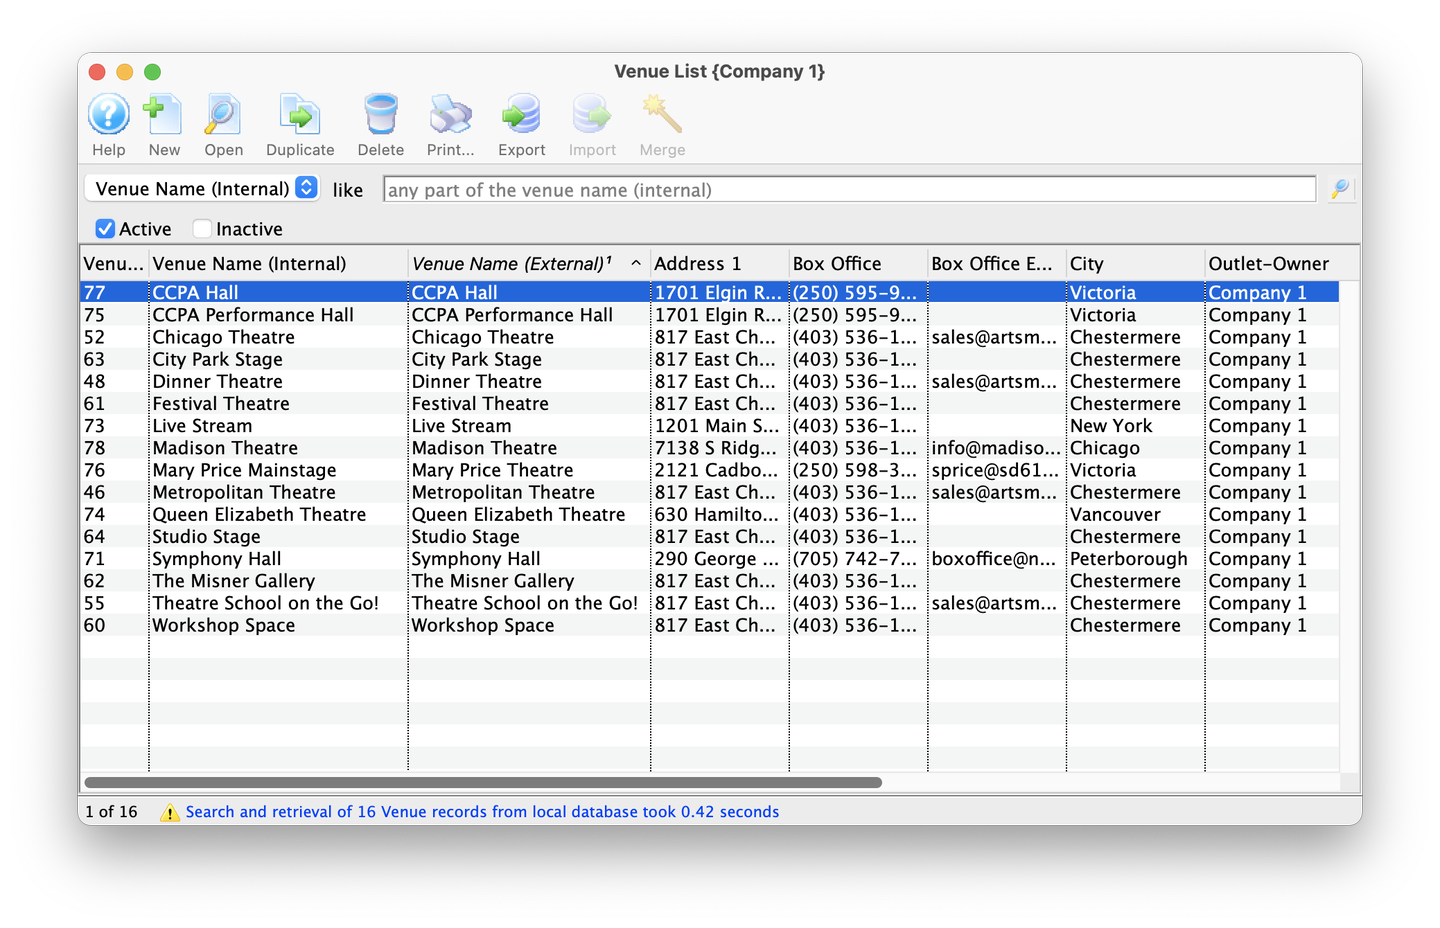
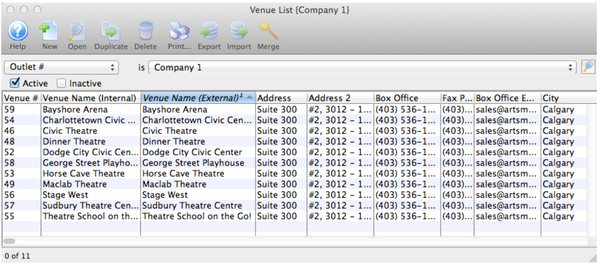
- The Theatre Map List window opens.
2. Chose the Map you want to view/edit from the list and click the Open
 button, alternatively, double click on the name of the map.
- The Theatre Map window opens.
3. Click on the Graphic Map
 tab.
tab.
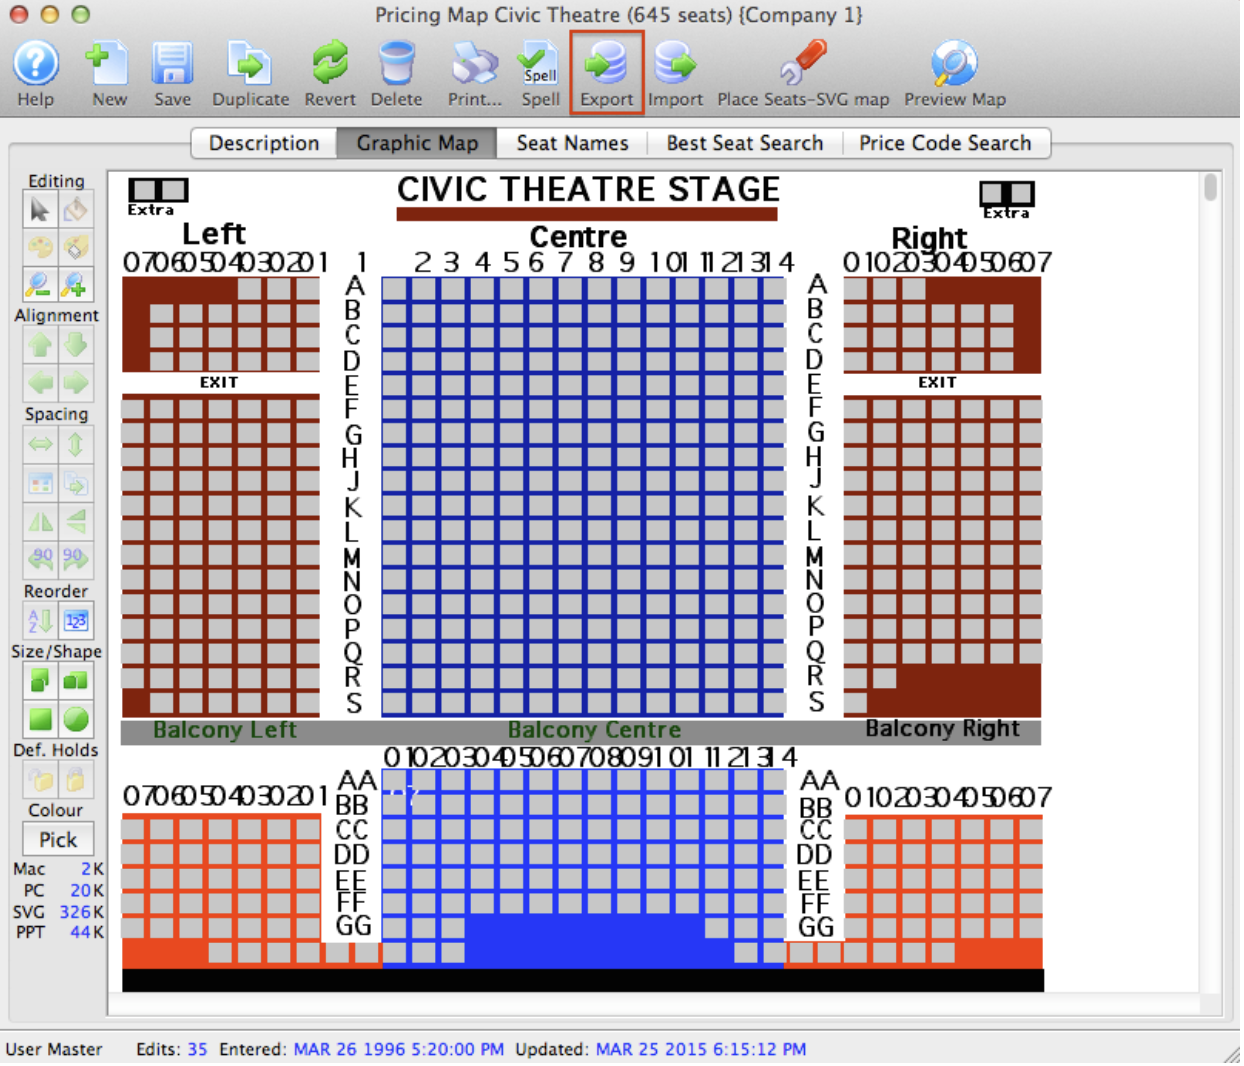

4. Click the Export
 button.
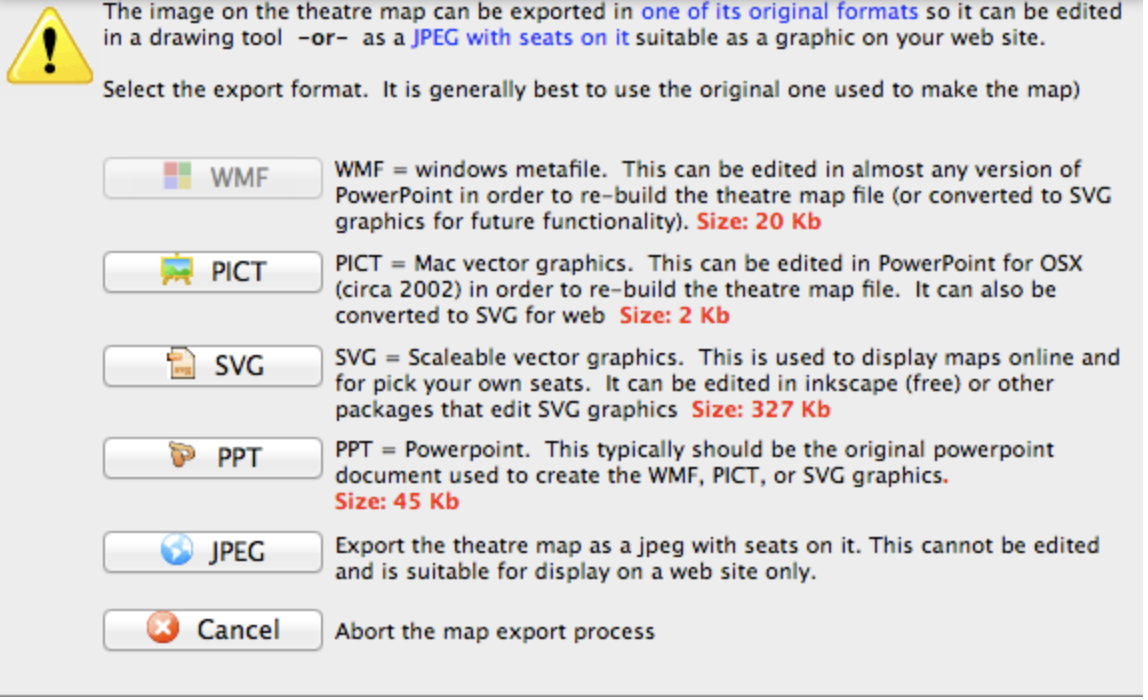
- A dialogue window will open allowing the option of exporting the Map as an SVG, PPT or JPG. The JPEG export will contain a picture of the entire map including the seats. The SVG will be only the graphical map without the seats. The size (in kb) is also listed with each file format.

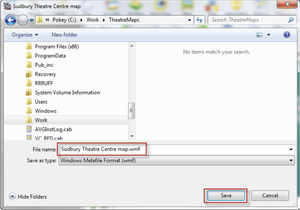
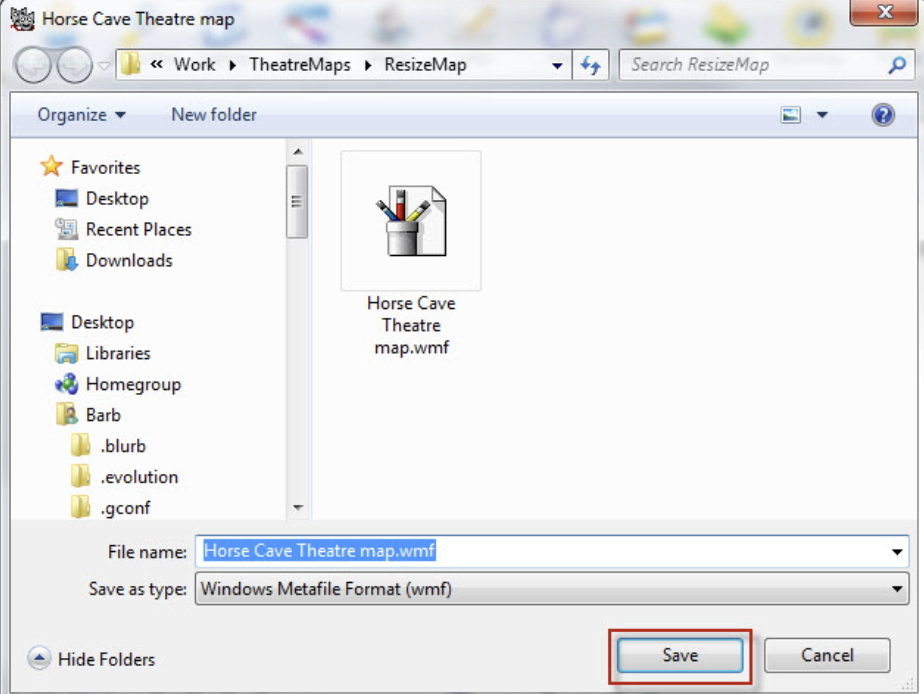
- After selecting an export format, the Save File for your OS window opens.
5. Change the directory and/or the file name as required and click the Save
 button.
- The file will be saved in the format specified and will be exported to the location specified and you can now change it as required.
Exporting the Original PPT Map Top
To able to export the the original ppt map, it most have to be save in TM. And Saving the original Powerpoint copy of the Map into the Database requires the steps below;
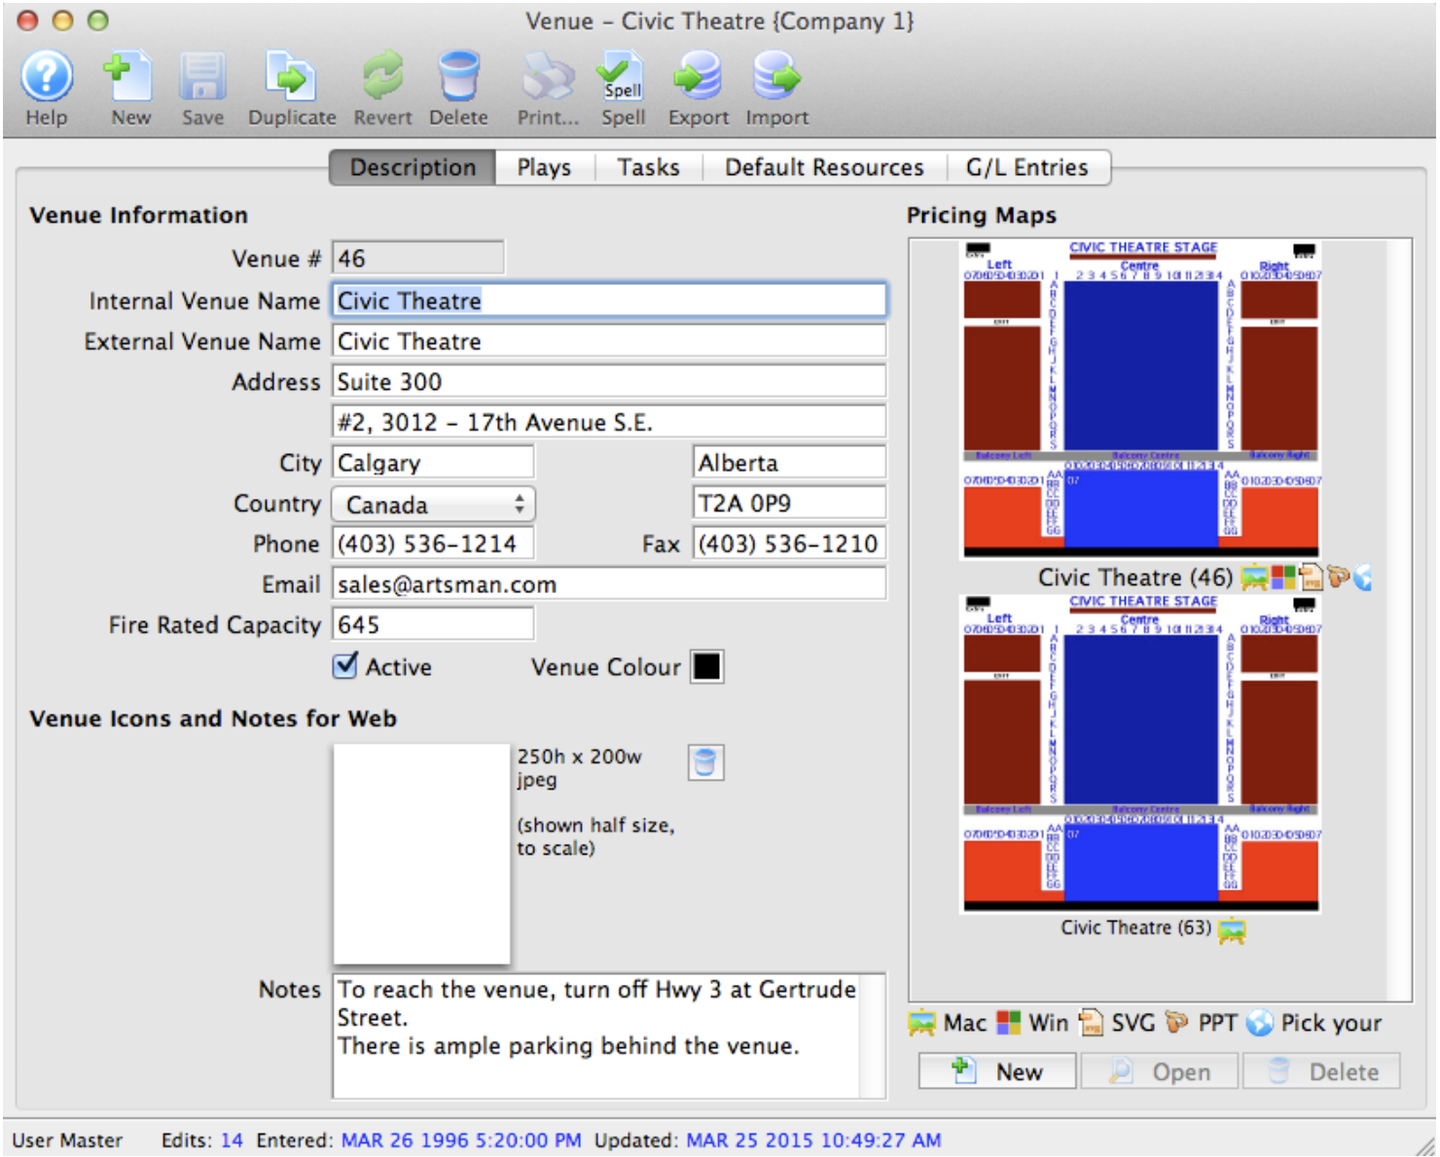
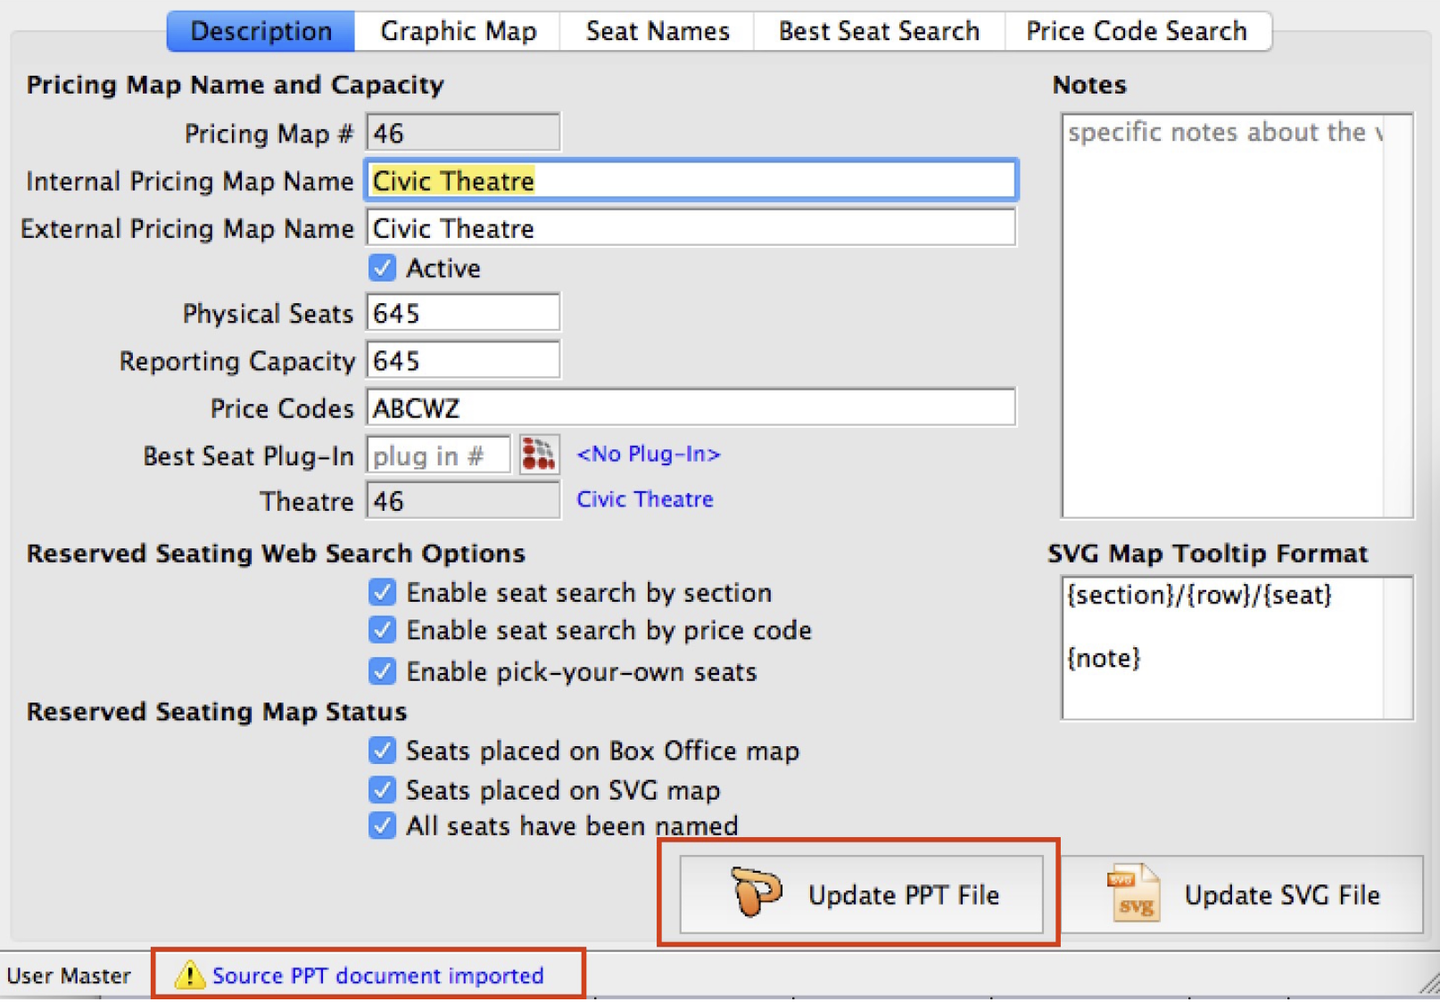
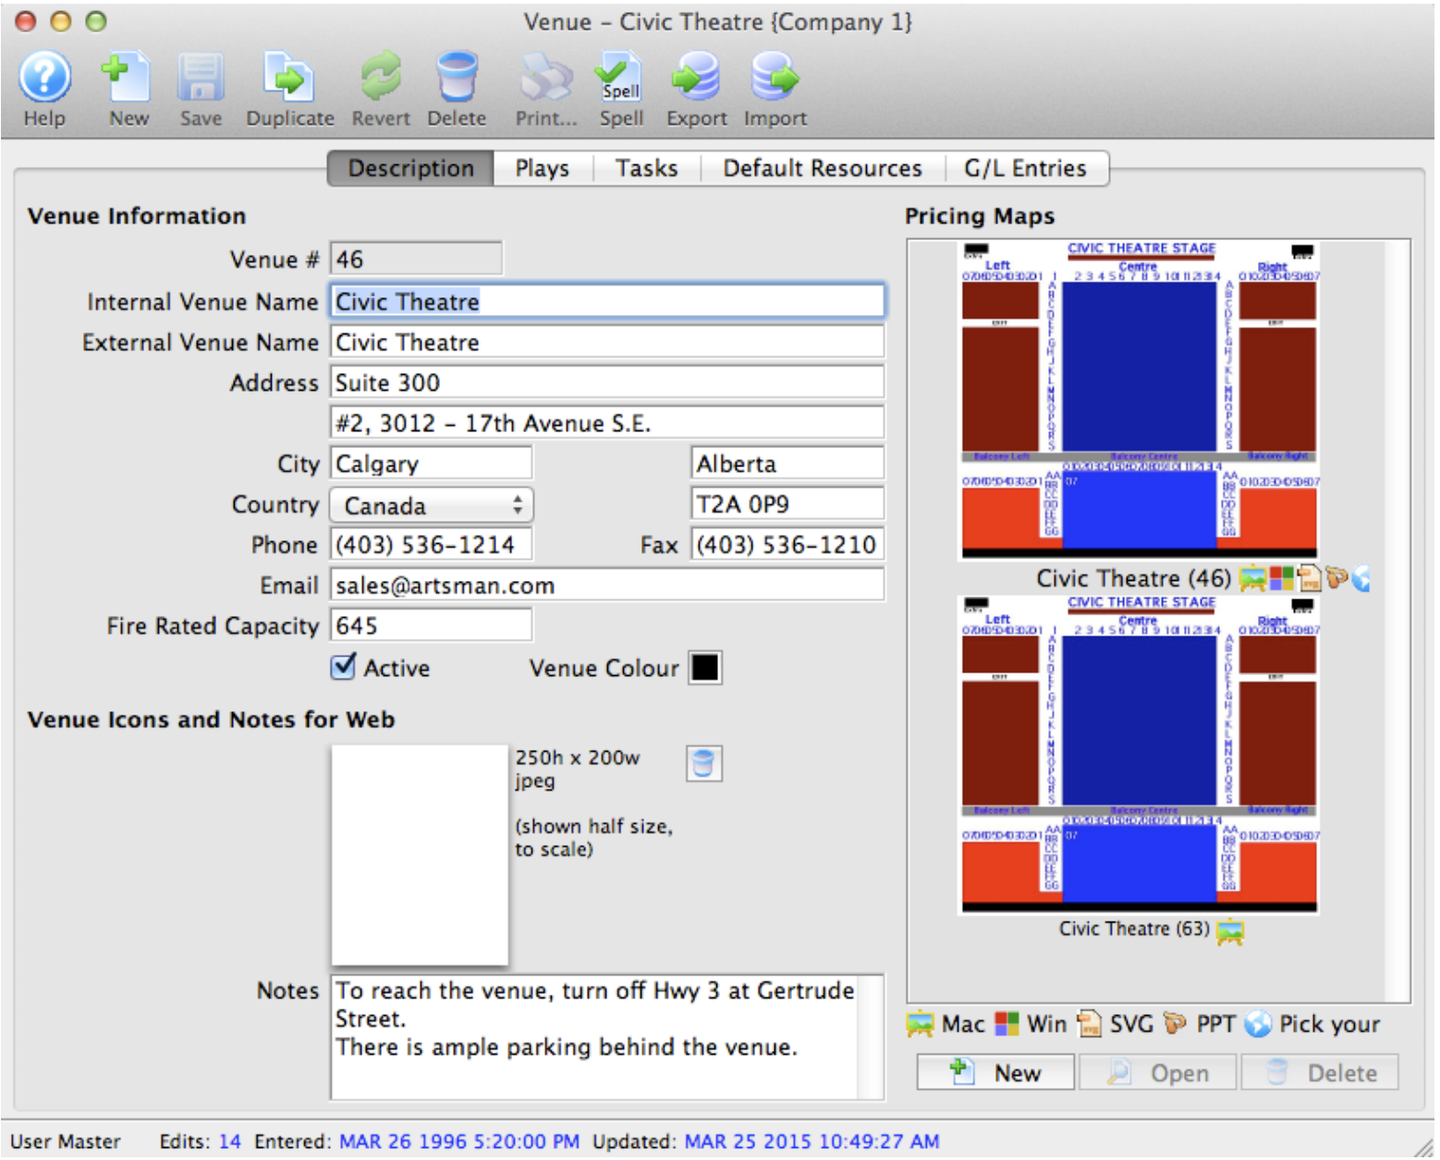
- Select the Description tab on the Pricing Map editing window.
- Click on your powerpoint document
- Drag it on top of the button that will be labelled 'Import PPT File' or 'Update PPT File' as indicated below
- Release the mouse
- If the message at the bottom of the screen indicates 'Source PPT document imported', you are done.

Exporting the Original PPT Map from the Database
If you have saved the original source drawing/map in the database as recommended, you can export it out again. Traditionally, we have used Powerpoint to create maps, but it has always been possible to use other drawing tools like OpenOffice.

- Click on the Description Tab
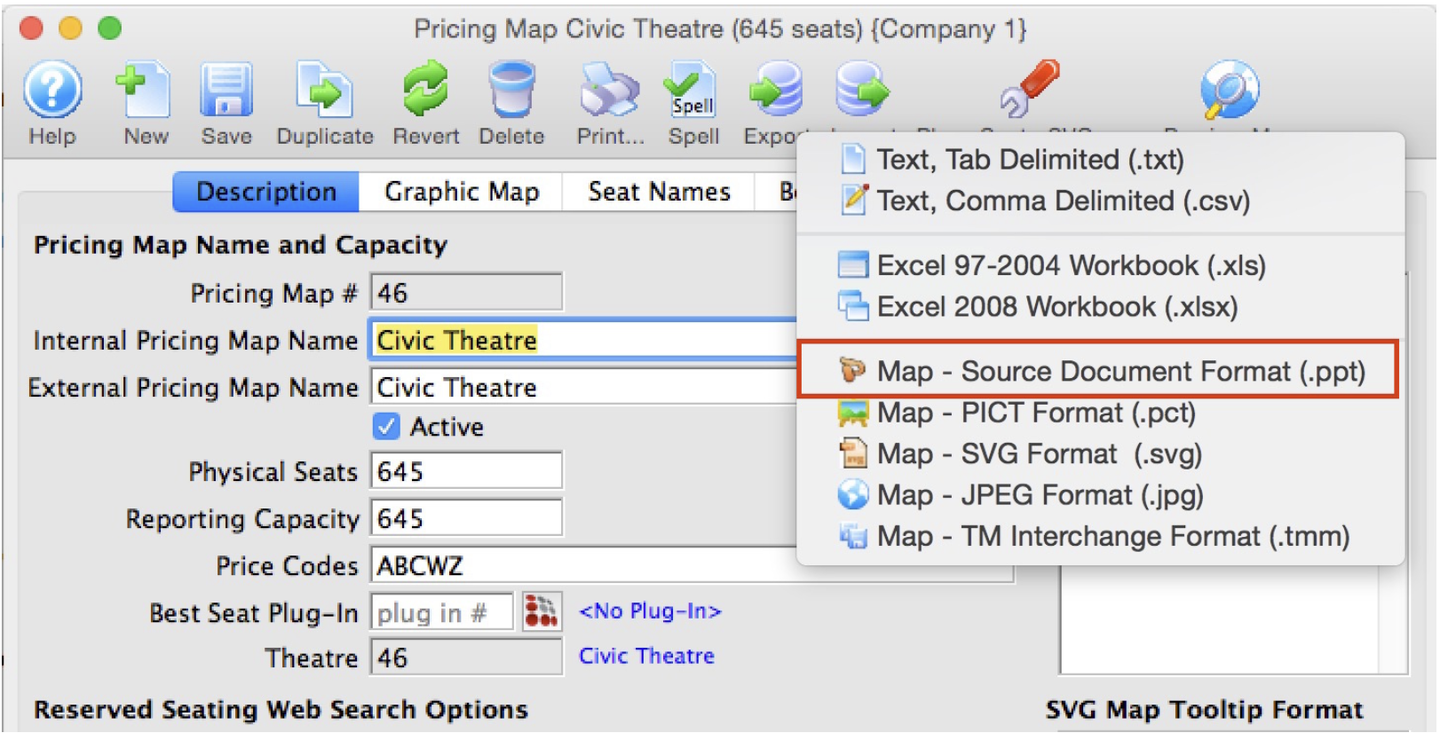
- Click on the Export toolbar icon at the top of the screen
- Select Map - Source Document Format (.ppt)
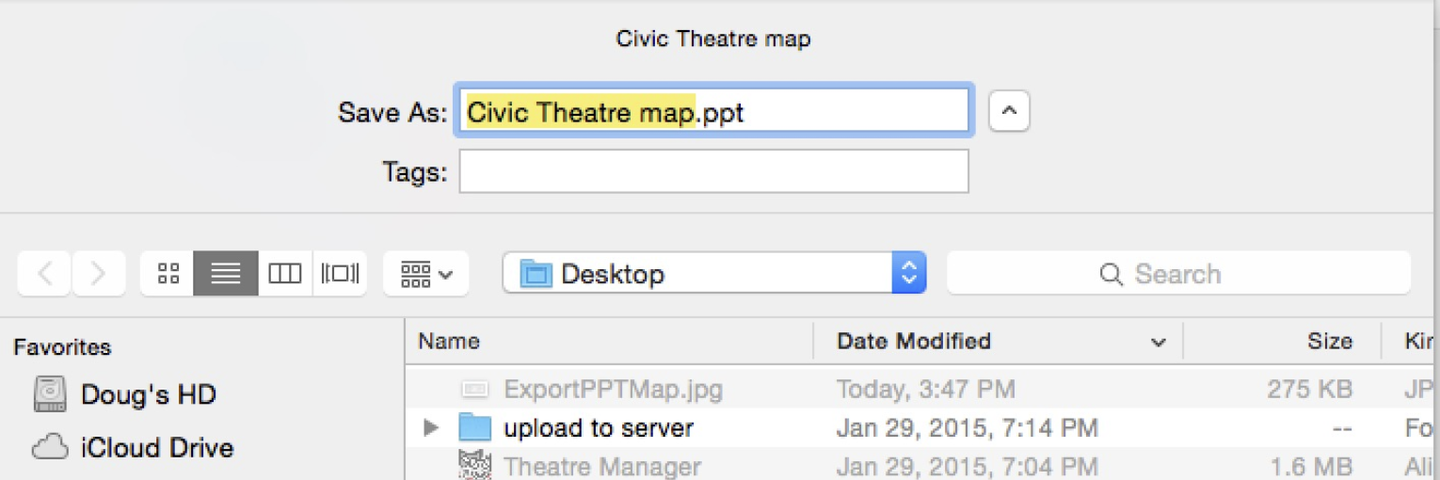
- Select the location to save the file- the desktop is a good place for working with it. It will default to a name that matches your pricing map name.

Exporting the Pricing Map Graphic Top
You may want to export a graphic file that has already been imported in Theatre Manager for editing.
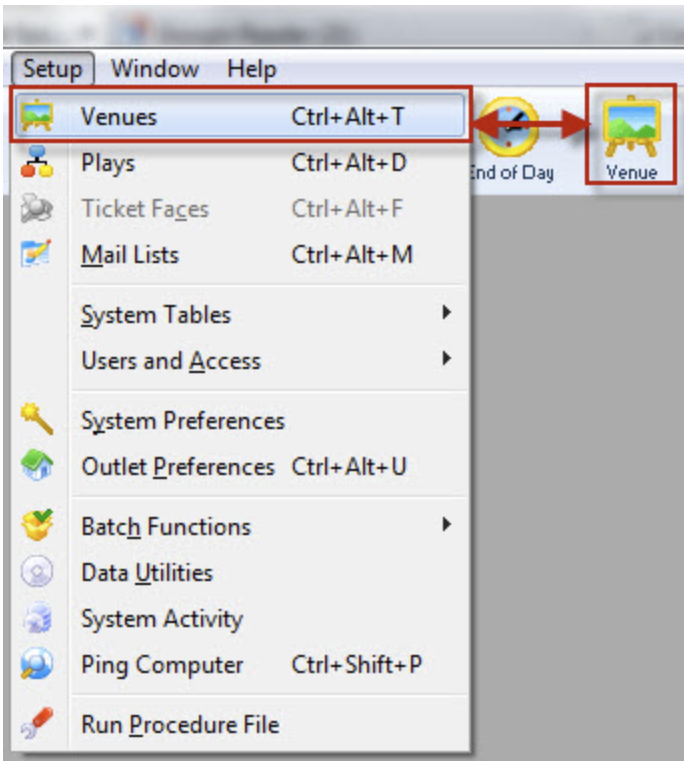
1. Theatre Maps is accessed through the Setup >> Theatre Maps menu.
Alternatively you can click on the theatre maps button from the Theatre Manager main toolbar / ribbon bar.
- The Theatre Map List window opens Click here, for more information on the Venue List window.

2. Choose the map in the Pricing Map portion of the window and click the Open button.
- The Pricing Map Window for the selected Pricing Map opens.
3. Click on the Graphic Map tab.
4. Click the Export
button
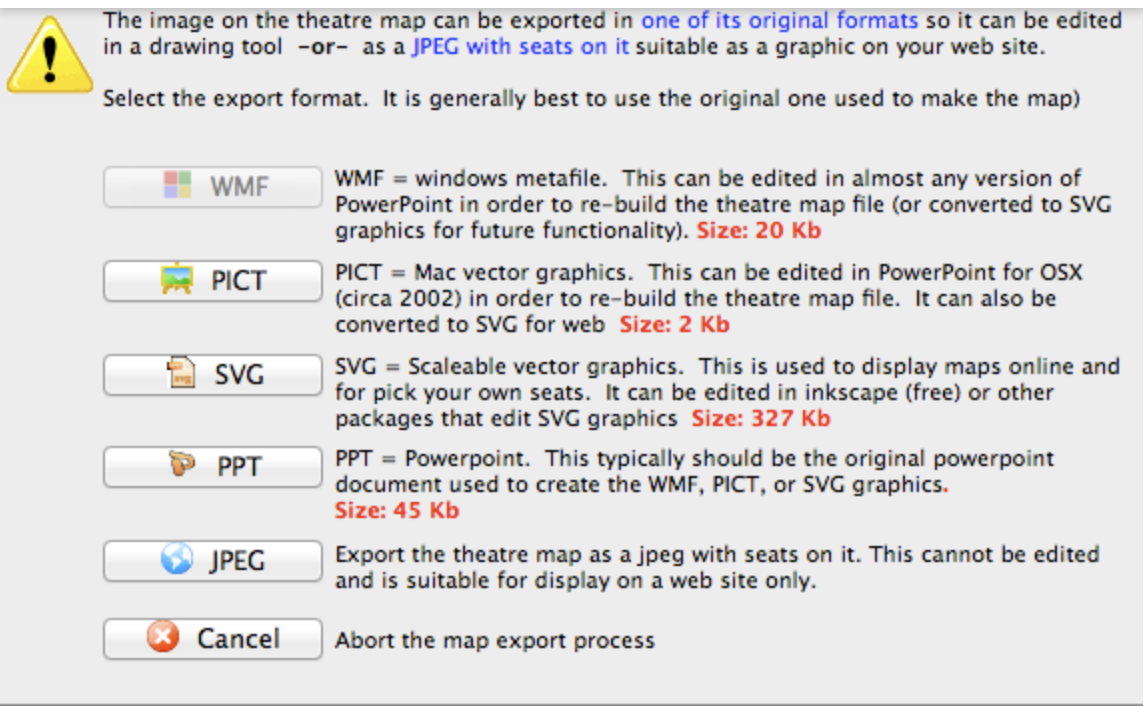

- A dialogue window will open allowing the option of exporting the Map as a JPEG file or SVG. The JPEG export will contain a picture of the entire map including the seats. The SVG will be only the graphical map without the seats. The size (in kb) is also listed with each file format.
- After selecting an export format, the Save File for your OS window opens.
5. Change the directory and/or the file name as required and click the Save
button.
- The file will be saved in the format specified and will be exported to the location specified and you can now change it as required.