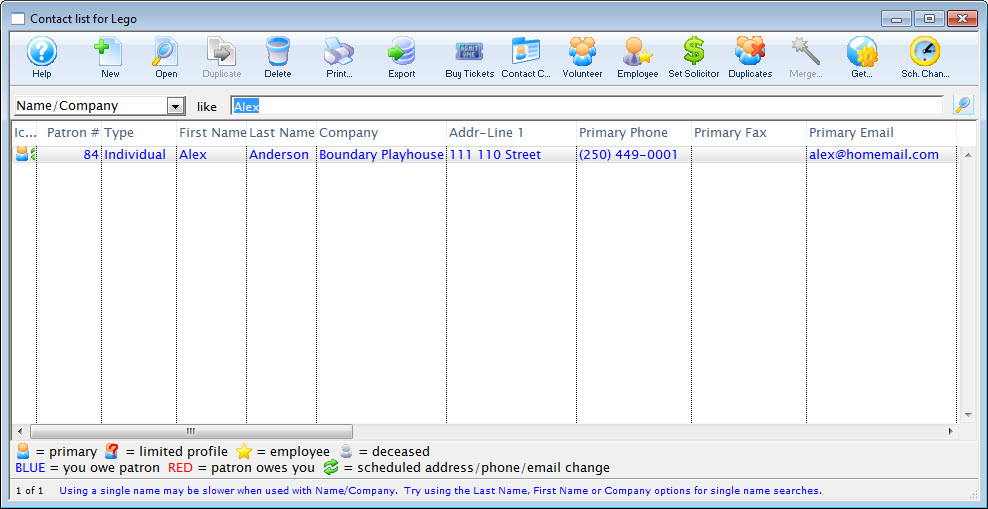
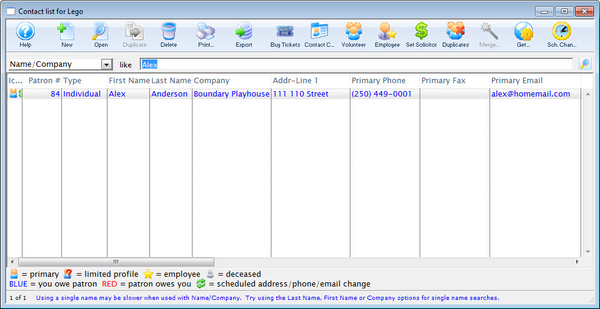
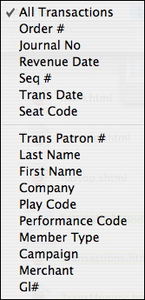
Contact List Window Top
The Contact List displays a list of patrons in the database. It can be narrowed to only patrons on a specific grouping by using select criteria.
Toolbar Top

New Button
Inserts a new Patron. Click here to learn how to insert a new patron.

Open Button
Opens the Patron Window for the selected patron.

Duplicate Button
Not available in this window.

Delete Button
Deletes the patron. Click here to learn how to delete a patron.

Print Button
Prints a report the of the patrons in the contact list to screen or default print location.

Export Button
Exports the data from the contact list into a tab delimited format and saves it to a selected location.

Buy Tickets Button
Opens a New Order Window for the selected patron in the contact list. Click here for more information on purchasing tickets.

Contact Card Button
Opens the Contact Card for the selected patron in the Contact List.

Volunteer Button
Opens the Volunteer Window for the selected patron. Click here for more information about the personnel/volunteer features.

Employee Button
Use this to manage the employee logon information for this patron. Click here to learn how to add an employee and setup their access details.

Set Solicitor Button
Assigns a donor solicitor to the patron record. Click here to learn how to set a default solicitor.

Duplicates Button
Searches the contact list for duplicate patrons. Click here to learn how to use this feature to find possible duplicate records.

Merge Button
Merges two or more selected patrons from the contact list.

Get Info Button
Opens a dropdown with options to copy address information to clipboard, show patron address on a browser map, or display the weather at the patron address. Click here to learn more about this feature.

Schedule Changes Button
Displays the Scheduled Changes List Window to create, view, or edit scheduled address or contact changes.
Contact List Columns Top

Primary Patron Icon
Indicates a patron who is the head of a household.

Employee Icon
Indicates that the patron is an employee. A grey star indicates that the employee is no longer active.

Scheduled Changes Icon
Indicates that the patron has scheduled contact information changes.
Patron Number
A unique number representing the patrons account.
First Name
First name of the patron.
Last Name
Last name of the patron.
Company
Company the patron works for.
Primary Phone
Phone number designated as the primary contact number.
Balance
Outstanding balance in the patrons account.
Address Line 1
First address line.
Address Line 2
Secondary address line.
Patron Search Parameters Top
Search options require parameters to search within. The most common search parameter is From To. This option allows for a start and end range to be entered for the search. It can limit down the list quickly and can be as specific as needed. The second most common search parameter is Like, which returns results containing the value entered for the search.
Patron Number
A patron number starting from one number to another. If the exact number is known this can be entered in both fields. The patron assigned that number will appear as the result.
Name/Company
Enter a part of the patrons first name, last name or company. All three fields in the database will be searched for a record containing like information (e.g. Ab returns Blaine Abel, Julie Abel, and Lauren MacIntosh of ABC Book Store).
First Name
The first letter, part of or a complete first name. The more entered the more accurate the results will be.
Last Name
The first letter, part of or all of the patrons last name. The more entered the more accurate the result. This field only searches the last name field within the database.
Phone/Email/Website
Part or all of a telephone, fax number, email address or website. Spaces, dashes and brackets are not needed when entering phone or fax numbers. They will be automatically formatted.
Balance - Tickets
A balance owed to or by a patron within a ticket purchase. A minus in front of an entered number will result in money owed to the patron.
Credit Card
Part or all of a credit card number. This search option may return partial results depending on your settings for PCI in the System Preferences setup.
Employee Number
The number of the Employee.
Patron Type
Patron Type can be used to sort patrons records into categories.
Addr-Line 1
A number, street or full address to be searched by that would have been entered in the first address field provided.
Addr-Line 2
A number, street or full address to be searched by that would have been entered in the second address field provided.
City
First letter, part or all of a city name. The more entered the more accurate the results.
Province/State
First letter, part or all of the province or state. The more entered the more accurate the result.
Postal/Zip Code
Part or all of the postal code or zip code. The more entered the more accurate the result.
Balance - Donation
A balance owed to or by the patron with a donation contribution. A minus in front of an entered number will result in money owed to the patron.
Date Entered
Enter a date range to view patrons entered into the system within that range.
Date Updated
Enter a date range to view patrons with updated records within that range.
Marketing #1
A customizable numeric range to search by.
Marketing #2
A customizable numeric range to search by.
Marketing #3
A customizable character range to search by.
Marketing #4
A customizable character range to search by.
Mktg #6 (Pop-Up)
Search from one of the options listed in the marketing pop-up. Marketing #6 is a customized field.
Mktg #7 (Pop-Up)
Search from one of the options listed in the marketing pop-up. Marketing #7 is a customized field.
Mktg #8 (Pop-Up)
Search from one of the options listed in the marketing pop-up. Marketing #8 is a customized field.
Age Code
Age Codes are used to categorize personnel and/or volunteers into particular age ranges.
Match Gift Company
Search for companies who are or are not flagged as matching gift givers in the Match Tab. Matching gift companies are designated under the Donor tab. This search is either Yes to indicate the list will contain records that are flagged as Matching Gift Companies, or No to indicate that the list will contain records that are NOT flagged as Matching Gift Companies.
Patron Donor Giving Capacity
Select a giving level. The donor tab of the database will be searched for matching patrons. Giving capacity is assigned under the Donor Tab.
Control Number
Numeric field to search by control number. Control numbers are associated with items purchased under the Membership Tab.
Pass/G.C. Card Number
Numeric field to search by member card number.
Ticket Number
A number field to search by ticket number. Each ticket has its own unique number as a reference. The patron displayed with have purchased the ticket with the number entered.
Order Number
An order number is a unique number used to define the order.
Tix Comment
Searches for comments typed in the Payment window.
PCI Data Check
Helps you to identify data attached to patrons that could be construed as a possible clear text credit card in violation of PCI guidelines. Click here for full information on the particulars of this function.
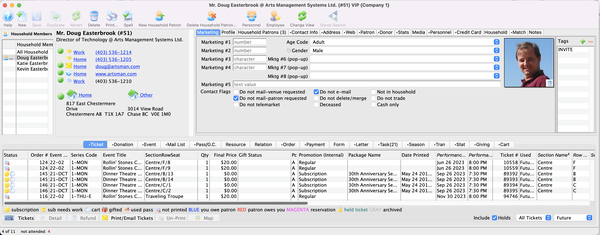
Patron Window Top
Before proceeding, review the introduction to patron management and about the Patron Window.
The Patron Window is the main interface used in Theatre Manager. This window can be accessed two ways:
- Patron Sales >> Patron
- Double-clicking a patron in the Contact List or single-clicking a patron in the Contact List and clicking the Open button.

New Button
Inserts a new Patron. Click here to learn how to insert a new patron.

Save Button
Saves changed made in the patron window.
Duplicate Button
Unavailable in the Patron List window.

Revert Button
Reverts the patron window data back to the last save point.
Delete Button
Deletes the patron. Click here to learn how to delete a patron.
Print Button
Prints the selected record.

Spellcheck Button
Completes a spell check of the patron record.

New Household Member Button
Reverts the patron window data back to the last save point.

Delete Household Member Button
Deletes a member of the current household. Click here to learn how to delete a household member.

Change View Button
Changes the current view or layout in the household portion of the patron window.
Volunteer Button
Opens the volunteer history for the selected patron. To learn more about personnel/volunteer features, click here.
Employee Button
Clicking the Employee button makes the current patron an employee. To learn how to add employee and setup their access details, click here.


Personal Data
The patron personal data area displays key name and contact information about the patron. This information can be in full and edited on the Contact Card.


Detail Tabs
The patron detail tabs harvest information about the actual patron, their personal details, and other information that relates to them as a person. Review these tabs in detail here.


Account Tabs
The Patron Activity Tabs carry information significant to the patrons account, their tickets, orders, contact history, and transactions. Review these tabs in detail here.
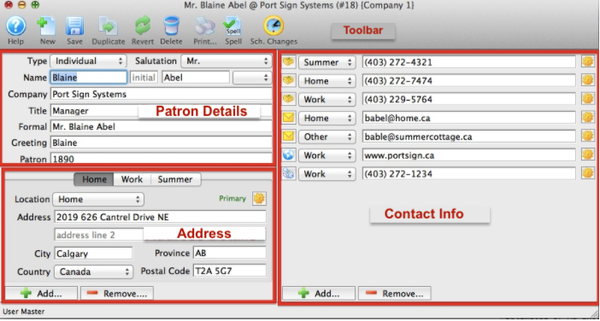
Patron Window View Options Top
There are 3 distinct views of the Patron Window that the Change View button toggles between.
Option 1
This is the standard and most popular view. It's a full view format that includes patron personal information, patron detail tabs, and Patron Activity Tabs.
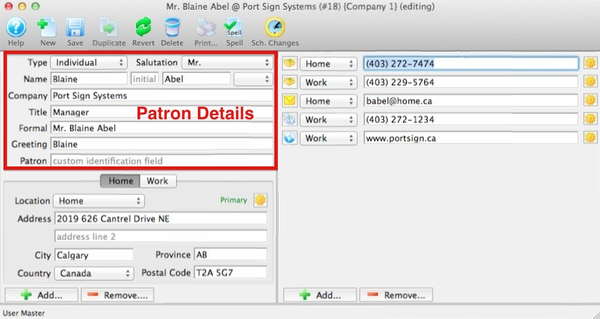
Option 2
This view includes only the top half of the patron record, the patron personal information and the patron detail tabs.
Option 3
This view includes only the bottom half of the patron record, the Patron Activity Tabs. It is useful when you are focused on selling items to a patron.
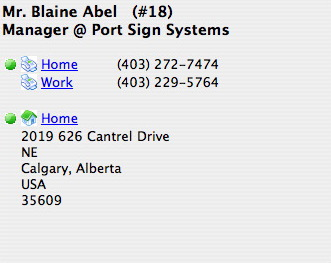
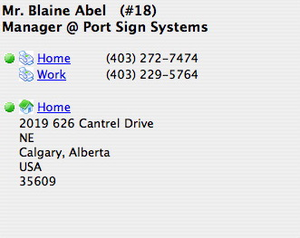
Contact Card Top
There are multiple ways to open the Contact Card for a patron. Options include:
Contact Card Button on Contact List
Clicking the Contact Card button on the Contact List toolbar (doesn't require opening a patron record)
Contact Info Tab on Patron Window
Double-clicking a contact line on the Contact Info Detail Tab on the Patron Window (requires opening a patron record)
Patron Name In the Patron Window
Double-clicking on any household patron name in the Patron Window (requires opening a patron record)
Areas Top
The Contact Card has three areas:
- Details
- Stores information on the type of patron, their company and title, proper salutation, formal and greeting names.
- Addresses
- Stores patron mailing information (including address, city, state/province, and zip/postal code) for as many different addresses as needed (e.g. winter home, summer home and several work addresses).
- Contact Info
- Stores as many lines of contact information as needed (e.g. home phone, work phone, mobile/cell, work fax, home email or work email).
Toolbar Top

Help Button
Connects to Theatre Manager Online Help for the Contact Card.
New Button
Inserts a new patron Contact Card for another patron in the same household.
Save Button
Allows Contact Card to be saved.
Duplicate Button
Not applicable.
Revert Button
Returns the content/text back to the saved content/text prior to any recent changes.
Delete Button
Removes the patron record, providing there are no financial transactions associated with the patron.
Print Button
For future development.
Spellcheck Button
Runs a spellcheck.
Scheduled Changes Button
Displays a list of the Scheduled Changes for the patron.
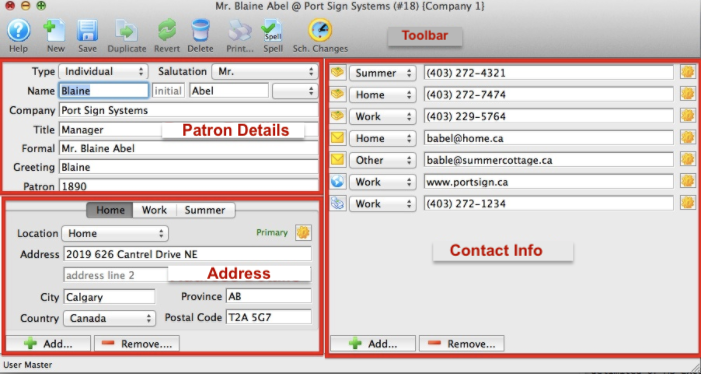
Patron Details Top
Some of the fields in this area may be marked as mandatory in Company Preferences >> Mandatory Data Tab, which requires data to be entered and will not save if left blank.

Type
The type of patron record that is being entered (e.g. Individual, Company, or School). The values available in this dropdown can be edited and customized in Code Tables >> Patron Type.
Salutation
The Formal Salutation for the patron (e.g. Mr., Doctor, or Ms.). The values available in this dropdown can be edited and customized in Code Tables >> Salutation.
Name First
First Name of the patron (this is a system-level mandatory data field)
Name Init
Middle Initial of patron
Name Last
Last Name of the patron (this is a system-level mandatory data field)
Suffix
Suffix for the patron, if applicable (e.g. Jr. or Sr.). The values available in this dropdown can be edited and customized in Code Tables >> Suffix.
Company
The Company Name that the patron is associated with (this is a system-level mandatory data field
Title
The Job Title that the patron holds within the associated company
Formal
The Formal Name of the patron (including salutation) usually used for donation requests. This field provides the patron donor name for program listing unless the name is altered in the Publication Name field found under the Donor Tab. The Formal Name is auto populated by First Name and Last Name, but can be manually overwritten by highlighting the text and typing over it.
Greeting
A Greeting Name (or familiar name, such as first name or nickname) for the patron. The Greeting Name preference is set in System Preferences >> Edits Tab. The Greeting Name is auto populated by First Name, but can be manually overwritten by highlighting the text and typing over it.
Patron
A custom 30-character identification field. Designated for an external number for a patron that can also be used to find patrons. Possible usage are for student/faculty numbers or a number in any other external system that you may need to communicate with.
Addresses Top
Caution
Theatre Manager does not allow # (the number sign) in addresses. Its use is
- Prohibited by Canada Post Guidelines
- Discouraged in by the US Postal Services in favor of using APT and other explicit short forms
There can be many different address locations for one patron stored within the Address. Some of the fields in this area may be marked as mandatory in Company Preferences >> Mandatory Data Tab, which requires data to be entered and will not save if left blank.

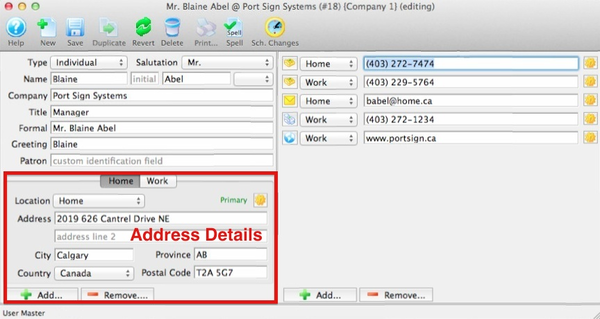
Location
Location Type of the patron's address. The values available in this dropdown can be edited and customized in Code Tables >> Location Type. This field is used to categorizes addresses, phone numbers, emails and website addresses. The three default options are Home, Work and Other.
Address
Street Address of the location. There are two lines available for more complex addresses. When a second address line is used, check formatting when printing address labels and ticket face.
City
The City or town for the address provided. To assist in quickly adding a patron, a default city name can be displayed when adding new patrons (see Company Preferences >> Mandatory Data >> default values on patron insert). The default city names come from the City field under the Company Preferences >> Company Tab.
Province/State
The Province or State where the city is located. The values available in this dropdown live in Code Tables >> Province/State. To assist in quickly adding a patron, a default province or state name can be displayed (see Company Preferences >> Mandatory Data >> default values on patron insert). The default value comes from the Province or State field under the Company Preferences >> Company Tab. The name for this field may be renamed in Company Preferences >> Appearance Tab.
Country
The Country where the province or state is located. The values available in this dropdown live in Code Tables >> Country. To assist in quickly adding a patron, a default country name can be displayed (see Company Preferences >> Mandatory Data >> default values on patron insert). The default country comes from the Country field under Company Preferences >> Company Tab.
Postal/Zip Code
The Postal Code or Zip Code field records the patron's postal identification number. Postal codes format automatically to capital letters. Zip codes format automatically to add hyphens when 9 numbers are entered. Edit checks warn if numbers or letters are entered incorrectly. The name for this field may be renamed in Company Preferences >> Appearance Tab.

Add Button
Adds another address to the patron.

Remove Button
Removes a location from the address area.

Contact Options Button
The gear button opens a dropdown of options that depends on the contact field the gear button is next to. For example:
- Schedule the removal of or change to the primary phone, fax, email, website or address as a one-time occurrence (and then change it back again at a later date).
- Show a map of or weather at the patron's address.
- Email the patron.
- Reset the web sales password for the patron's account and send a one-time login email.
- Display the Forgotten Password Reset Log which shows detail history of the patron trying to log in online.
Contact Info Top
There can be as many lines of contact information within the contact area as are needed. Location types can be customized to meet needs.
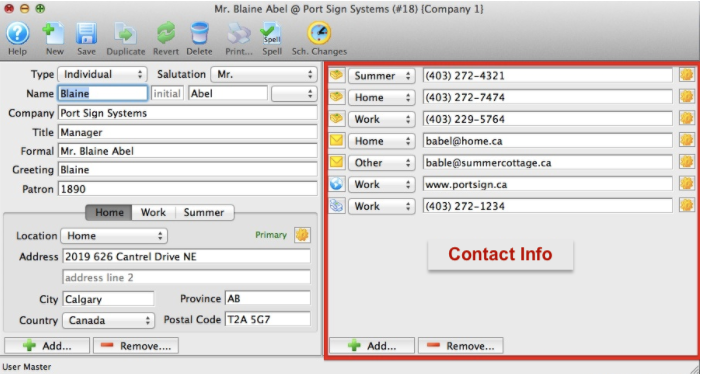
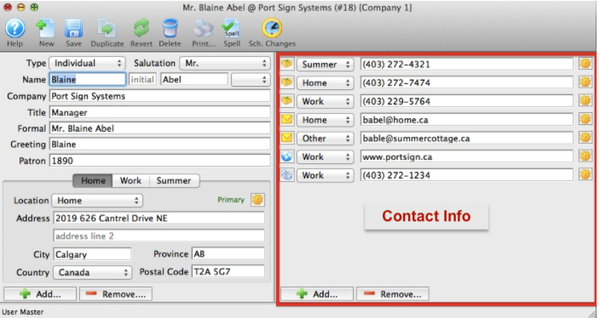

Contact Type Icons
Type of contact information for the patron.
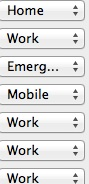
Location Type Dropdown
Location of the contact. The values available in this dropdown can be edited and customized in Code Tables >> Location Type
Contact
Contact information for the patron.

Add Contact Button
Adds a piece of contact information to the patrons record. Each selection opens another flyout to select. When you make your selection, the patron's Contact Card opens to the field selected.
Remove Contact Button
Removes the highlighted piece of contact information from the patron record.
Patron Detail Tabs Top
Before proceeding, review the introduction to patron management and about the Patron Window.
Welcome to reference content for the Detail Tabs on the Patron Window. The detail and marketing tabs are the top of the patron screen are used to manage additional information about the patron. This might include birthdays, net worth for wealth management, past donation totals and volunteer summaries.

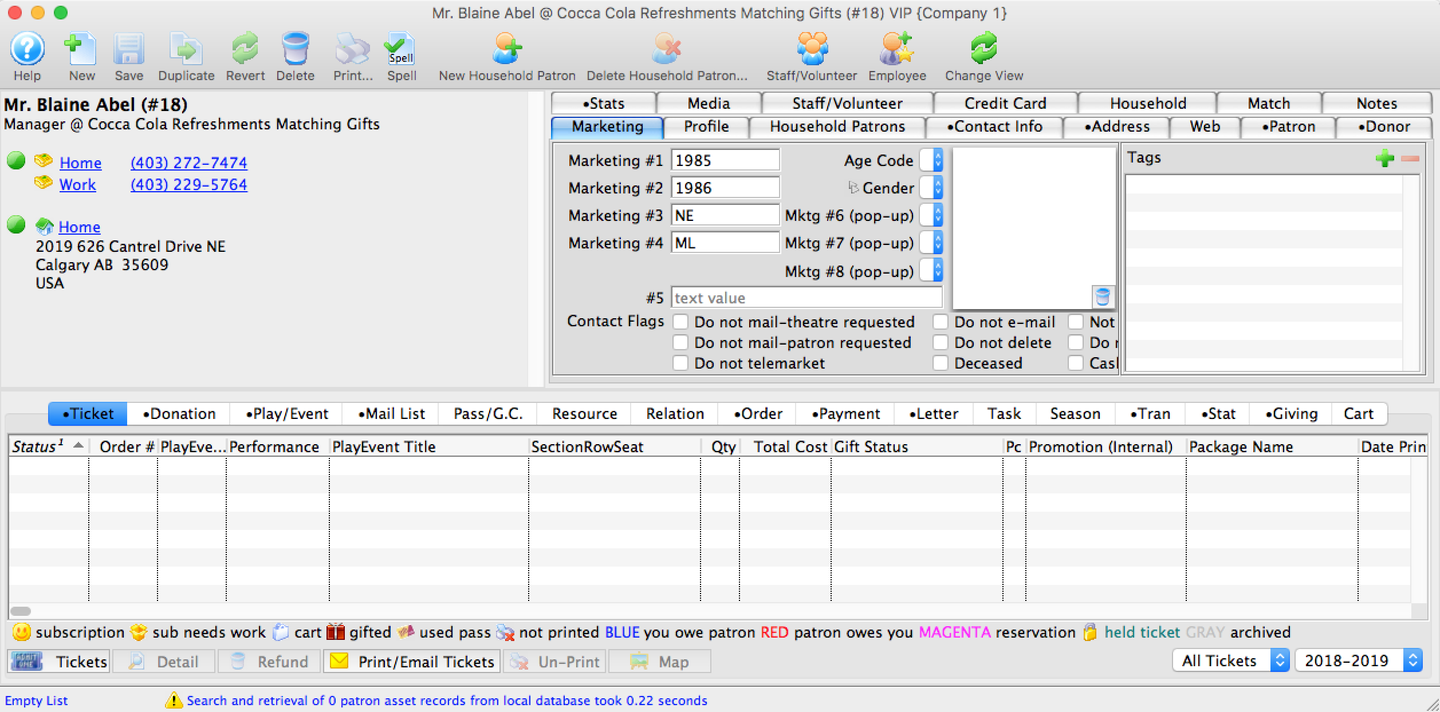
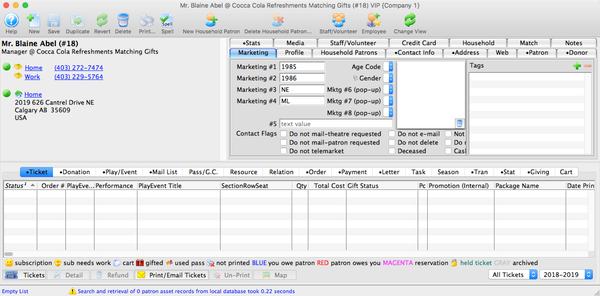
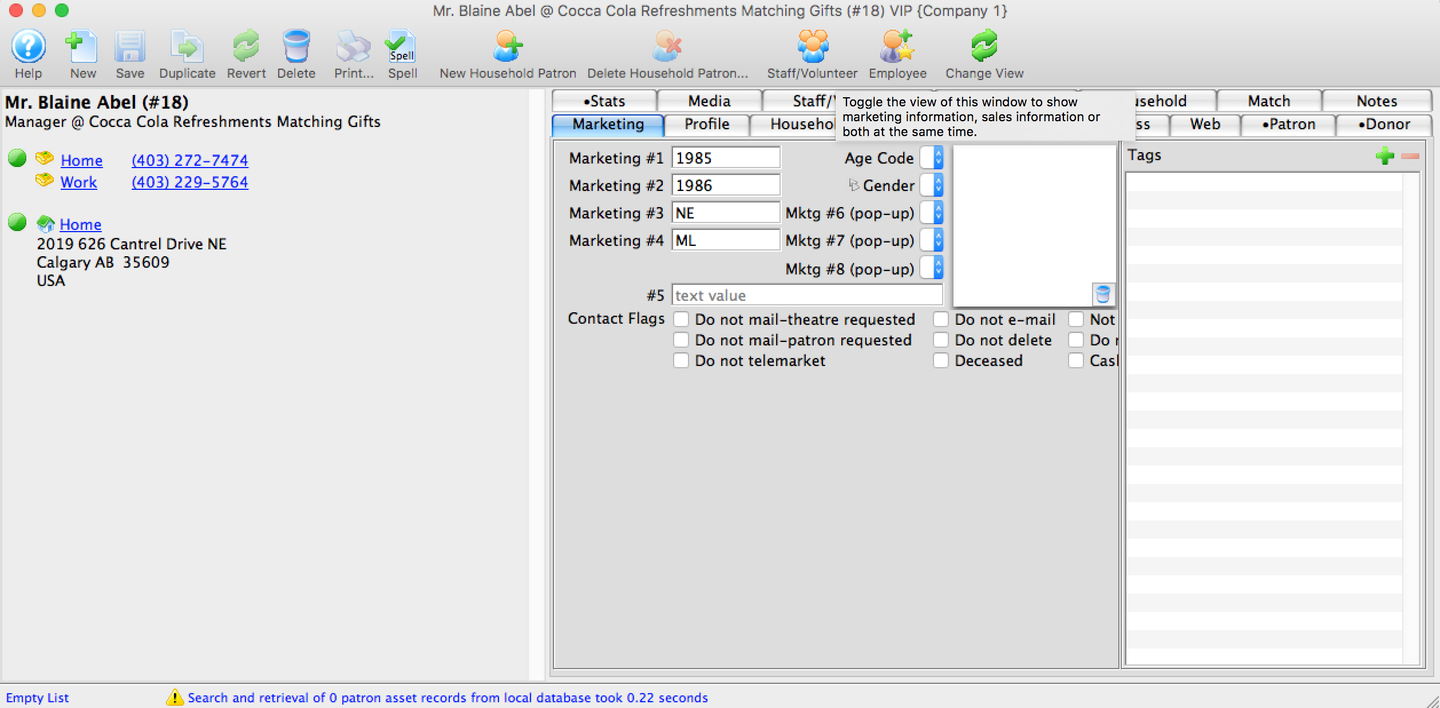
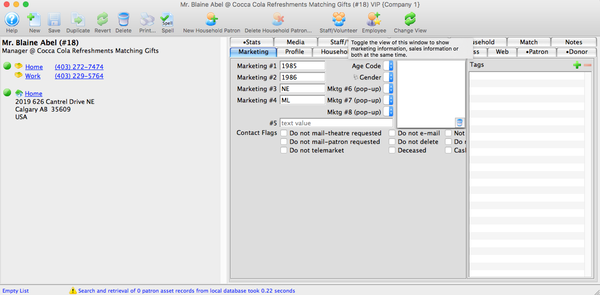
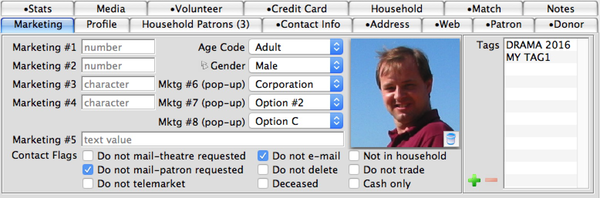
Marketing Tab Top
The Marketing Tab displays the marketing details for the current patron. These fields are useful in capturing additional specific-yet-common information about patrons that can be used in the future to create a target market group. Often these fields are used to record information about patron origin, status, programming preferences, organization affiliations, etc. Note that some of the same data appears on the Volunteer Home >> Marketing Tab.

Marketing Field One
This field is a numeric field, restricted to 30 numbers and is searchable.
Marketing Field Two
This field is a numeric field, restricted to 30 numbers and is searchable.
Marketing Field Three
This field is an alphanumeric field, restricted to 10 letter/digit combination and is searchable.
Marketing Field Four
This field is an alphanumeric field, restricted to 10 letter/digit combination and is searchable.
Marketing Field Five
This field is an alphanumeric field, restricted to 60 letters/digit (including spaces) and is not are readily searchable.
Age Code
This field contains a pull down menu, which can be edited in the Code Tables >> Patron Age Codes.
Marketing Field Six (Pop-Up)
This field contains a pull down menu. This menu is created in Code Tables >> Marketing #6.
Marketing Field Seven (Pop-Up)
This field contains a pull down menu. This menu is created in Code Tables >> Marketing #7.
Marketing Field Eight (Pop-Up)
This field contains a pull down menu. This menu is created in Code Tables >> Marketing #8.
Do Not Mail - Theatre Requested
Used when the company decides it will not mail particular patrons. That is, the company may have lost contact with a patron, or it is not necessary to mail board members.
Do Not Mail - Patron Requested
Used when a patron asks the company not to mail them.
Do Not Telemarket
Used when a patron requests not to receive telemarketing correspondence.
Do Not E-Mail
Used when a patron does not want to be contacted via e-mail.
Do Not Delete
Used when the patron is never to be removed from the database. This also prevents the patron from being merged with other patrons.
Deceased
Used if the patron has passed away. These patrons cannot be printed on labels or sent an email.
Not in Household
Used if the patron has left a company but there is a lot of data that should remain with the company. In a sense, acts like deceased, but is clearly marked different. These patrons cannot be printed on labels or sent an email.
Do Not Trade
Used when the patron does not want their contact information traded with other sources.
Cash Only
Used when the ONLY payment method accepted for patron is cash. Credit cards or checks are no longer accepted. If the patron attempts to buy online using their account, any credit card they enter as a payment will respond back as if it were declined, effectively preventing them from buying online. If the patron calls in, you can still take over their shopping cart and complete the sale. Employee functions settings have permissions to indicate who can:
- SET the cash only flag
- CLEAR the cash only flag
- Use a credit card or check, even if the person is cash only (normally reserved for a supervisor)
Gender
Used to allocate a patron's gender. The dropdown values can be edited in Code Tables >> Gender. The gender can be manually flagged here or automatically flagged when a salutation is applied via the setup of Code Tables >> Salutations.
Patron Photo
You can drag and drop an image of the patron onto the patron's record. See more information on image size and types before using.
Tags
You can add any number of tags to the patron.
Profile Tab Top
This tab provides a place to save some more personal information about the patron
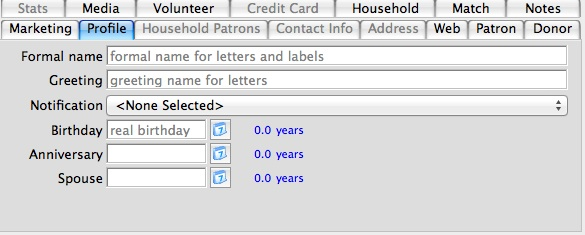
Formal Name
The patron's formal name. The formal name is a combination of salutation, first name, initial and last name.
Greeting
Displays the name the patron likes being called in everyday life. It is quite often the patron's first name or a version of it.
Birthday
Date of patron's birth. Use the calendar button to select a date or type a date in the field provided.
Anniversary
Patron's anniversary date. Use the calendar button to select a date or type a date in the field provided.
Spouse
Patron's spouse's birthday. Use the calendar button to select a date or type a date in the field provided.
Notification
Select an electronic notification from the drop-down. This will send an electronically generated letter to a designated employee alerting that employee of activity in this patron's record.
Household Patron Tab Top
This tab is used to view all members of the household.
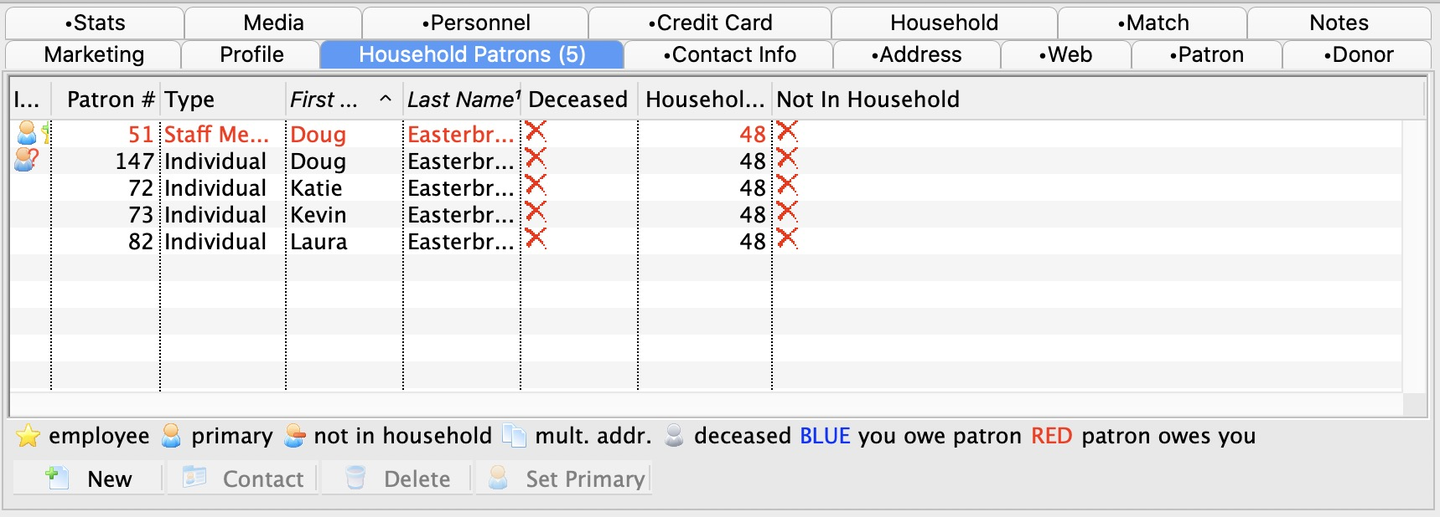

Patron Number
Unique number used as reference for the patron.
First Name
First name of the patron.
Last Name
Last name of the patron.
Household Number
Unique number used as reference for the household.

New Button
Adds a new member to the household. For more information on adding a member to a household, click here.

Contact Button
Opens the Patron Contact Card.

Delete Button
Deletes a member of the household.

Set Primary Button
Changes the primary contact person for the household. To set a patron as the primary of the household, highlight the patron in this window, click the Set Primary button.

Primary Patron Icon
The primary household person is recognized by this symbol.
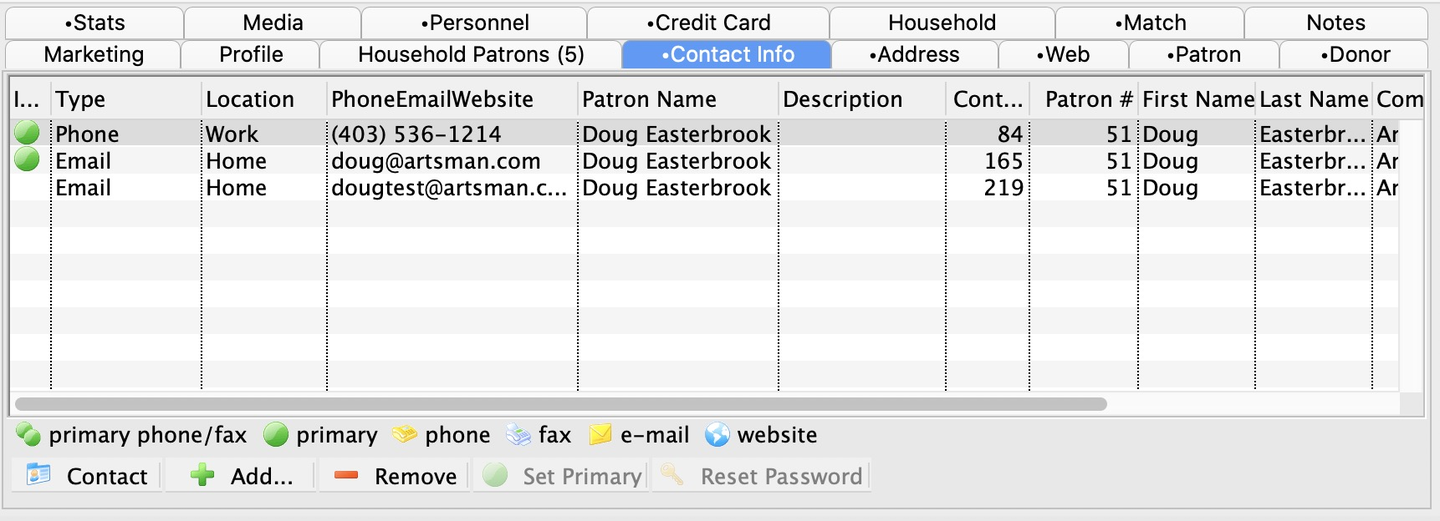
Contact Info Tab Top
This tab is used to show all the contact information for a patron, such as phone, fax, email and web links. You can alter key preferences from the list, or you can go to the Patron Contact Card to add, edit or delete any of the contact information.
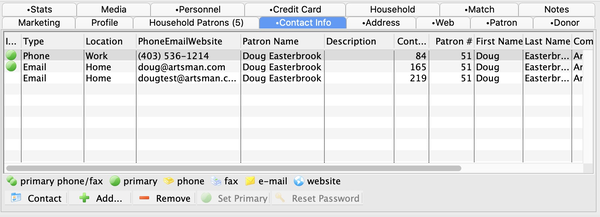
Type
An image representing the type of contact information represented on this line. Contact data can be one of:
- Email addresses (multiple allowed, each of which logs into the same account online)
- Phone numbers (home, work, cell, emergency, etc.)
- Fax numbers (multiple allowed)
- Websites (personal or work related)
Location
The location for the patron information. This is a customizable field and the values are defined in Code Tables >> Location.
Phone/Email/Website
The detailed contact information.
Contact Button
Opens the Contact Card so that you can edit their contact information.
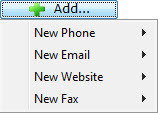
Add Button
Adds a piece of contact information to the patron's record. Each selection opens another flyout to select. When you make your selection, the Contact Card opens to the field selected.

Remove Button
Removes the highlighted piece of contact information from the patron record.
Set Primary Button
Changes the highlighted information to the primary contact information for the patron.

Primary Contact Icon
The primary contact information is recognized by this green dot symbol.

Reset Password Button
This button will be activated when an email contact is selected. Clicking it begins the password reset process.
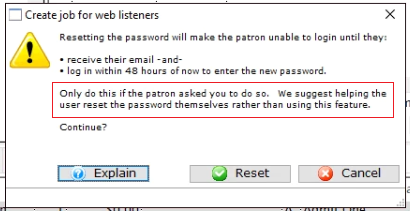
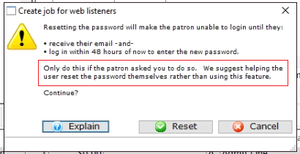
Password Reset Popup Window
This is the password reset confirmation popup. If you continue, the patron's current password will be reset and rendered un-usable. A password reset email will be sent with a 48-hour reset link. If the patron does not make a new password within 48 hours, you (or they) will need to reset the password again and get a new email.
Address Tab Top
This tab is used to store address information for a patron.

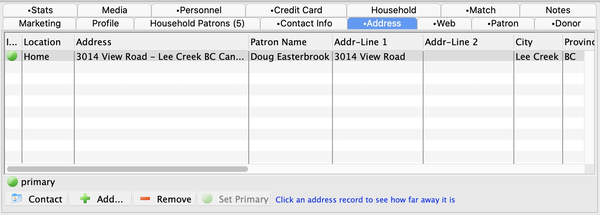
Location
The location for the patron information. This is a customizable field in Code Tables >> Location.
Addr-Line 1
Patrons street address or P.O. Box.
Addr-Line 2
Additional line for patron address details if needed.
Add-City
City of the address.
Province/State
Province or state of the address.
Postal/Zip Code
Postal code or zip code of the address.
Country
Country of the address.
Contact Button
Opens the Patron Contact Card.
Add Button
Clicking this opens a flyout to select the address type you want to add (e.g. home, work, summer, winter, etc.). Making a selection opens the Patron Contact Card with the correct tab for data entry.
Remove Button
Removes an address from the patrons record, unless it is the primary address for the patron. If the primary address needs to be removed, set another address on the account to the primary address.
Set Primary Button
Changes the primary address for the patron.
Click Address Link
The primary address is recognized by this green dot symbol.

Click Address Area
Highlighting a patron's address in the window changes the display to show the number of miles/kilometers from the patron's home to the address set in Company Preferences. The calculated distance will replace the existing text.
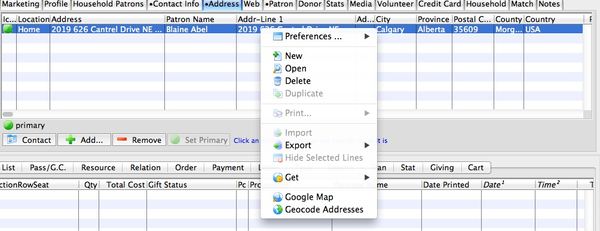
Context Menu Top
When a patron's address is highlighted on the Address Tab, several additional functions are available on the context menu via right-click (Windows) or control-click (Mac).
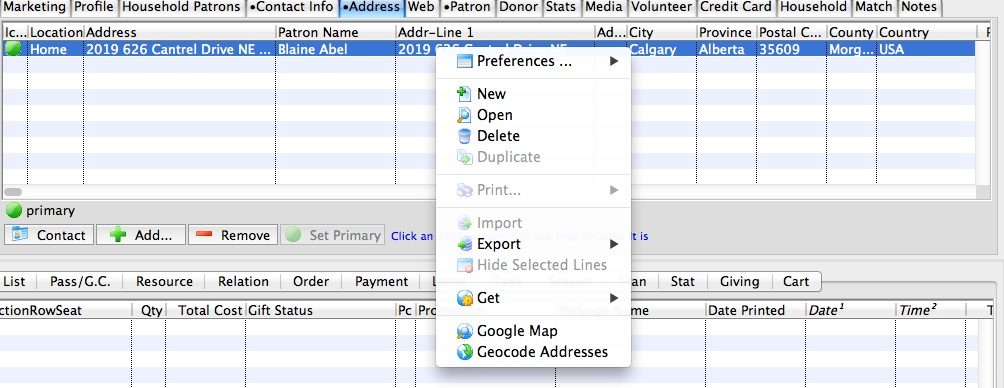
Preferences
These Column Preferences allow this toolbar to be customized.
New
Adds a new address to patron's record.
Open
Opens a selected address from patron's record.
Delete
Removes an address from patron's record, unless it is the primary address for the patron. If the primary address needs to be removed, set another address on the account to the primary address.
Duplicate
For future development.
Print
For future development.
Import
For future development.
Export
Allows for the patron address record to be exported to text or MSExcel document. Follow the patron address export steps to export data for patron number, address lines 1 and 2, city, province/state, country, first and last names, etc.
Hide Selected Lines
For future development.
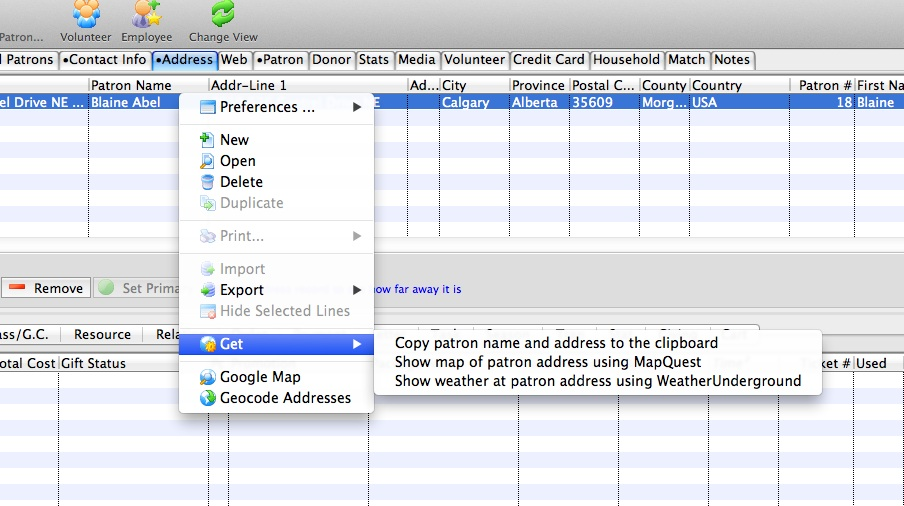
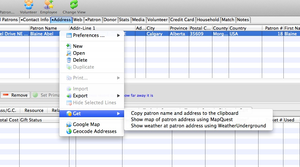
Get
There are three Get functions related to a patron's address. These functions can be accessed through the Contact List as well:
Google Map
Allows the patron's address to link directly to Google Map through a web browser.
Geocode Addresses
Allows for the patron's address(es) be converted into a geographic location using latitude and longitude.
Web Tab Top
The web tab is used to keep track of a patron's history of purchases over the internet.
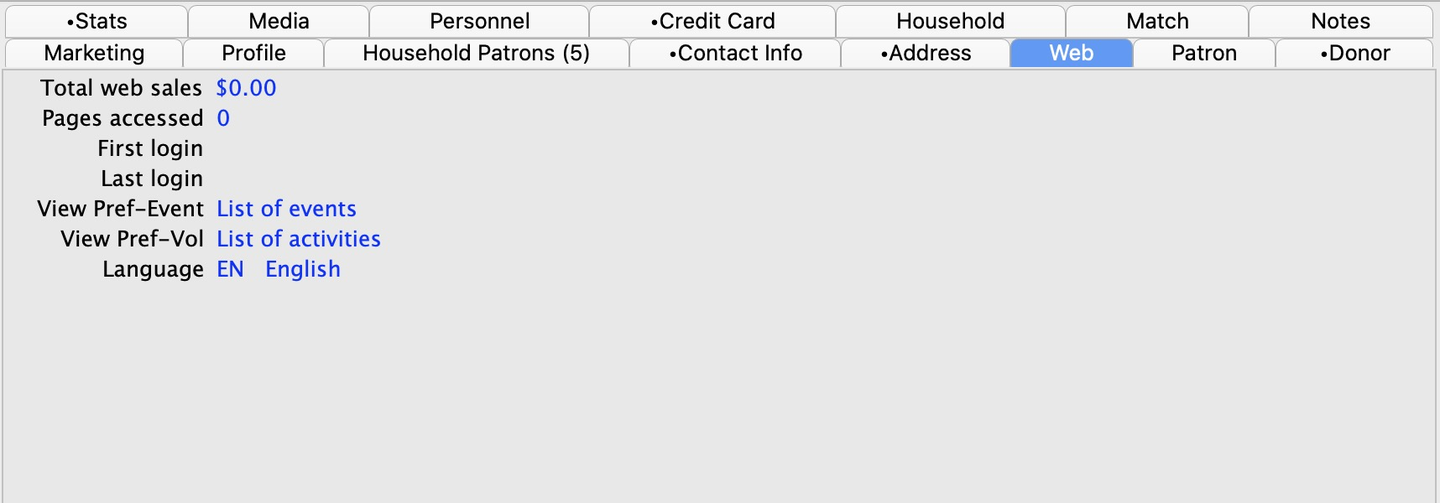

Total Web Sales
Total value of sales over the web.
Pages Accessed
Number of pages accessed by the patron.
First Login Date
The first time the patron logged into the website.
Last Login Date
The last time the patron logged into the website.
Patron Tab Top
Caution
Patron sale promotion restrictions apply to both box office and web sales since this is considered a contractual price agreement for a patron. If you make a new household patron, the selected promotions from the primary contact will be copied to the new household member. However, if you change one of the household members, it does not change the others, so you can customize each person. Sales promotion restrictions can also be applied to certain employees should you wish the employee to only sell something like group sales. Patron restrictions (if any) always over-ride any employee restrictions (if any).
This tab gives a brief overview of the patron's financial history with the company.
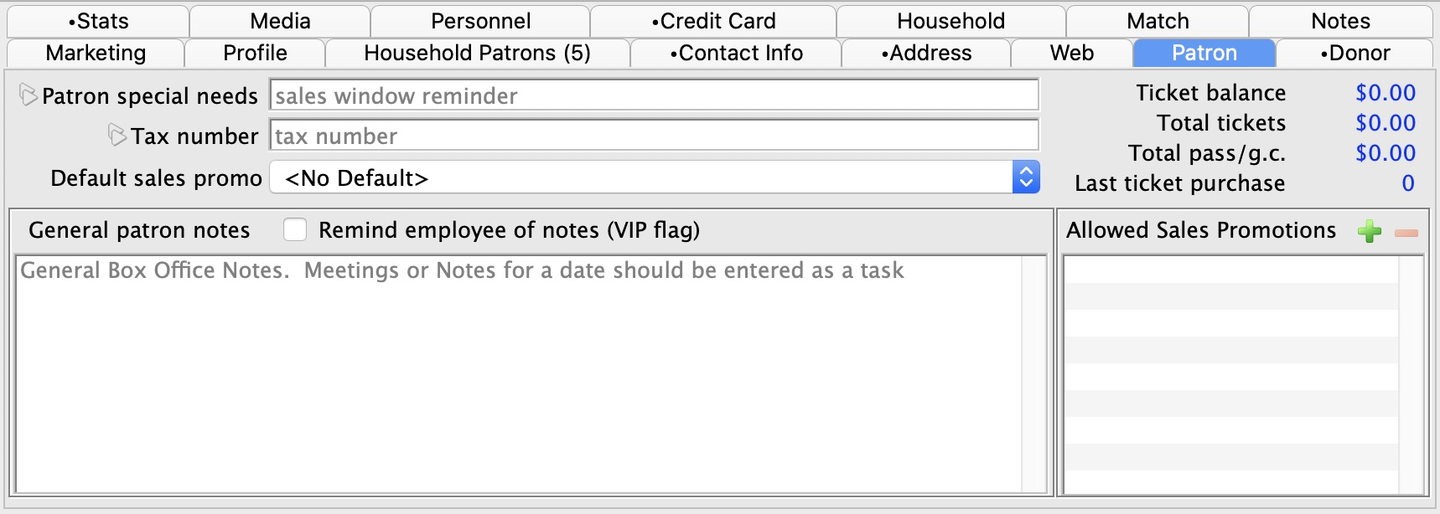

Patron Special Needs
A high priority note employees need to be aware of during sales (e.g. patron requires wheelchair seating). This note appears in the Order Window during purchasing.
Tax Number
If this patron has a tax-exempt number, you may enter it here. This field is only for reference, however. To automatically remove the taxes, be sure to add the tax-exempt number to the Household Tab.
Default Sales Promotion
An option to select a default sales promotion when this patron purchases tickets (if the sales promotion is available). If the patron's default sales promotion is not available, the default sales promotion on the Performance Tab will be used. If neither promotion is available, the default for the Sales Promotion Window will be used. If none of these are available, the employee must manually select a sales promotion to use for the sale.
Allowed Sales Promotion
If the patron is a tour operator, reseller, or school where you want them to receive specific pricing at the box office, you can enter one or more sales promotions on their record. By doing so, only those sales promotions can be used to sell tickets for the patron and none of the others that the box office normally has access to will be seen. For example, you might associate a group price and a bus driver comp with the patron so that the comp promotion is the only price that they can be charged. If those promotions are not available on a performance, you can't sell a ticket to them.
Remind Employee of Notes
When checked, and you open the Patron Window, it makes an audible beep and opens to the Patron Tab instead of the default Marketing Tab. There is no pop-up displayed to keep movement during a sale process faster. Instead, it allows you to read the notes and move on without having to acknowledge a confirmation message.
General Patron Notes
Notes about the individual patron.
Ticket Balance
Amount of money due from or to the patron. A red number means the patron owes the company, a blue number means the company owes the patron.
Total Tickets
Total amount of money spent on tickets by the patron.
Total Memberships
Total amount of money spent on membership items by the patron.
Last Tickets
Last year the patron purchased tickets.
Donor Tab Top
The donation tab provides a brief look at the donation defaults for a patron.


Publication Name
This is how the patron generally wishes to be recognized.
Normally this is left blank for most patrons, but if a patron has a specific request for ALL donations, enter something here. It was intended for foundations, granting agencies, and matching gift corporations that have specific recognition needs. However, it can be used for any patron. Refer to the actual entry of a donation to see how the program name is populated.
Giving Capacity
Expectation of the patrons giving range within a specific time frame.
Don't Solicit By:
The options are:
- Mail: If flagged the patron does not wish to receive mail. This flag can be used to remove the patron from mail campaigns.
- Phone: If flagged the patron does not wish to receive phone calls. This flag can be used to remove the patron from phone lists.
- Email: If flagged, the patron does not want to receive emails. This flag can be used to remove the patron from email lists.
In many instances, it may better to use one or more Mail Lists than these quick flags to decide how to communicate with donors.
Solicitor
Assigns a specific employee as solicitor for this patron.
Donor Tab #2
Donor date field.
Moves Mgt Date
Use to track the date a patron reached a selected level within the moves management structure. The calendar button can be used to select a date.

Donor Level Dropdown
Donor level. Allows you to choose a donation selection level.
Last Match Co.
The company and individual who last matched the donors gift.
General Donor Notes
Any general notes about the donor that are not related to a specific donation.
Private
Restricts the view of the patron's donation info from general users of Theatre Manager. For more information on restricting access to donor information click here.
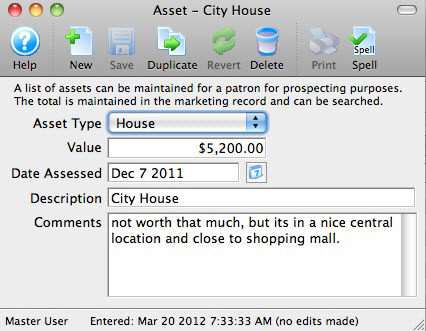
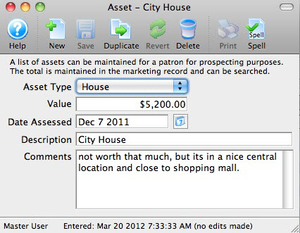
Asset Tracking - Asset Detail Window
If you wish to track key assets for prospecting a high net worth donor, you can enter them into the list on the upper left. Click the New, Edit or Delete buttons under the Asset List to edit various aspects of the assets, including the value and when it was valued. A total of all assets is displayed to the right at the bottom of the statistical information column.
Refer to the Code Table >> Donor Assets to create or edit the values used in this window.
A user must have access to the asset tracking data in their employee permissions, otherwise this list is not displayed in the window. You can choose to have only key development staff members see this information.
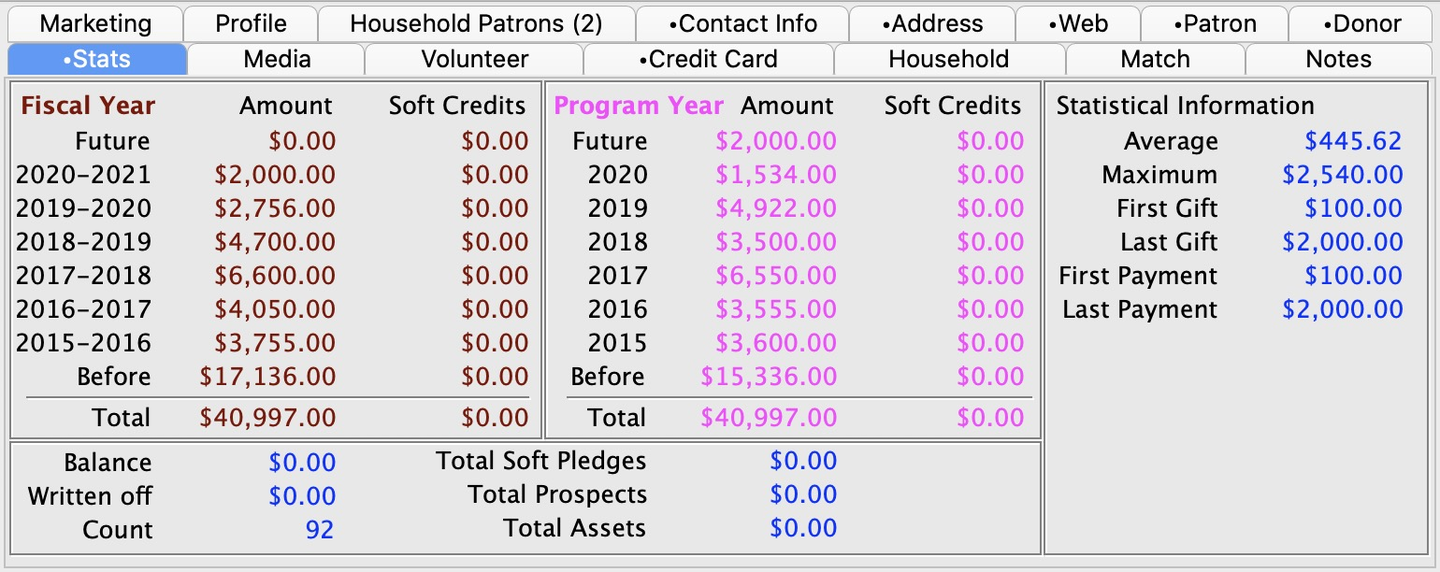
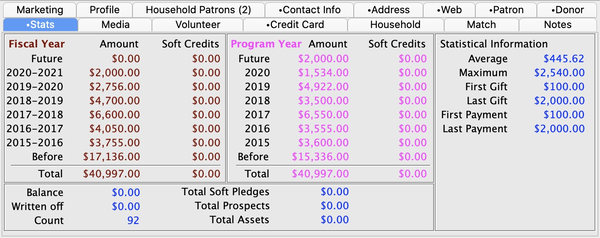
Stats Tab Top
Caution
The totals displayed on this tab are also displayed in the Who's In Tab on Mail Lists and a few other places within the system. They are handy for quickly finding people based on total donations. However, if you want to distinguish based on campaigns or other donation fields, you may need to use a database query within a Mail List to identify and contact people.
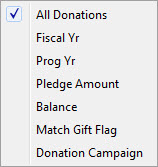
This tab displays some summary statistics on the donations the patron has made. The data is separated into:
- Fiscal year (past 6 and future)
- Program year (past 6 and future)
- Balance, and totals for soft credits and pledge amounts
- An indication of minimum/maximum gifts and when they were given
Media Tab Top
The Media Tab is used to keep track of patrons who are members of the media and the appropriate marketing materials to use for them.
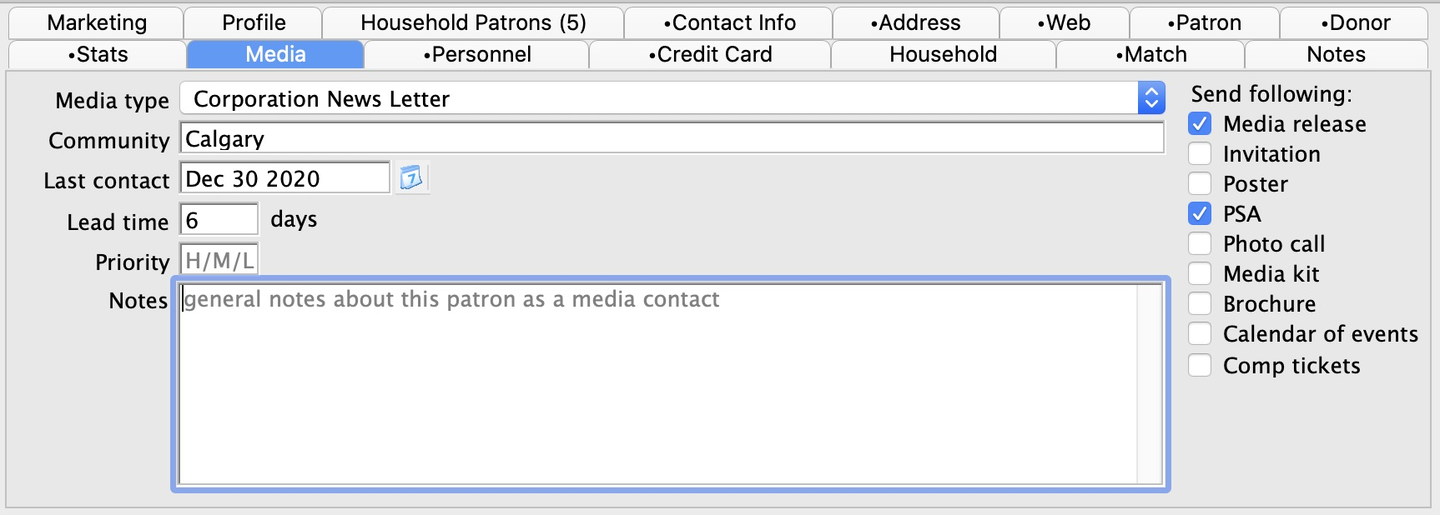

Media Type
Record the type of media that the patron works with. To select a media type, open the drop-down list and click on the desired choice. The list of media types available can be altered in Code Tables >> Media Types.
Community
The area in which the media type spans. For example, a television station could reach an entire county while a community paper circulates within a neighborhood or specific city. This field defaults to the city entered on the patron window.
Last Contact
Last time the media member was contacted.
Lead Time
Number of days (in advance) that the media member needs to be aware of an event in order to advertise it.
Priority
For setting a custom rating across media contacts for accurate distribution of limited advertising materials.
Notes
Relevant notes about the media contact.
Send Following
This is what the media member requires in order to properly advertise the event. Add a check mark by clicking in the box next to the required items:
- Media Release
- For official press releases
- Invitation
- For specific one-on-one invitations
- Poster
- For posters display requirements
- PSA
- For public service announcement needs
- Photo Call
- For photo opportunities
- Media Kit
- For media/press kit/packet delivery
- Brochure
- For those who need brochures/fliers delivered
- Calendar of Events
- For regular delivery of a paper/digital event list/calendar
- Comp Tickets
- For those who receive comp tickets (entries here do not actually reserve tickets)
- Checking this causes another checkbox to appear for recording the standard number of comps the media member receives (entries here do not actually limit comp ticket booking).
Personnel Tab Top
The Personnel Tab is used to show which patrons are volunteering for an event. Click here for more information on setting volunteers.
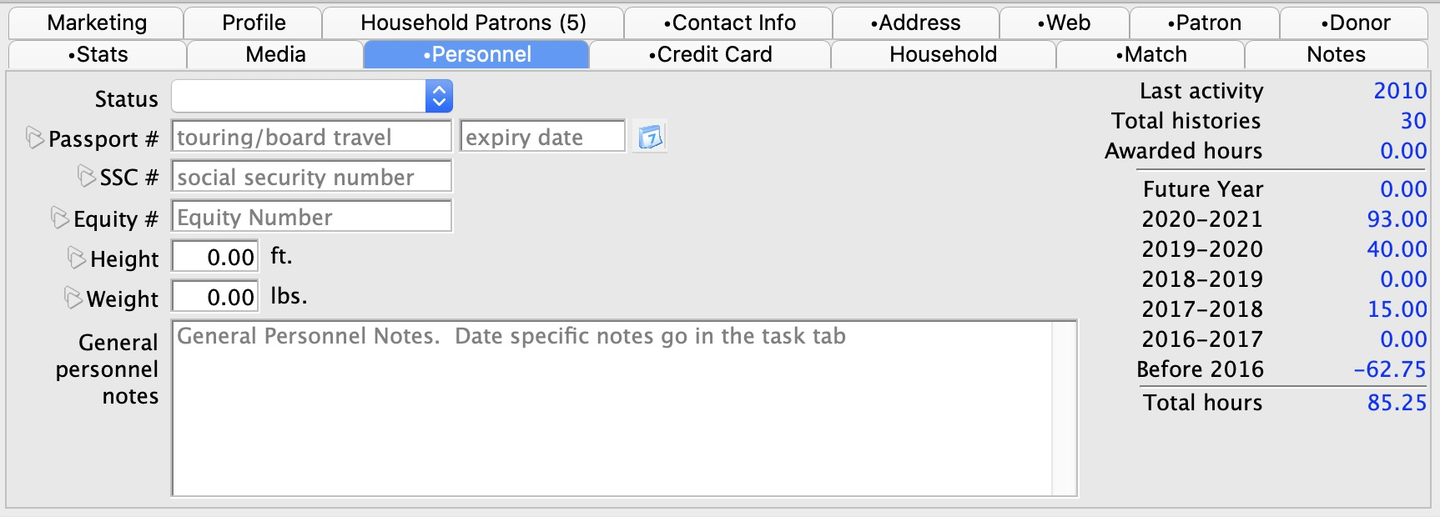

Status
Select the appropriate one of the following:
- Status-Active
- Status-Inactive
- Status-Unknown
Passport Number
The passport number of the individual
Equity Number
The equity number of the individual
Height
The height of the individual
Weight
The weight of the individual
General Volunteer Notes
General notes about the volunteer
Last Activity
Displays the year the individual last volunteered
Total History
The number of times the individual has volunteered
Awarded Hours
Number of hours the volunteer has worked that have been awarded
Total Hours
The total number of hours the individual has worked as a volunteer
Credit Card Tab Top
This tab stores the patron's credit card history for records and auditing purposes. Data in this tab is visible to an employee if they have been granted access under Employee Setup >> Data Tab.
The data in this tab feeds the patron credit card search screen during the payment phase of an order.

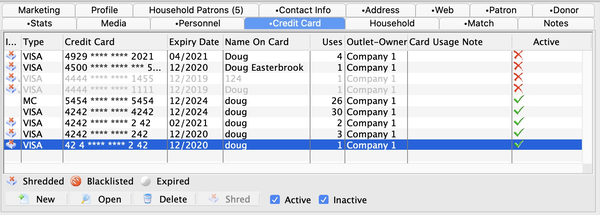
Type
Credit card type (e.g. Visa, Master Card, American Express, etc.)
Name on Card
Name used for added security when processing the card
Credit Card
The credit card number
Expiry Date
Date the card will expire
Uses
Once a card has been used, this field holds a count of the number of payments that used this credit card number. A card that hasn't yet been used has a value of 0.

New Button
Manually adds a new credit card to the patron's file.

Open Button
Opens the Credit Card Detail Window for editing.

Delete Button
Deletes a credit card from the patron file. Only credit cards without any transaction history can be deleted from the patron record.

Shred Button
Shreds the selected credit card record(s) if they exceed your retention period's minimum number of days. Theatre Manager can implement either Schedule "C" or "D" for the SAC.

Active Status Checkboxes
Determines the state of the card and if it can be selected to process credit card transactions. Inactive should be used for expired, lost, or stolen cards.
Credit Card Detail Window Top
This window is used for manually adding and editing credit cards on a patron's record.

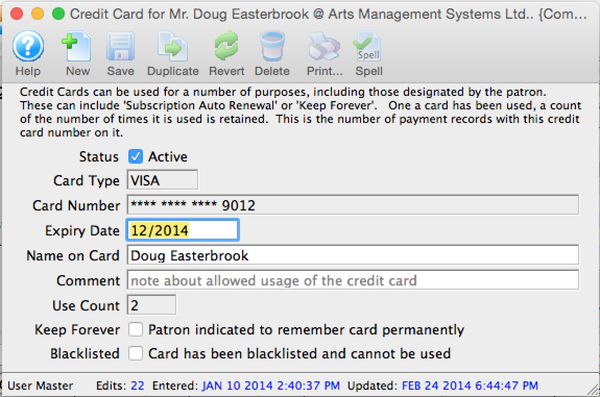
Status
Determines the state of the card and if it can be selected to process credit card transactions. Unselected equals the value inactive. Inactive should be used for expired, lost, or stolen cards.
Type
Credit card type (e.g. Visa, Master Card, American Express, etc.)
Credit Card
The credit card number
Expiry Date
Date the card will expire
Name on Card
Name used for added security when processing the card
Comment
A short note field that appears in the credit card search screen during the payment phase of an order (e.g. "Use for annual membership", "do not use for subscriptions", "single charge not to exceed $100", etc.).
Use Count
Once a card has been used, this field holds a count of the number of payments that used this credit card number. A card that hasn't yet been used has a value of 0.
Keep Forever
This flag indicates that the patron has formally requested the card to remain on file permanently.
Blacklisted
Checking this marks a card as blacklisted, which prevents this card from being used again. If the same card number is in use by other patrons, you may be prompted to also blacklist the record on those accounts. Only employees with blacklisting permissions in Employee Setup - Functions Tab can clear the blacklist status.
Household Tab Top
This tab stores information related to all members of the household. Changes to this tab will affect all members of the household.
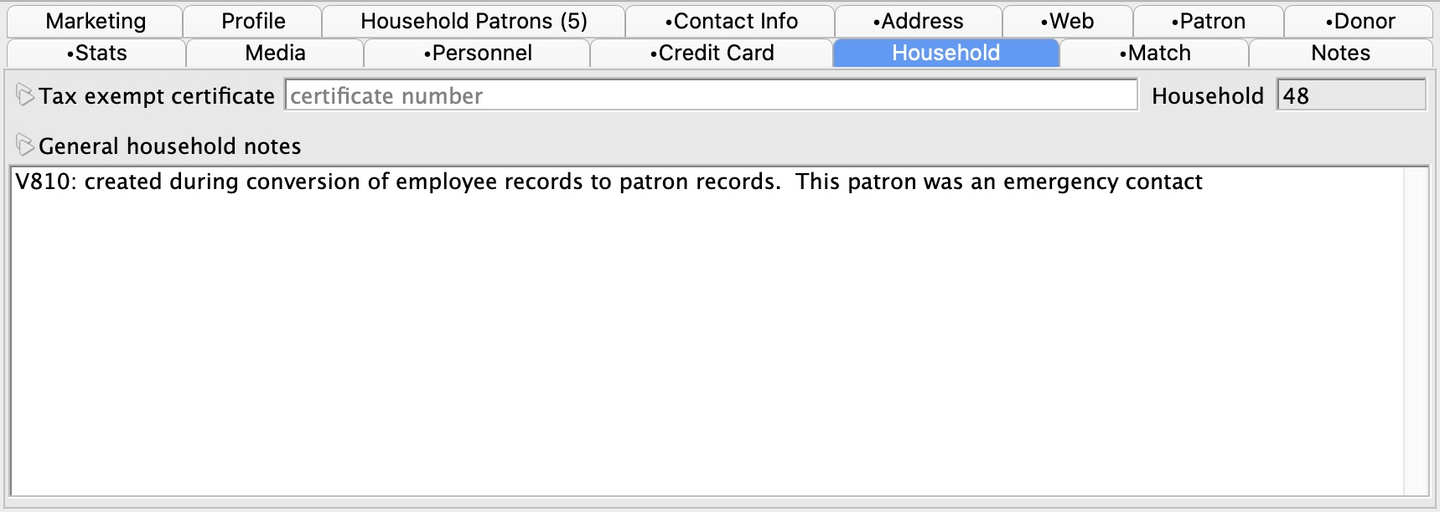

Tax Exempt Certificate
When entered, Theatre Manager will not charge taxes to the patron.
Household General Notes
Notes about the household. Notes entered will be visible in the household tab of each household member. Notes changed in one record will affect all records.
Match Tab Top
The Match Tab allows you to indicate that a particular patron record is a matching gift company.

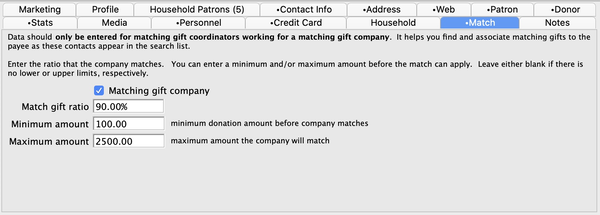
Matching Gift Company
A checkmark indicates that this patron record is a matching gift company.
Match Gift Ratio
The ratio of each donor's gift that the company will match.
Minimum Amount
The minimum threshold below which the company will not match (if applicable). This field is optional.
Maximum Amount
The maximum threshold above which the company will not match (if applicable). This field is optional.
Notes Tab Top
The Notes Tab allows you to collect additional pieces of information about the patron.
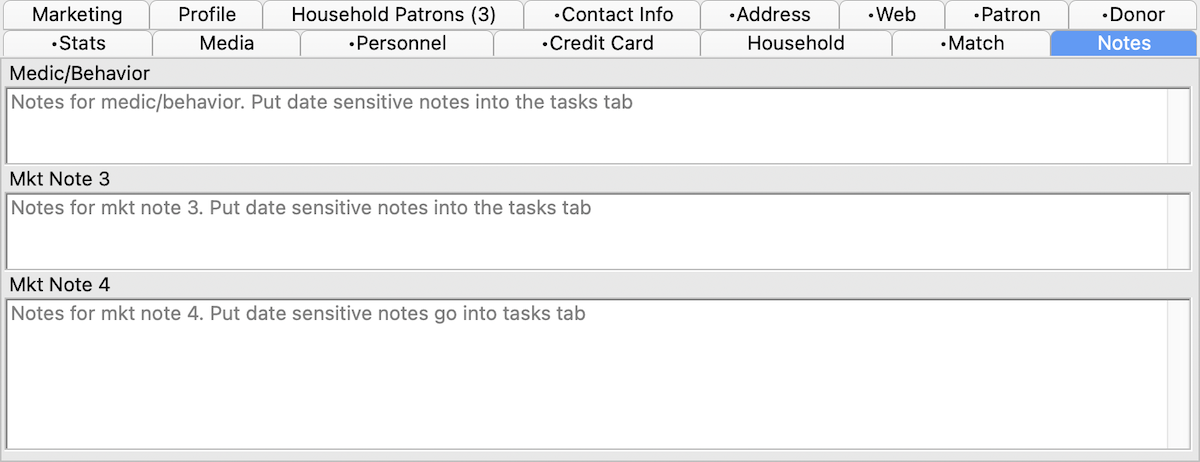

Medic/Behavior Special medical or behavior notes about the patron.
Mkt Note 3 Additional notes field.
Mkt Note 4 Additional notes field.
Patron Activity Tabs Top
Before proceeding, review the introduction to patron management and about the Patron Window.
Welcome to reference content for the Account Tabs on the Patron Window. The account history tabs live at the bottom of the Patron Window and are used to display the history of the patron with your organization, such as tickets, donations, past orders, emails that they've received, meetings, statistical purchase history and more.


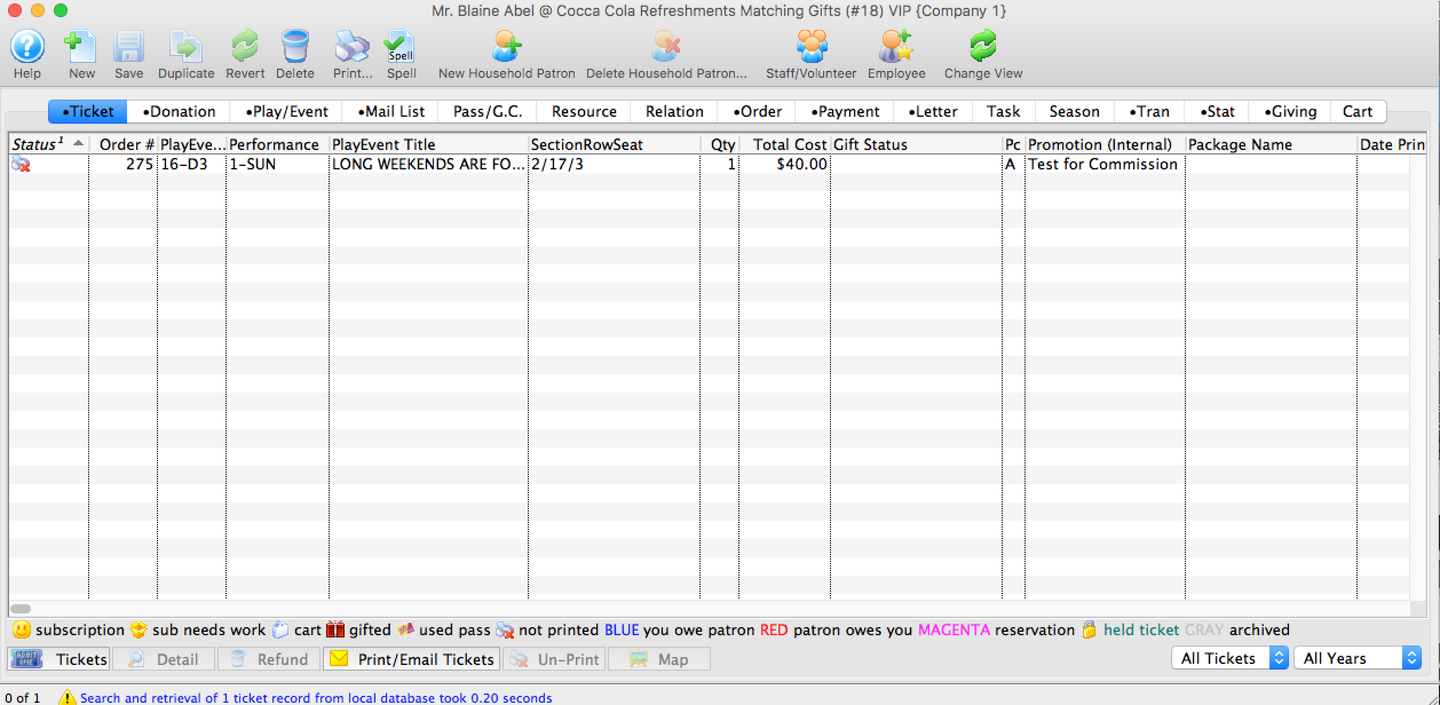
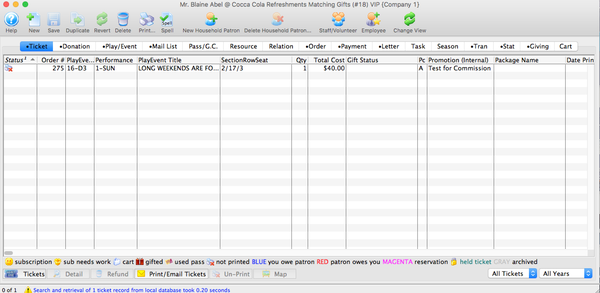
Tickets Tab Top
The Tickets Tab shows a summary of all tickets bought by the patron. They may be shown by different types and years using the pull down filters bar in the bottom right corner.

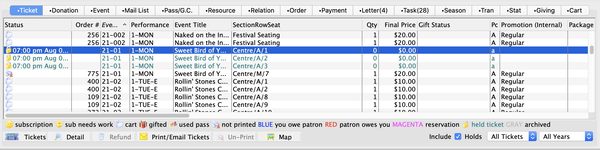
Order Number
The order number is a reference number for the order.
Event/Play Code
A unique code used to define the event.
Performance Code
A code which describes which day the event took place on.
Section/Row/Seat
Section/Row/Seat provides the location of the patron's seat.
Qty
The number of admissions the ticket allows (e.g. 1 for a ticket to a reserved seating event or 24 for a group ticket to a festival seating event).
Total Cost
Displays the amount paid for the ticket. The price includes markups, discounts, and taxes.
Pc
Pertains to the price code selected when the ticket was purchased.
Promotion
Displays the sales promotion used when the ticket was purchased.
Date Printed
Date the ticket was printed on.
Performance Date
The date of the performance will take place.
Performance Time
The actual time the performance will take place.
Play Title
The name of the event the ticket was purchased to.
Used?
The status of the ticket can be marked as used if attendance is tracked within Theatre Manager.

Tickets Button
Opens a popup that allows you to:
- Purchase new tickets for the patron
- Add new tickets to the selected order
- Exchange the selected tickets
- Change the selected tickets price or promotion
- Return the selected tickets to the box office for resale
- Pay for tickets in the first selected order
- Assign ticket as a gift to, which opens a sub menu
- Release the selected tickets that are held specifically for the patron
- Open a new order, ready to buy the selected held tickets. Tickets are not sold automatically since you will need to select a price code and sales promotion manually. It will show you which tickets are held for the patron.
- If held tickets part of a shopping cart are selected, you can open the cart directly from this window which gives you options like taking over the cart and checking the cart out on behalf of the patron.

Detail Button Opens the Ticket Detail Window.

Refund Button Returns tickets back to a sales state and allows a refund or transfer of patrons funds to another form.

Unprint Button Unprints tickets that already have a printed date.

Map Button Same as the Attendance by House and Calendar Report - Print Graphic Map by Ticket report. Maps the patron's highlighted tickets to their seats in the venue.

Ticket Display Filters These two filters controls which tickets are visible in this Ticket Tab. Typically, you want to show all tickets in the future, but the search can be limited at any time. Each employee can also customize their default filter view on this tab in Employee Preferences >> Patron Tab.
Donation Tab Top
If you are new to donation management in Theatre Manager, it may be helpful to read about donations before proceeding.
The Donation Tab lists all donations attached to a patron record. From here, you can insert, modify, or delete donations.
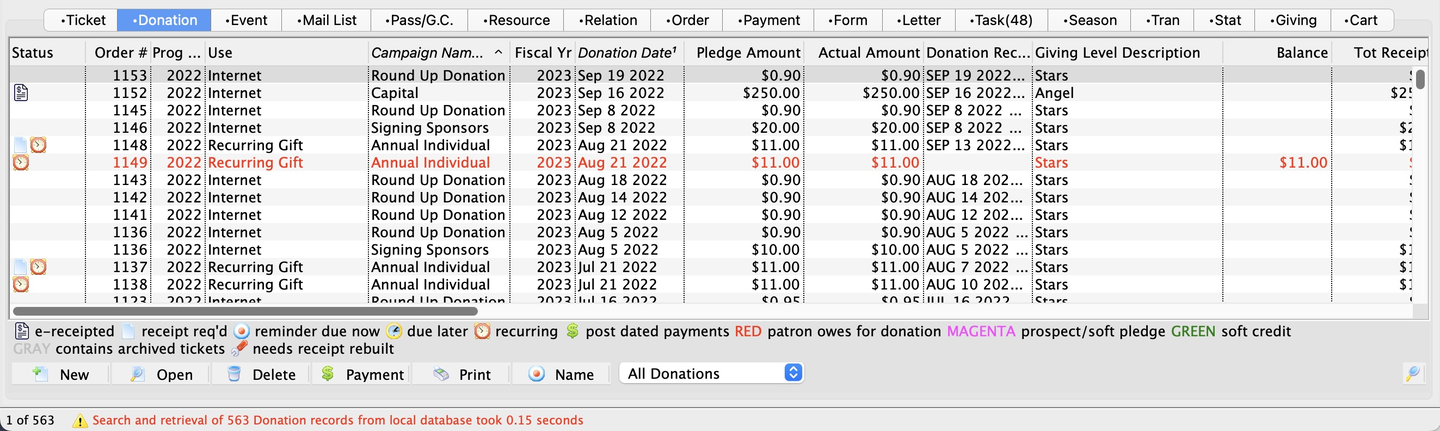
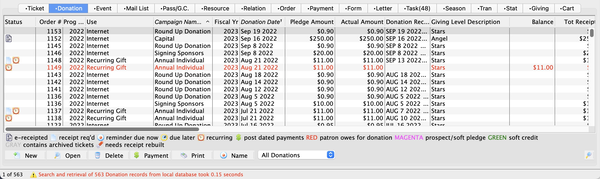
Status
A display of icons indicating the status of the donation.
Order Number
The reference number for the order.
Program Yr
The program year that defines the time frame that the donation will be recognized in published material.
Use
The type of donation received.
Campaign Name
Name of the campaign that the donation was assigned to.
Fiscal Year
The financial fiscal year of the donation.
Donation Date
Date the donation was made (recorded in Theatre Manager).
Pledge Amount
The amount the patron pledged.
Actual Amount
The amount received on this gift to date. A donation may be made in the form stock and the payment amount may therefore be more or less than the original pledged amount. Read more about managing gifts of stock.
Giving Level
What level of giving the donation is at.
Balance
Outstanding balance of the pledged amount remaining (or the unpaid difference between the donation and the total payments).
Total Receipted
The amount of the donation that has been issued receipts.
Soft Credit
Soft credits that have been applied to the donation.
Program Name
The patron's name as it should be listed on the program.

Add Button
Add a new donation.

Open Button
Opens the highlighted record's Donation Detail Window for modification.

Delete Button
Deletes the highlighted donation. Tax receipts and prior payments must first be removed before a donation record can be deleted.

Payment Button
Opens the Payment Window for the highlighted donation. For more information about pledged unpaid payments, click here.

Print Button
Prints the highlighted donation on a thermal ticket (if a default ticket face has been associated with the campaign).

Name Button
Opens the Set Donation Name dialog for the highlighted donation.
Donation List Filter
Filter options for the visible donations in this tab.
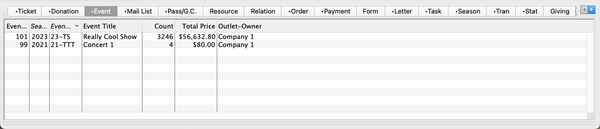
Event tab Top
The Event/Play Tab is used to keep track of which events a patron or household has purchased. Theatre Manager automatically adds events to this tab when a patron purchases tickets and maintains a running total of tickets held for each event by the patron. This is the list of events referenced by the commonly-used criteria field Marketing Patron Bought for Events.
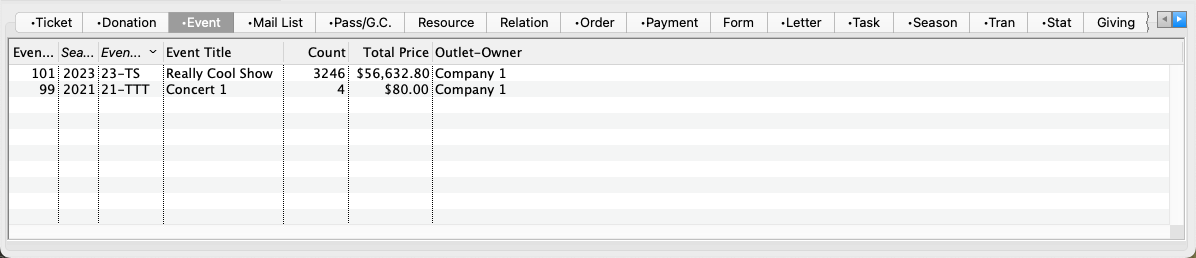
Play Number
The unique number used to distinguish between events.
Year
The year the event is associated with.
Play Code
A unique code used to distinguish between events.
Play Title
The title of the event.
Count
Count of tickets purchased to that event. Zero means that the patron has purchased and refunded all tickets, but they still indicated interest in the event.
Price
Total value of the tickets that the patron has purchased.
Outlet-Owner
The outlet that created the event.
Mail List Tab Top
This tab is used to view all the mail lists that a patron belongs to. It is also used to manually add or remove patrons to or from a mail list. You can also access the Mail List Search Window from this tab.
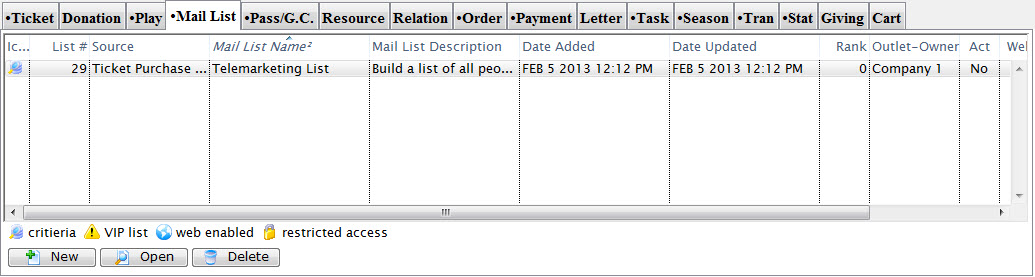
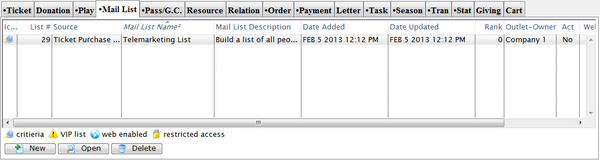
List Number
This is the number that was assigned to the Mail List when it was created.
Source
How the patron was added to the mail list.
Mail List Name
This column displays the names of the mail lists that the patron belongs to.
Mail List Description
This is a brief description of the nature of the mail list.
Date Added
This is the date that the patron was added to the corresponding mail list.
Date Updated
The date the Mail List was last ran or updated.
Outlet-Owner
The outlet the Mail List belongs to.
Mail List Active?
Displays the current active or inactive state of the mail list.
Web?
Shows the mail list's status on the website.
Changed By
The last person to edit or update the mail list.

New Button
Clicking this button allows the user to attach a patron to a Mail List manually.
Open Button
Clicking this button opens the Mail List Detail Window for the selected mail list.
Delete Button
This button removes a patron from the selected mail list.
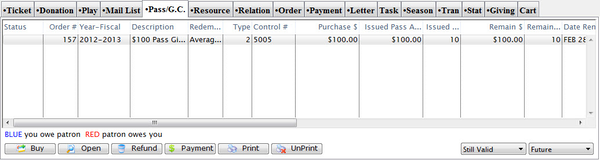
Pass Tab Top
Before proceeding, read about memberships in Theatre Manager. The tab may have a different name (e.g. Memberships, Gift Certificates, etc.) in your database.
The Memberships Tab tracks data for memberships, gift certificates and/or event passes for a patron.
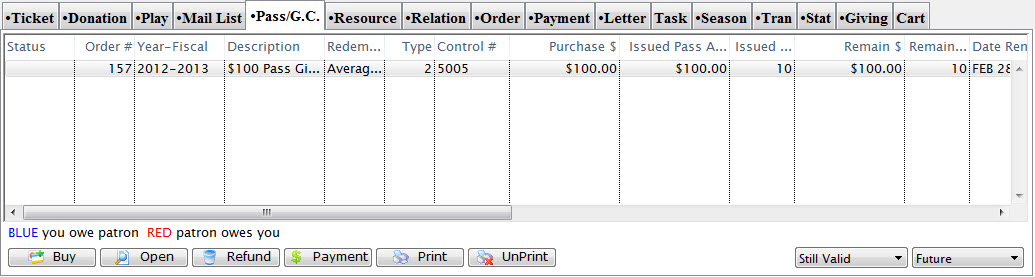
Order
The unique number for this order.
Fiscal Year
Fiscal year the membership belongs to.
Member Type
The type of membership purchased. Membership types are setup in Setup >> System Tables >> Passes/Gift Certificates.
Date First Member
te the membership has been valid since.
Control Number
The control number for this membership used for redemption purposes.
Purchase $
The value of the membership at the time of purchase.
Issued Qty
Number of admissions the membership was valid for at the time of purchase.
Remain $
Remaining dollar value the membership can be redeemed for.
Remain Qty
Remaining admissions for the membership.
Date Renewed
Date the membership can be renewed on or till.
Last Renewed
Date the membership was last renewed.
Expire Date
Date that the membership will expire.
Notes
This column displays any notes that are pertinent to the membership.

Buy Button
Clicking this button allows you to buy a new membership.
Open Button
Clicking this button allows viewing the Membership Detail Window.
Refund Button
Clicking this button allows refunding a membership.
Payment Button
Adds a payment to the membership.
Print Button
When the membership preferences define the pass as printable, this prints the selected membership. For more information on setting up membership types, click here.
Unprint Button
When the membership preferences define the ability to unprint, this unprints the selected membership. For more information on setting up membership types, click here.
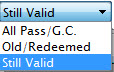
Pass Status Filter
Use the status filter in conjunction with the date filter to limit the visible passes on the tab list by current or expired memberships.
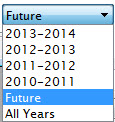
Pass Date Filter
Use the date filter to limit the visible passes on the tab list in specific years. Use this in conjunction with the status filter.
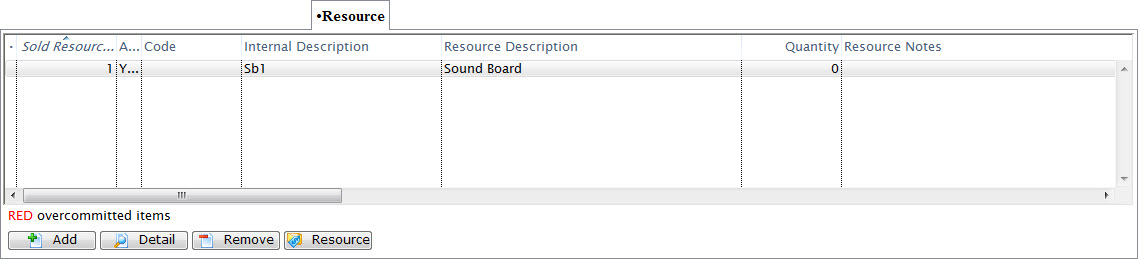
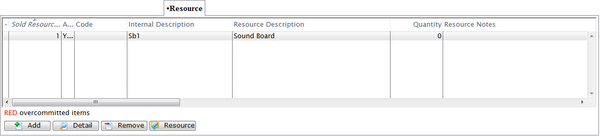
Resource Tab Top
The Resource Tab is used by the Facility Management portion of Theatre Manager to keep track of resources associated with a patron.
Relation Tab Top
Read the introduction to relationships before proceeding.
Caution
Note that when a relationship is created in this tab, a corresponding entry is automatically created in the other patron's account. Altering or deleting a relationship entry in one patron's account similarly modifies or removes the corresponding entry in the other patron's record.
The Relation Tab is where your you add, edit, or delete specific relationship/interaction information with other patrons in your database. To create new or modify existing relationship types used in this tab, see [Code Tables >> Patron Relationships](/reference/code-tables#patron-relationships).
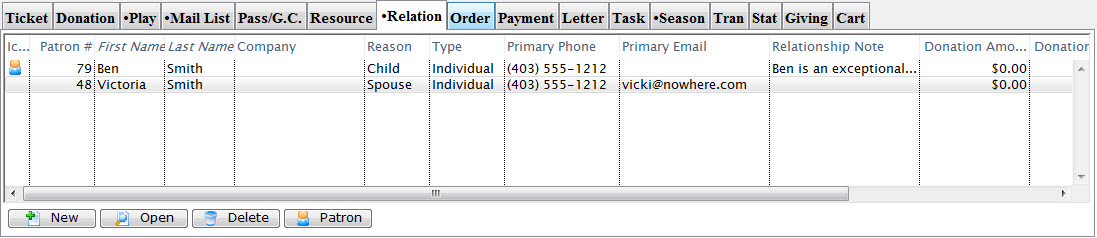
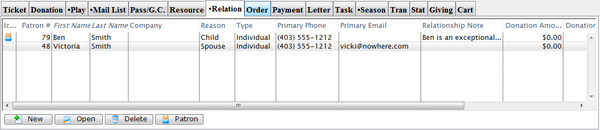
Patron Number
The patron number of the other patron in the relationship.
First Name
The first name of the other patron in the relationship.
Last Name
Last name of the other patron in the relationship.
Company
The company associated with the other patron.
Type
The type of relationship the patron listed has with the selected patron.
Primary Phone
The phone number of the patron listed.
Email
The email associated with the patron listed.
Relationship Note
Any notes made about the listed patron.
Reason
A description of what this relationship is. The relationship can be viewed from both patrons and Theatre Manager automatically adjusts the terminology displayed in the column based on the type entry setup in code tables. For example, under patron A, the relationship may indicate that patron A is the Child of patron B while patron B's account will say Parent of patron A.
Donation Amount Pledged
The pledge amount of the other patron in the relationship. This information could be helpful to soliciting donations of the current patron.
Donation Amount Soft Credit
Value of soft credits that the other patron has. This information could be helpful in soliciting donations of the current patron.
Donation Count
The number of donations the other patron has made.
Hours
Number of hours the other patron has contributed through work or volunteering. This information could be helpful in filling in volunteer or work schedules.
Relationship Notes
The notes allow for an additional description of the relationship. This could be useful for describing relationships of people in partnerships or business.
Outlet
The outlet identification number.
New Button
Adds a new relationship to the patrons record. Alternative, add multiple relationships at one time.
Open Button
Edits a current relationship.
Delete Button
Removes a relationship from a patrons record.

Patron Button
Opens the patron record for the other patron in the relationship.
Order Tab Top
The Orders Tab allows the user to view a summary of all previous purchases the patron has made. For more information on order management, click here.
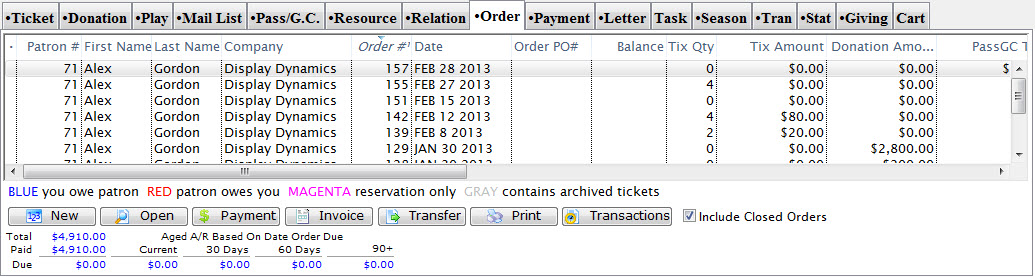
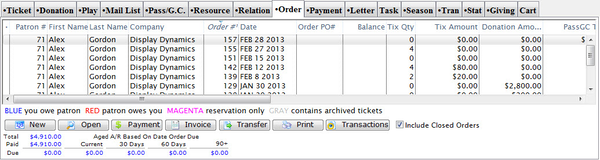
Order
A unique number used to define the order.
Date
Date on which the order was made.
Tix Qty
Number of tickets in the order.
Tix Amount
Value of the tickets in the order.
Donation Amount
Value of the donations in the order.
Membership Amount
Value of the memberships in the order.
Fee Total
Value of the fees in the order.
Order Total
Combined total value of the donation.
Balance
Displays the amount the patron owes.
Final Date Due
Date which the outstanding balance on the order is due.
Outlet
The number representing the outlet responsible for the order.
New Button
Opens a New Order Window.
Open Button
Opens the selected order for editing.
Payment Button
When clicked with a single order selected, opens the Order Detail Window and lets you pay for the order. When clicked with multiple orders selected, applies a single payment for multiple orders.

Invoice Button
After placing an order for a patron, this button creates an invoice to be sent to the patron.

Transfer Button
Transfers the selected order to another patron, including payments.
Print Button
Opens a print dialog, to print the selected order

Transactions Button
Opens the Transaction History Detail Window record for the selected order.
Include Closed Orders
This filter box should usually be checked to show all orders that have received payment, whether they have been closed already.
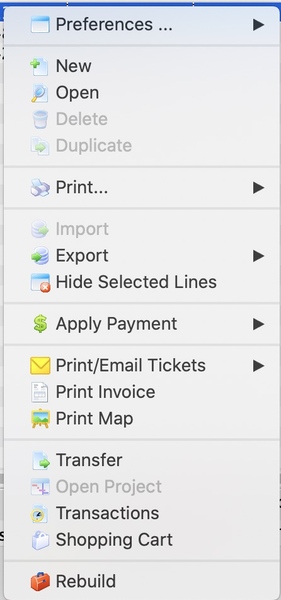
Order Tab Context Menu Top
This context menu is accessed by selecting one or more rows in the Orders Tab and right-clicking (control-clicking on a Mac). There are many functions on this menu, several of which can also be prompted from buttons on the Orders Tab. One of the important one functions available ONLY from this context menu is Rebuild. Rebuilding an order is a rarely needed, but useful troubleshooting tool that:
- recalculates any balances that look to be errant on the patron record
- recalculates the overall patron balance
- allocates payments to amount paid for donations, tickets, passes, etc. on the order

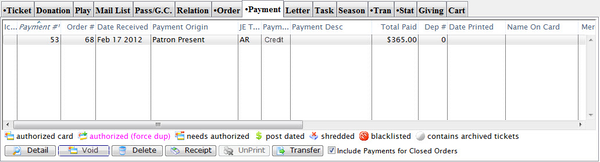
Payment Tab Top
The Payment Tab allows the user to view a summary of all payments the patron has made toward previous purchases.
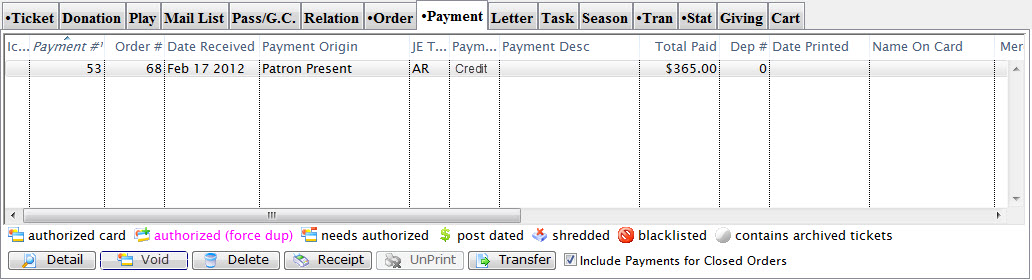
Payment Order Number
The number given to the payment to tie it to the order.
Date Received
Date the payment was received.
Recd By
Employee who took the payment.
Srce
Represents the payment source.
Payment Method
Method received for payment.
Total Paid
Value of the payment.
Deposit
Deposit number for this payment.
Date Printed
Date the receipt for this payment was printed.
Seq Number
Merchant account number applicable to credit cards processed through Theatre Manager.
Merchant
Name of the merchant account used to process the payment.
Outlet-Owner
Outlet responsible for collecting the payment.
Detail Button
Opens the Payment Detail Window for the selected payment.

Void Button
Voids the selected payments. You can only void two things:
- Pass/Gift Certificate (if based on dollar value) which will put the money back on the pass
- Credit Cards that have not been deposited yet
Anything that is not in the list above must be put through as a negative payment to the appropriate payment method.
Delete Button
Deletes the selected payment.

Receipt Button
Allows printing a receipt for the payment if a receipt ticket face has been assigned in Company Preferences >> Ticket Faces.
Unprint Button
Unprints the receipt for the payment.
Transfer Button
Allows a transfer of a payment.
Include Payments for Closed Order(s)
This box should usually be selected to show orders which have received payment and been closed.
Form Tab Top
The form tab on the patron window lists all the form(s) a patron responded to and the content of response.


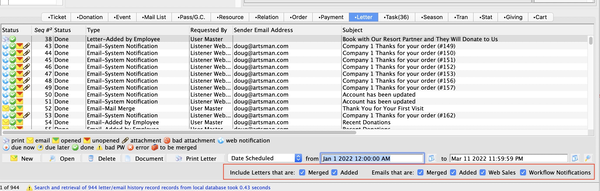
Letter Tab Top
This tab is used to keep track of all letters written to or emailed a patron, even from the web listeners. You can attach individual letters to individual patrons and to customize letters that can be attached to individual donations, payments, ticket transactions, or passes.
To access additional features, including the ability to resend an email (including web confirmations) by marking it as not done, select a row and right-click (control-click on a Mac) to open the context menu.
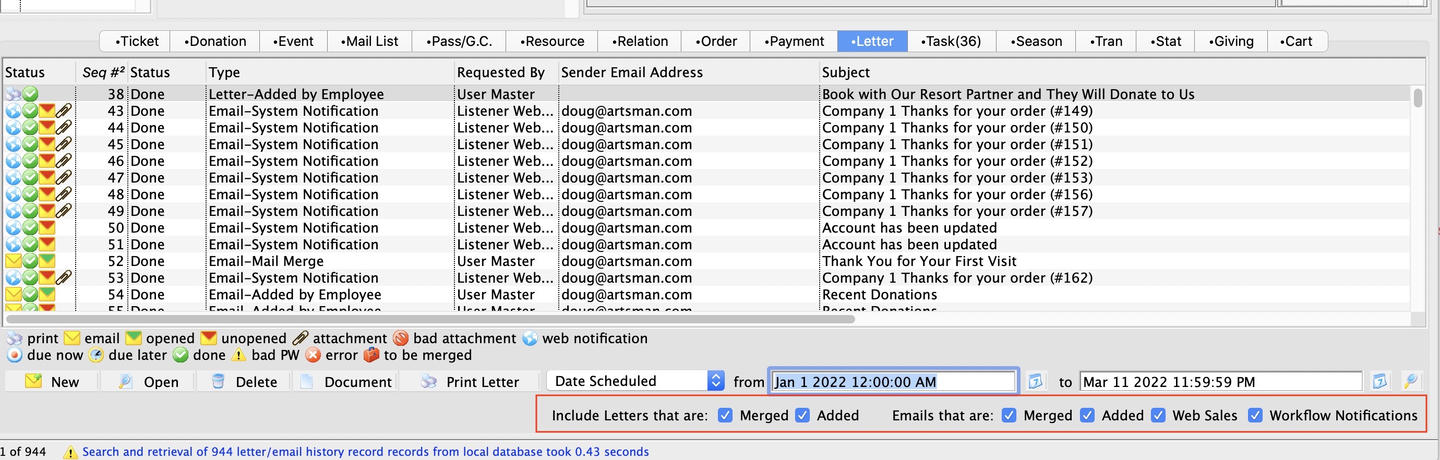
Status
This column displays the printed status of the letter, whether it is done or not.
Type
This column displays the type of the letter, if it was a single letter or was it a merged letter.
Priority
Displays the priority level of the letter. This can be used to help asses printing needs.
Requested By
The user who added the letter to the patron.
Note
This column displays notes associated with the letter.
Records/File Connected to Correspondence
It is very important to pay attention to this field when printing a letter from the Letters Tab. This field displays the items that Theatre Manager currently has in memory (e.g. donor data, member data, personnel data, etc.). To print a letter from the letters tab, ensure Theatre Manager has the correct information in memory to print the letter. For example, To print a donation letter from the Letters Tab, these Items Connected should list donation information about the donation that is being merged. If it does not, load that information into memory. To load a file into memory before printing it, consult a support technician.
Date Begin
Date the letter was added to the patrons record.
Date End
The last date the letter was updated.
Date Printed
The date which the letter was printed.
New Button
A letter can be added to a patron record using this button. A letter added this way will only draw on the patron's contact information.
Open Button
Opens a window to show the Email/Letter Detail Window envelope information about the letter selected in the patron's record. This shows its current status, when it was sent and who it went to. You can change the status and cause the letter or email to be resent.
Delete Button
Deletes the selected letter.

Document Button
Opens the merged letter with any attached documents.

Email/Letter Button
Sends the selected correspondence immediately.
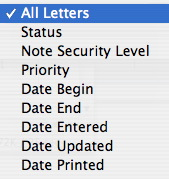
Letter Filter
Limits the letters viewed in the Letters Tab. Once an option other than All Letters is selected, a search field appears to the right of the field. Enter search values in the To and From fields and click the Search button (magnifying glass) to refresh the search.
Task Tab Top
If you are new to tasks, read about the Facility Management module before proceeding.
This window shows all tasks that a patron is attached to as a participant.
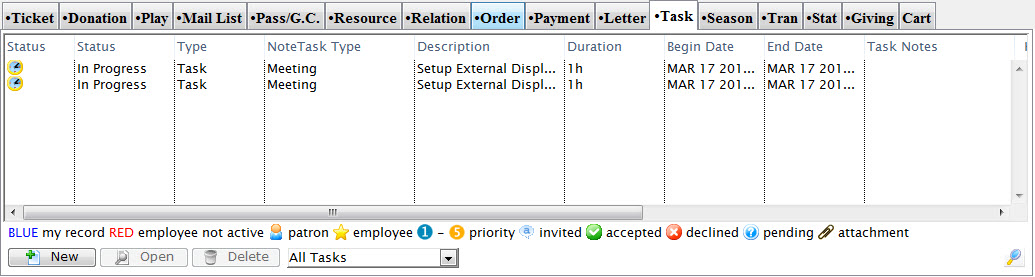
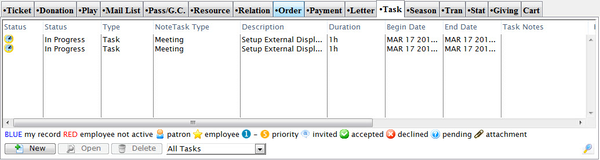
Status
The current status of the task (e.g. done, not done, in progress, etc.)
Task Number
The sequence number assigned by the database to the task.
Type
The Type of the task as defined in the Code Tables >> Facility Task Type.
Description
The description of the task.
Duration
The length of time of the task.
Begin Date
Date the task is set to begin.
Date End
Projected completion date of the task.
Task Notes
Notes associated with the task (if any).
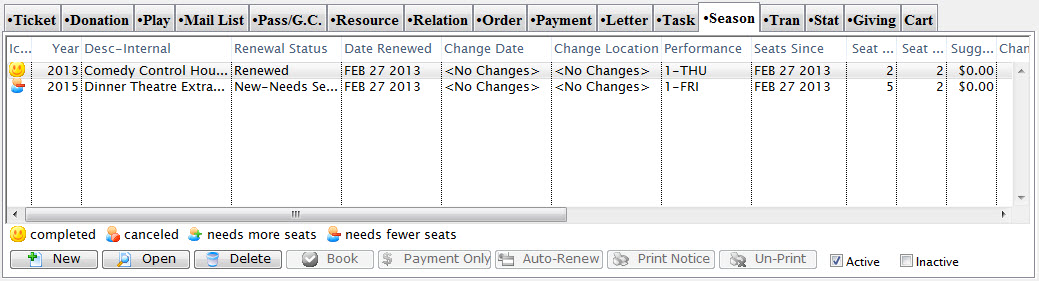
Season Tab Top
This tab keeps track of a patron's season subscription package information. If you are new to seasons subscriptions, read more here
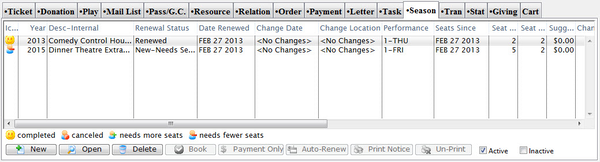
Ref. Number
This column displays the reference number that was assigned to the patron's favorite seats. This number can be used for internal tracking purposes.
Year
This column displays the year the that season subscription was purchased.
Season Package
This column displays the season subscription that was sold to the patron.
Series
This column displays which series the patron has booked their season subscription for. This example image above shows that the patron has booked their subscription for the first Saturday performance for each show.
Printed
This column displays the date that the patron's season tickets were printed.
New Button
Opens the Select a Season Package Window to start adding a new record.
Open Button
Opens the selected subscription record.
Delete Button
Deletes the selected subscription record.

Book Button
Books the selected subscription record.

Payment Only Button
Lets you make a payment for the selected subscription.

Auto Renew Button
Lets you renew the selected subscription.

Print Notice Button
Prints the renewal notice for the selected subscription.
Unprint Button
Unprints the renewal notice for the selected subscription.
Active
Enabling this check box shows only the active subscriptions in the list.
Inactive
Enabling this check box displays the inactive subscriptions for the patron in this list.
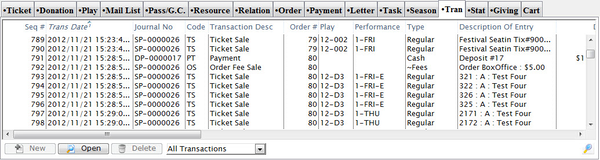
Tran Tab Top
Did You Know?
This same Transaction History List can be accessed from many places in Theatre Manager such as the end of day wizard, events, performances, G/L entries, patron records, etc. The contents of the transaction list varies depend on the route used to access it.
In order to make a correction to transactions the user MUST have a Master User status in Theatre Manager.
The Transaction Tab shows all the transactions that have occurred for the patron.
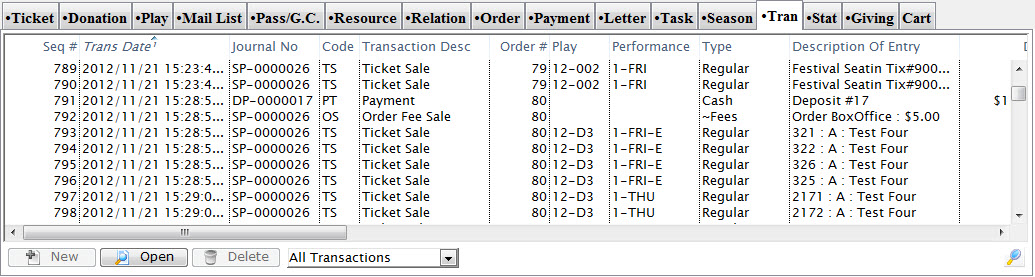
Seq Number
A unique number used to track the transaction
Tran Date
Date and time the transaction took place.
Journal No
A unique journal number for tracking the transaction line.
Code
The transaction code used to describe the type of transaction.
Transaction Desc
Description of the transaction.
Order Number
The order number for the transaction. This number can be used to track the transaction by order.
Play Code
Play code is only displayed if the transaction effects and event.
Performance Code
Performance code is only displayed if the transaction effects a performance.
Type
The type of transaction.
Description of Entry
Detail on the purpose of the transaction.
New Button
Can be used to manually enter a transaction.
Open Button
Opens the detail window of the transaction.
Delete Button
Deletes the selected transaction.
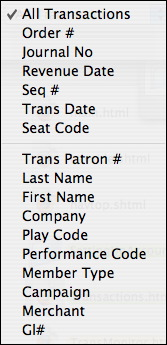
Transaction Search Filter
Used this search dropdown to filter the visible transactions by one of the available search fields. Select a search field, enter values in the To and From fields, and click the Search button (magnifying glass icon) to run your search on the visible list.
Stat Tab Top
The Statistic Tab summarizes a variety of information that describes the patron's interactions with your organization.


Year-Statistics
The fiscal year range the statistic belongs to.
Number Donation
The number of donations made within the fiscal year.
Donation Actual Amount
The cumulative value a patron has confirmed they will donate within the fiscal year.
Soft Credits
The cumulative value of soft credits made within the fiscal year.
Hard Pledges
The cumulative value of hard pledge donations made within the fiscal year.
Number Tix
The number of tickets bought within the fiscal year.
Tix Sales Total
The cumulative value of tickets bought within the fiscal year.
Regular
The dollars spent purchasing tickets using standard ticket sales procedure.
Subscription
Dollars spent on subscription ticket sales based on show setup.
Other Type 1
Dollars spent on Other Type 1 ticket sales based on show setup.
Other Type 2
Dollars spent on Other Type 2 ticket sales based on show setup.
Other Type 3
Dollars spent on Other Type 3 ticket sales based on show setup.
Number Member
The number of membership items bought within the fiscal year.
Pass Value
The dollars spent by the patron on the purchase of passes, memberships, gift certificates or other items.
Number Fee
The number of times a fee paid within the fiscal year.
Fee Total
The dollars collected from the patron for fees on ticket orders.
#StaffVoluneer
The number of scheduled times a patron has staff/volunteer/personnel activities within a fiscal year.
#StaffVoluneerAmount
The rate charged for staff/volunteer/personnel activities with in a fiscal year.
Resource Value
The cumulative value of merchandise or resources bought within the fiscal year.
#Projects
The cumulative value of projects within the fiscal year.
Stat#
The stat database sequence number.
Outlet
The outlet control number.
Outlet-Owner
The outlet reporting the transactions.
Fiscal Year
The year based on account setup within Company Preferences >> Accounting Tab.
Donor Summary Tab Top
This tab is used as a reference to view the "saved" patron giving levels created during specific moments in time. You can use this information as a quick overview of where the patron was each year rather than reviewing all their individual donations under the donor tab. The information in this tab is optional, as the data and giving levels for any time period can be calculated using the Donor Program Insert-Giving Level report at any time. This data is also used when people need to export out the total amount donated by patrons based on certain criteria and what giving level they are at.
Date
The date the overall level was created or saved.
Combined Pledge
Total value of pledges within this level of giving.
Number Gifts
Number of donations made to reach the giving level.
Includes Matching
To reach the level did the matrix include matching gift totals.
Combined Giving Amount Matching Gift
Total value of matching gifts contributing to the patron reaching this level of giving.
Combined Giving Amount Soft Credit
Total value of soft credits contributing to the patron reaching this level of giving.
Giving Level
The level in the giving matrix the patron reached.
Giving Level Matrix
The name of the matrix the giving capacity is assigned to.
Outlet-Owner
Outlet the giving matrix belongs to.
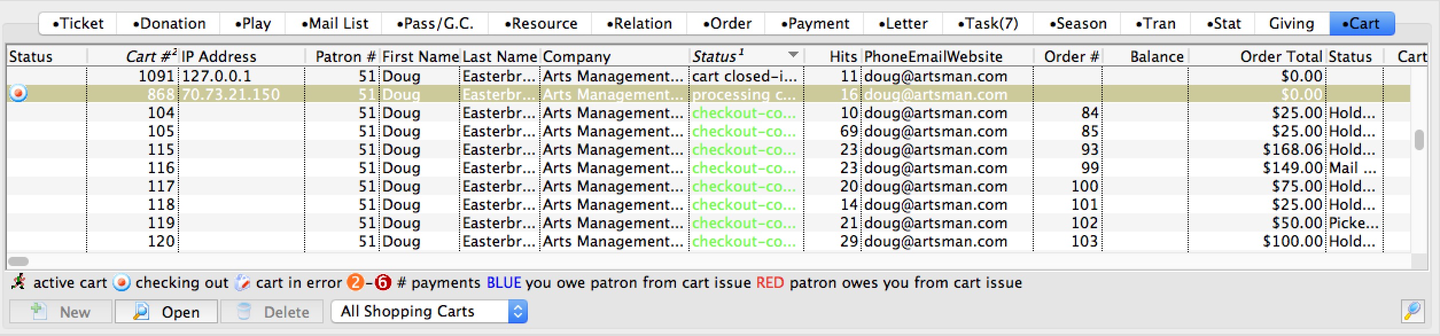
Cart Tab Top
The shopping cart tab on the patron window lists all the internet shopping experiences for a patron. From here you can:
- look at the cart status to see if they checked out successfully or not
- open up and view details about the shopping cart
- take over the shopping cart on the patron's behalf and check them out (if the cart is still active)
You can also view all carts for all patrons.
Cart Number
A unique number representing the patrons web shopping cart.
Patron Number
The patron identification number.
First Name
Patron's first name.
Last Name
Patron's last name.
Company
The name of the company the patron belongs to.
Status
The status of the shopping cart. You might see:
- Active
- The patron is still purchasing items and adding them to the cart.
- A cart will stay active until the cart timeout is reached. A timeout occurs when the patron has not asked for another web page for that time period.
- Completed
- The patron has completed a purchase using either a credit card and/or a pass/gift certificate.
- All items in the cart are reflected in the various other tabs in the patrons record.
- Checkout - Errors Processing Cart
- This means that the patron started to check out, provided their credit card and proceeded sufficiently far in the process that the card was likely authorized. After that point, some issue occurred that prevented all items in the cart from being processed.
- A cart in this state will not let any of its tickets be released so that you can inspect it manually and correct the issue.
- Cart Closed - by patron
- This means that the patron decided to log out not complete the purchase.
- Cart Closed - by system
- This means that the patron abandoned their cart and the system closed it after a period of inactivity.
Hits
The number of web pages that the patron accessed for that shopping cart. It is possible to check out a couple of tickets in as little as eight web page hits if the patron has an account. Average is probably about 20 as patron shop, especially for subscriptions. Any large number generally means that the patron was unsure.
Cart Value
Total value of the patrons cart.
Tix Qty
Number of tickets the in the cart.
Pass Qty
The number of passes in the cart.
Donation Qty
Number of donations in the cart.
Checkout Date
The date the patron paid for the items in the cart.
New Button
Not available as only the web listener can create shopping carts.
Open Button
Opens an existing shopping cart so that you can view the web logs and contents and, if the cart is still active, checkout on behalf of a patron.
Delete Button
Deletes a shopping cart for the patron.
Schedule Changes Top
Updates to addresses and contact information can be scheduled to take place at a later point in time. This includes removing content, like when a patron moves, or switching between content, like when a snowbird is out of town for the season.
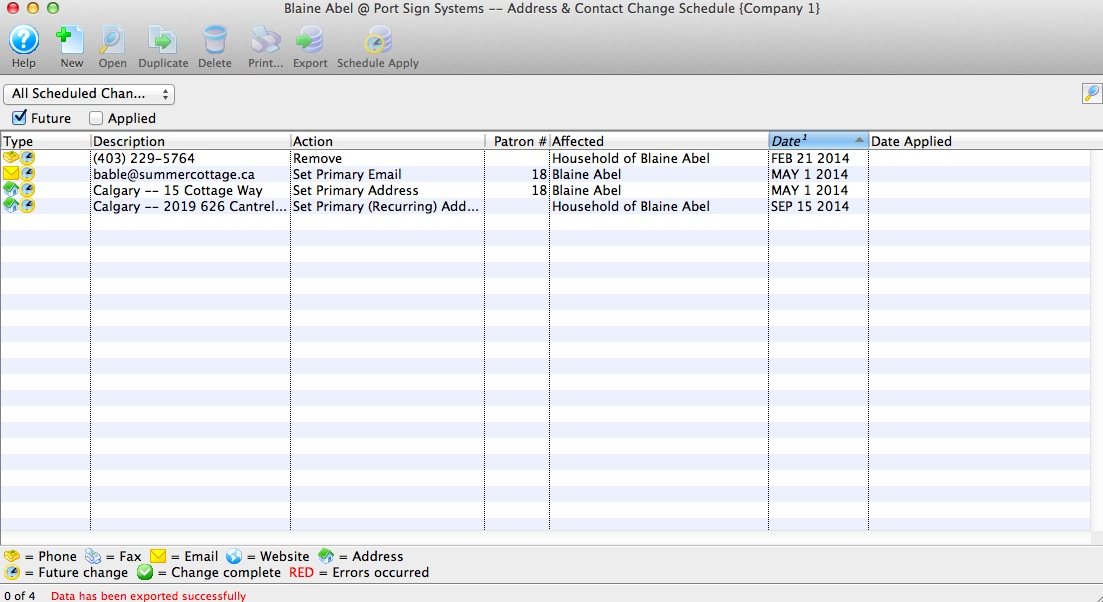
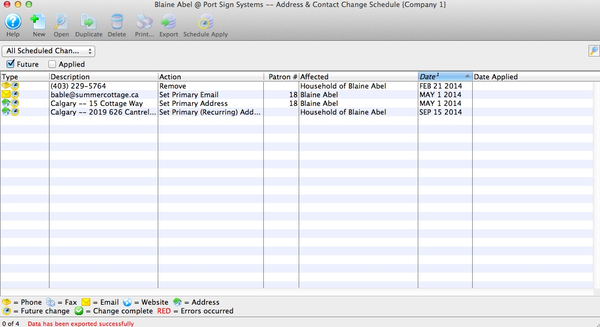
Changes List Window Top
The Scheduled Changes Window displays a list of address and contact change schedules. A patron may have more than one address where they reside during different times of the year. For example, they may have a summer home and would like to receive mailings at their summer home from June to September. An address can be scheduled to change from their permanent to their summer address and then back to their permanent address in September.
Help Button
Connects to Theatre Manager Online Help.
New Button
Opens the Scheduled Changes Wizard to enter a new scheduled change.
Open Button
When an existing scheduled change is selected, opens the change record for viewing or editing.
Duplicate Button
Not currently available on this window.
Delete Button
When an existing scheduled change is selected, removes it.
Print Button
Not currently available on this window.
Export Button
Exports the list to a tab-delimited or Excel workbook file.

Schedule Apply Button
Rather than waiting until the scheduled date, this button applies the contact information change now (without editing the scheduled changes record for the future).
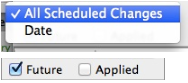
Scheduled Changes Filter
Filters the items in the list by Date, Future and/or Applied.
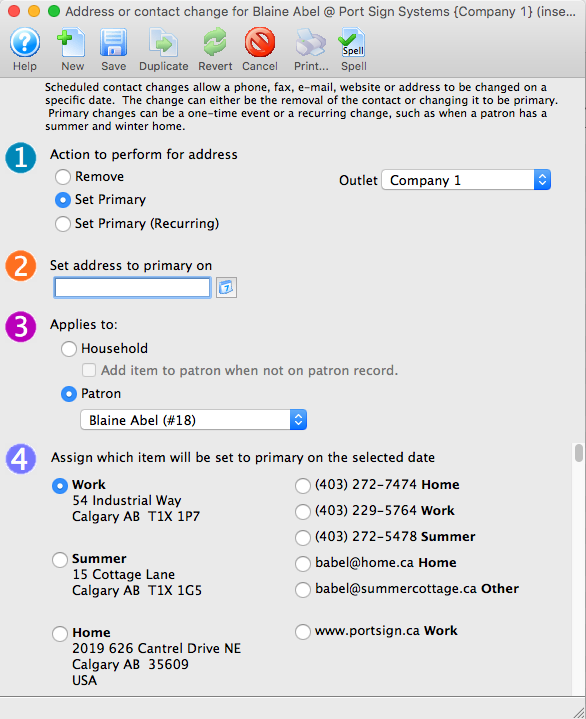
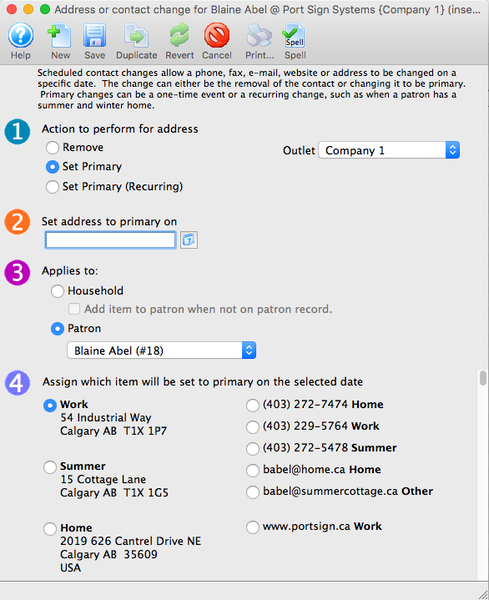
Changes Wizard Top
When opened to add a scheduled change, the Scheduled Changes Wizard is a single window with four steps. This window can also be opened to edit an existing scheduled change. In this case, the prior step choices will appear and the user may edit them and use the Save or Cancel buttons to apply or cancel their edits.
Only one item within each step can be selected for change. If you need to make another change to a different contact information, create another scheduled change record.
The four options are:
- Action to perform for address
- You can remove the contact (one-time), set primary (one-time), or set primary (recurring).
- Set address to primary on
- Dates can be entered in a variety of text formats (e.g.
may 1 23,5/1/2023, etc.). Alternatively, the calendar icon opens the Date Selection Widget for visual selection.
- Dates can be entered in a variety of text formats (e.g.
- Applies to
- You can choose either Household (which adds an item to a patron not already on the patron record) or Patron, which lets you select the correct household member.
- Assign which item will be set to primary on the selected date
- Displays a list of the patron's current addresses and contacts.
Duplicates Wizard Top
Before proceeding, read about duplicate searching and merging.
The Duplicates Wizard searches for possible duplicate patron records based on selected search criteria. It can also be used to automatically merge duplicate records. The wizard can be started from two places:
- The Contact List
- Click the Duplicates button on the Contact List Main Toolbar.
- Mail List Detail Window >> Who's In Tab
- Right-click (control-click on a Mac) from the Who's In List and select the Find Duplicates option from the context menu.
- Right-click (control-click on a Mac) from the Who's In List and select the Find Duplicates option from the context menu.
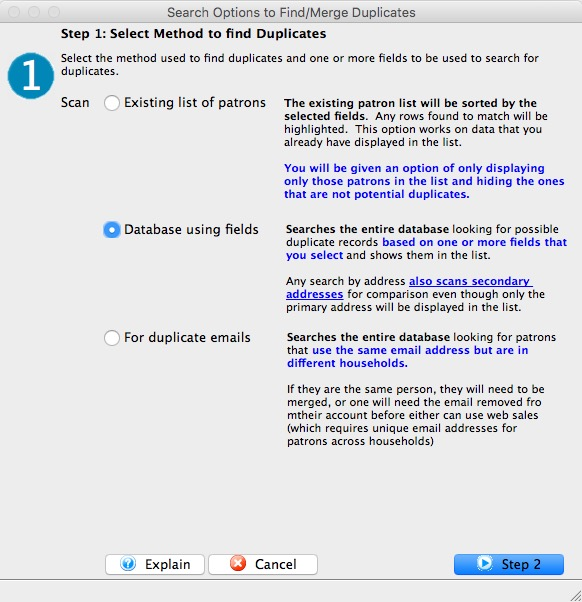

Step 1 Screen When opened from the Contact List, the first screen provides three options:
- Existing List of Patrons
- Uses fields you specify in Step 2 to search the list of patrons currently visible in the Patron List
- Database Using Fields
- Uses fields you specify in Step 2 to search the entire database
- For Duplicate Emails
- Searches for patrons with the same email address that are in different households (commonly occurs from data imports from other system)
When opened from Mail List Detail Window >> Who's In Tab, the first screen provides only one option:
- Existing List of Patrons
- Uses fields you specify in Step 2 to search the list of patrons currently visible in the Patron List

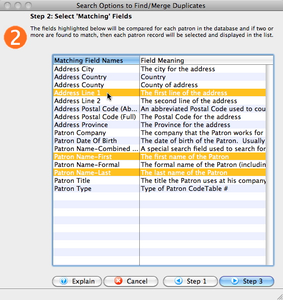
Step 2 Screen This screen identifies records that MIGHT match.
If you selected Existing List of Patrons or Database Using Fields in Step 1, Step 2 displays a list of database fields available to use to identify possible groups of duplicate patrons. It is highly recommended to select at least two fields on this step before proceeding to Step 3.
If you selected For Duplicate Emails in Step 1, this window displays only one search field option: Primary Email.
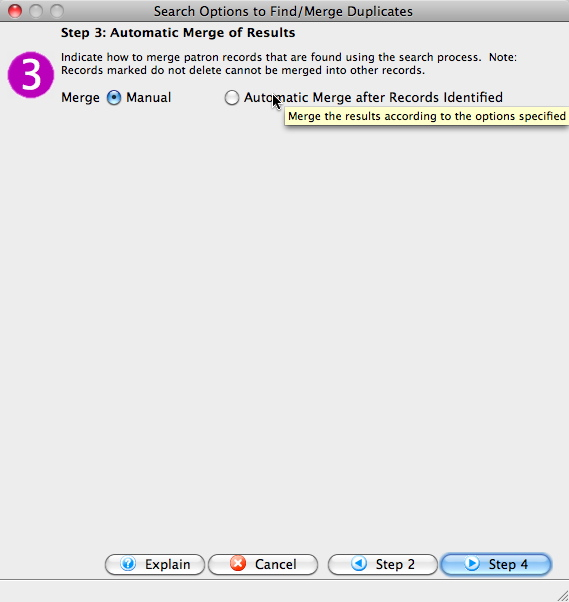

Step 3 Screen (manual) The third window of the wizard offers a choice about how to handle merging the results of the duplicates search. The Manual option (recommended) will result in a list of possible duplicates that the user can manually review, then remove or merge as needed.
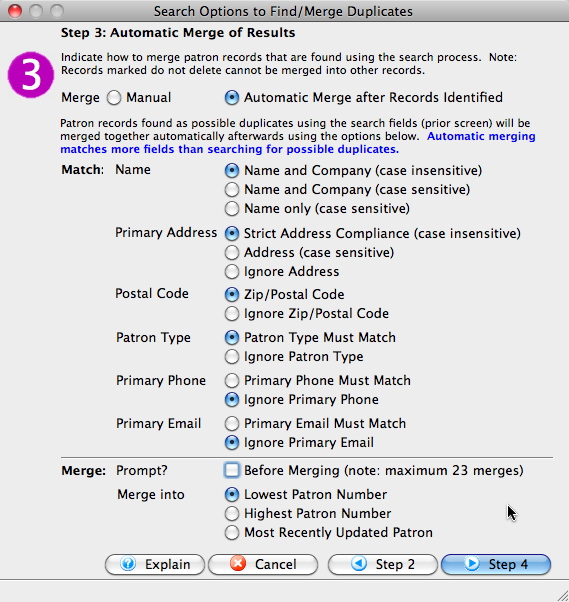

Step 3 Screen (auto) The third window of the wizard offers a choice about how to handle merging the results of the duplicates search. The Automatic Merge after Records Identified*= option opens a variety of options to be used during the automatic merge process. These are the selections that determine which of the POSSIBLE matches identified from Step 2's selections actually get merged. This step should include more fields than Step 2 since it controls which records actually get merged.
After selecting fields to match on (or ignore), the bottom area indicates if you want TM to either:
- Prompt you for each match (it can only open a maximum of 23 windows due to memory constraints)
- Automatically merge data that matches (it can handle a lot of records)
- Only use this option if you have fairly conservative matching criteria (i.e. use a lot of fields) and you have a lot of data that you might have just recently imported.
Theatre Manager will always merge into an employee record if it exists. If no employee exists, then the system will merge any a patron marked Do Not Delete. If neither an employee nor Do Not Delete record exist in the group to be merged, then Theatre Manager will defer to the final selection on this screen to determine which patron record to merge into:
- Lowest Patron Number
- Highest Patron Number
- Most Recently Updated Patron Number
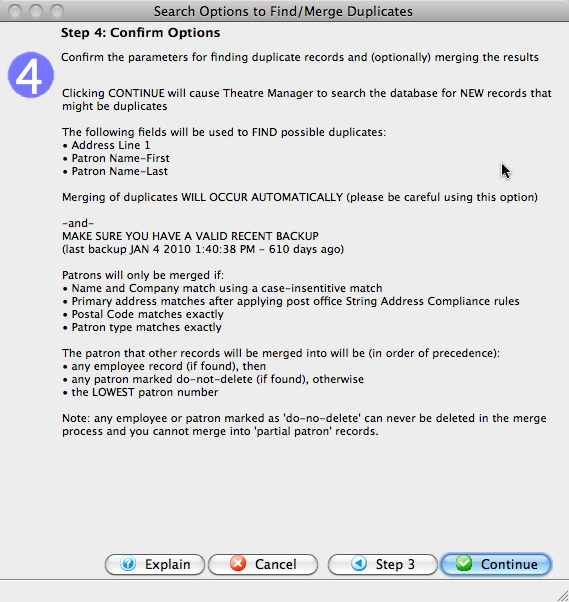
Step 4 Screen The final screen is a review of your choices from steps 1-3:
- If you are searching the database or the list
- The last known backup date
- The fields used to IDENTIFY possible duplicates
- The fields used to DECIDE which patrons to merge together
- How TM will decide which patron to merge into
The results of a duplicate search differ depending if you searched based on database fields or looked for duplicate email addresses. Refer to the how-to guide for searching for duplicates for more details.
Merge Patrons Top
Before proceeding, read about duplicate searching and merging.
The Merge Patron Window can be opened from two places:
- The Merge button on mail toolbar of the Contact List toolbar
- The context menu from the Mail List Detail Window >> Who's In Tab
In both cases, you must have at least two patron records selected in order for the Merge option to be active. You will also be prompted to select your merge type before the Merge Patron Window opens (into a single patron or into common household).
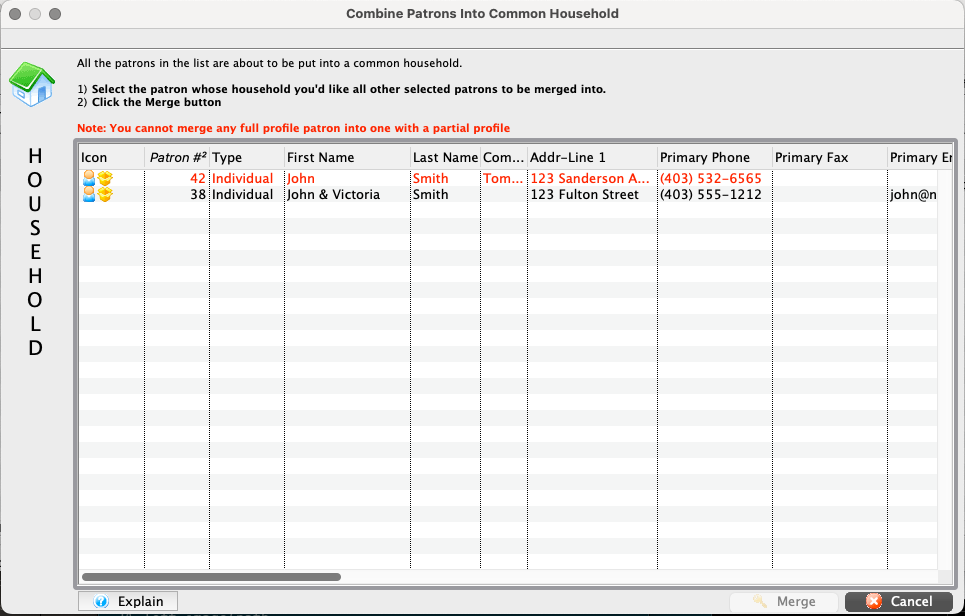
The Merge Patron Window displays a patron list of the records you selected when you started the process. The left-hand border displays which merge type you selected for quick reference:
- Single Patron for the option into a single patron.
- The Merge button will not activate until you select one patron in the list to serve as the record the others are merged into.
- Household for the option into common household.
- The Merge button will not activate until you select one patron in the list to serve as the primary patron record that the others will become household members of.
There are several rules in place that prevent patrons from being merged as a household member or into another primary single patron record:
- They are marked do not delete
- They are an employee in any outlet
- They have an order in the middle of being sold
- They have shopping carts that have one or more of the following status codes:
- Active
- Auth button clicked
- Processing a payment
- Filling the order after payment accepted
- Partially completed checkout with an error
- Their record is limited profile
- You cannot merge a patron with complete information into a limited profile patron record however you can merge as many limited profile patrons into each other or into a full patron record.
Forgotten Password Activity Log Top
This feature can be accessed from:
- The Web Sales Management menu
- Right-clicking on a patron (with an email) in the Contact List window and selecting Forgotten Password Log from the context menu.
- Right-clicking on a patron (with an email) in the Who's In Tab on the Mail List Window and selecting Forgotten Password Log from the context menu.
- Clicking the gear icon on an email address in the patron Contact Card and selecting Forgotten Password Log from the context menu.
- The Web Listener Log if the log entry appears to contain an email
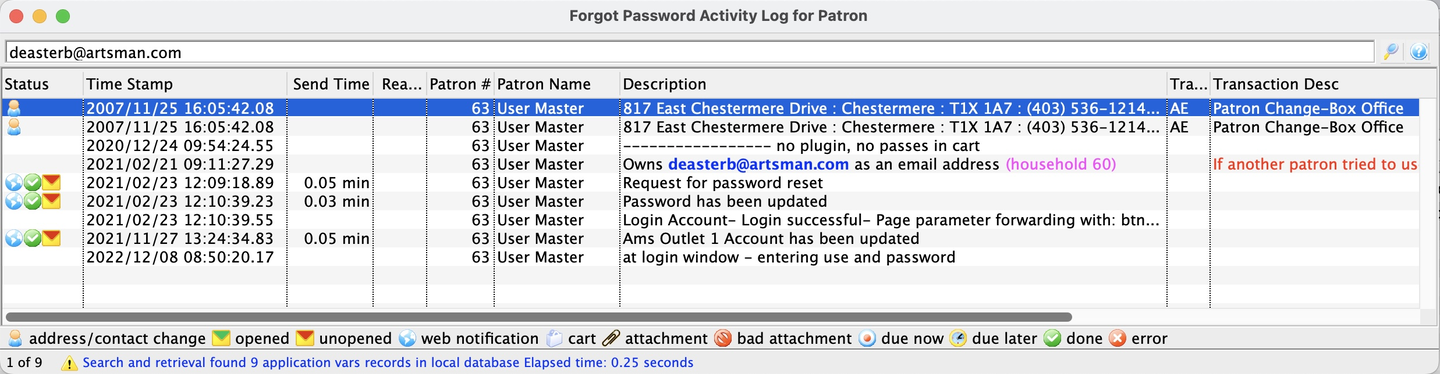
This window shows a log containing a patron's forgotten password behavior to help determine if a patron is (or is not) receiving their email, is (or is not) regularly forgetting their password, etc. The entries in the log are curated from:
- Patron transactions showing if the patron was merged, changed their own data online, or had their data changed at the box office.
- Patron emails specific to the requesting of passwords and emailing of order confirmations, as well as how long it took TM to send the email and how long it took the patron to read the email.
- Web logs showing forgotten password requests and issues updating the password including error messages the patron might have received trying to enter their password (like password needs upper case/lower case or a number, etc.).
The logs are ordered by time stamp. You should be able to see a brief summary of:
- A request for a password email. This would confirm that they did ask for a reset and by the right email address. If the email address did not exist, you would see that message.
- The email sent to the patron. If there is no email sent, the email did not exist.
- If the email exists, attempt to change the password on the email.
- If the email does not exist, attempt to create a patron, perhaps using that email address.
- Transaction logs indicating that the patron was created, merged, or updated.
- If the patron finished an order online, you'll see the confirmation email record.