Preparation
Insert a new patron to be used as the Quick Buy patron for the sales. The patron's name could reflect the fact that it is the Quick Buy Patron. Enter the last name as the last two digits for the current year (e.g. 98-) and the first name as 'Quick Buy'. When multiple terminals are used to conduct Quick Buy Sales at the same time, a separate patron account could be set up for each terminal. In the case of multiple terminals, enter the last name as the last two digits for the current year (e.g. 98-) and the first name as 'Quick Buy 2'.
It is recommended that each Theatre Manager user have their own Quick Buy patron account. This will prevent any one patron account from becoming too large. This can be defined in the Employee Preferences. Click here for more information.
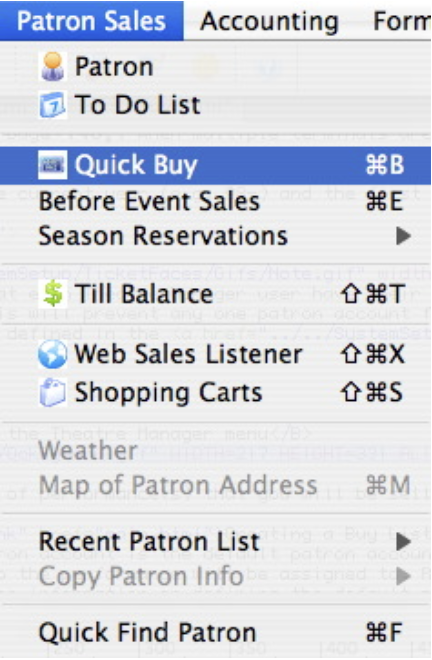
1. Access Quick Buy in the Patron Sales menu.
2. Create the Buy List of performance(s) that the user will be selling tickets to.
The Quick Buy patron account is the default patron account to which all the tickets sold to the performance will be assigned to. Click here for more information on Employee Preferences and defining the default patron account to be used when performing Quick Buy Sales.
3. Click Seat Selection
 tab.
tab.
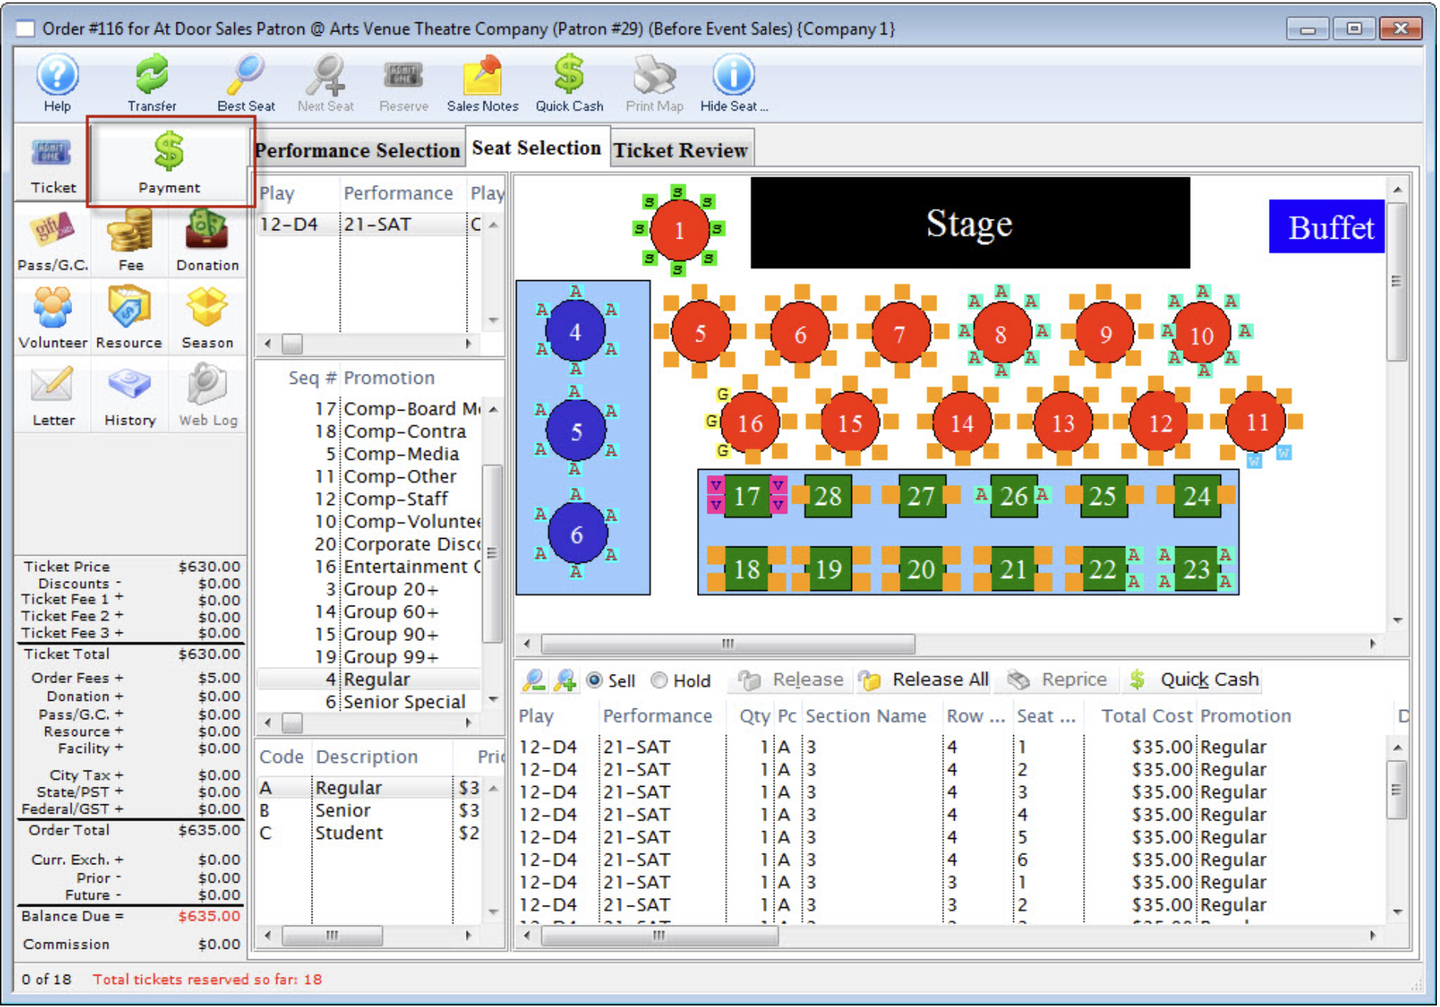
4. Reserve the tickets as would be done with a real patron's account.
Click here to refer to the section Festival Seat Sales.
Click here for more information on Reserve Seat Sales.
5. Click the
 button.
{% end %}
button.
{% end %}
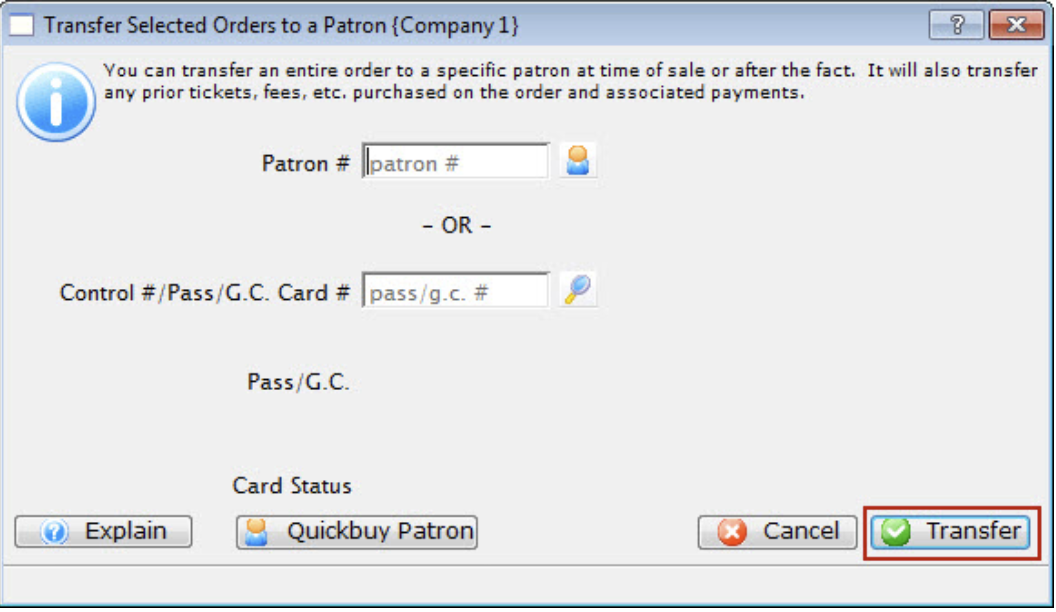
From this window there are the following options:
- Add a new Patron. Click here for information.
- Search for a Patron by Name. Click here for information.
- Search for a Patron by Member Card #. Click here for information.
- Reverting back to the QuickBuy Patron by using the Quick Buy Patron button will use the Quick Buy Patron the user has setup.

6. Once the patron or member card is entered their information will be displayed in the window.
7. Verify the information and click the Transfer
button.
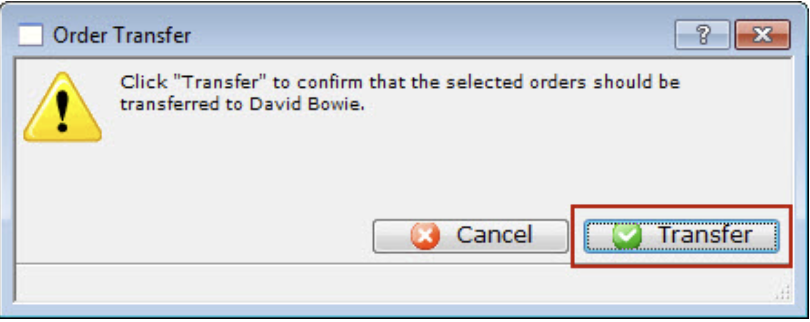
- A confirmation window will appear..
8. Click Yes
 to transfer the order.
9. Click the Payment
 button to receive payment for the ticket(s).