Add a New Event Top
This is the first of four processes required to complete a new event build:
- Add a new event
- Add a performance to the new event
- Setup base prices for each new performance
- Enable sales promotions for each new performance
Before proceeding, please read about events and make sure the pricing map you will need is already setup.
Best Practice
If building any of the special event cases below, review any relevant how-to notes before proceeding:
Open the event list
- Go to Setup >> Events to open the Event List Window
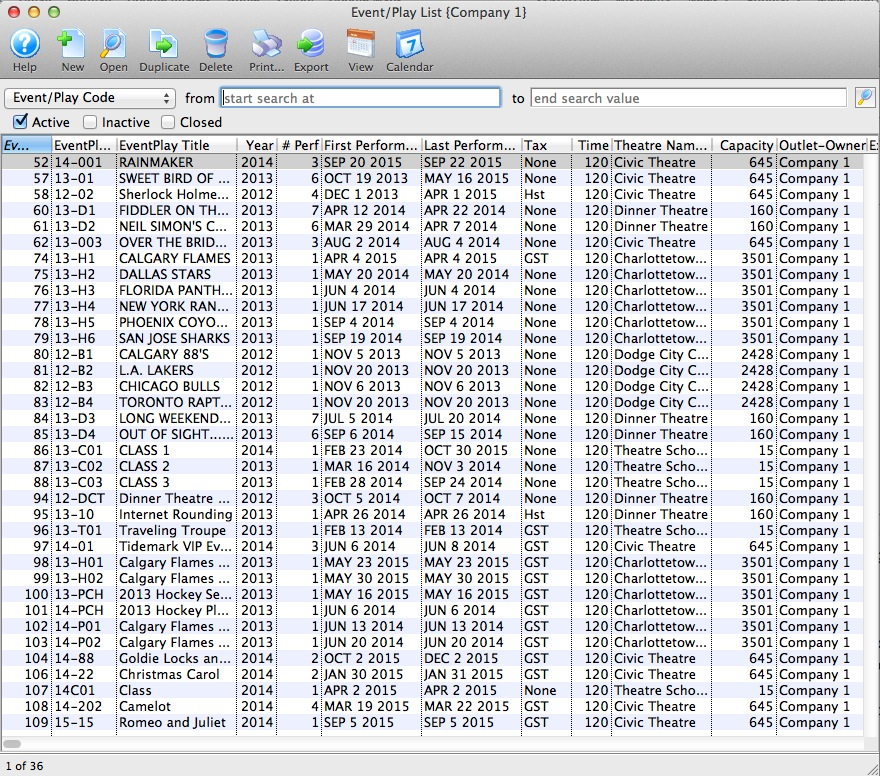
Start the event insertion process
- On the top menu bar of the Event List Window, click the New button

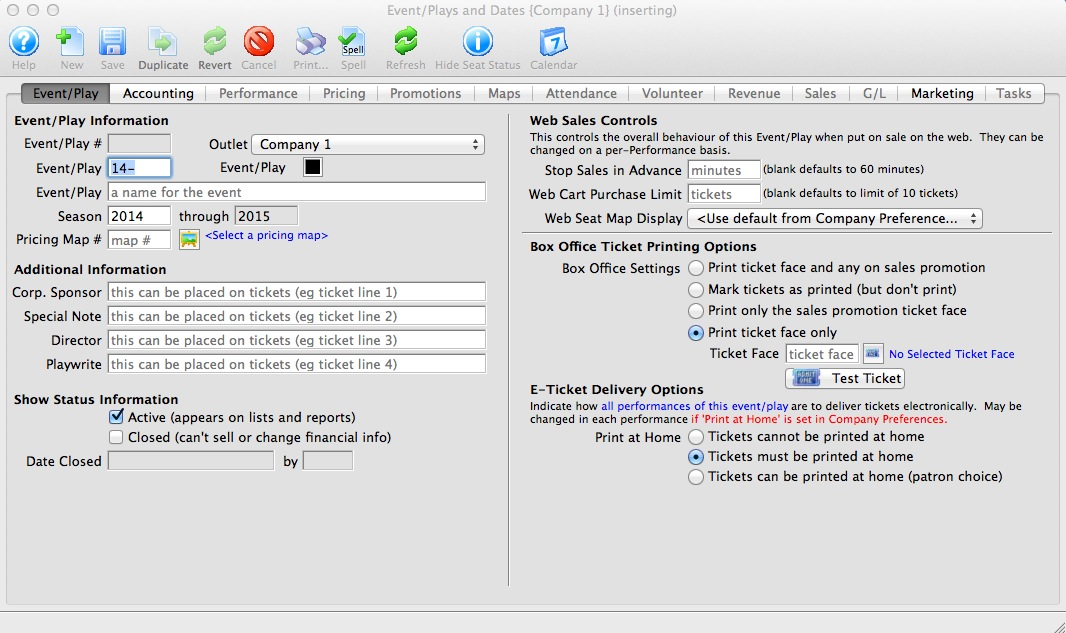
Enter the necessary event tab information
- On the blank Event Detail Window >> Event Tab, enter the following fields required to be completed for any new event:
- Event Code
- Must be unique in your database
- Event Title
- Limited to 100 characters
- Will appear in Online Store and printed on tickets
- Season Start Year
- Theater Manager automatically enters the current fiscal year
- Theatre Manager automatically completes the Season End Year based on what is entered in the Start Year
- Pricing Map #
- Click the Lookup button to the right of the field to open a Pricing Map Lookup List, search for and select the correct map, then click Select to auto add the map's number to the event
- Ticket Face
- Required unless you select Box Office Settings >> Mark tickets as printed (but don't print)
- Click the lookup button to the right of the field to open a Ticket Face Lookup List, search for and select the correct ticket face, then click Select to auto add the face's number to the event
- Event Code
- Though not required to save the new event, complete any of the remaining key fields on this tab:
- E-Ticket Delivery Option
- Additional Information fields to print on tickets
- A Web Cart Purchase Limit (if relevant)
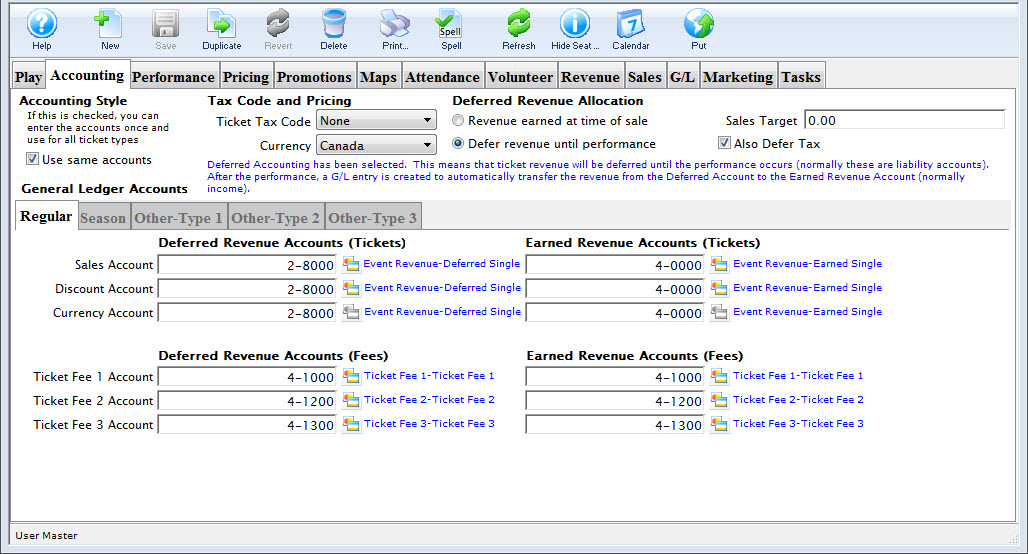
Setup the correct revenue type and G/L accounts
- Click Accounting to open the Accounting Tab
- Complete the required fields (read about event accounting setup for more details):
- Deferred Revenue Allocation Type
- When Revenue earned at time of sale is selected, only earned accounts will appear in the bottom part of the window
- Ticket Tax Code
- Currency
- General Ledger Accounts
- When Use same accounts is checked, only one tab of account options will be available in the bottom part of the window
- When Use same accounts is unchecked, different accounts can be selected for the five different ticket types
- Deferred Revenue Allocation Type
- Though not required to save the event, you may want to add a Sales Target for reference and reporting purposes
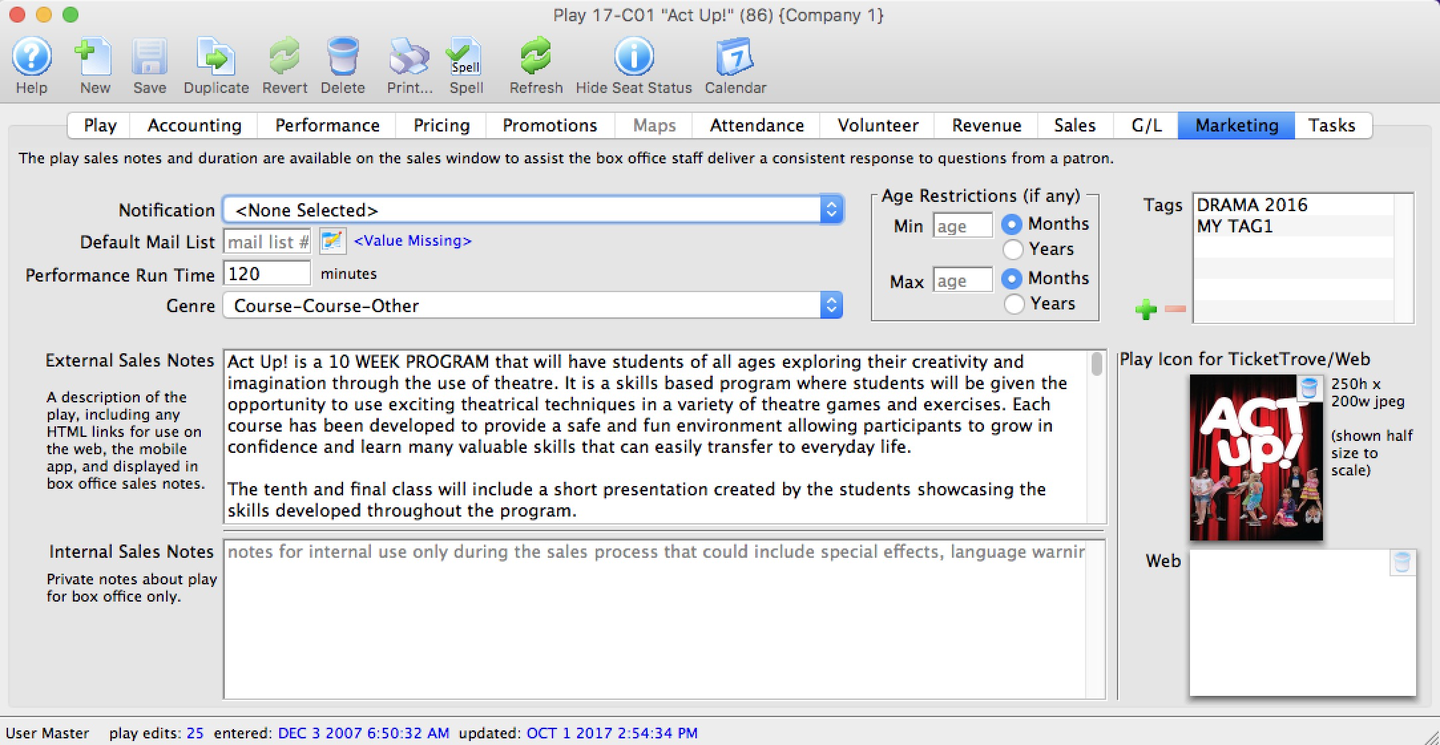
Complete the marketing tab details for sales reference
- Click Marketing to open the Marketing Tab
- Select a Genre from the dropdown option
- Though not required to save a new event, it is recommended that you complete additional fields on this tab:
- Icon for TicketTrove/Web
- Image that appears in the Online Store
- Performance Run Time
- Impacts the Facilities Management Calendar
- External Sales Notesf
- Appears in the Online Store
- Internal Sales Notes
- Available during a box office sale for quick staff reference
- Icon for TicketTrove/Web
- If relevant, select a workflow notification to trigger internal emails whenever tickets are sold to this event
- If relevant, select a default mail list to add all ticket buyers to a mail list
- If relevant, add any tags to further describe/label the event
- If relevant, especially for courses, enter appropriate minimum and maximum ages
- Click the Save button to complete the event addition
Now that you have an event setup with accounting information, it's time to add specific performance dates and times.
Add a New Performance Top
This is the second of four processes required to complete a new event build:
- Add a new event
- Add a performance to the new event
- Setup base prices for each new performance
- Enable sales promotions for each new performance
The following how-to guide assumes that an event has already been created.
Best Practice
If building any of the special event cases below, review any relevant how-to notes before proceeding:
Open the Performance Creation Wizard
- From the appropriate event's Performances Tab, click the New button on the bottom left
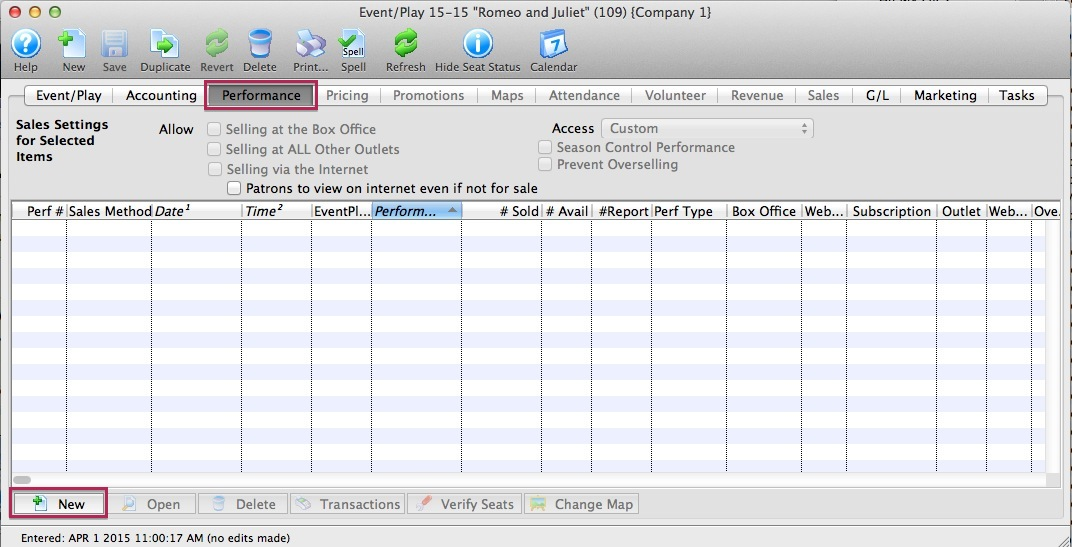
Enter the number of performances and basic performance settings
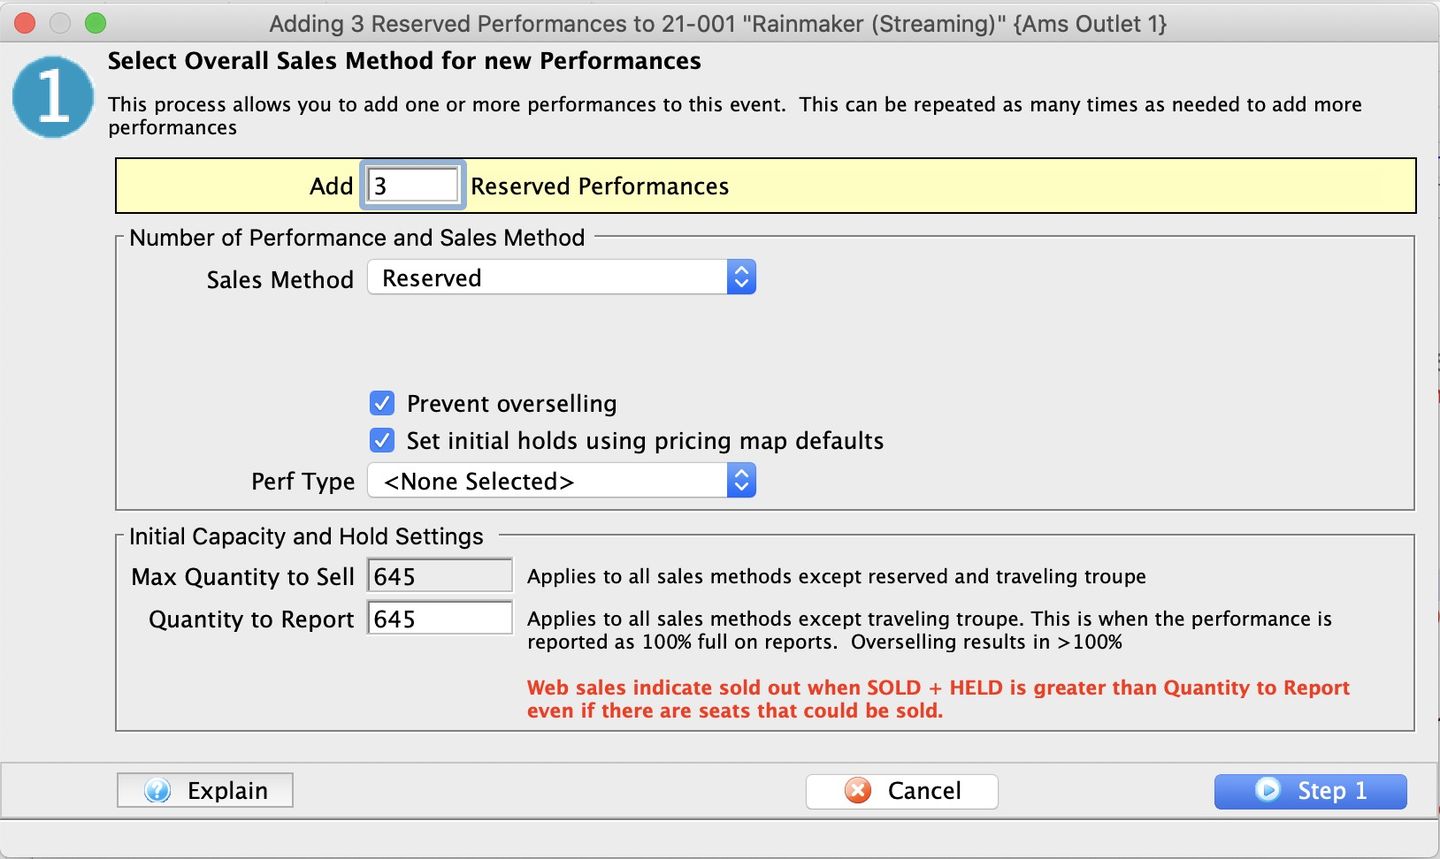
- From Step 1 of the Performance Creation Wizard, enter the number of performances to add from this session of the wizard
- If you have a regular pattern of performances (e.g. similar dark days, performances times, sales methods, etc), enter total number of performances for the event
- If you have a different pattern for each week, then do one week at a time and repeat the process
- If you have no pattern at all, enter however many performances you want to add and then manually adjust them in Step 4 of the wizard
- Select the correct Sales Method
- If relevant, edit the default options for
- Prevent Overselling
- Set Initial Holds
- Perf Type
- Max Quantity to Sell
- Quantity to Report
- When set, click Step 2 to move forward
Select most common sales settings for the performances
- From Step 2 of the Performance Creation Wizard, select the appropriate sales locations, performance reminder emails, and any relevant sales target or performance flag values
- When set, click Step 3 to move forward

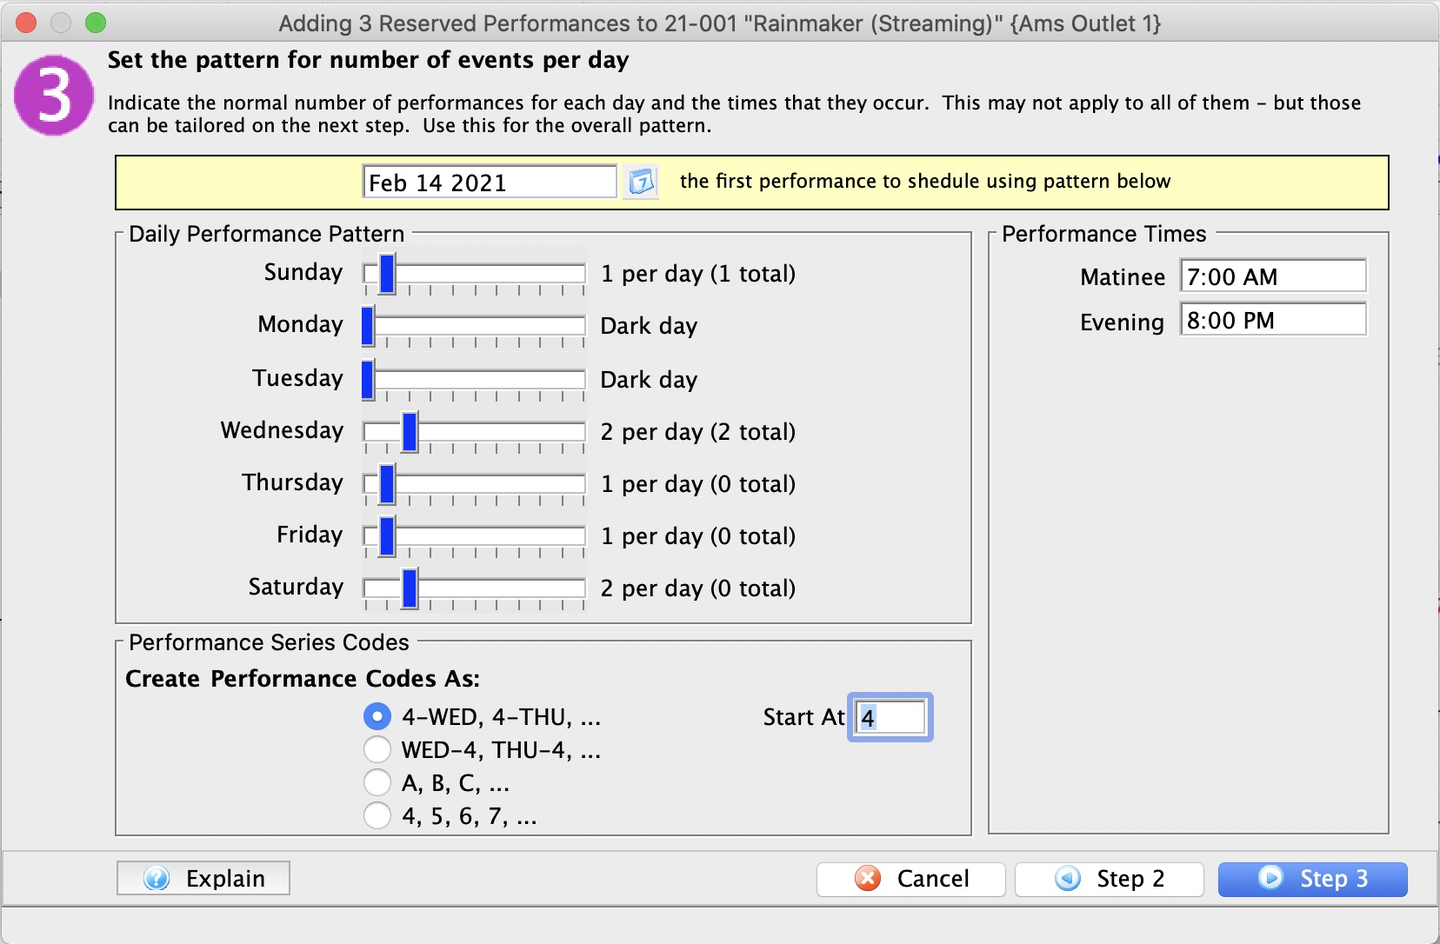
Setup a default pattern for the wizard to create each performance date and time
- From Step 3 of the Performance Creation Wizard:
- If no performances already exist, enter date of the first performance
- If adding additional performances, enter next performance date
- Using sliders, set pattern for how performances are to be distributed
- Select maximum number of performances (up to 10) that typically occur on each weekday
- Additional performance times will appear on right-hand side based on maximum number of per day performances set on left-hand side
- Set standard times for the performances (e.g. matinees at 2PM and evenings at 8PM)
- If relevant (usually when adding additional performances), choose a performance series code pattern at bottom of the screen
- When set, click Step 4 to move forward
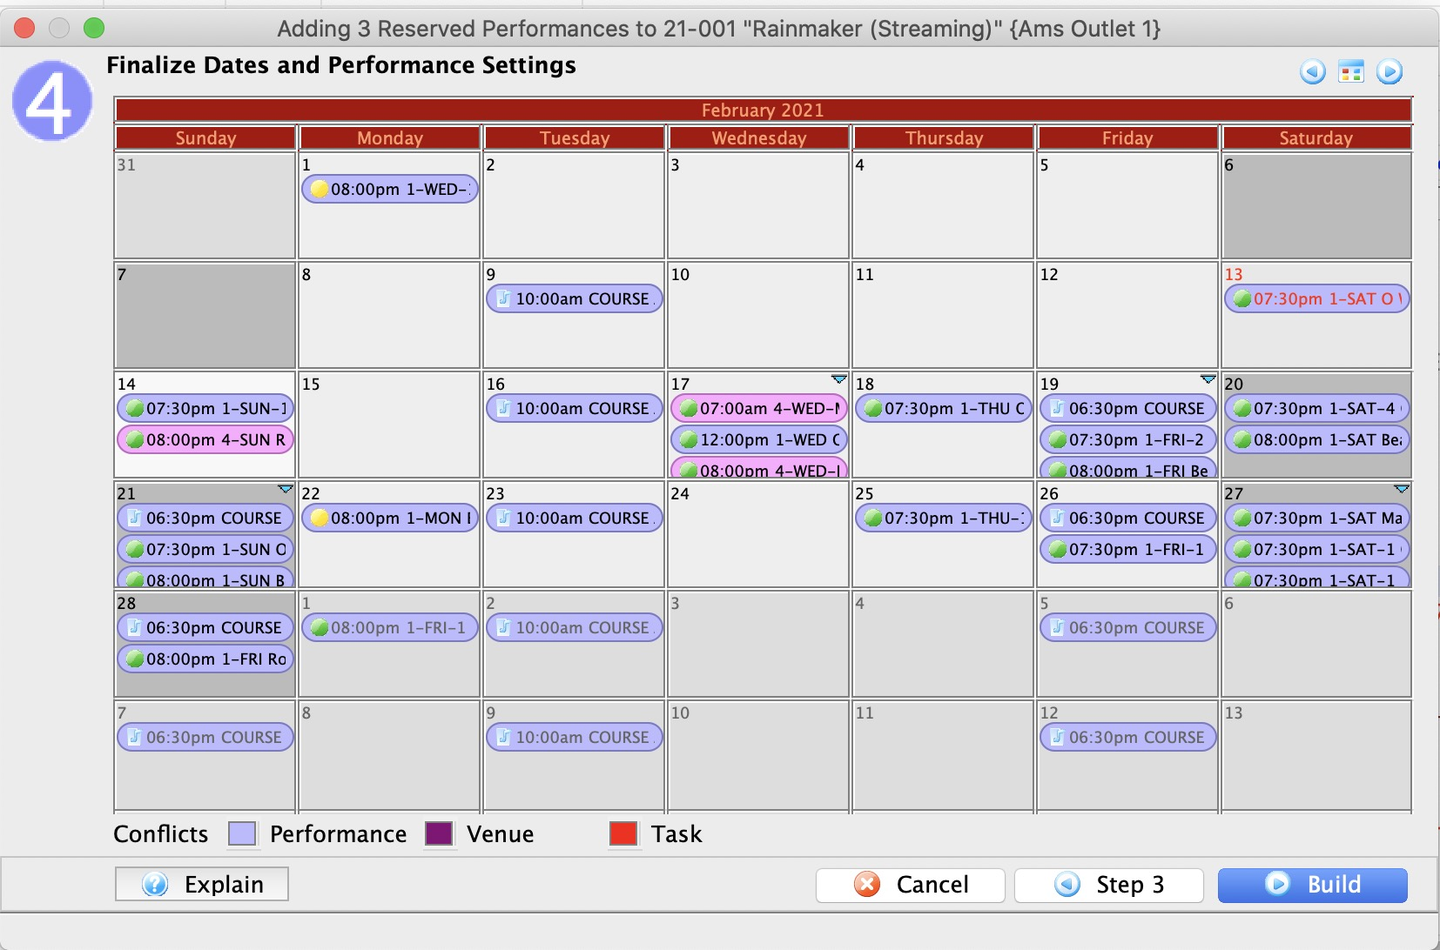
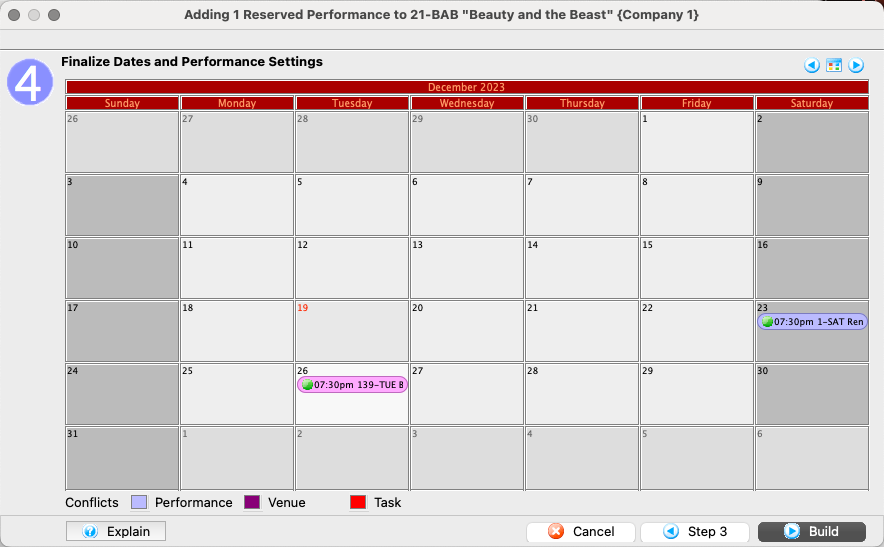
Review the default performance dates and times, making individual changes as necessary
- From Step 4 of the Performance Creation Wizard, review the default (in pink) performance dates and times on the preview calendar
- Drag and drop performances to change their time
- Right-click on performances to change their time
- When set, click Build to process the new performances
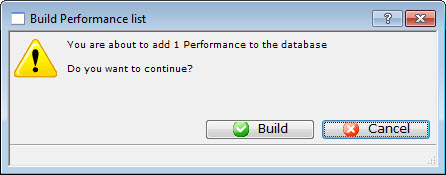
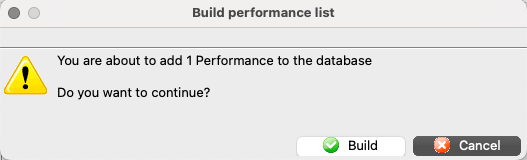
Review the confirmation dialogue
- Click Build to proceed
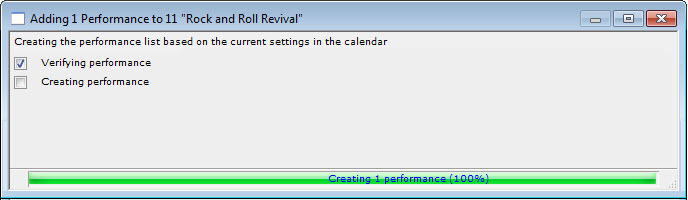
Wait for Theatre Manager to create the performances
- Processing time depends on how many items you are adding at one time
- When done, the activity bar on the Add Performance Verification Dialogue will finish and you can close the dialogue
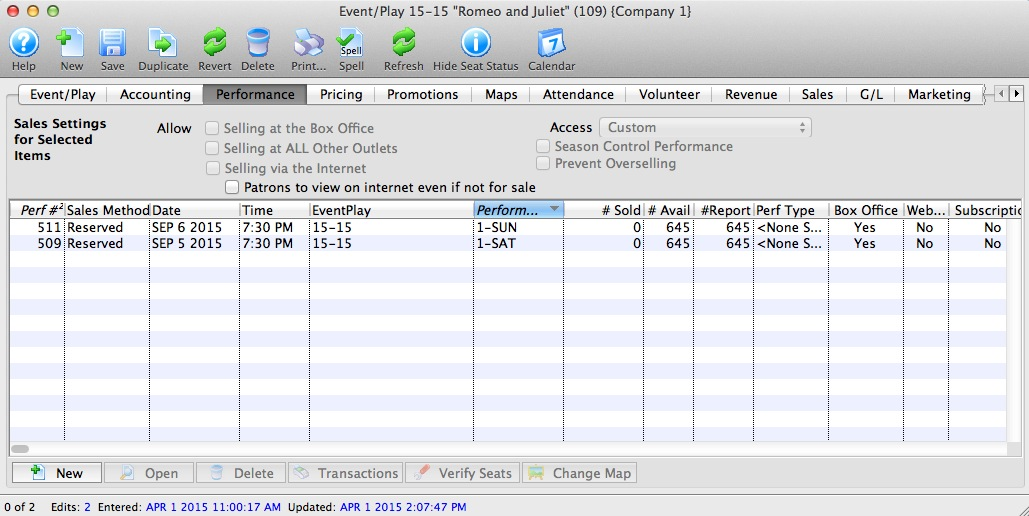
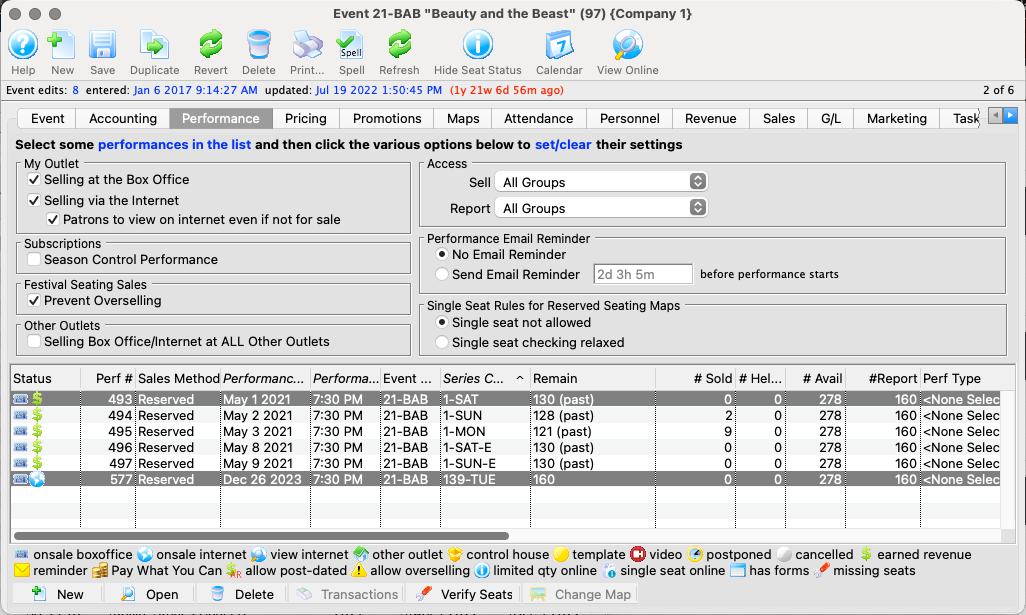
Review the newly cleated performances
- On the Performance Tab, review the new items
- Make individual changes as needed
Now that you have an event setup with specific performance dates and times, it's time to setup the base prices for each date and time.
Partially Duplicate an Existing Event Top
The following steps walk through duplicating only minimal information from an existing event, namely the detail on the Event Tab and Accounting Tab. This feature is best used when events and performances vary significantly from year to year without a consistent pattern. If events and performances tend to follow similar patterns in settings, number of performances, dates and times, then consider duplicating an existing event and its performances instead, which may save you repetitive data entry.
Find the event to be copied
- Go to Setup >> Events to open the Event List Window
- Find the event you want to duplicate
- Single-click to select it

Start the duplication process
- With your original event selected in the list, click the Duplicate button

Select the partial duplication option
- On the submenu of duplication options, select Make copy of event - title and accounting data only

Find and open the newly copied event
- Find the newly created event in the Event List (it will have the same title and code as the original, but no First Performance or Last Performance date)
- Single-click and hit Open (or double-click) to open the event

Adjust the copied value and complete the event build
- On the Event Detail Window, adjust the Event Code (it must be unique and will not save until this step is completed)
- If relevant, adjust the Title and any other settings on the Event Tab or Accounting Tab
- Go to the Marketing Tab and complete appropriate fields (Genre is required before you can save the new event)
- Go to the Performance Tab and add relevant performance dates and times
- If relevant, open the Performance Detail Window and review/adjust any settings further
Save your edits
- Once your edits are in place, click Save and close the window

The event and its newly created performances now appear in the Event List Window. Duplicated events exist independently of their original counterpart and future edits must be made to each event separately.
Fully Duplicate an Existing Event and Its Performances Top
The following steps walk through duplicating an event (or multiple events) along with all of the related performances and settings. This feature is best used for quickly creating new events that are very similar to past ones in terms of their settings, number of performances, and dates. If events and performances change significantly from year to year without a consistent pattern, then consider duplicating an existing event instead, which may mean less manual editing on your part.
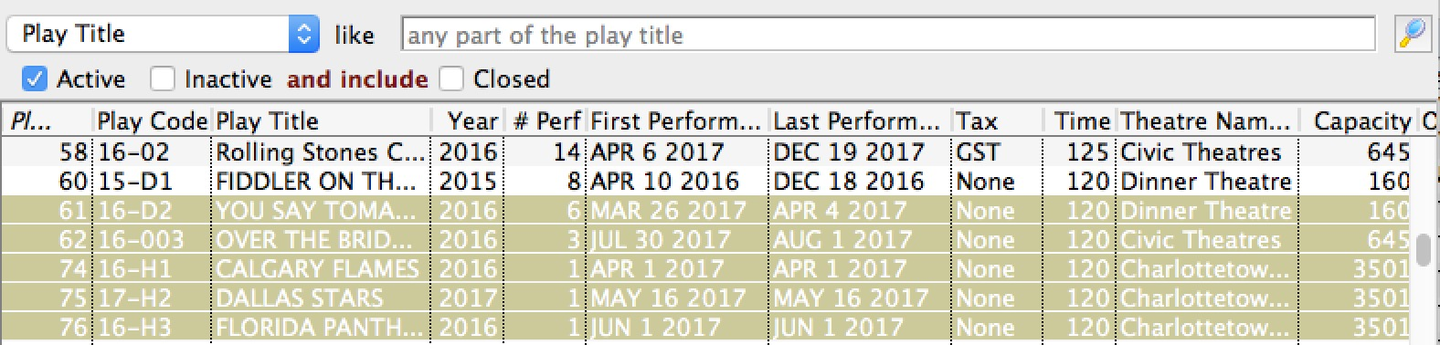
Find and select the event(s) to be duplicated
- Go to Setup >> Events to open the Event List Window
- Find the event(s) you want to duplicate
- Single-click to select them
Start the duplication process
- With your original events selected in the list, click the Duplicate button
Select the full duplication option
- On the submenu of duplication options, select Use duplicate event wizard to create new season/course sessions
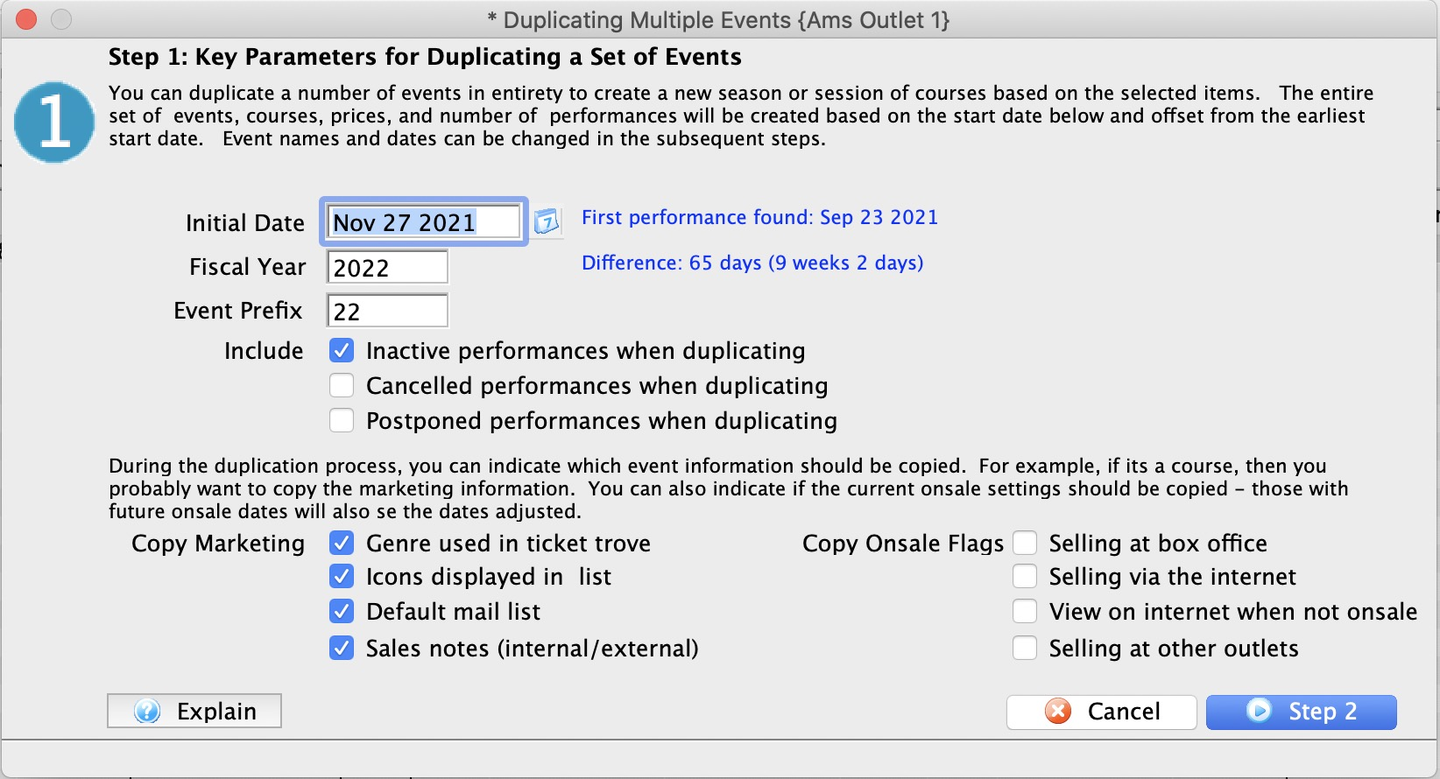
In the duplication wizard, set initial copy parameters
- In step 1 of the Event Duplication Wizard, enter:
- The earliest performance date of the duplicated event(s)
- Review the default Fiscal Year and Event Prefix values and adjust if necessary
- Review the performance inclusions, marketing field, and on-sale date field options, checking off any you want to duplicate and unchecking any you want to be left blank on the new events
- When ready, click Step 2
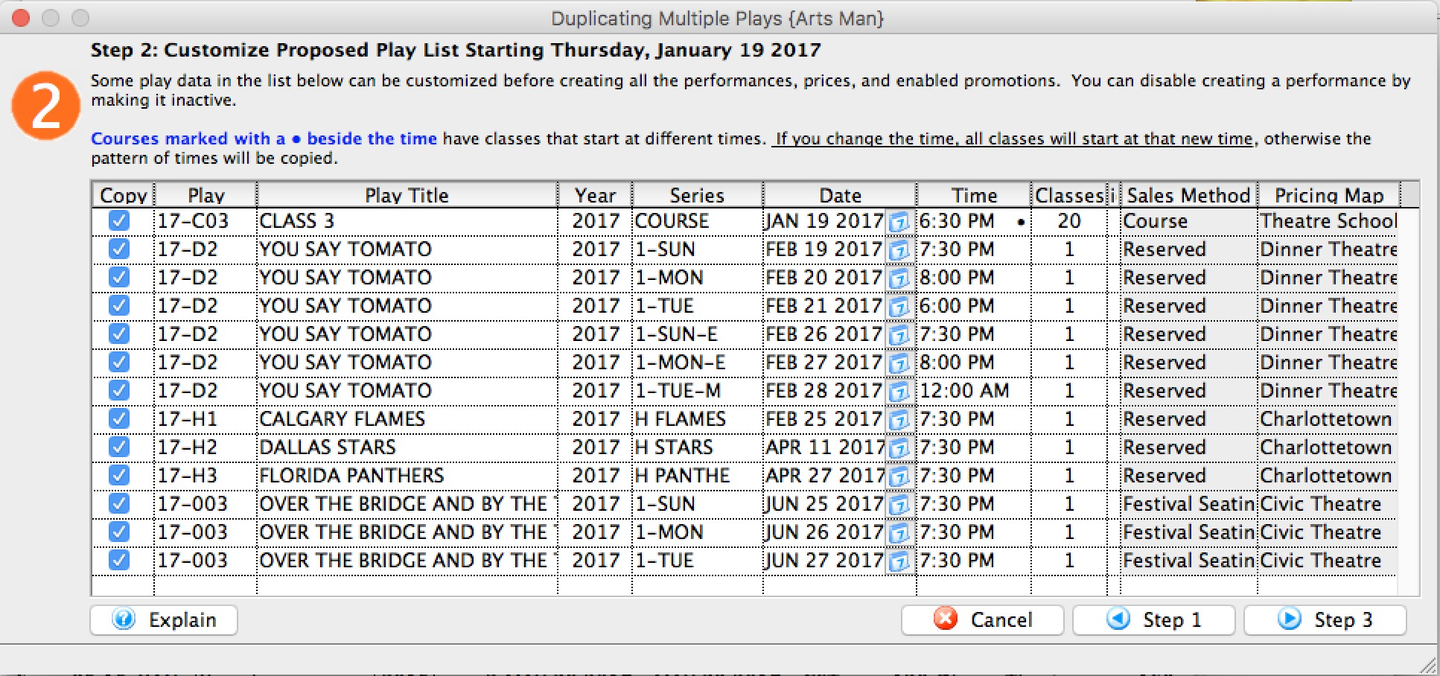
In the wizard, make any necessary changes to the proposed events and performances
- In step 2, review the list of proposed new performances
- To set a custom Title, Event Code, or Fiscal Year, alter one row with the new value to use
- To set a custom Performance Date or Time, manually change every row that is listed incorrectly
- When you have completed your edits, click Step 3
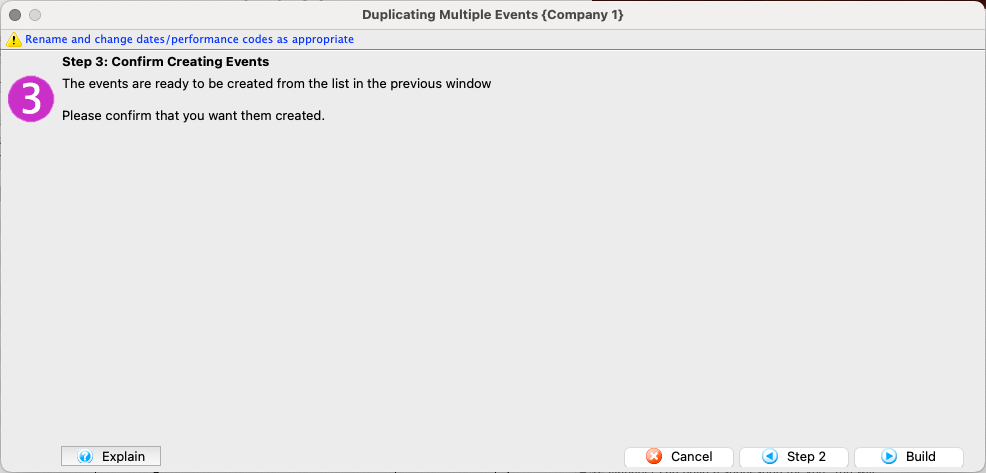
Confirm your duplication settings and complete the process
- Click the Build button to confirm your settings
- Let Theatre Manager finish the duplication process and close the wizard
The new event(s) will now appear in the Event List Window. It is a good idea to open each one and review the settings, make any further adjustments and per performance customizations, etc. Duplicated events and performances exist independently of their original counterpart. Future edits must be made to each event/performance separately.
Duplicate an Existing Performance Top
Read about duplicating performances here.
Open the existing event
- Find the event in the Event List Window
- Open the event's Detail Window >> Performance Tab

Select and open the performance to be copied
- Double-click the performance to be copied to open the Performance Detail Window
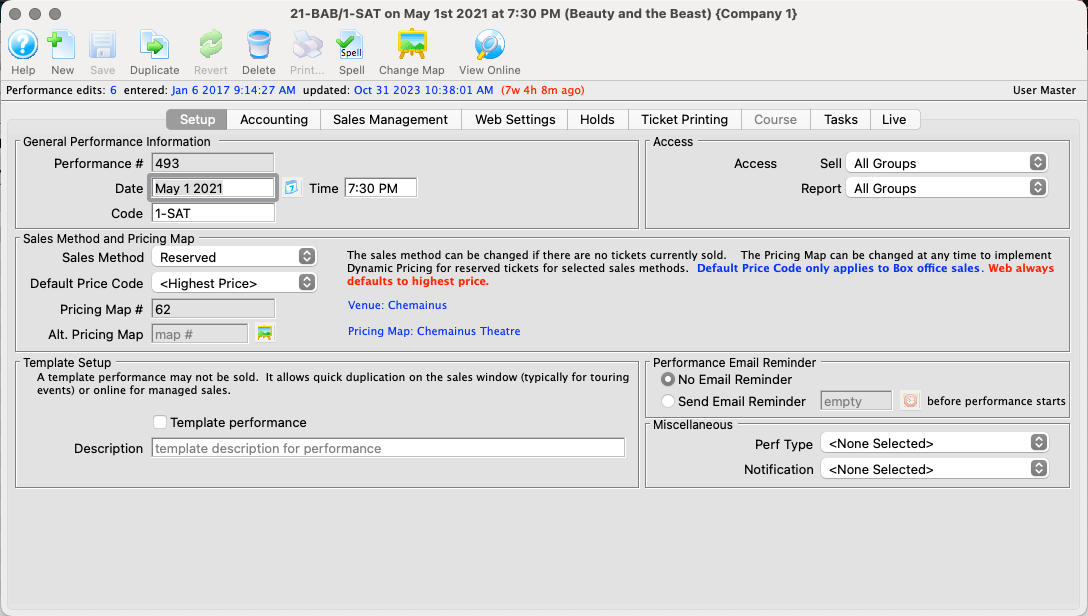
Start the duplication process
- Click Duplicate (from the Performance Detail Window and NOT from the Event Detail Window)

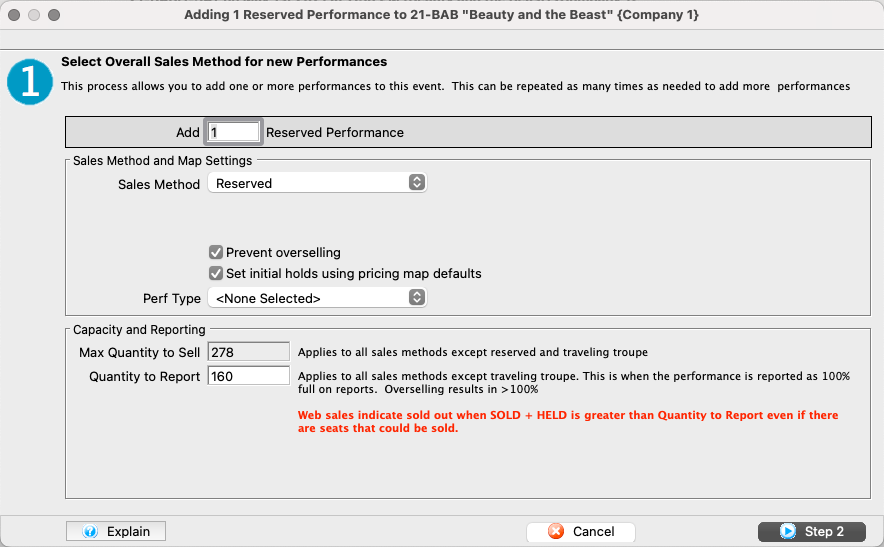
Enter the number of performances and basic performance settings
- From Step 1 of the Performance Creation Wizard, enter the number of performances to add from this session of the wizard
- If relevant, edit the default options for
- Prevent Overselling
- Set Initial Holds
- Perf Type
- Max Quantity to Sell
- Quantity to Report
- When set, click Step 2 to move forward
Select most common sales settings for the performances
- From Step 2 of the Performance Creation Wizard, select the appropriate sales locations, performance reminder emails, and any relevant sales target or performance flag values
- When set, click Step 3 to move forward

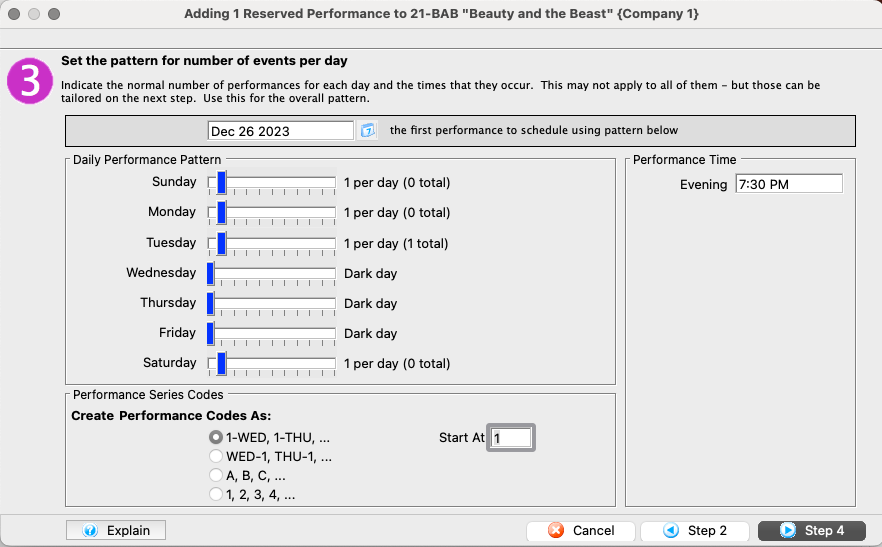
Setup a default pattern for the wizard to create each performance date and time
- From Step 3 of the Performance Creation Wizard, enter the first new performance date
- Using sliders, set pattern for how performances are to be distributed
- Set standard times for the performances (e.g. matinees at 2PM and evenings at 8PM)
- Choose a performance series code pattern at bottom of the screen
- When set, click Step 4 to move forward
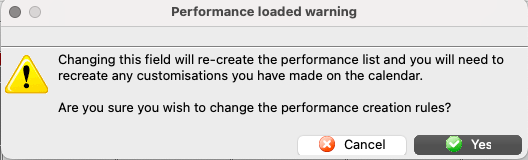
Confirm your choices
- Click Yes on the alert to reload the proposed performance dates and times based on settings in steps 1-3
Review the default performance dates and times, making individual changes as necessary
- From Step 4 of the Performance Creation Wizard, review the default (in pink) performance dates and times on the preview calendar
- Drag and drop performances to change their time
- Right-click on performances to change their time
- When set, click Build to process the new performances
Review the confirmation dialogue
- Click Build to proceed
Wait for Theatre Manager to create the performances
- On the Performance Tab, review the new items
- Make individual changes as needed
Double-check the base price values
- Go to the Price Codes Tab
- Select the new performance dates one at a time and review the base price values copied from the original performance
- Make any adjustments as necessary

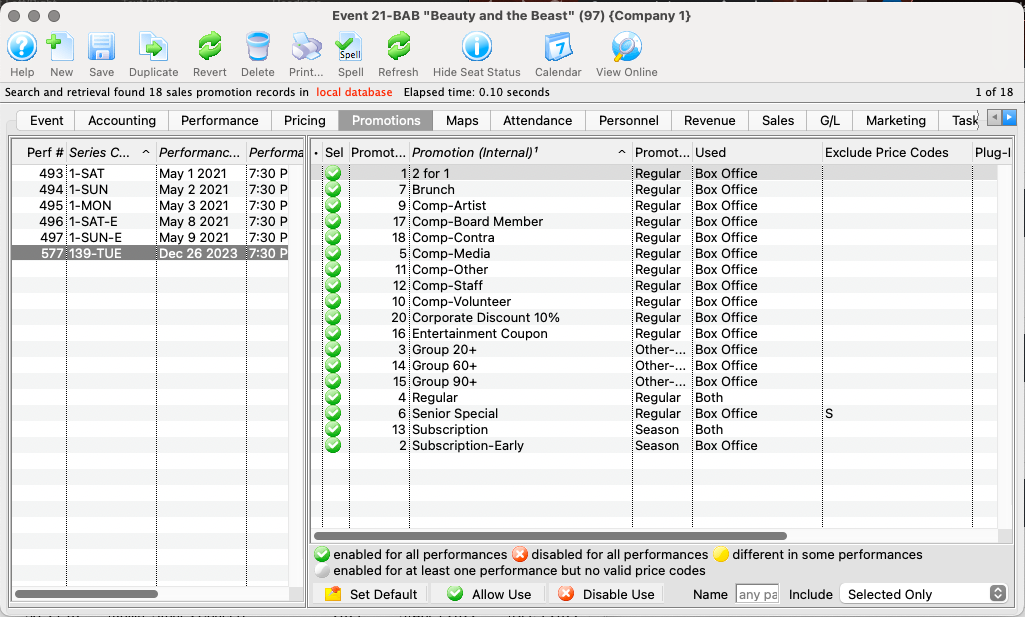
Double-check the enabled sales promotions
- Go to the Promotions Tab
- Select the new performance dates one at a time and review the enabled sales promotions copied from the original performance
- Make any adjustments as necessary
- Click Save and close the Event Detail Window
Now that the new performances have been added through duplication, they exist independently of the original. Future edits must be made to each performance separately.