Basics Top
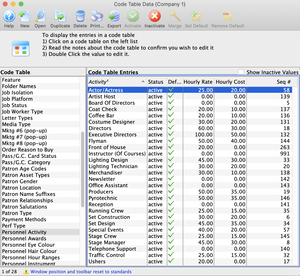
Editing Values Top
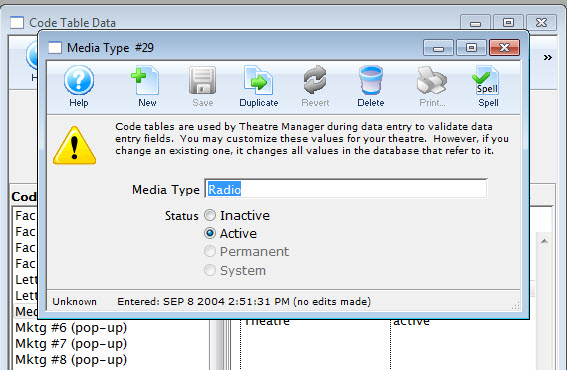
you can edit the value of an entry in a Code Table but by changing it you will be changing all records which used the previous value.
- Double click the value you would like to edit.
- Change the value as needed.
- Click Save. All existing records with this value will be changed.
Changing Value Status Top

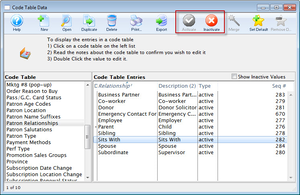
Changing the status of a code value is a good way to remove a value from use temporarily.
- Select the Code Table and value you would like to change the status of.
- Click either the Activate or Inactivate buttons, depending on which status would like to change to.
Setting or Removing a Default Value Top
Some code tables allow setting up a default value to be used when inserting a new record into Theatre Manager (e.g. if the salutation code table had a default value of Mr. and Mrs.). This feature reduces the amount of time it takes to input information into Theatre Manager. Values that do not change each time a new record is inserted can be predefined.

- Select the value from the appropriate code table.
- Single click the value to highlight it.
- Click the Set Default button. A bullet should now appear beside the value, signifying the default code table value.

- Select the default value from the appropriate code table. This will be the value that is marked by a bullet icon.
- Single click the value to highlight it.
- Click the Remove Default button. If the bullet has disappeared the process was successful.
Merging Code Table Values Top
Merging code table values can take some time as it depends on how many values you are merging and the number of times they have been merged. Make a backup of your database before you perform a merge on code table data.
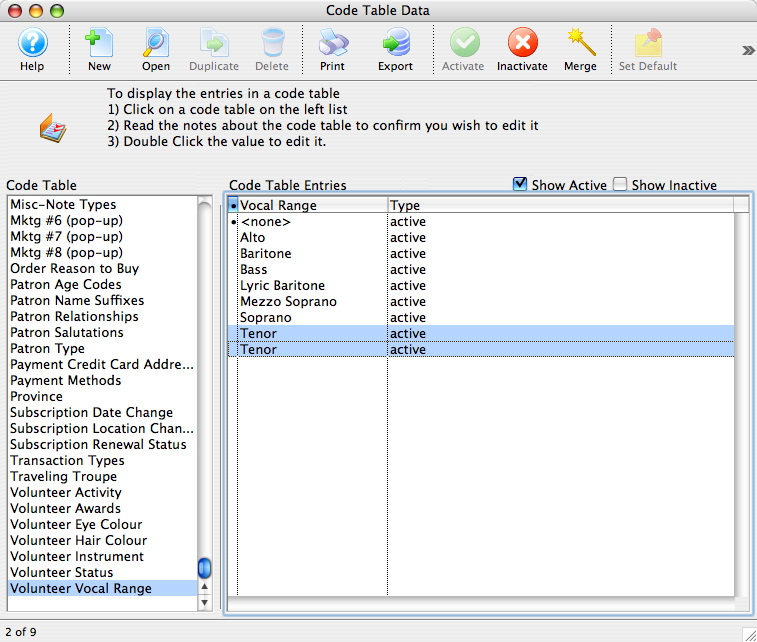
Select the values that you would like to merge.
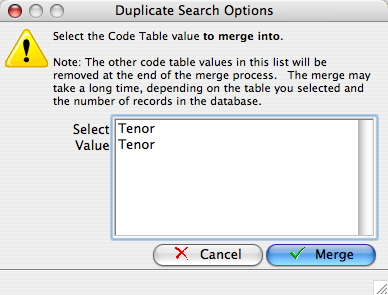
Click the Merge button and the Duplicate Search Options Window will open.
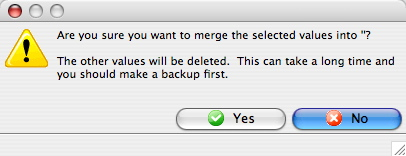
Select the value you would like to merge all data into, then click Merge. A Warning Window will open asking you to confirm the merge. Click Yes to continue with the merge.
Deleting Values Top

To determine if you can delete data from a code table, check the Delete button. If the button is inaccessable (greyed out), no data can be removed from the table. Once a code has been assigned to a record it cannot be deleted. If you want to prevent further use of a value, and you can not delete it, disable it.
- Choose the code value to be deleted by single clicking the value.
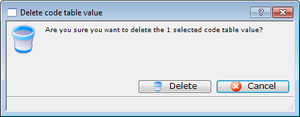
- Click the Delete button to open the Delete a Record confirmation dialog opens.
- Click the Delete button to complete the deletion.
Reloading Values Top
When you launch Theatre Manager, the current values from the code tables are loaded into memory. Adding new values or editing existing values does not reload the values stored in memory for other employees currently logged onto Theatre Manager. To see any changes made, all users need to re-launch Theatre Manager to see all changes made by other users updated in memory. to reload all the changes made to the code tables, you need to perform the following steps:
- Close Theatre Manager
- Start Theatre Manager
Editing Default Accounts Top
The default accounts should not need to be edited for changed very often. there may be times which you need to, for example when upgrading Theatre Manager, sometimes new default accounts are added. Or, you may desire to change the account numbers on a yearly basis. Before editing a default account, ensure that there is a general ledger account number that is set up. Refer to Creating General Ledger Accounts for more information.
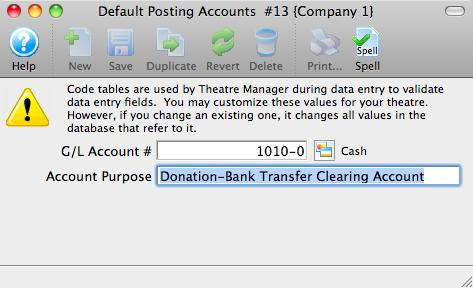
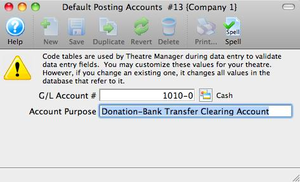
- Double click on the account to be edited, which opens the Entry of Account Description Window.
- Enter the G/L account number. If you do not already have a general ledger account number setup in G/L Accounts, do so now. Entering a G/L Account Number here will assign a general ledger account to the default account in code tables. For example, the default account Exchange Fees is assigned the G/L Account #4-2000-200. Therefore all revenue generated from exchange fees will be posted to that account number.
- Enter an account purpose (or description). this field should be already filled in. You may change the name if you like, but it is not recommended.
- Click Save.
Editing Payment Methods Top
Inserting a New Payment Method Top
Inserting a New Payment Type is used to add options to the Payment Methods category in Code Tables.
- Create a general ledger account number.
- Entering a new payment type in Code Tables requires entering a General Ledger Account number for the card type in the Chart of Accounts.
- Open System Tables >> Code Tables.
- Click here to learn how to access the Code Tables Window.
- Click on Payment Method.
- Click the New button.
- The Payment Methods Insert Window opens.
- Enter the Payment Code.
- This is the short form of the payment description. This text appears as the code table lookup value.
- Enter the Payment Description.
- This is the full description of the type of payment that you are creating. This text appears as the code table result value.
- Enter the GL Account Number.
- This is the G/L number that you created in step one. Type in the full 8 digit account number or use the drop down list on the right side of this field to manually select the account number.
- Select the Payment Type.
- Click on the radio button that best describes the type of payment method you are inserting.
- Select Mandatory Fields.
- If a customer is paying via credit card, you must decide which credit card fields must be entered before payment can be accepted. The fields you may make mandatory are credit card number, credit card expiry date, credit card authorization number, and process card via credit card server. The last selection is available using Theatre Manager's Credit Card Authorization. Selecting yes for any of these fields makes them mandatory fields.
- Select the Merchant Charges Tab.
- For Credit Cards, Merchant #, Service Charge G/L Account Number and Percent of Dollar Value or Dollar Charge Per Transaction are required.
- Click the Save button.
- The new payment type has now been created and is ready for use.
Changing Credit Card Provider Top
Caution
Before changing the merchant provider for a credit card payment method, please read about the full ramifications of a changeover for purchases done with the old provider that might need refunding in the future.
Before beginning this process, we suggest picking a time that will naturally limit any transactions that could be processed until the new Merchant account is in place (e.g. earlier in the morning). A switchover can usually be done in 5 minutes or less. If you wish, you can turn off web sales (only necessary for comfort).
The general steps are:
- Preparing for the Switchover to a new merchant account
- Switching Merchant Information in Theatre Manager
- Testing the Merchant Account
- Migrating Post Dated Payments to your new merchant account
- Updating Payment Ticket Face to print your new merchant account information
Step 1: Preparing for the Switchover Top
Caution
Make sure you have all the information from your merchant provider to enter into the fields on the merchant window. If you cannot complete this section, do not go on to the next section.
- Set up the information for your new merchant account.
- Do not activate it yet.
- Set the new merchant to emergency mode.


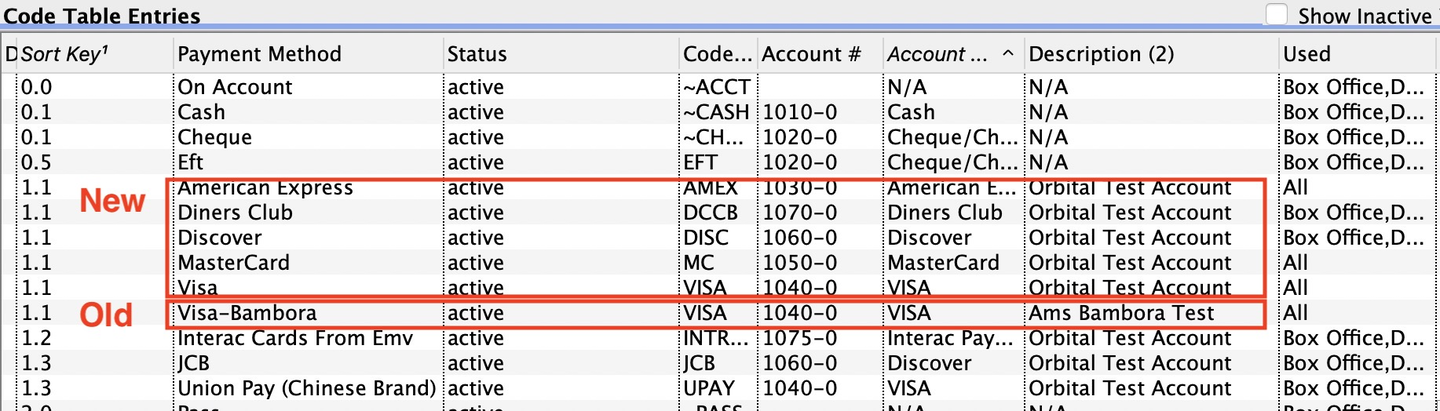
- Set up NEW credit card payment methods for your NEW merchant accounts.
- Create card payment types for VISA, MCARD, AMEX, etc that your new merchant provider accepts.
- Associate them with your new merchant provider created in Step 1.
- You might also want to rename your old payment methods (e.g. VISA - old merchant provider) so that you know which is which at a glance.
- Complete the End-of-Day (EOD) process for your current Merchant Provider.
- Immediately turn your existing merchant provider into emergency mode. This allows you to maximize sales uptime and minimize web sales outage to minutes because:
- Sales will to continue while you complete the switchover.
- Cards entered while in emergency mode will not authorize, but instead be moved to the new merchant provider as post dated payments (due today) and authorized in the next end of day.
Step 2: Switching Merchant Information Top
Once you have all the merchant information entered from the previous step:
- Go to Setup >> System Tables > Merchant Accounts to see the merchant account list. You should see both your current and your future merchant records.
- Open both your old merchant account and your new one.
- Select the Employee Tab on both windows.
- Select and drag all employees from the old merchant account to the Employee tab of the new merchant account.
- You will see that all employee names now appear on the new merchant. From this point in, those employees will use the new merchant account.
- On the NEW merchant account window:
- Check the Active flag in the new merchant account.
- Uncheck the emergency mode setting in the new merchant account.
- Close the new merchant account window.
- On the OLD merchant account window:
- Uncheck the Active box in the old merchant account window.
- Close the old merchant account window
Step 3: Testing the Merchant Account Top
Caution
Once the Merchant Account is updated in Theatre Manager and all Merchant Numbers have been updated, employees will need to log out of Theatre Manager and back in for changes to take effect.
Once employees logged back in, test the new merchant account from end to end by:
- Processing a test transaction to ensure the new merchant account processes cards correctly.
- Run an End of Day in Theatre Manager to ensure the transaction batches properly.
- Open your online merchant profile and see that the batch is there and closed, with the right amount.
- Once you are sure the transactions are processing correctly you can then start up the web sales again.
- When you make the changeover to the new merchant account, you must RESTART your web listeners to ensure all web checkouts use the new merchant provider.
Step 4: Migrating Post Dated Payments Top
Many venues use post dated payments for donation, recurring donations, subscriptions, and partial or progress payments for courses. These credit card payments are linked to the payment method for the old merchant processor and need to be switched over to the new processor. To do so, REPEAT the following steps FOR EACH credit card type you now accept for your new merchant provider.

- Go to Setup >> System Tables and find all your payment methods.
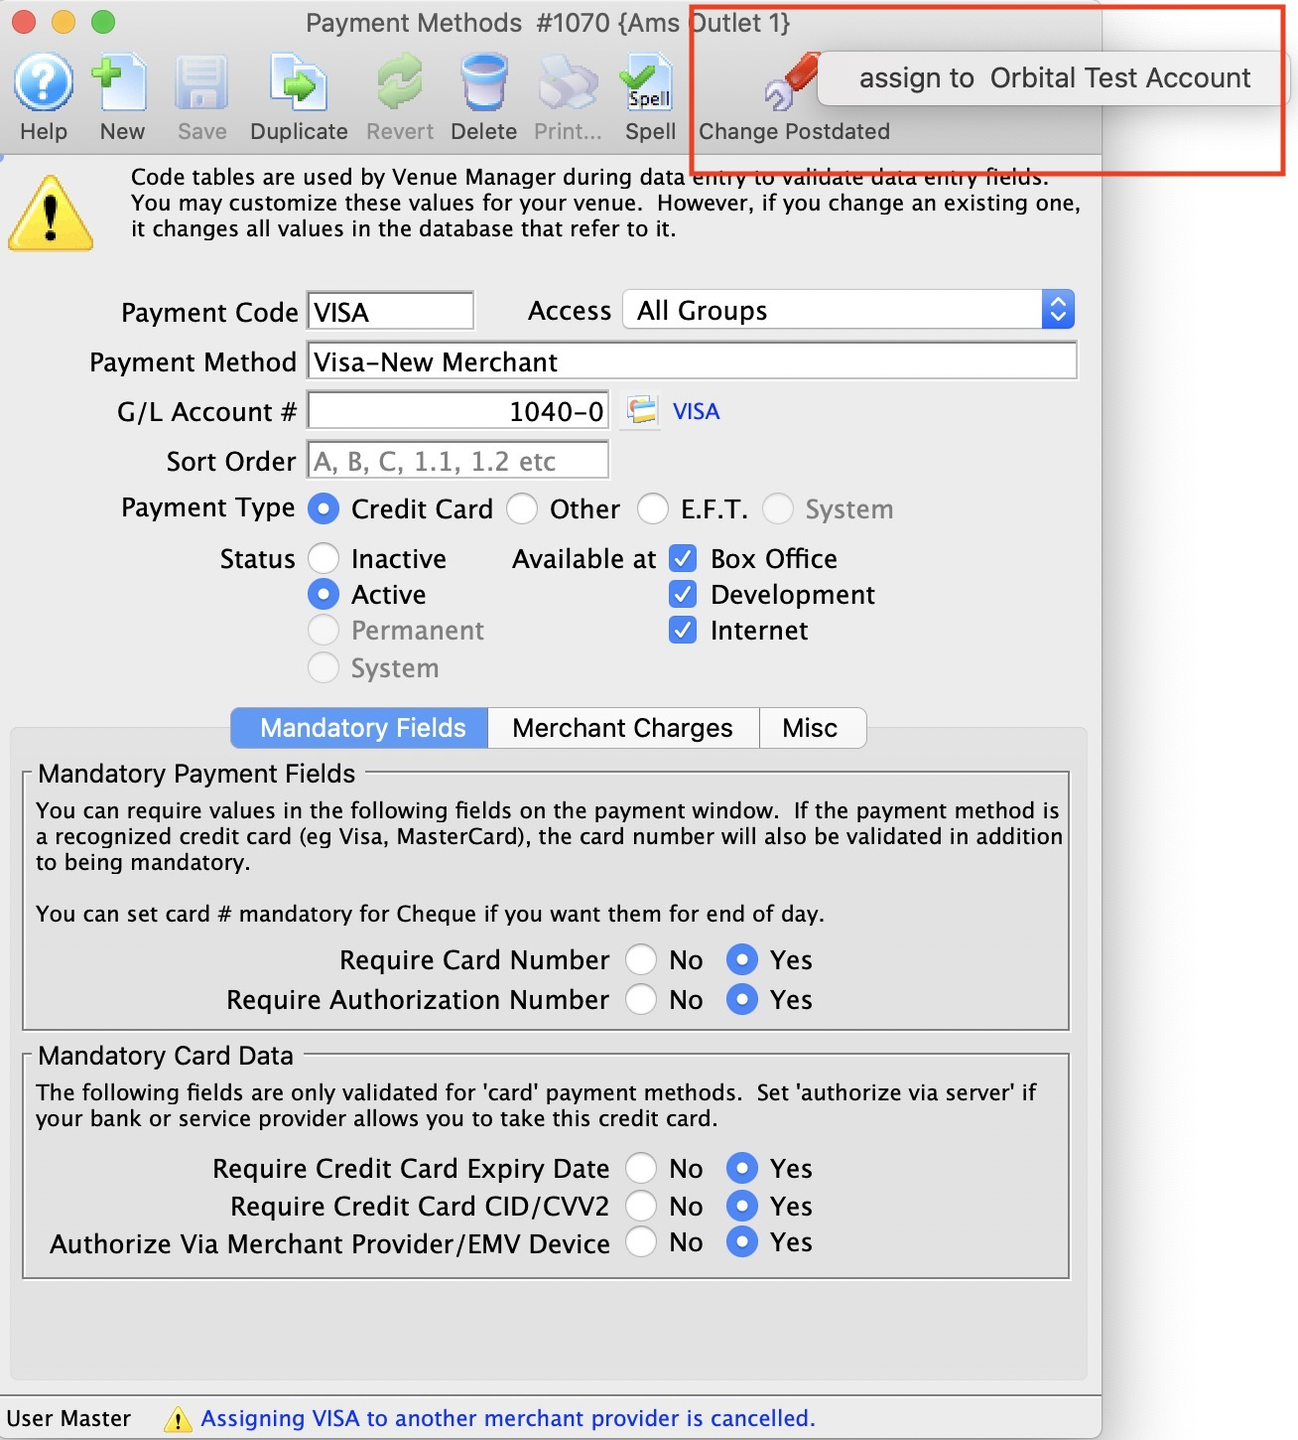

- Open one of the OLD credit card payment methods associated with the OLD merchant provider.
- The Migrate Postdated Button will be active.
- Click on it and select your new merchant from the list of merchant providers.
- The NEW merchant account will only appear in the popup list if:
- The new merchant account is active.
- The new merchant account is not in emergency mode.
- The same card type (e.g. VISA) exists for both old and new merchants.
- The NEW merchant account will only appear in the popup list if:
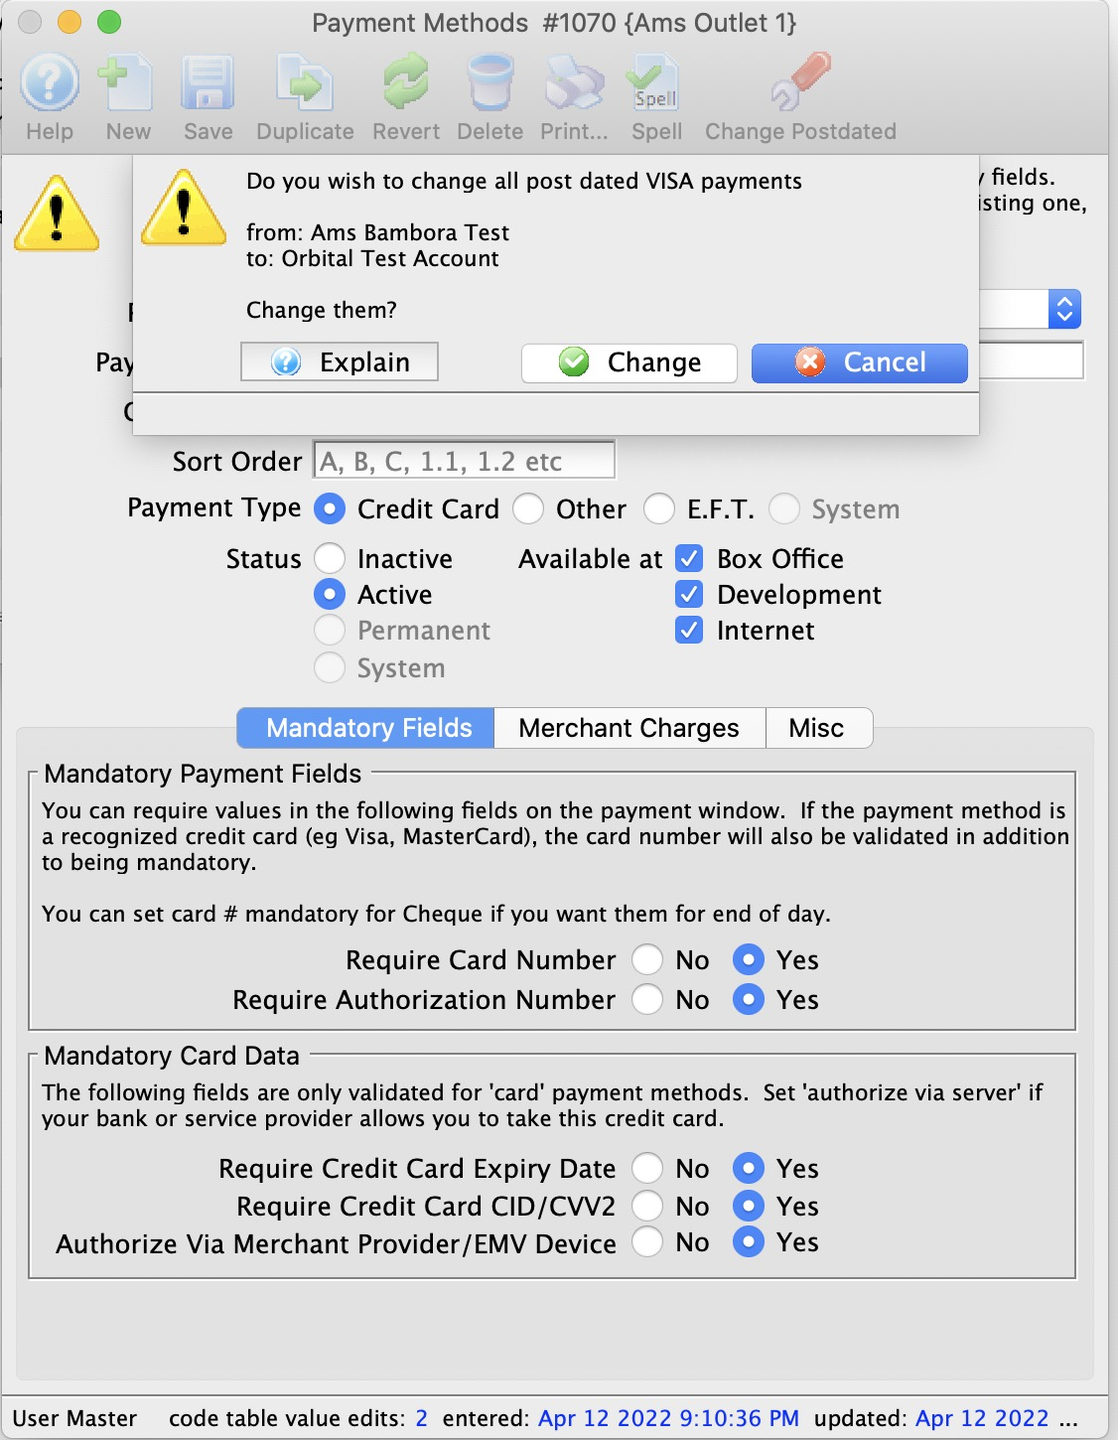

- You will be asked to confirm that all post dated payments are to be moved to the new merchant provider. Confirm if you wish to continue. If you make a mistake, you can always reverse the process and move from the new merchant provider back to the old one.
- Make the payment method you just transferred the post dated payments from INACTIVE so that it can't be used again.
- Repeat the above steps for each of the other credit cards you are transferring to the new merchant account
Step 5: Updating Payment Ticket Face Top
At the box office, if you print a receipt ticket face along with the tickets, you may need to change the merchant information on that ticket face.
- Go to Setup >> Ticket Faces
- Locate your Credit Card Ticket Face
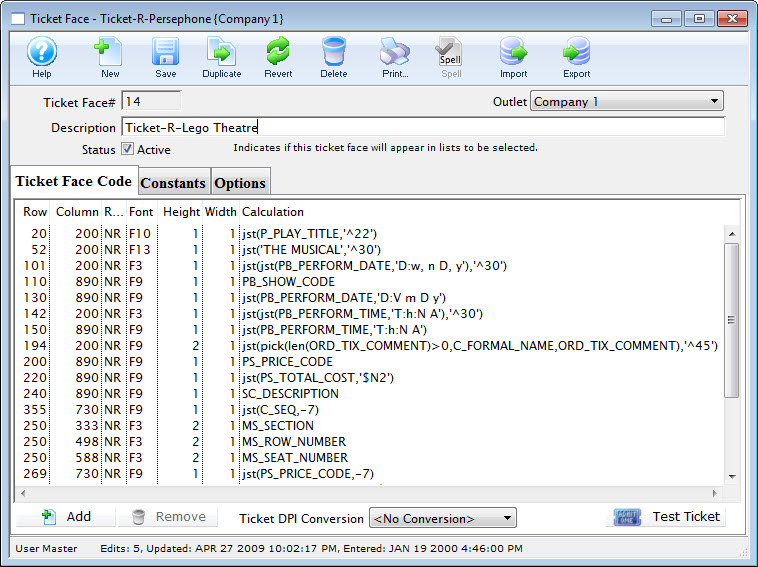

- Edit the ticket face
- Locate the line of code that displays your current merchant account number(s) (if they are hard coded on the ticket face).
- If the field is MM_MERCHANT_NUMBER, then no change is required.

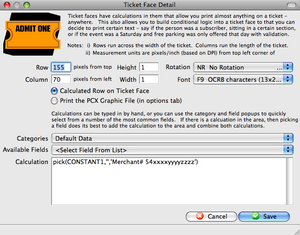
- Edit the line of code to have your new merchant account information.
- Click the Save button.
- Click Save in the toolbar
Rounding Cash Payments Top
Caution
Before proceeding, make sure you understand how rounded payments work.
In Canada, the penny was vanquished in 2013. This means that cash sales at the door need to be rounded up or down, depending on the price. Theatre Manager will do that for you automatically if you:
- Go to * Setup >> System Tables >> Code Tables*
- Select Payment Methods
- Double click on the payment method you wish to setup for rounding on the right. (If you are rounding the Cash payment method, then find the system ~CASH payment.)
- Click on the Misc Tab for the payment method and set Allow Payment Rounding to on
- Indicate the amount of rounding you want. Normally, this rounding amount would be $0.05 to round to the nearest nickel. You can have TM round to the nearest dime, quarter or any value you place into this field.
- Provide a Fee Type that will be used to track any rounded amounts or create one if you do not have a rounding fee account
- You will need a G/L code in your chart of accounts to post the fee to.
- The fee should not have any tax associated with it as you are just tracking the amount of cash that you gain or lose to rounding the payment. If your payments are evenly distributed (e.g. half are rounded up, half are rounded down), the total amount in this account will approximate zero.
While intended only for cash payments at the box office, Theatre Manager will round any payment type you want if you set them up this same way.
Deleting a Payment Type Top
Caution
If a payment type has been used, it cannot be deleted.
If you wish to discontinue a payment type, disable it.
To delete an unused payment type:
- Select the payment type that will be deleted.
- Click the Delete button.
- The Delete Code Table Confirmation opens.
- Click the Delete button.
- The payment type is now deleted.
- Clicking the Cancel button will abort the deletion.
Editing Personnel Activities Top
Adding Personnel Duties Top
To set up personnel/volunteer activities, you perform the following steps:

- Go to Setup >> System Tables >> Code Tables and scroll down to select Personnel Activity.

- Click the New button to open the Personnel Activity Insert Window.
- Give the new activity a specific name so anyone will be able to decipher its purpose. It will also appear on reports and search criteria.
- Optionally, if tracking hours or if hours do not match the task or performance it is associated with:
- Enter the number of hours before and after the performance that the worker is expected to be there. For example, if the performance starts at 7:30 pm, you might expect an usher to arrive 1 hour before and stay a half hour afterwards. If these two fields are set, they add extra time to the personnel record before event start and duration of performance. Thus a 2 hour performance might result in a time credit of 2 + 1 before and 0.5 after, or 3.5 hours. This will show on the calendar in Facility Management.
- Alternatively, you can specify a fixed number of hours to credit to the staff/volunteer for doing this activity. This approach is more suitable for things like directors, actors or volunteer office staff who might be given a time allotment, regardless of the duration of the event.
- If either of the above are provided, they become defaults during data entry. If not provided, the setup can specify the total time if you want the time to be fixed, rather than based on calendar input.
- If you want this activity to have special colouring on the calendar, select a color other than black.
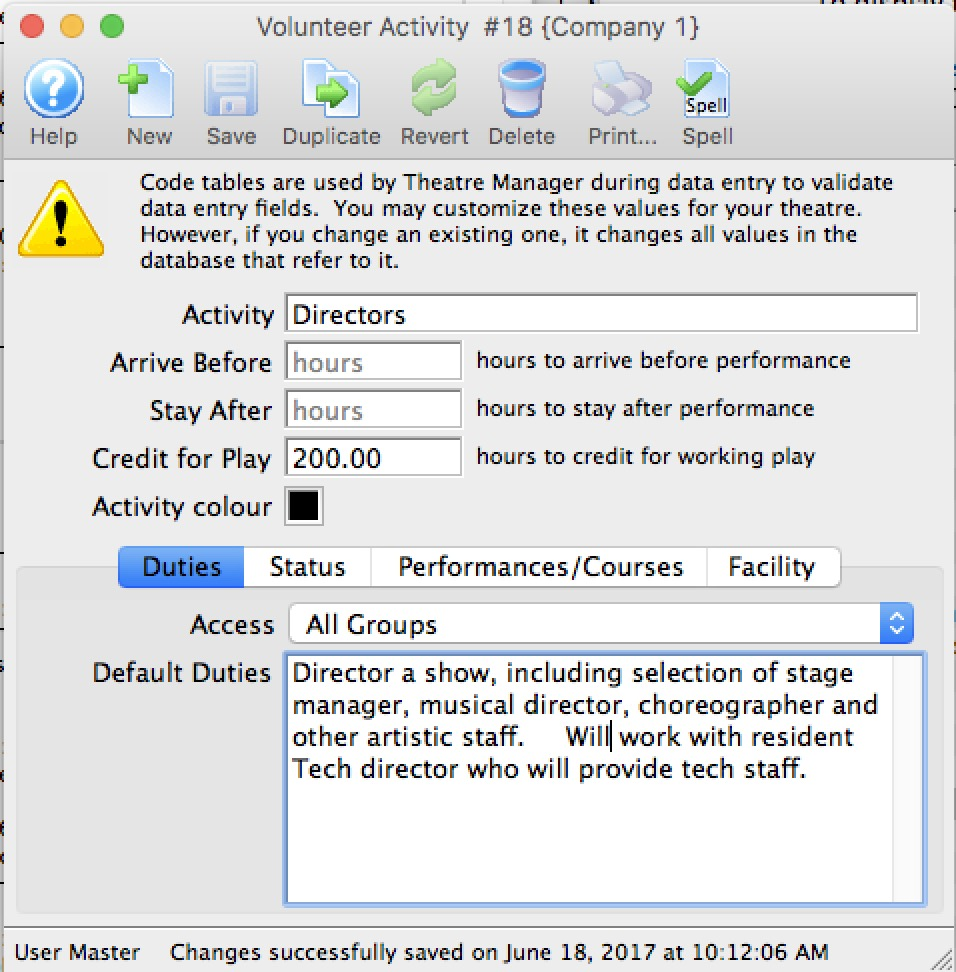
- On the Duties tab, enter any default duties for this position.
Activity Status Tab Top


The Status tab is used to indicate if the personnel/volunteer activity code is active or inactive as well as where it might be used.
Performances and Courses Tab Top
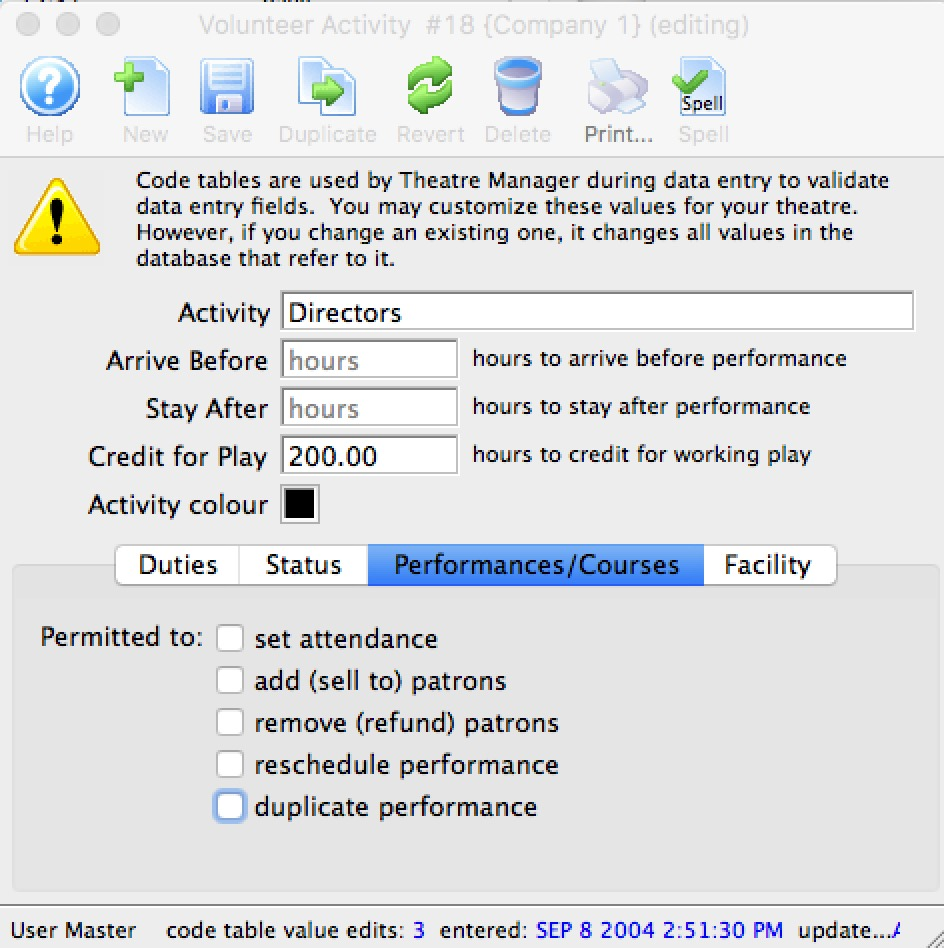

This feature is designed to work in conjunction with the online store to give a staff member/volunteer to accomplish various tasks within the web module. The permissions will allow the employee managing a course/class to set attendance, add participants on the fly, refund a class, reschedule a class or add a new class.
If this activity code is associated with the person for a particular event, the following indicates what they can do online. The personnel/volunteer will need to pull up the event/performance online in a web browser.
Set Attendance
This means that the employee/volunteer can set or clear attendance reasons for the patron for each class or event using a tablet or computer. This is not meant for high volume attendance tracking - more for courses and really small events.
Add (sell to) Patrons
If enabled, the employee/volunteer can add NEW patrons to the course. It is designed for those kinds of classes where people can just show up - and then be enrolled by the instructor.
Remove (refund) Patrons
If enabled, the employee/volunteer can remove people from the course/class and issue a refund to the patron in form of a credit (e.g. pass/gift certificate).
Reschedule Performance
Allows the employee/volunteer to change the date and time of a class within the course
Duplicate Performance
Allows the employee/volunteer to add extra classes to the course.
Facility Setup Tab Top
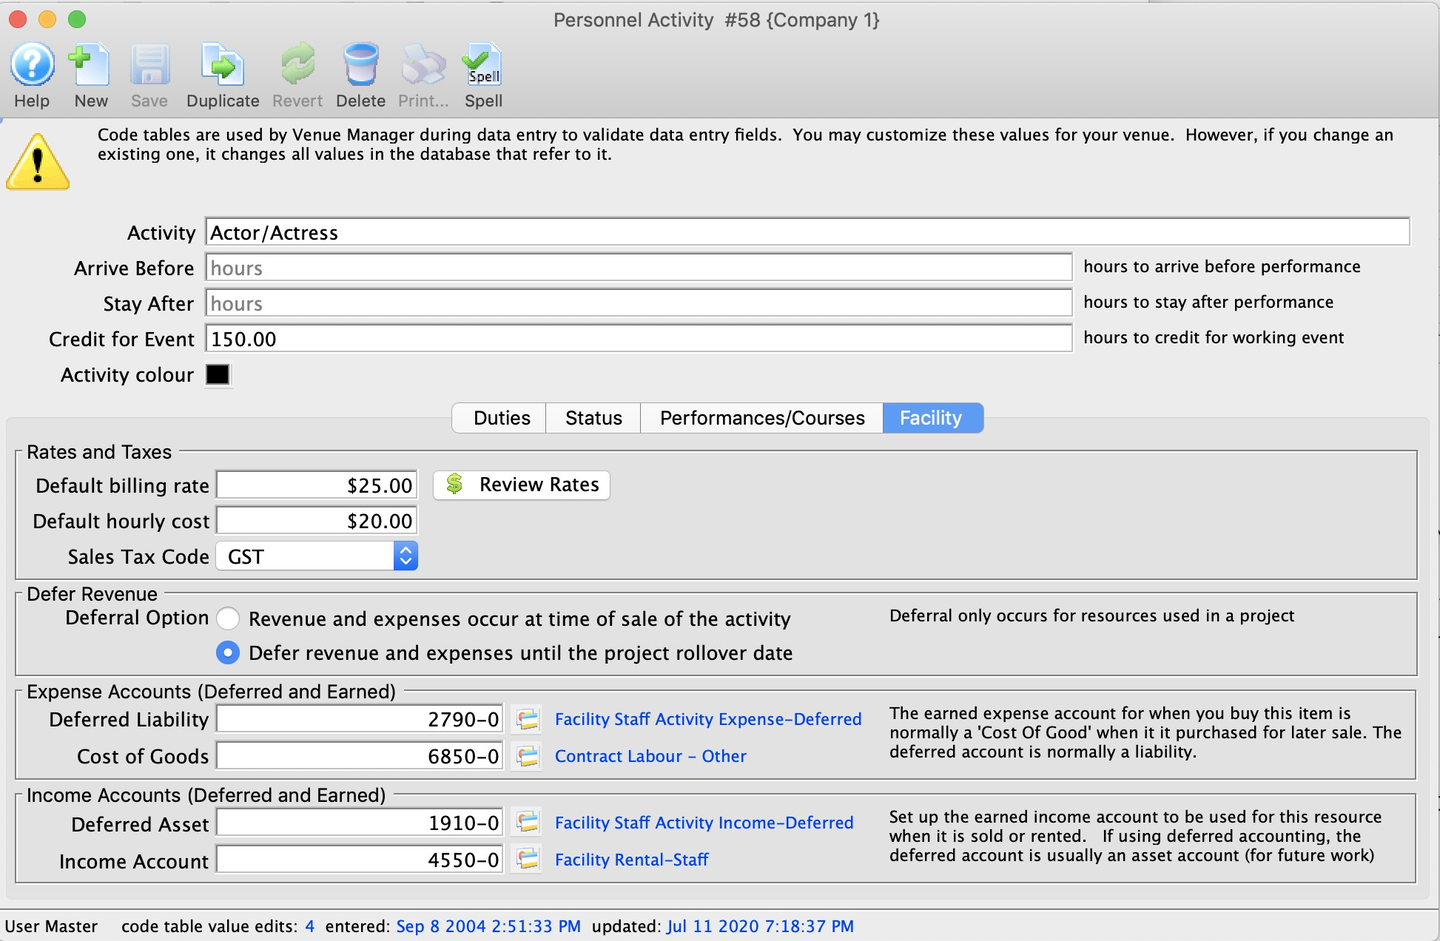
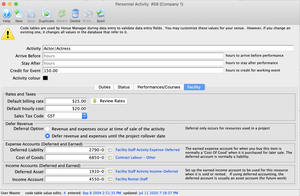
On the Facility tab, enter all of:
- Default Billing Rate - what we wish to bill the person out at to the renters
- Default Hourly Cost - default hourly cost of using the person in this activity
- Can be overridden by setting pay rates on the employee facility set up window
- Sales Tax Code - used to add taxes to the expenses and income
- Use Deferred Accounts
- if set, then any facility project marked as using deferred accounts will use the deferred account entered below
- if neither the project nor the activity uses deferred accounts, then only the earned accounts need to be specified
- Accounts
- Deferred Expense Account - the deferred account into which future expenses will be placed if using deferred accounting for the project (typically a liability account)
- Earned Expense/Cost of Goods Account - the earned account for expenses will be rolled into when the project ends (typically either an expense or cost of goods account)
- Deferred Income Account - the deferred account into which future income will be placed if using deferred accounting for the project (typically an asset account)
- Earned Income Account - the earned account for income to roll into when the project ends
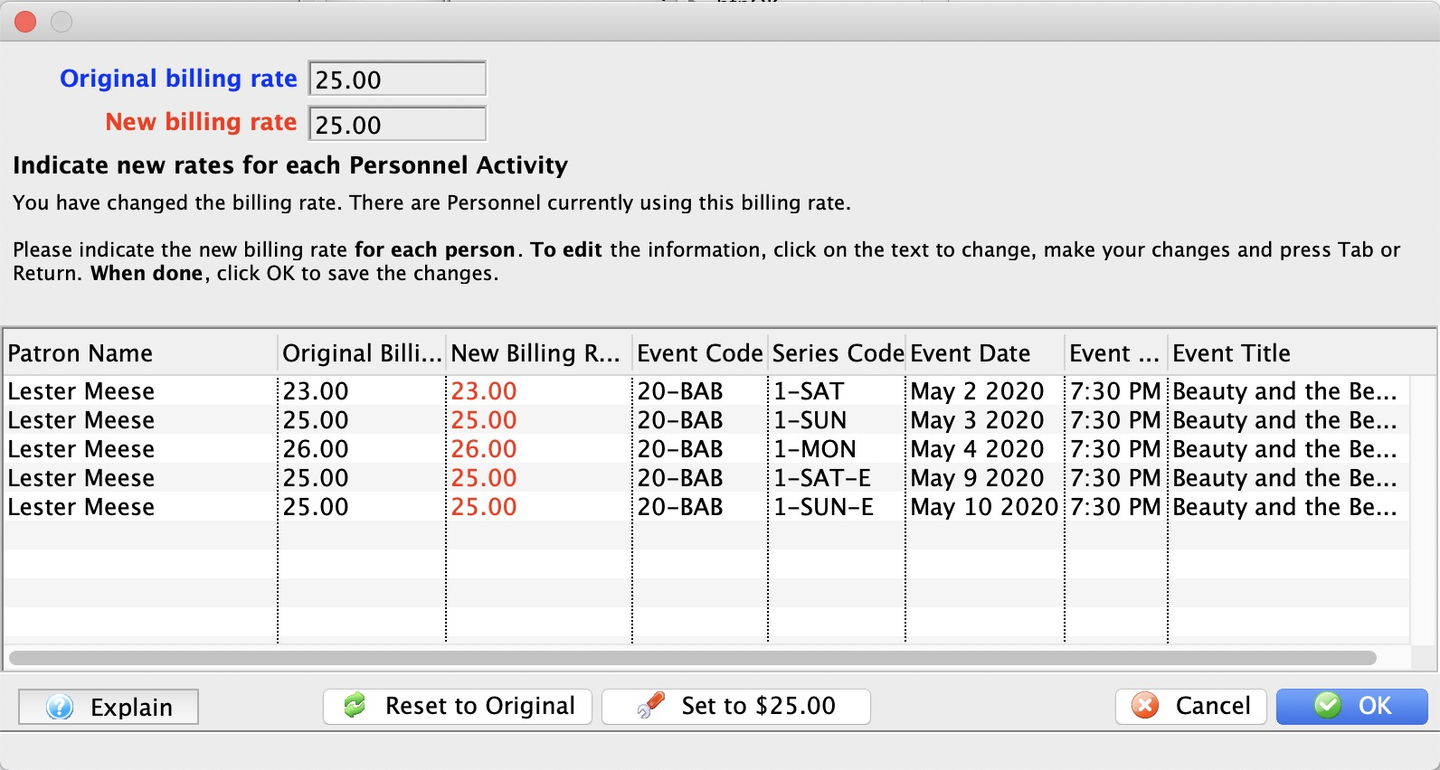

To see current billing rates for anyone already associated with this activity, click the Review Rates button. The same window will pop up if you change the default billing rate, giving you an opportunity to change or leave alone the billing rate for anyone associated with the activity.