Edit a Price Code Top
This is the third of four processes required to complete a new event build:
- Add a new event
- Add a performance to the new event
- Setup base prices for each new performance
- Enable sales promotions for each new performance
The following how-to guide assumes that an event has already been created and had performance dates and times added.
Best Practice
If building any of the special event cases below, review any relevant how-to notes before proceeding:
Use the following steps to edit a price code in an event, either to setup up pricing for a new performance or to adjust an already setup price:
Open the event
- On the Event List Window, find the event and double-click to open the Event Detail Window
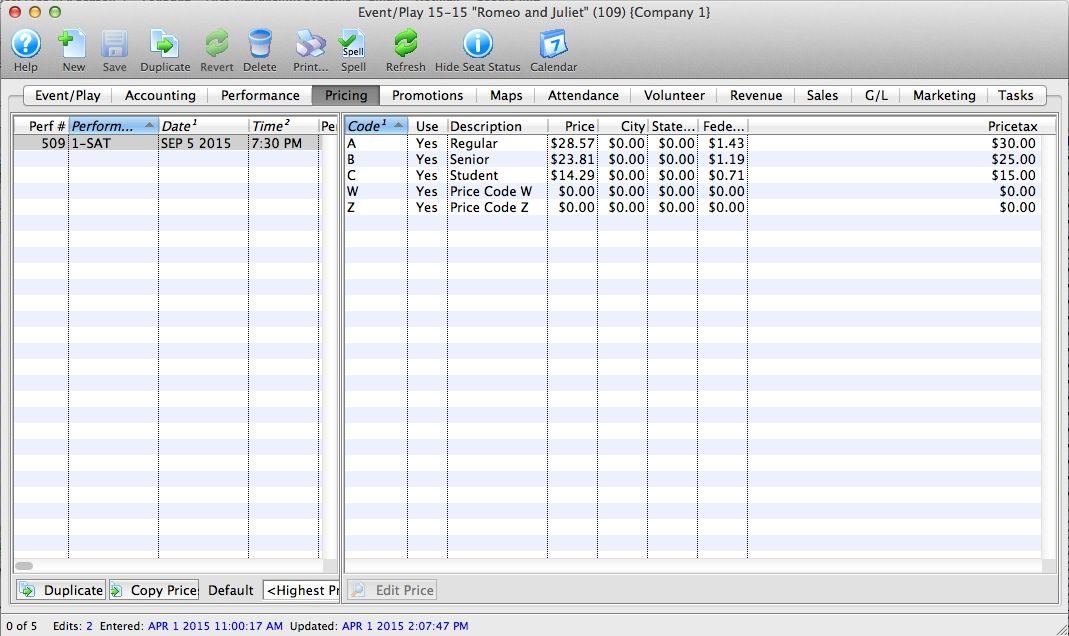
Go to the pricing tab and select the correct performance
- Go to the Price Codes Tab
- Single-click to select the correct performance on the left-side list and activate that performance's price codes on the right-side list
Set the price code name and base price value
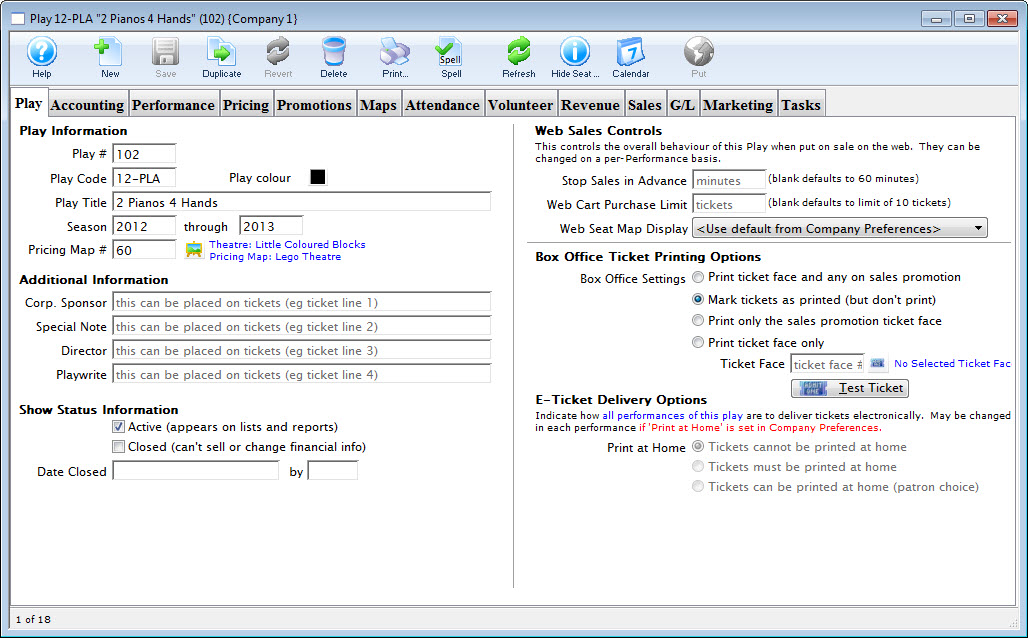
- Double-click (or single-click and hit Edit Price) on the correct price code
- On the Price Code Detail Window, enter:
- A descriptive name (e.g.
Adult,Price Code A,VIP Section, etc) for both the box office and patrons online to reference - The base price value for the pricing section (the amount before taxes and any sales promotion calculations are applied)
- A descriptive name (e.g.
- If the price code should not be available for purchase, de-select Allow Price Code to be used
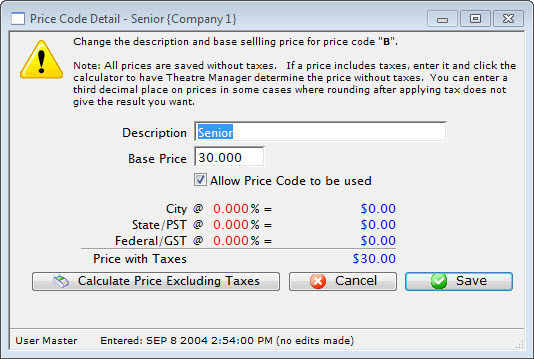
If you want help selecting a base price value that will end with a specific amount including taxes, use the calculation button
- If your ticket price does not include taxes or you already know the correct base price to use, skip this step
- If your ticket price includes taxes and you only know the final price that the price code should be:
- Make sure the event has the correct tax rate setup
- Enter the final price you want in Base Price
- Click Calculate Price Excluding Taxes and Theatre Manager will automatically adjust the Base Price value to create your previously entered end price

Save your changes and repeat for all remaining price codes
- Click Save and close the Price Code Detail Window
- Repeat steps 2-4 for every price code that needs to be setup or edited
- Click Save at the top of the Event Detail Window when all changes have been entered

Now that you have setup base prices for your new performance(s), it's time to enable the appropriate sales promotions for each date and time.
Enable a Sales Promotion Top
This is the fourth of four processes required to complete a new event build:
- Add a new event
- Add a performance to the new event
- Setup base prices for each new performance
- Enable sales promotions for each new performance
The following how-to guide assumes that an event has already been created, had performance dates and times added, and had base prices setup.
Best Practice
If building any of the special event cases below, review any relevant how-to notes before proceeding:
Best Practice
If you have an existing performance with enabled sales promotions that are similar to what you want to use on this event, consider using the copy prices feature to save a little time.
Use the following steps to manually adjust which sales promotions are available for each performance, either to setup a new performance for sale or to adjust a performance already on sale:
Go to the promotions tab and select the correct performance
- On the Event List Window, find the event and double-click to open the Event Detail Window
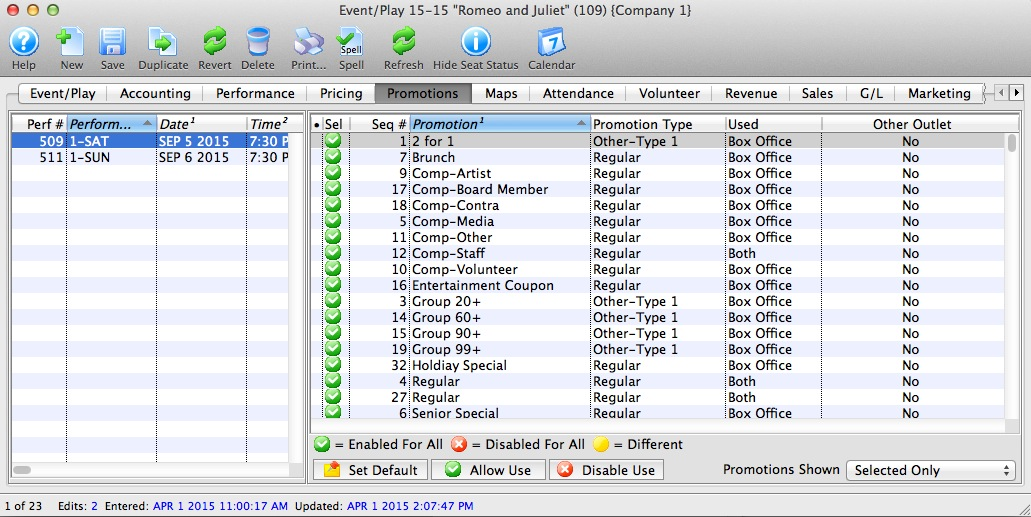
- Go to the Promotions Tab
- Single-click to select the correct performance(s) on the left-side list and activate the related promotions on the right-side list
Adjust the sales promotions visible in the list as needed
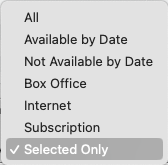
- Use the Include dropdown in the bottom right of the window to filter which sales promotions are visible in the list
- All shows all active promotions in the database
- Selected Only shows only promotions enabled for the selected performance(s)
- Other filter options limit the visible promotions based on the promotion availability settings
- For long lists, sort the visible columns to help find the one you're looking for
- Refer the bottom legend to clarify color icon meanings
To allow the promo to be used, enable it
- Single-click the promotion(s) to be allowed
- Click Enable (makes the icon green)

To disallow the promo from use, disable it
- Single-click the promotion(s) to be disallowed
- Click Disable (makes the icon red)

You have now completed the four basic processes required when building a new event and getting it ready for sales.
Set Default Price Code Top
Read about setting a default price code here.
Copy Prices Top
Read about copying price codes and promotions from one performance to another here.
Duplicate Prices Top
Read about duplicating price codes from one event to another here.
Add a Fee to a Ticket Price Top
Read about adding ticket fees here.
Add New Price Codes Top
Theatre Manager Supports dynamic pricing where you can change the pricing zones in a venue, change the prices, and/or change the pricing map for the performance.
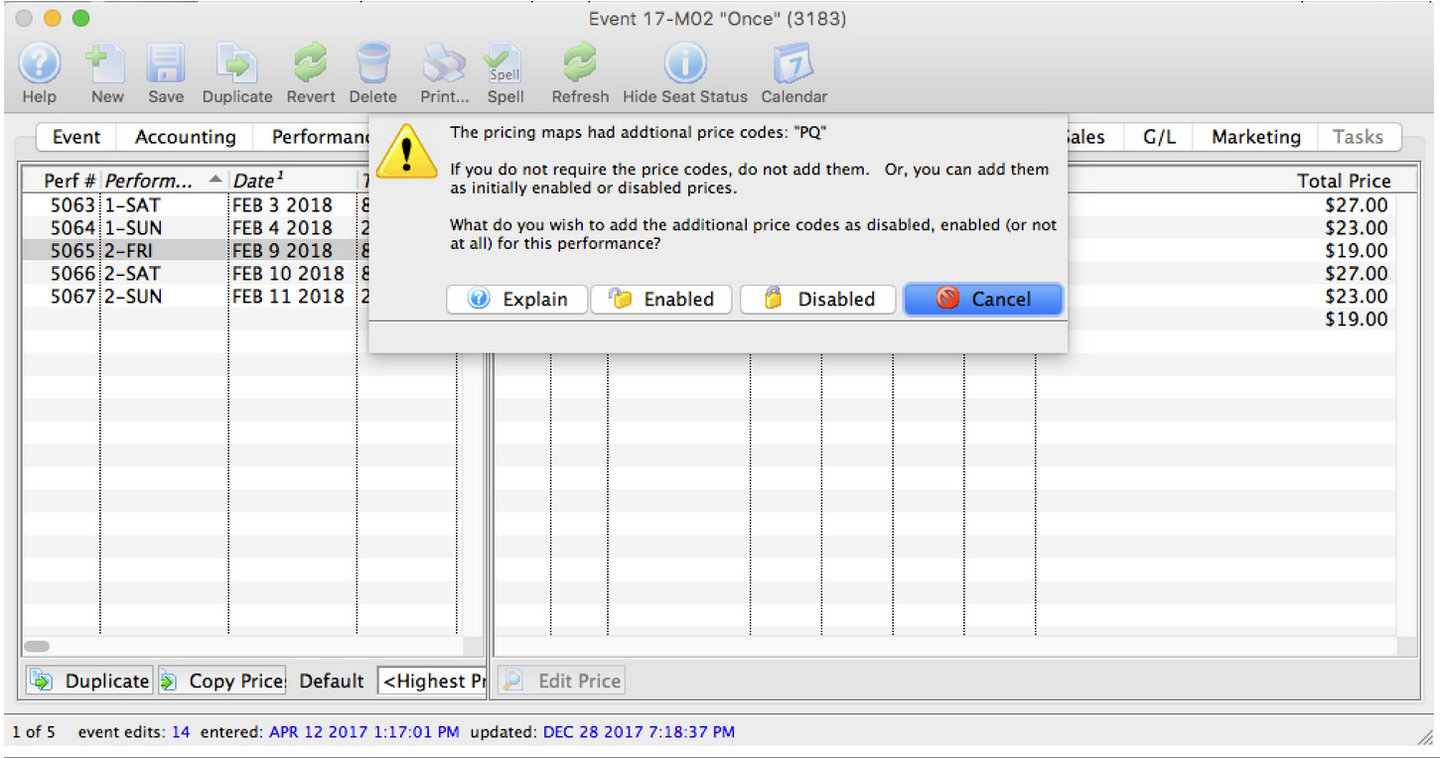
If new price zones are found when looking at pricing for a performance that do not have corresponding prices, you will see an alert dialog that asks what you want to do with those additional pricing zones. You can:
- Cancel adding the new pricing zones - which means that the new prices will not be created. This is the best option as pricing is not changed.
- Add the pricing zones to the performance as initially disabled, which means that the price codes are added as zero price, but not enabled for purchasing. This is a safe option since the price codes are added, but nobody can use them until you set prices.
- Add the price zones as initially enabled, which means that the prices are instantly available as zero price tickets. This is the least safe option, but probably what you would pick if the event is not available for sale online. If a performance is available for sale online, the disabled setting is automatically be used for that performance.
You will only receive this message to add prices if:
- The event is still open for sales. If it has been closed or is inactive, you will not be prompted to add prices if they are different
- You click on each performance in the prices tab to view the prices for that performance - ie the prices codes are not automatically added on change of venue.
- There are additional price codes in the venue that are not set up for the performance.