Custom Category Top
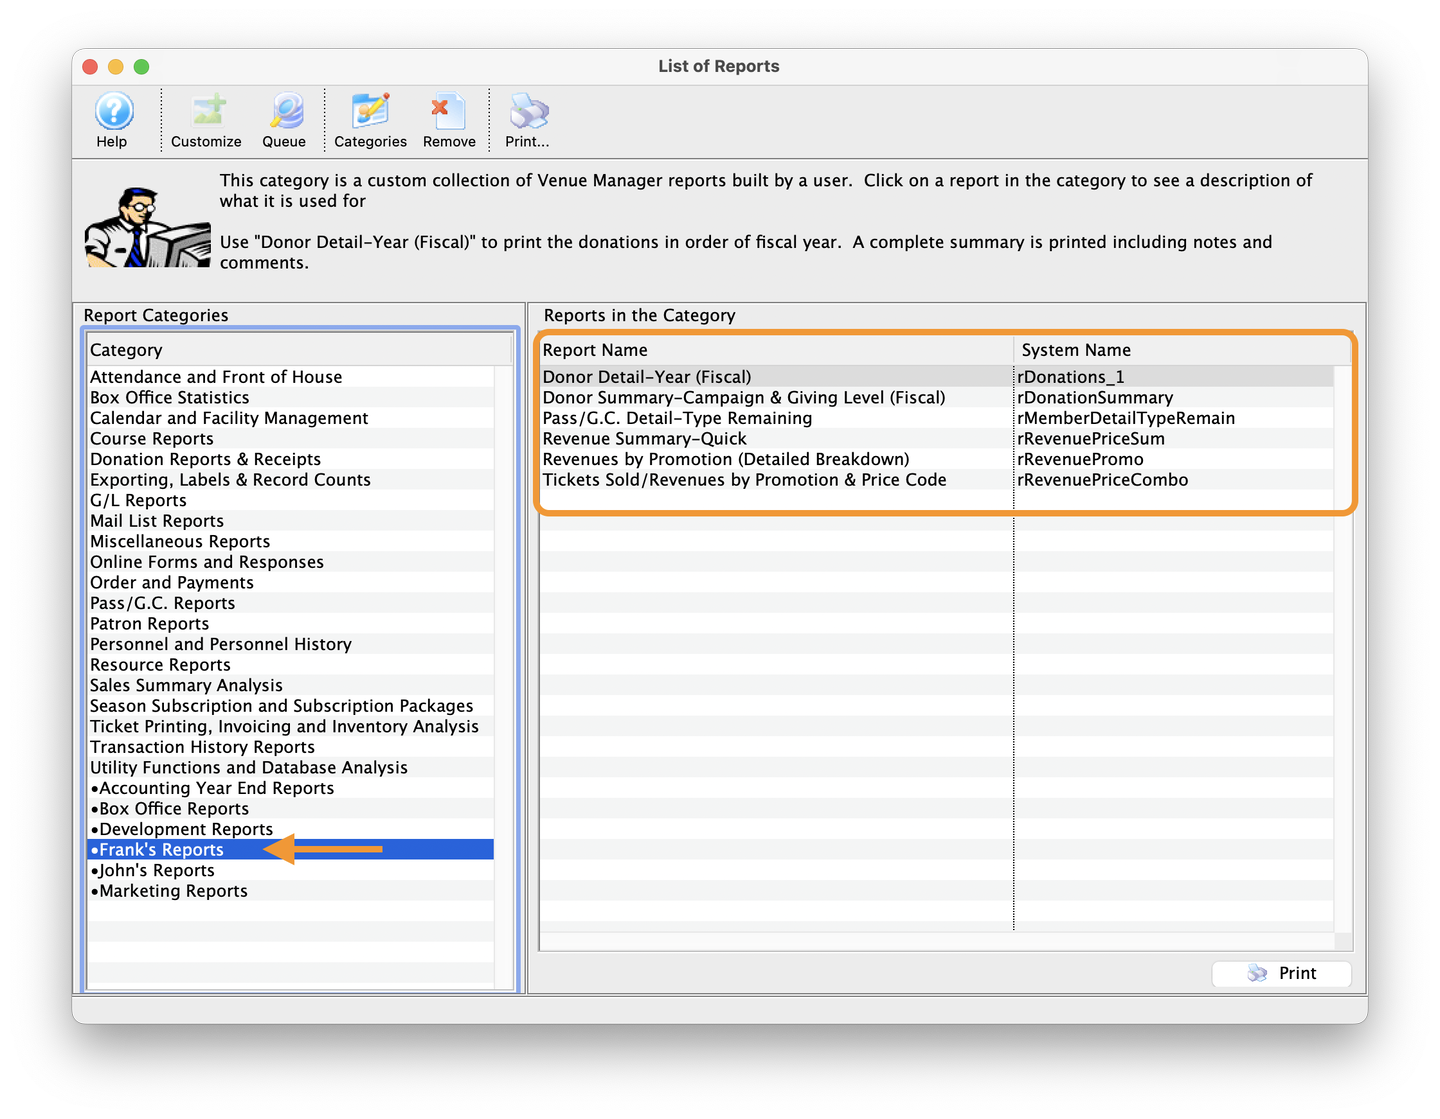
Theatre Manager has over 300 unique reports, which can be both incredibly useful, but also overwhelming if one forgets where to find them. Custom Report Categories allow users quick access to their most useful reports, allowing them to store their favourite reports in one place.
Popular options include creating categories by department, by position, or by employee. Whatever the approach, creating a custom category involves three basic steps:
- Click the Categories button in the Report toolbar
- Give the new category a name
- Drag and drop existing reports to the new custom category to start populating it
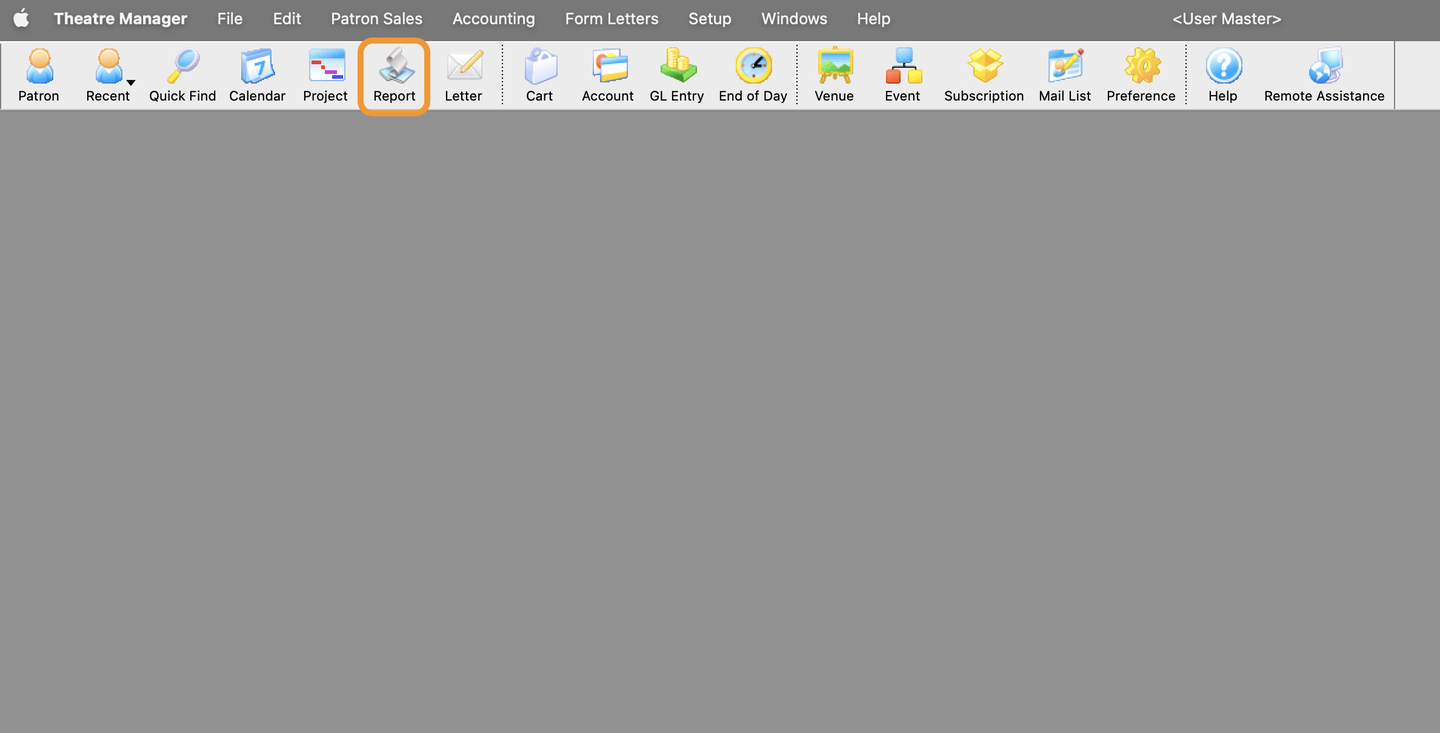
Click the Report Icon in the Toolbar
- Look for the Theatre Manager toolbar after logging in
- Click the Report button
- This will open up the List of Reports window
Click the Categories button
- In the List of Reports toolbar, click the Categories button
- This will open up the Custom Report Categories window

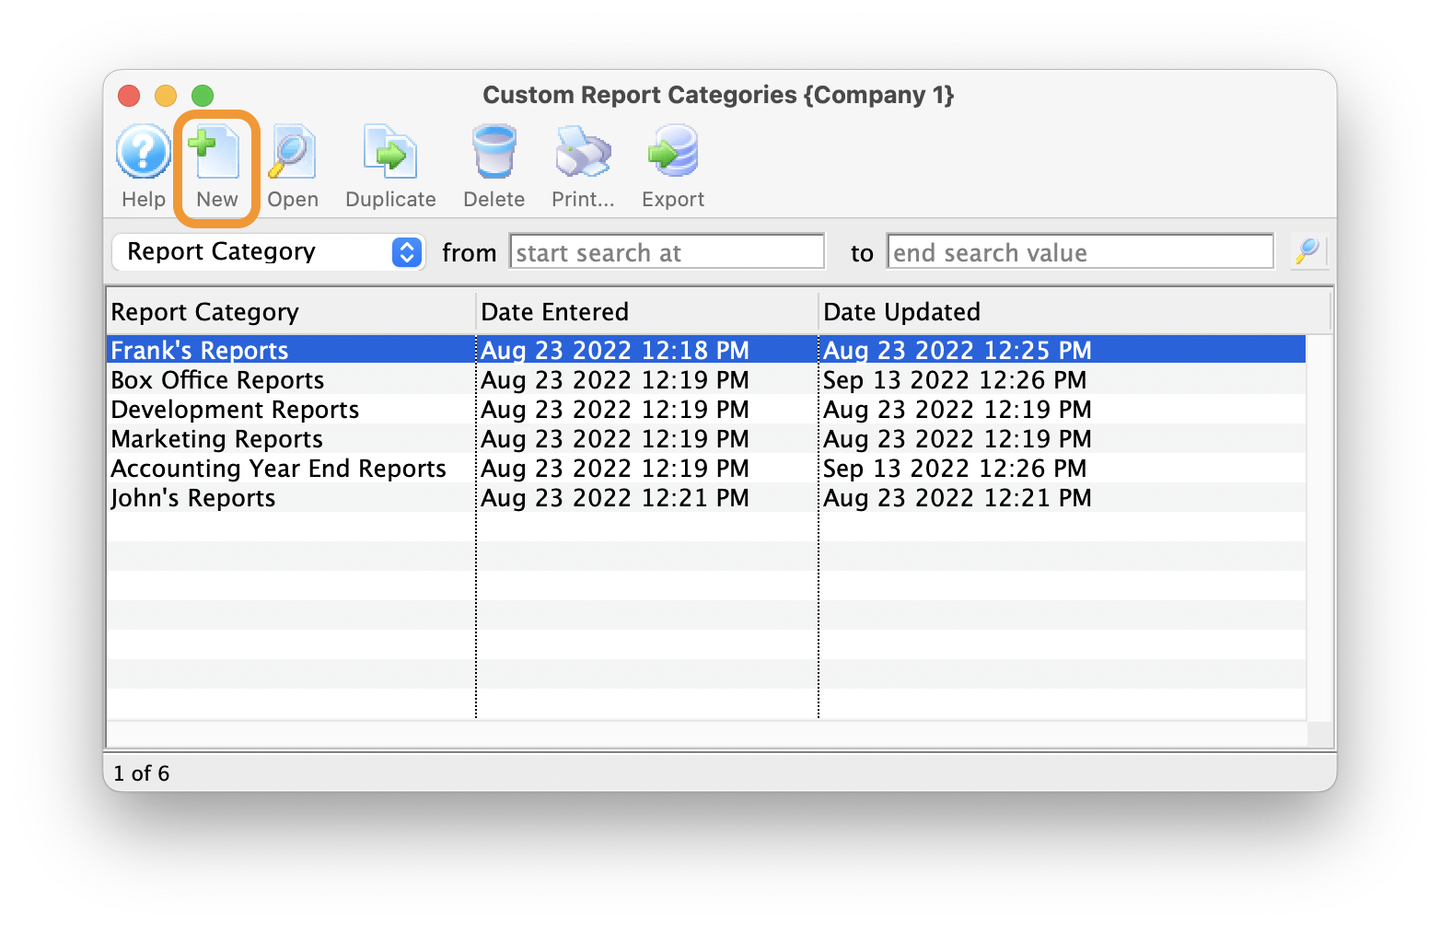
Click the New button
- From the Custom Report Categories window
- Click the New button
- This will open the Insert Report Category window
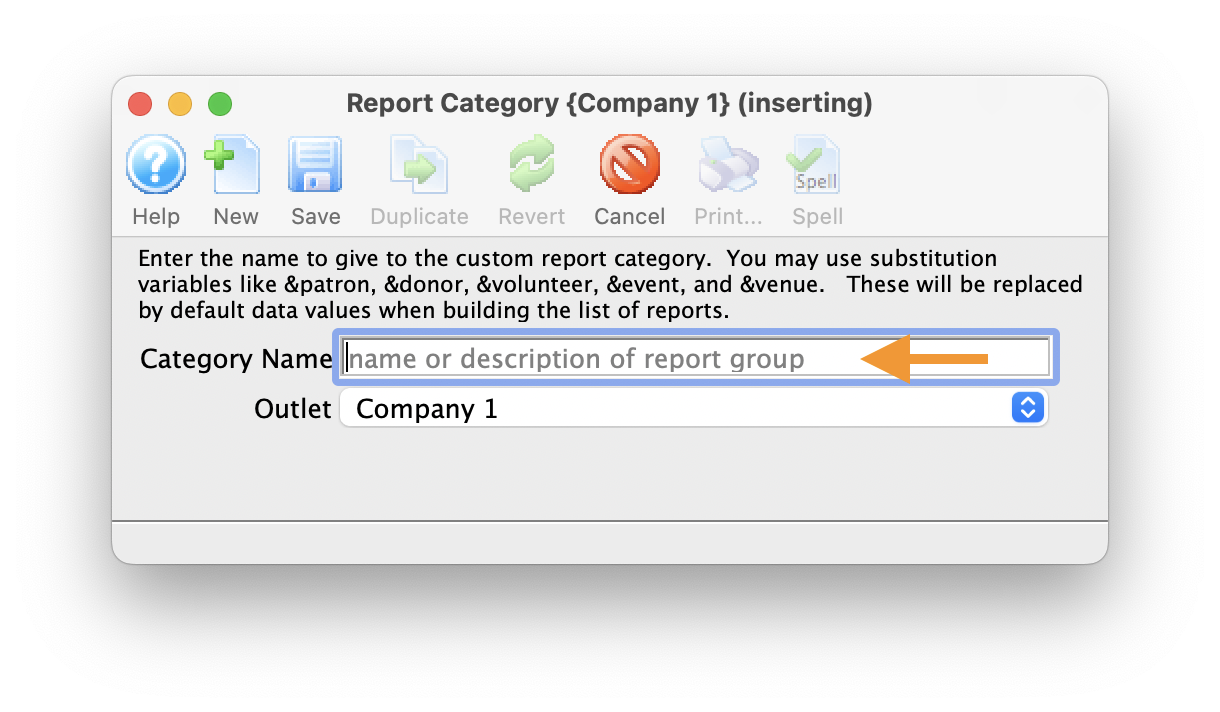
Fill In the Custom Category Name
- Enter the desired name for the Customer Category
- In this example, we will use "End of Day Reports"
- When ready, click Save and close the window
- Users can also simply close the window, which saves any changes and closes the window
- Closing the window will bring the user back to the Custom Report Category window
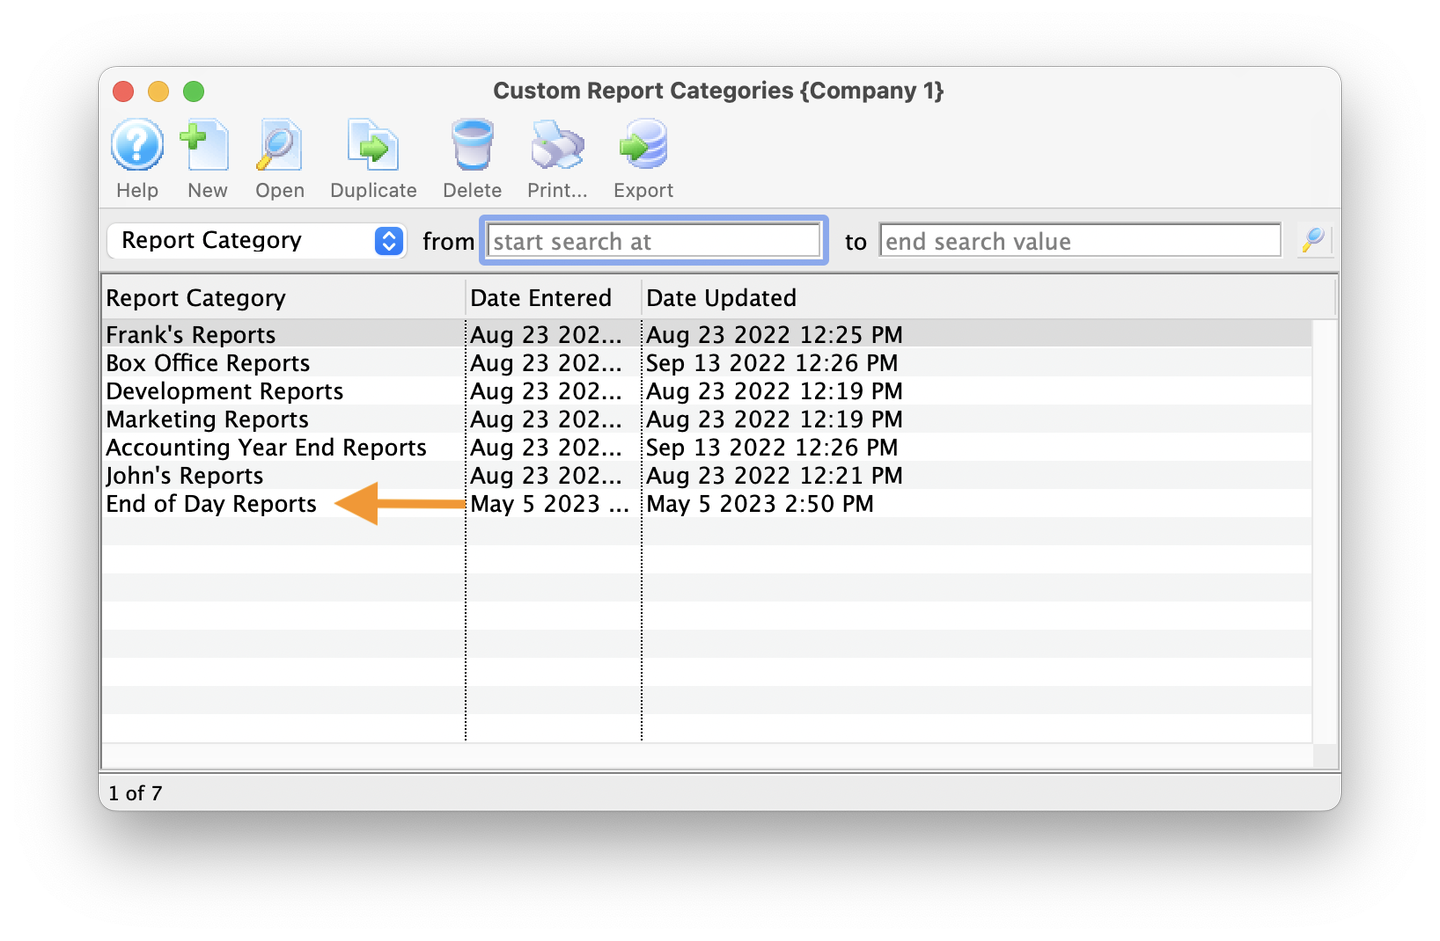
Review New Custom Category
- Users will now see the End of Day Reports custom category
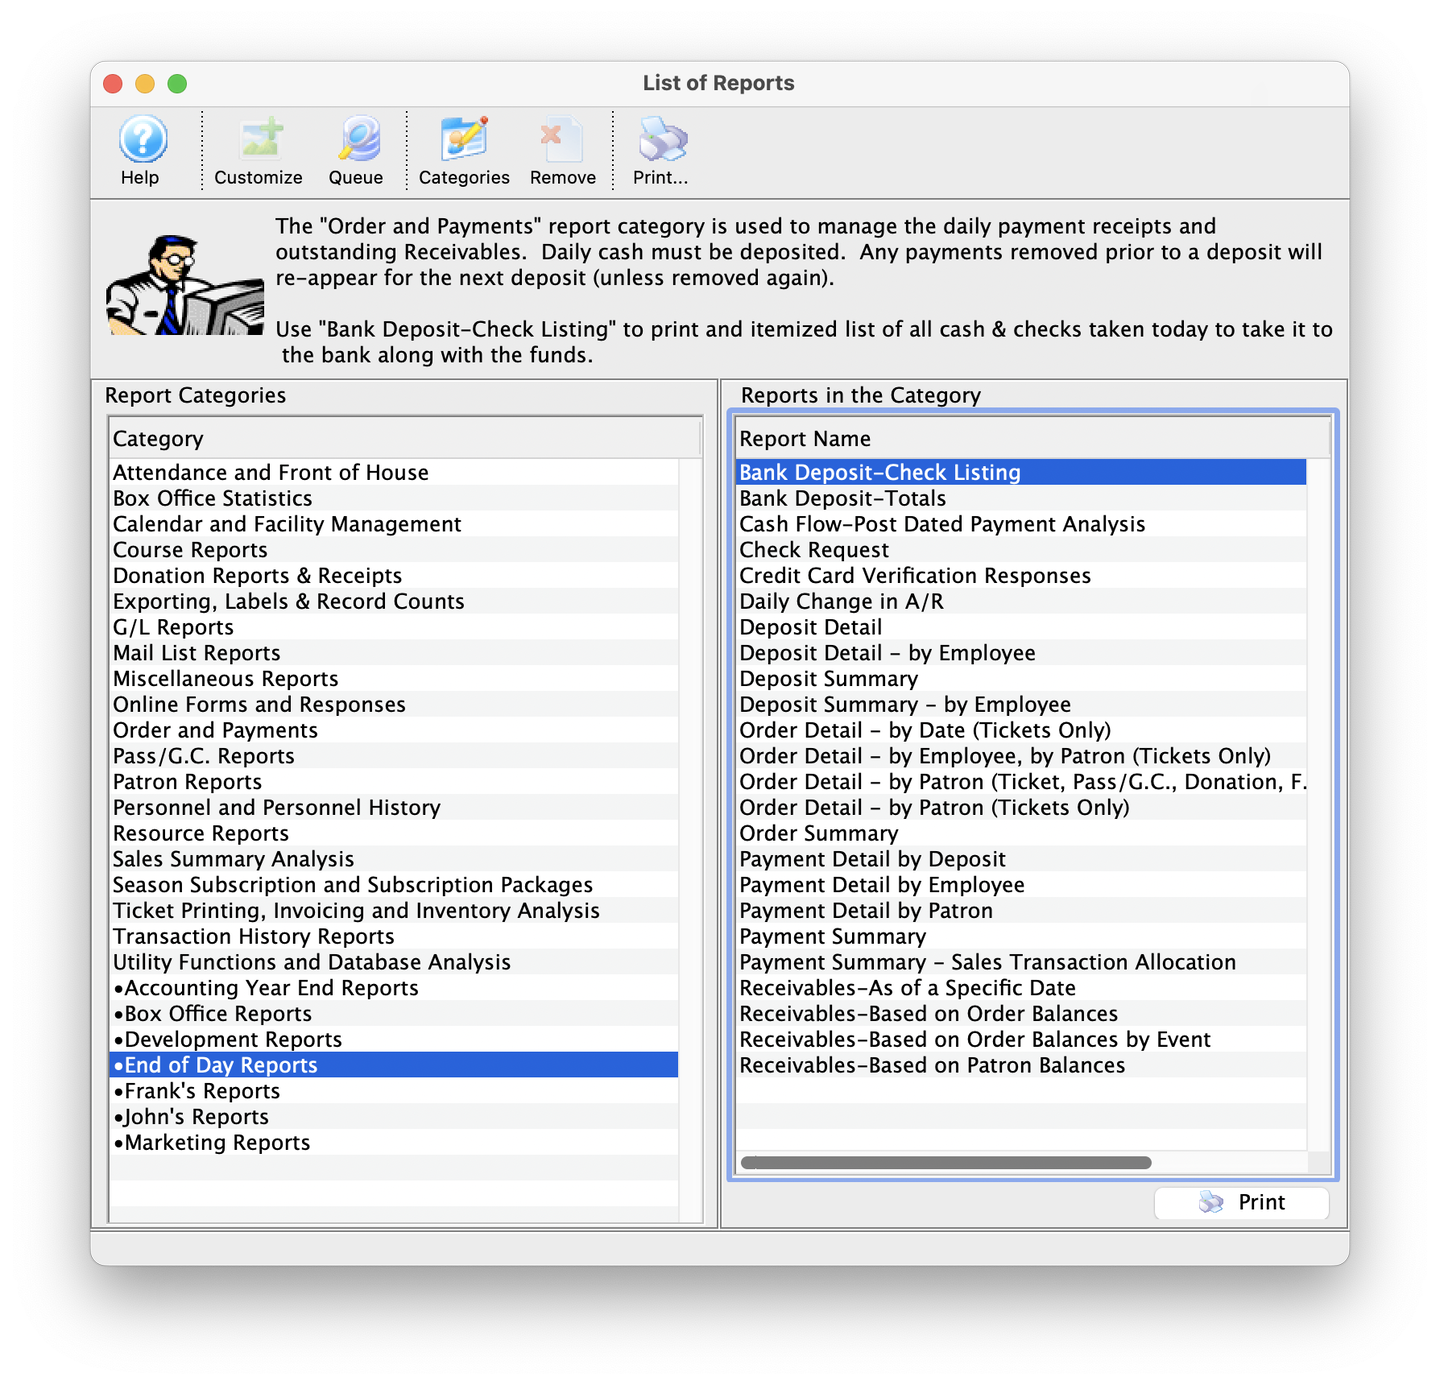
Select the Orders and Payments Category
- Back in the List of Reports window, select the Orders and Payments category
- Look for the Bank Deposit-Check Listing report
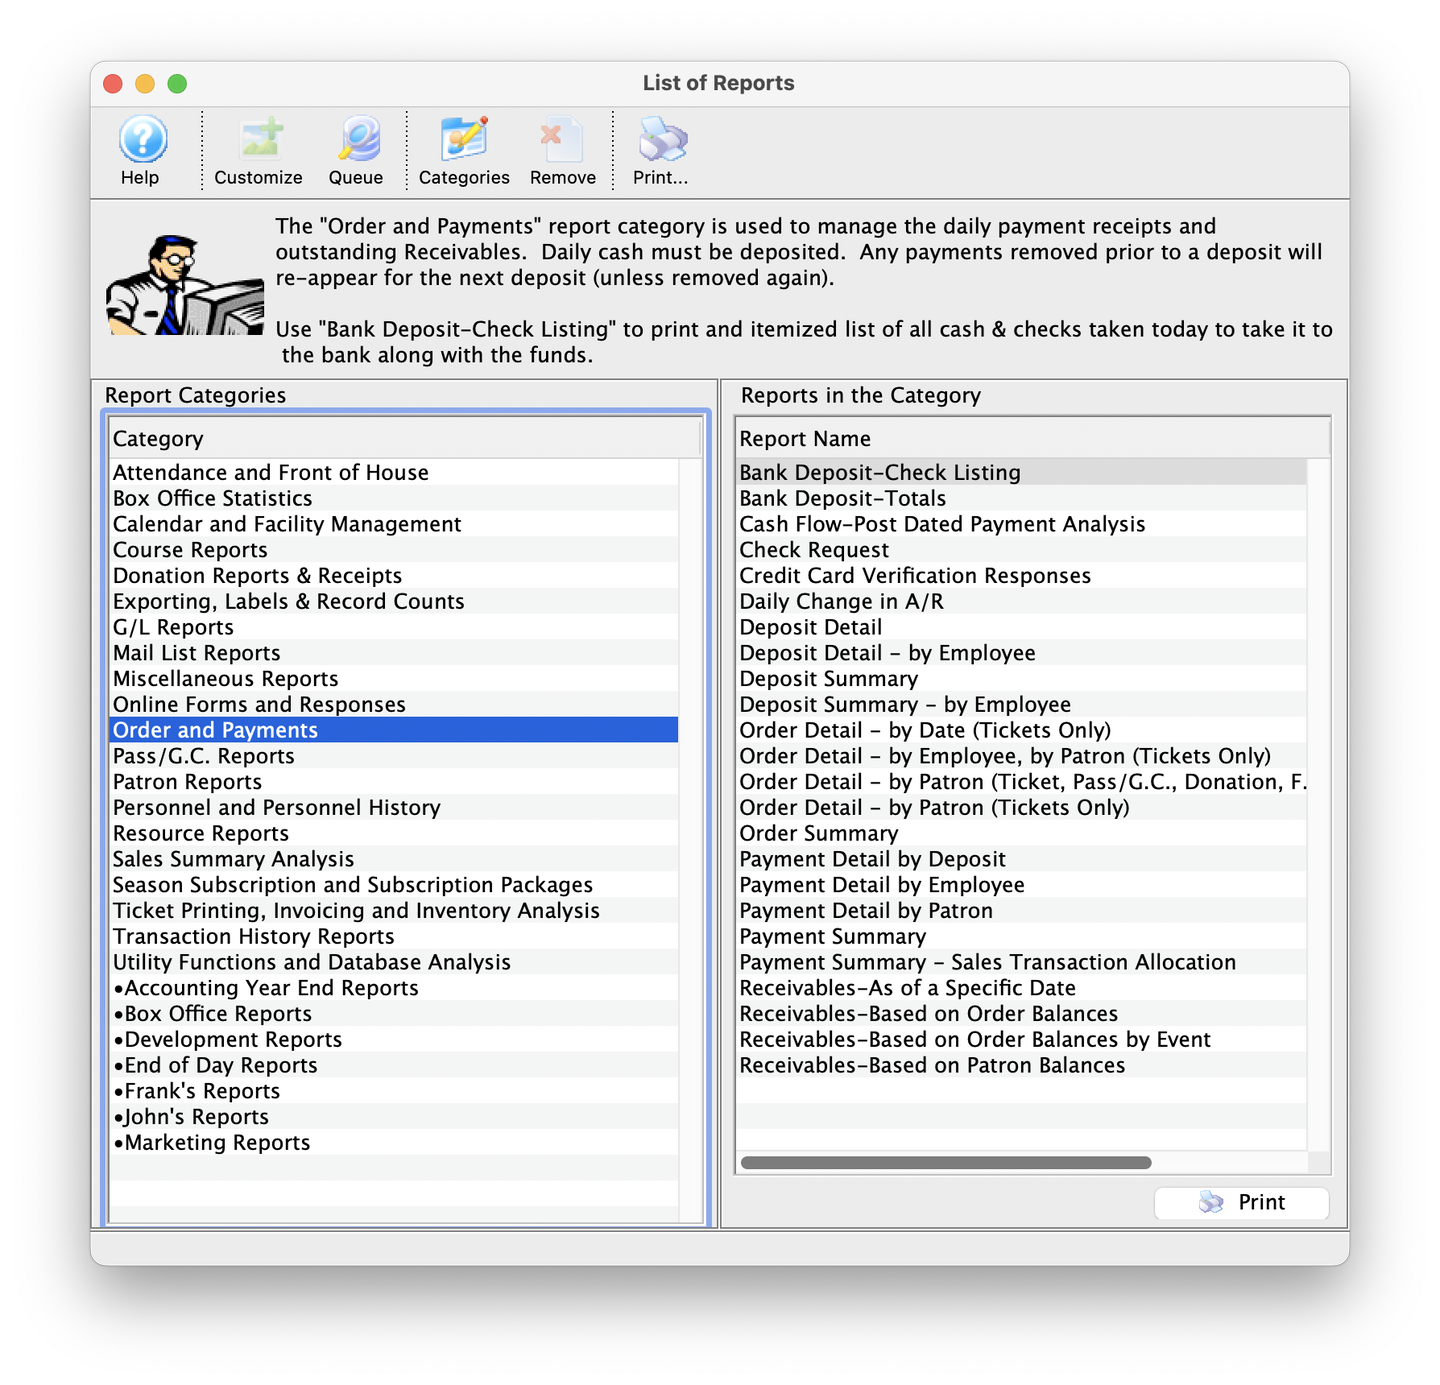
Select the Bank Deposit-Check Listing Report
- Single click the Bank Deposit-Check Listing report
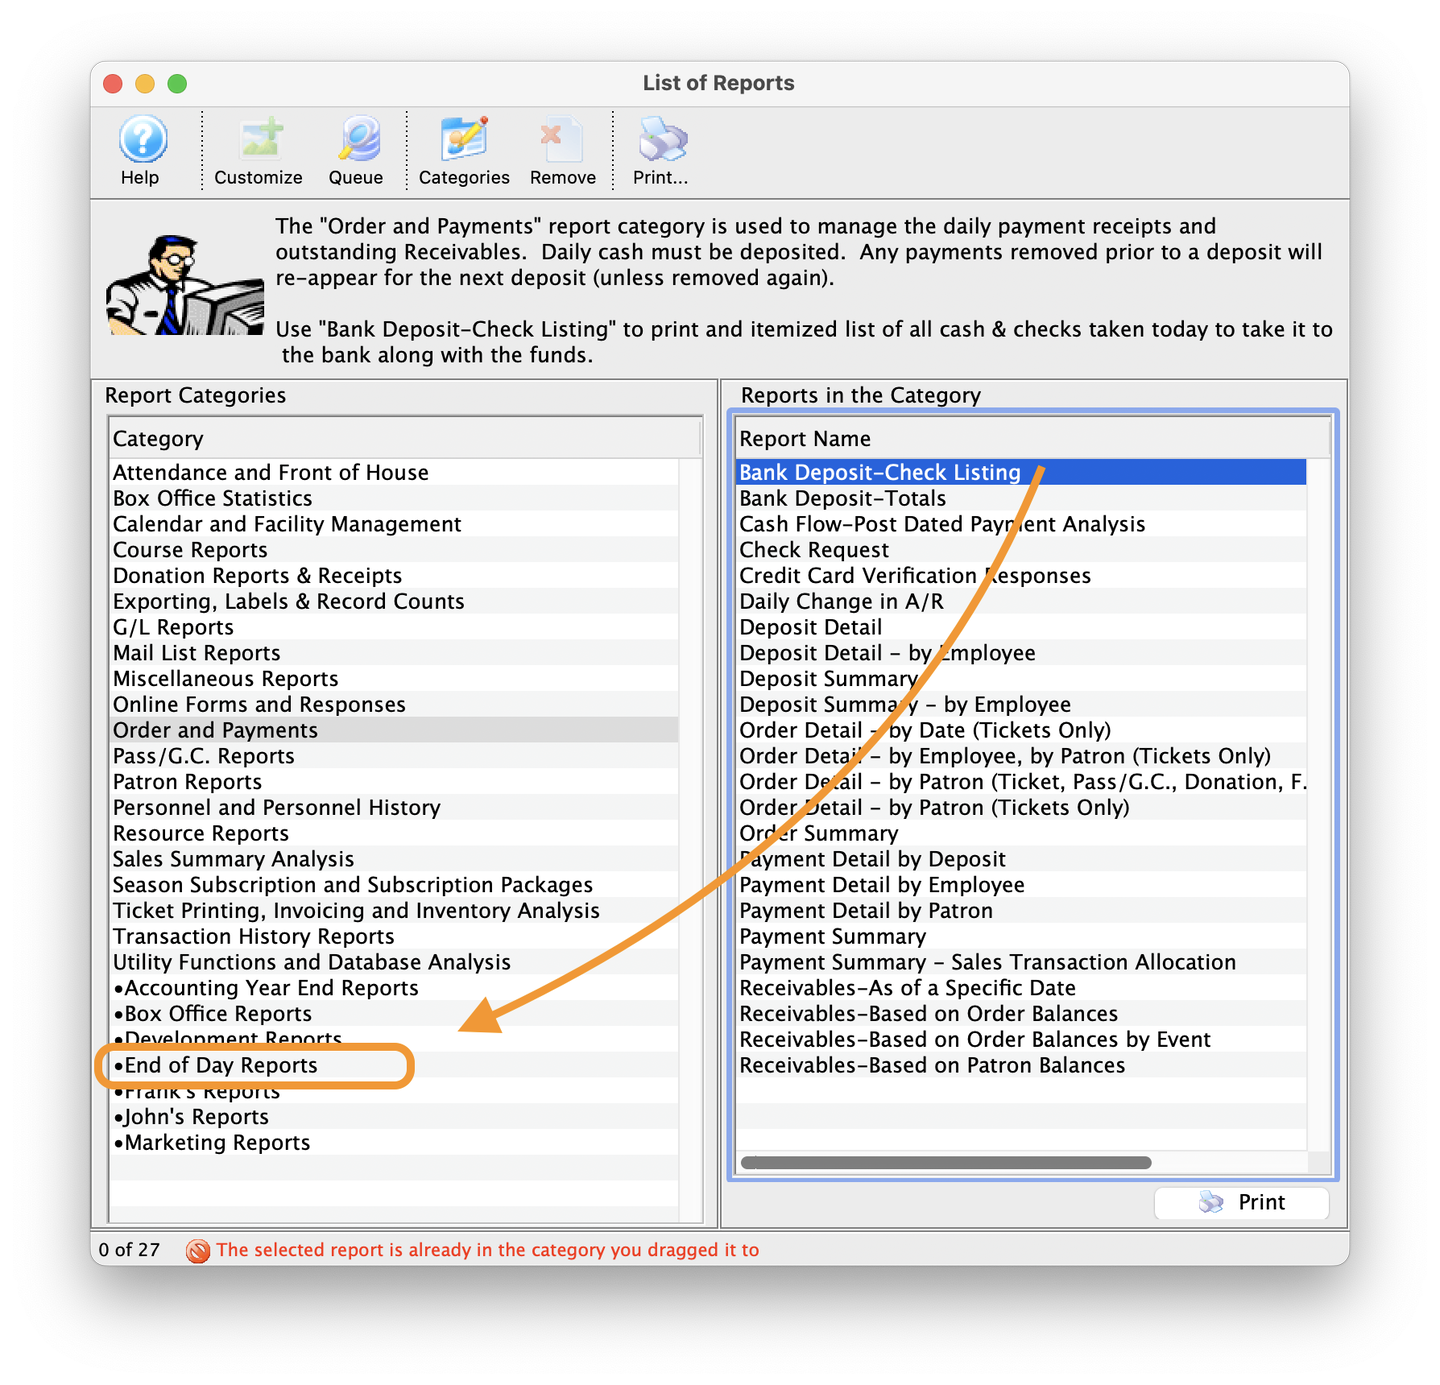
Drag and Drop to the Custom Category
- Holding down the mouse button with the Bank Deposit-Check Listing report highlighted
- Drag the report over top of the End of Day Reports custom category on the left-hand side, IE: Drag and Drop the report on the right-hand side to the custom category on the left-hand side
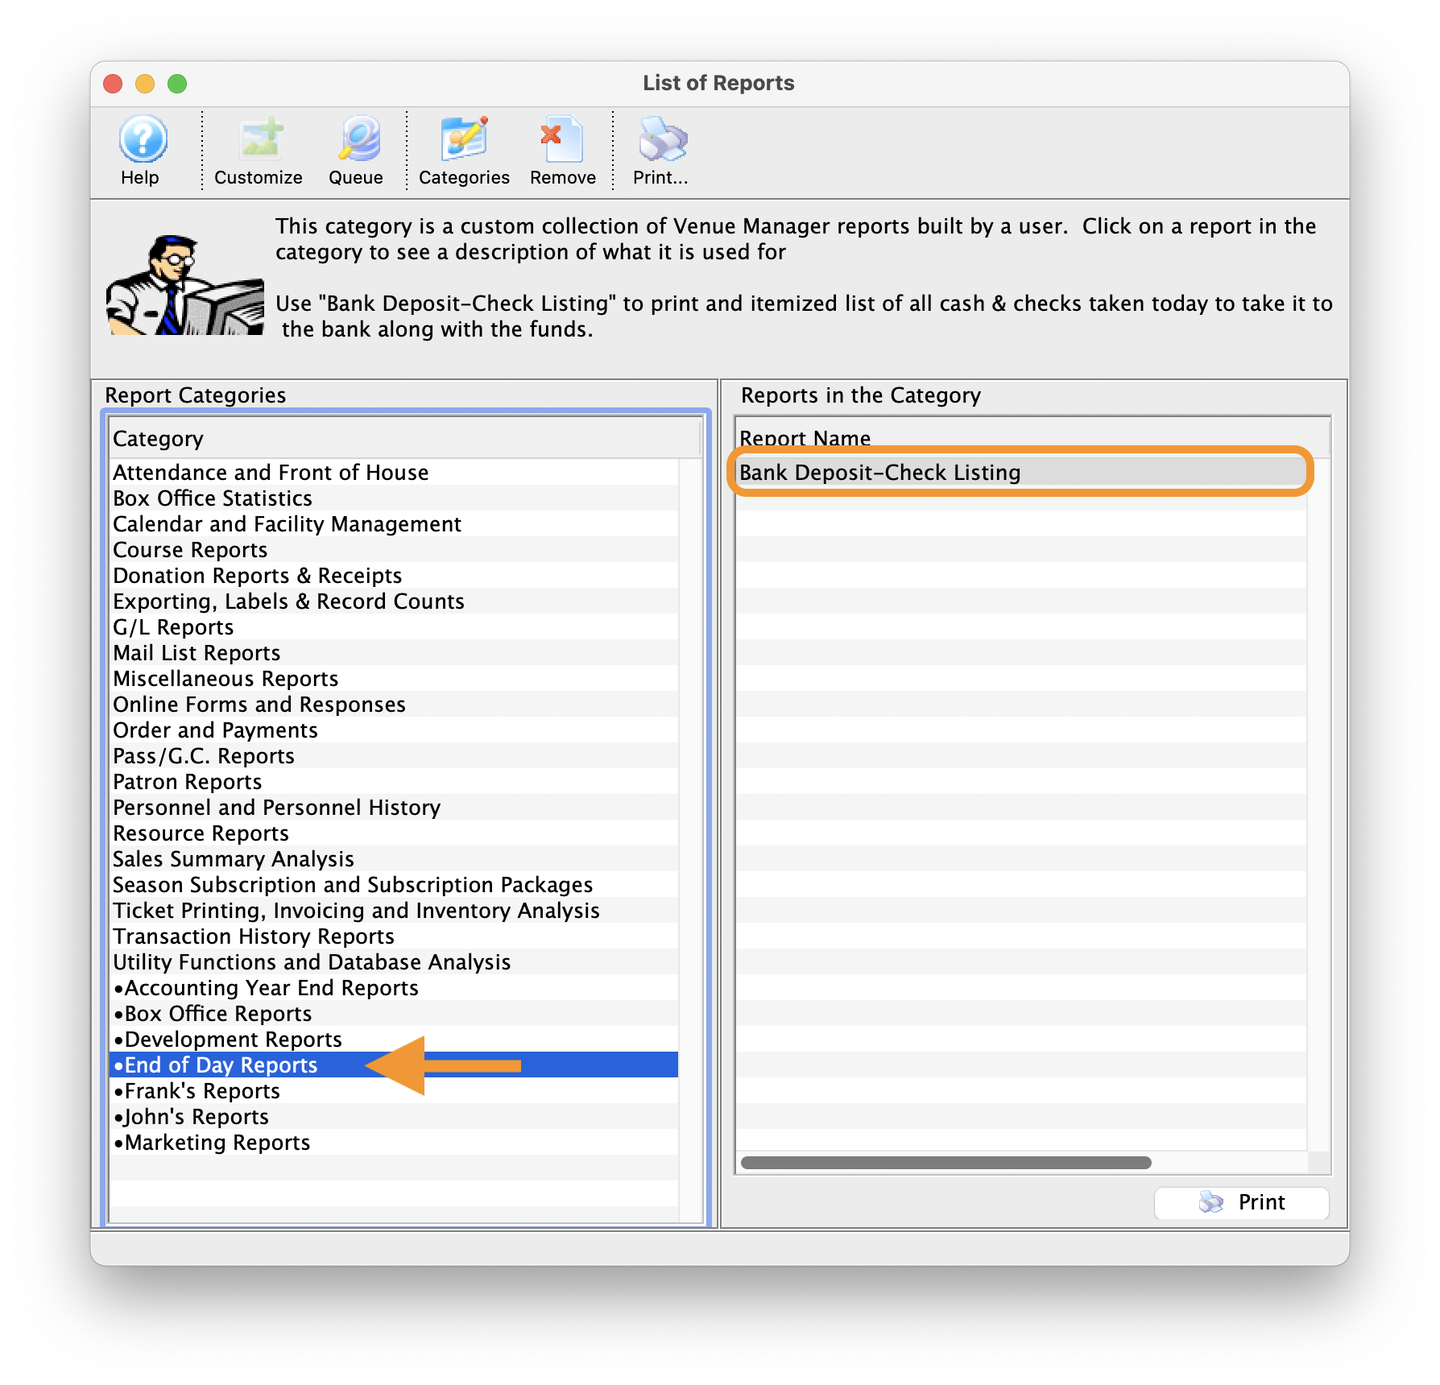
Select the End of Day Reports Custom Category
- If the Drag and Drop was successful, you will now see the Bank Deposit-Check Listing report in the End of Day Reports Custom Category
Congratulations! You've just completed the tutorial for creating a Custom Report Category and populating it with helpful reports for easy future reference.
Invoice Step By Step Top
This section presumes you know how to do both of the following:
- Login into Theatre Manager
- Complete an order with a ticket, donation, or pass in it
It also assumes that you have a completed order in your employee account and that the Company Preferences have the correct company email settings in place.
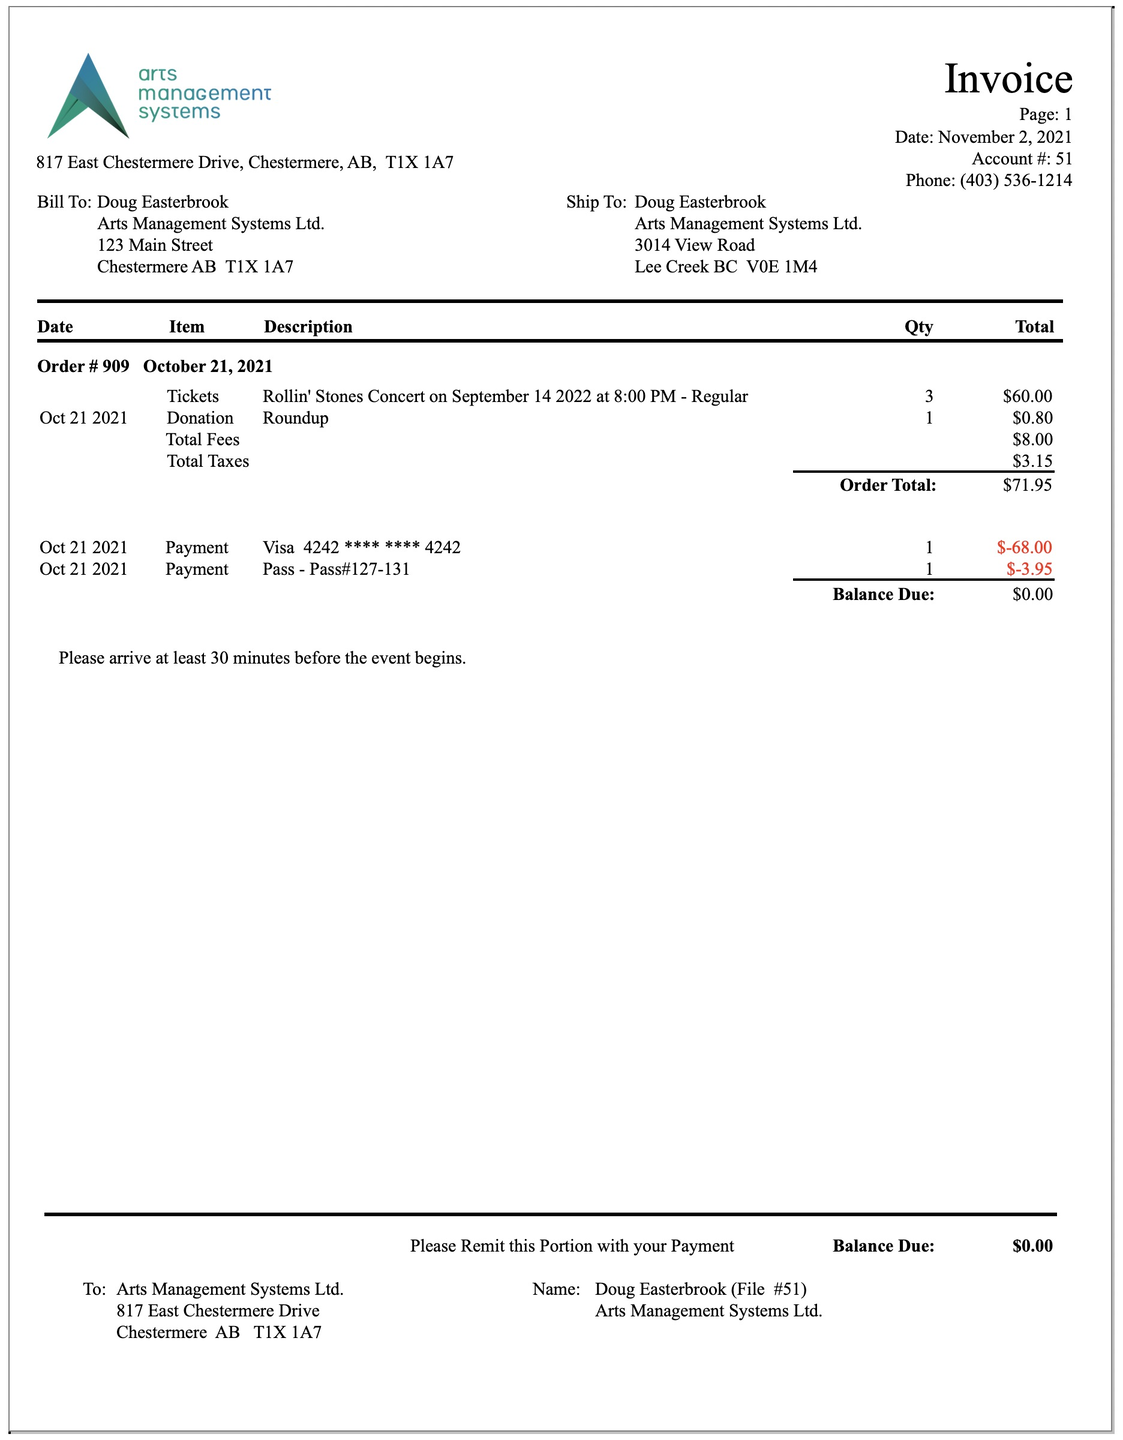
The Print Invoices Report is used to print invoices for an order(s) that has been completed in Theatre Manager. For more details about running invoices, click here.
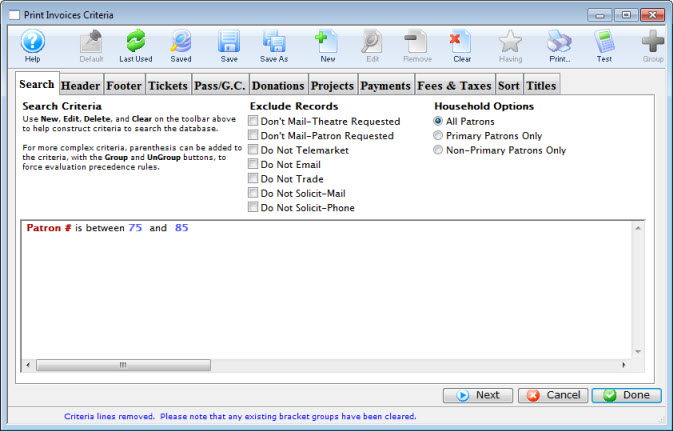
Go to your employee Patron Window >> Orders Tab and single-click on a row to select a completed order. Make sure it contains at least one ticket, donation, or pass. Click the Invoice button. The Invoice Build Options opens with a line of criteria ALA order # is one of XXX.
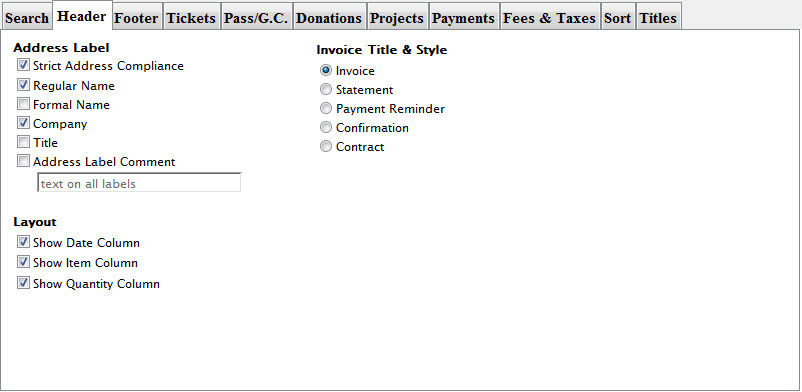
Make adjustments as necessary and then click the Next button to move to the Footer Tab.

Make adjustments as necessary and then click the Next button to move to the Tickets Tab. To have the comments print, do all the following:
- Enable the Print Tear Off Section checkbox
- Enter a Performance Start Warning Time greater than 0
- Use the Additional Comments dropdown to choose the desired custom comment
- Make any desired one-time edits to the Additional Comments textbox
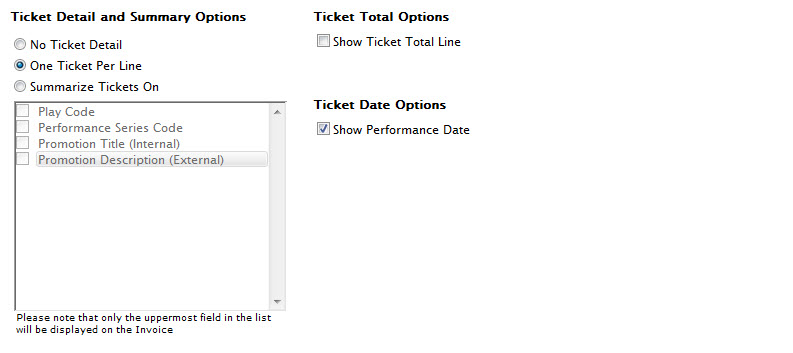
Make adjustments as necessary and then click the Next button to move to the Pass/G.C. Tab.
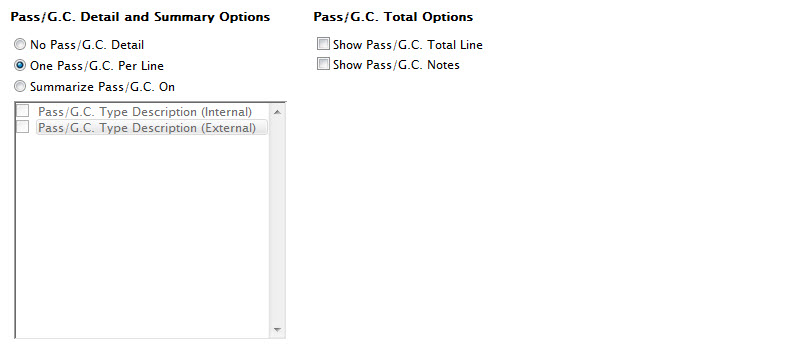
Make adjustments as necessary and then click the Next button to move to the Donations Tab.
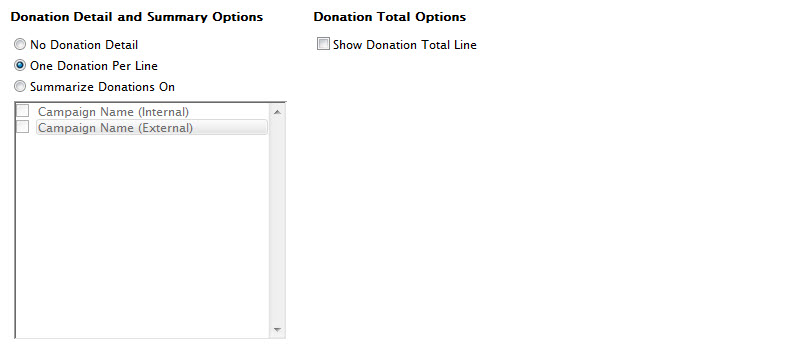
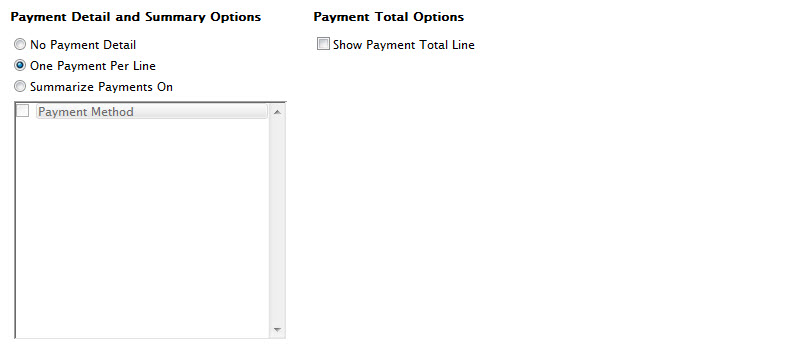
Make adjustments as necessary and then click the Next button to move to the Payments Tab.
Make adjustments as necessary and then click the Next button to move to the Fees & Taxes Tab.

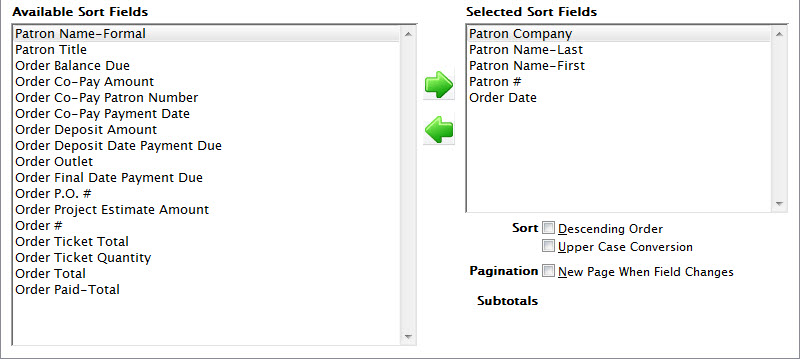
Make adjustments as necessary and then click the Next button to move to the Sort Tab.
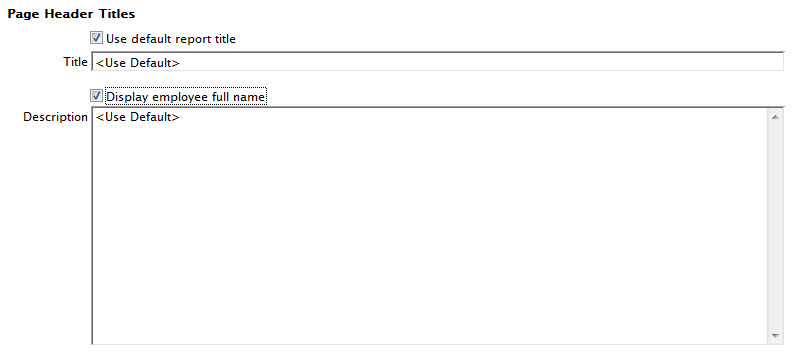
Make adjustments as necessary and then click the Next button to move to the Titles Tab.
Make adjustments as necessary and the click the Done button to generate the invoice.

Note that the From field defaults to Company Preferences and the To field automatically pulls the patron's primary email (your employee account email in this case). Add some text manually in the Body field. (We are not using pre-built email templates for this tutorial.)
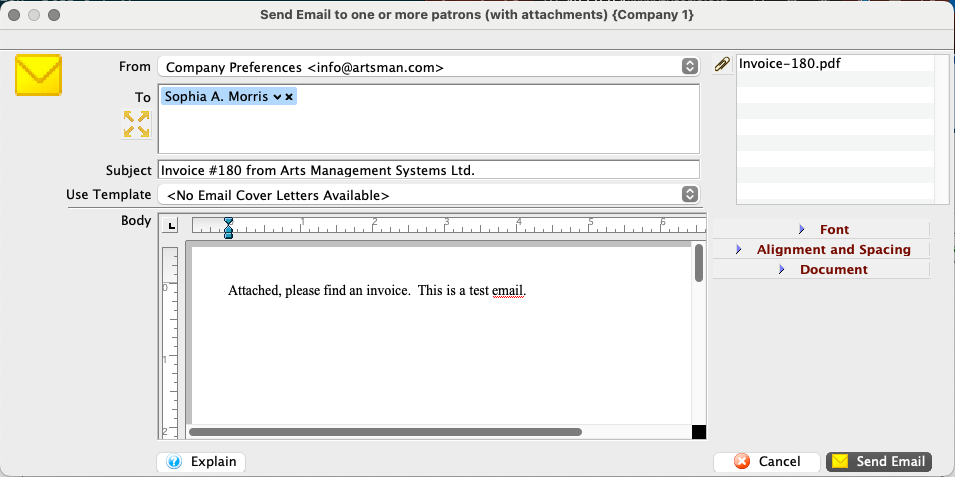
Click the Send Email button, which will generate the email and close this window.

Close the Invoice Builder Window and return to your employee account.
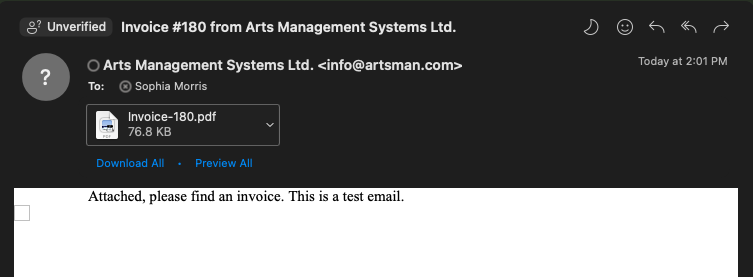
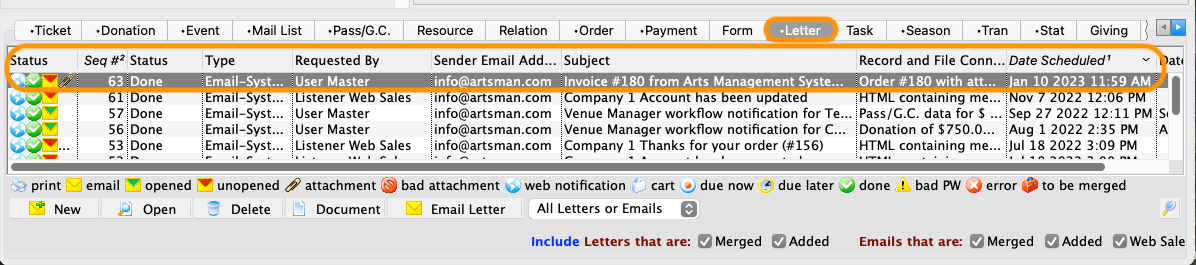
Go to your patron account's Letter Tab and find the newly generated invoice email with today's date.
After a couple of minutes, go to your employee email reader and find the message with attached invoice document.