One Time Donation Top
New Donation Window

Processing a one-time donation in Theatre Manager involves 3 basic steps:
- Select a Donation Campaign
- Enter the donation amount
- Processing the payment
The following tutorial demonstrates how to enter a one-time donation into the system.
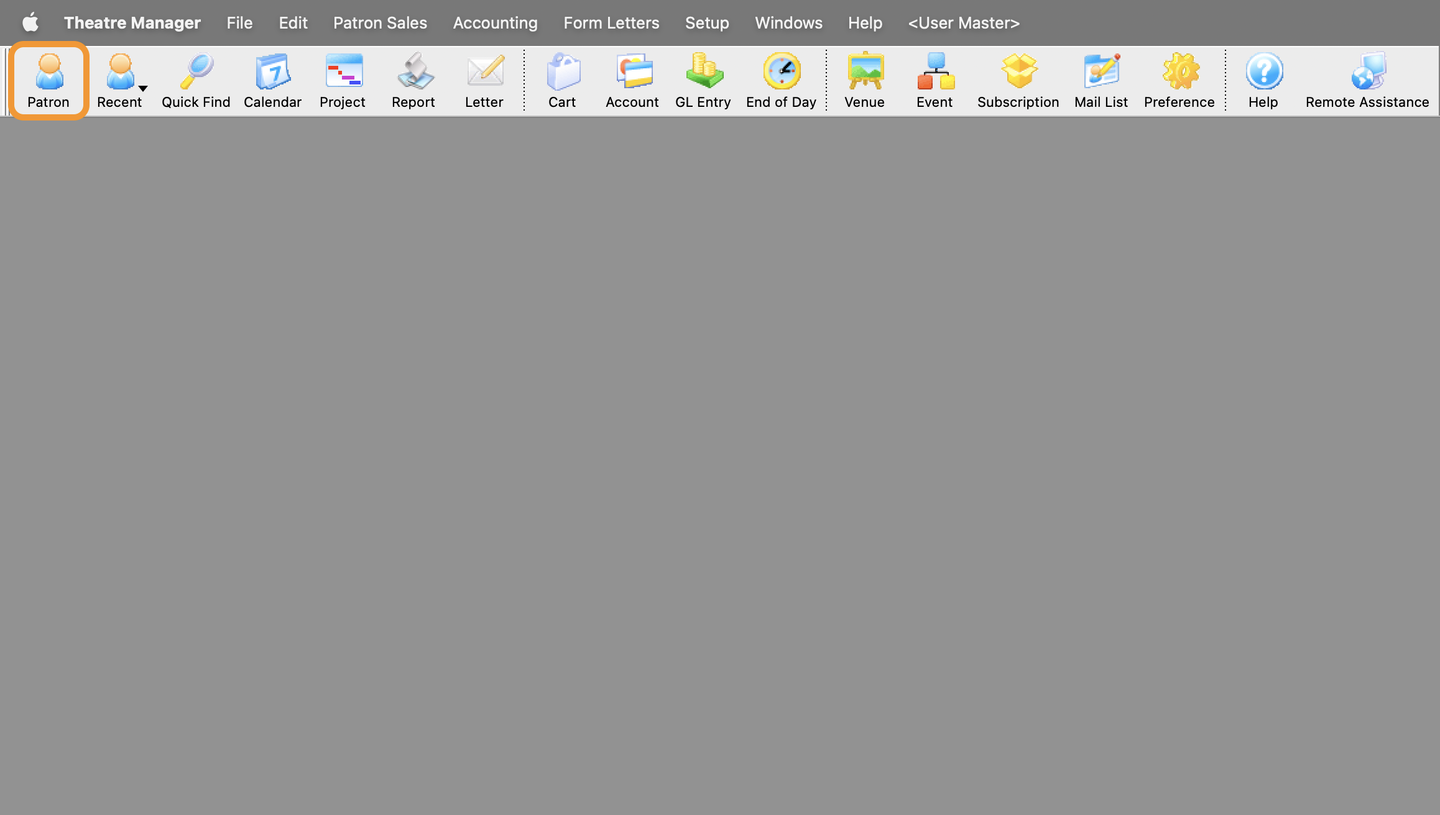
Open the Patron Lookup Window
- Click the Patron Lookup button from the main toolbar
Patron Lookup
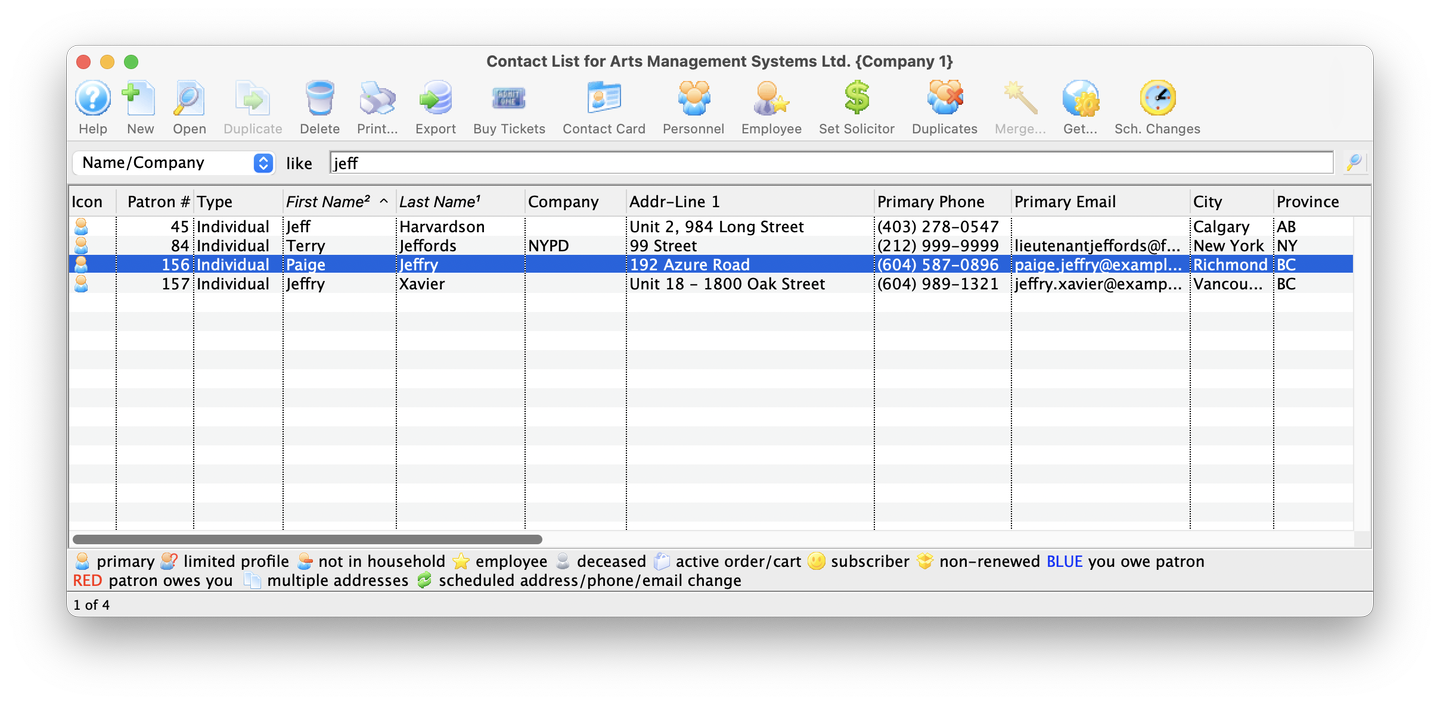
Search for the Patron
- Use the Patron Lookup window to search for the patron in the database
- Double-click to open up the Patron Record
Patron Search
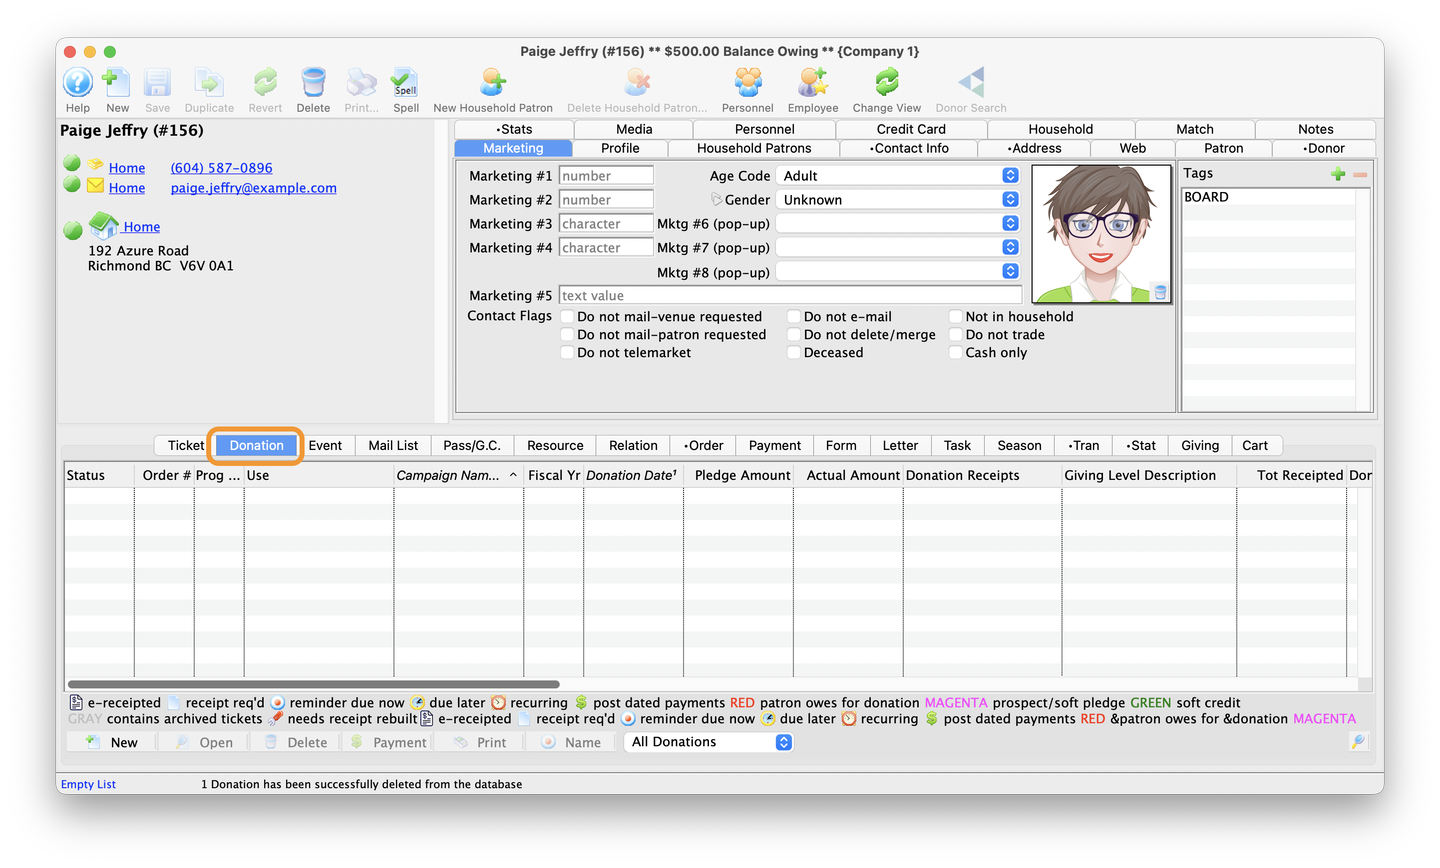
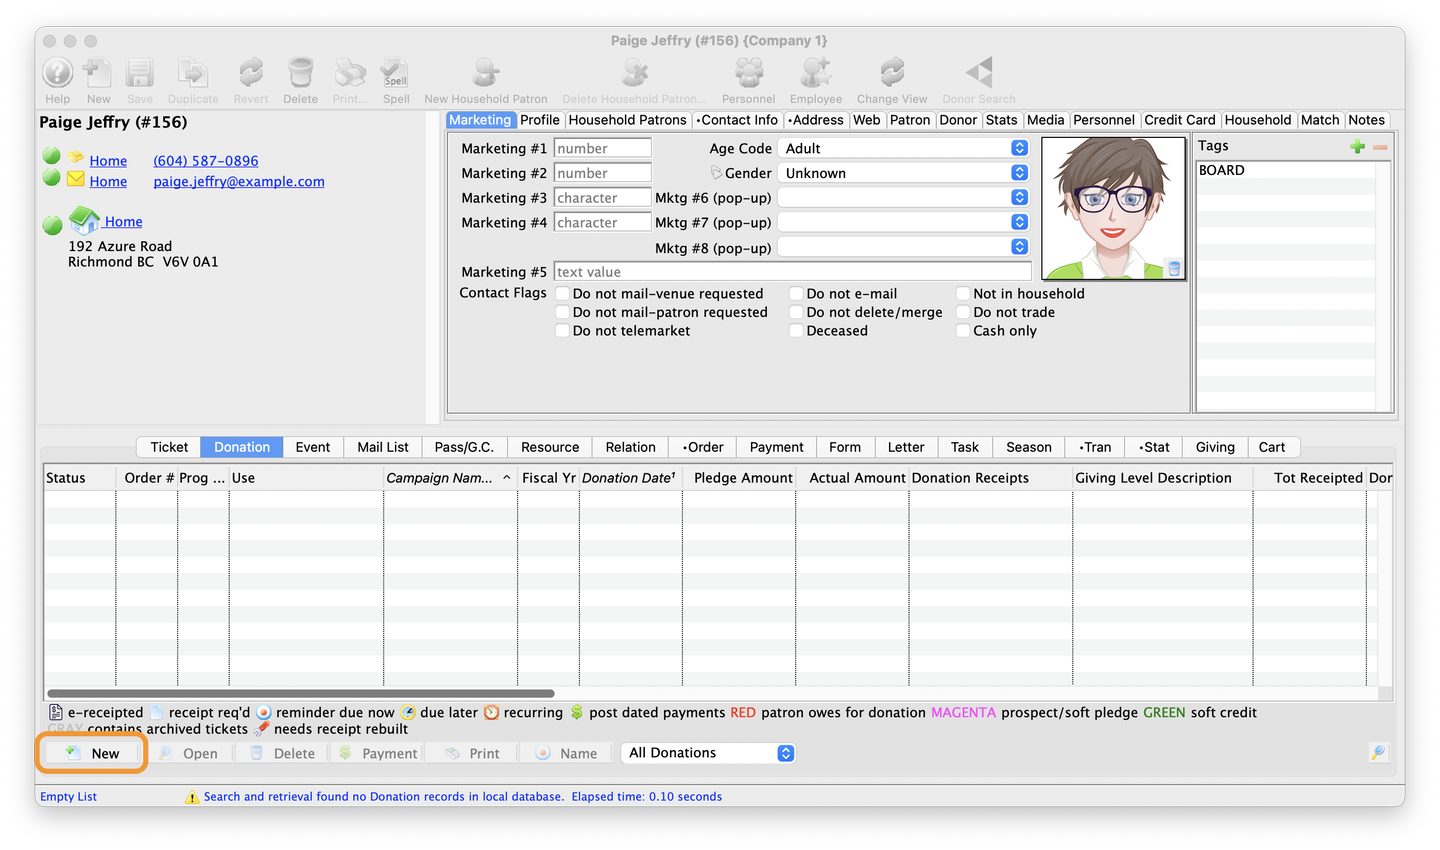
Click on the Donation Tab inside the Patron Record
- From the patron record, select the Donation tab
Donation Tab
Click New
- From the Donation tab, click the New button in the lower row of menu options
- This will open up the Donation Detail window
New Donation Button
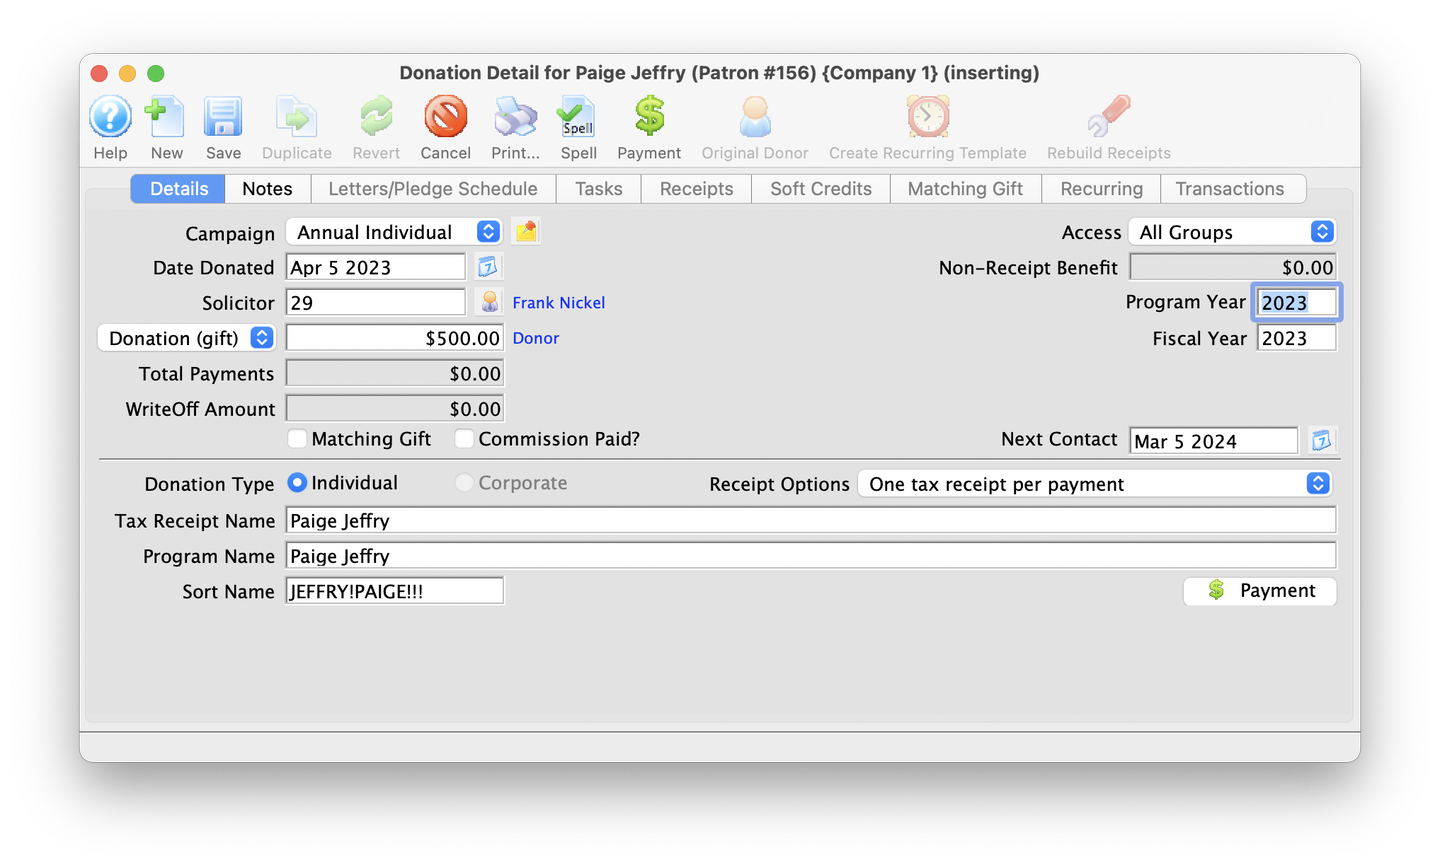
Select Donation Campaign
- From the Donation Details window, select a Donation Campaign from the pull down menu
- In this example we've selected the Annual Individual campaign
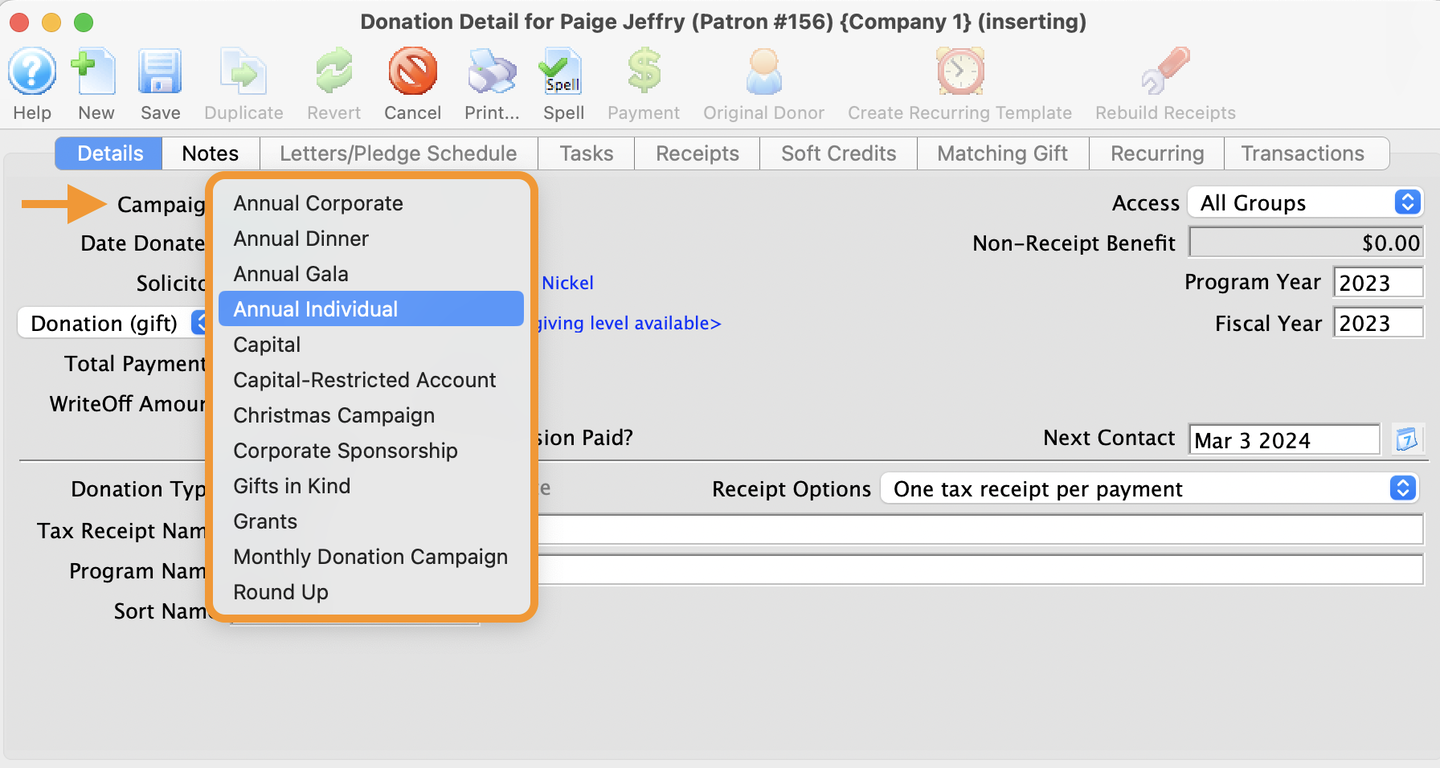
Select Donation Campaign
Enter Donation Amount
- Enter a donation amount in the Donation Gift field
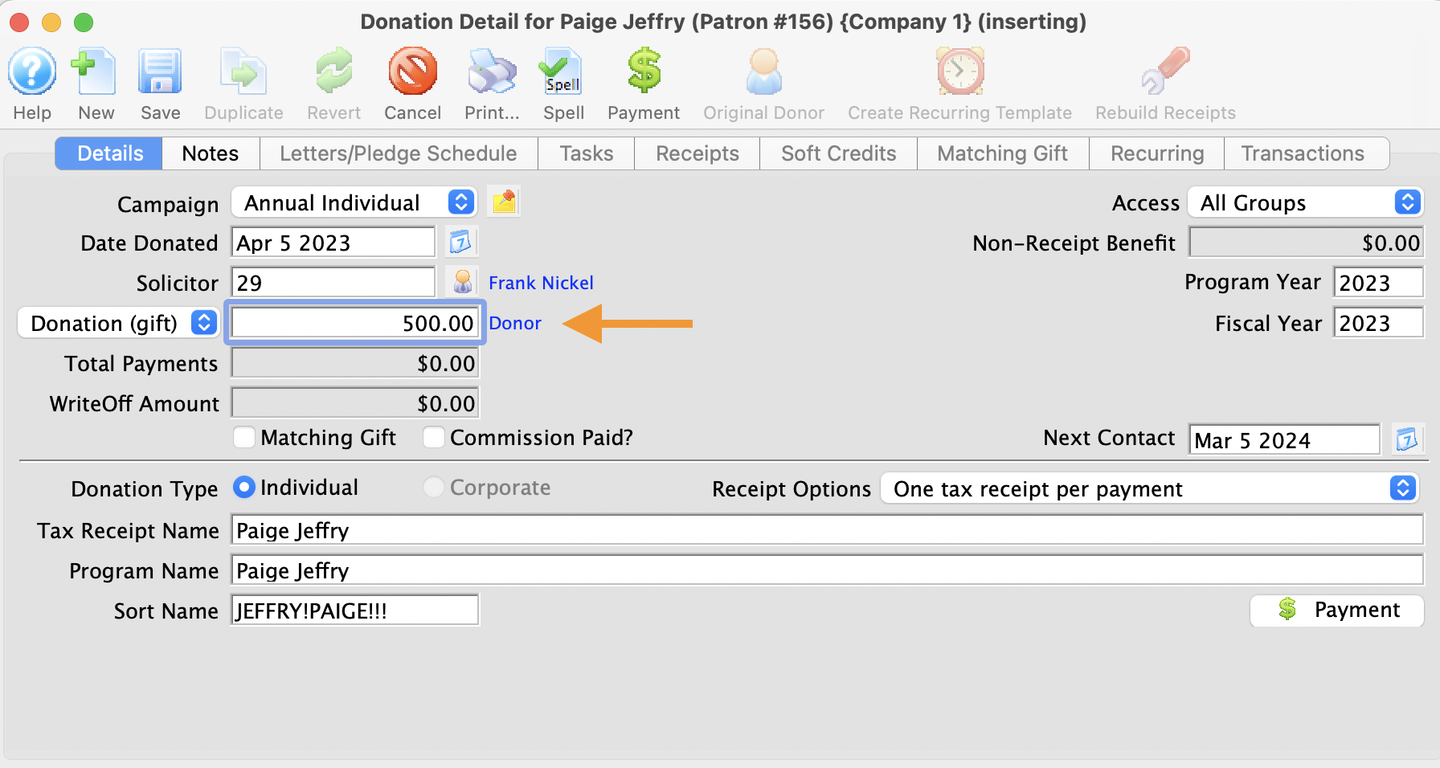
Enter Donation Amount
Click Payment
- From the Donation Details window, click on either one of the Payment buttons
- This will open up the Order/Payment Details window
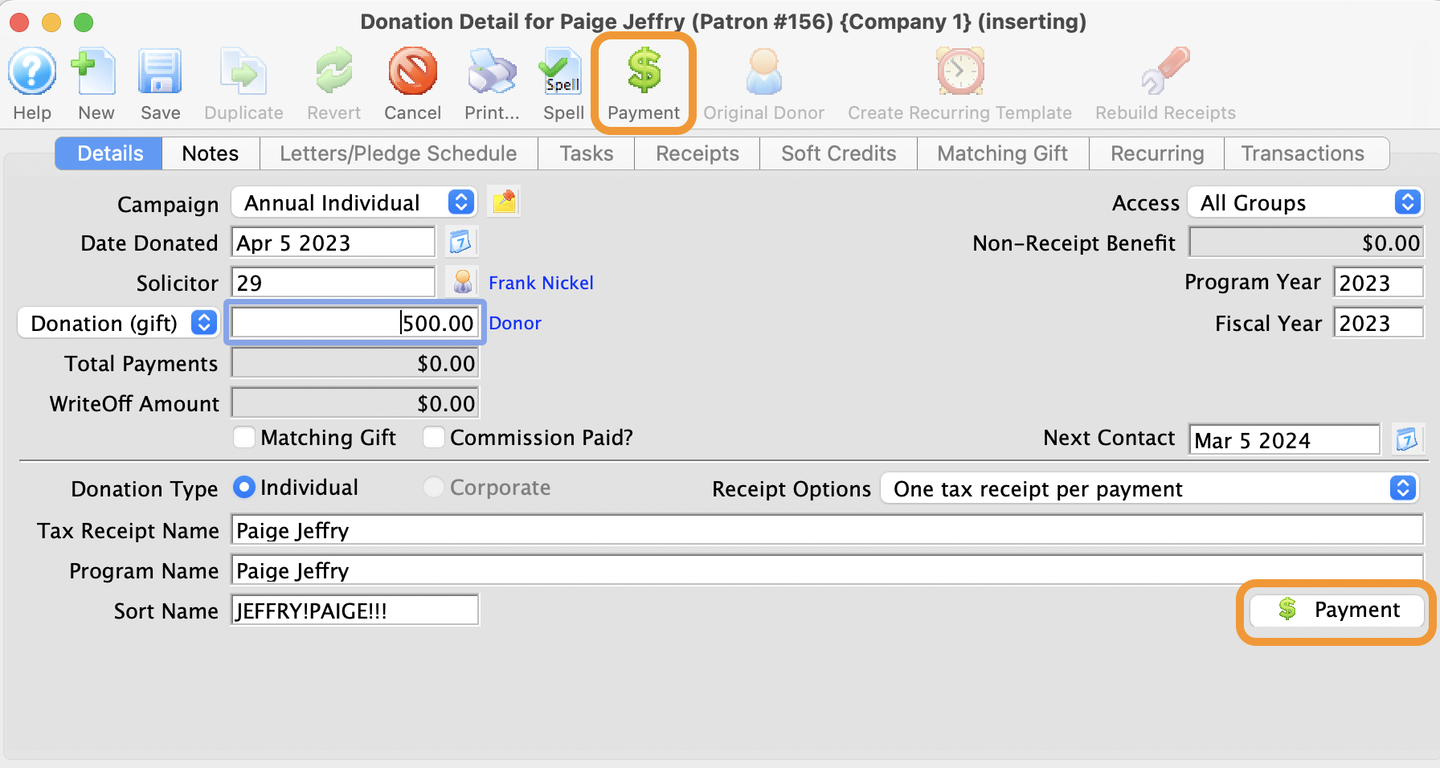
Payment Buttons
Select Payment Method
- Select the Payment Method from the pull down menu
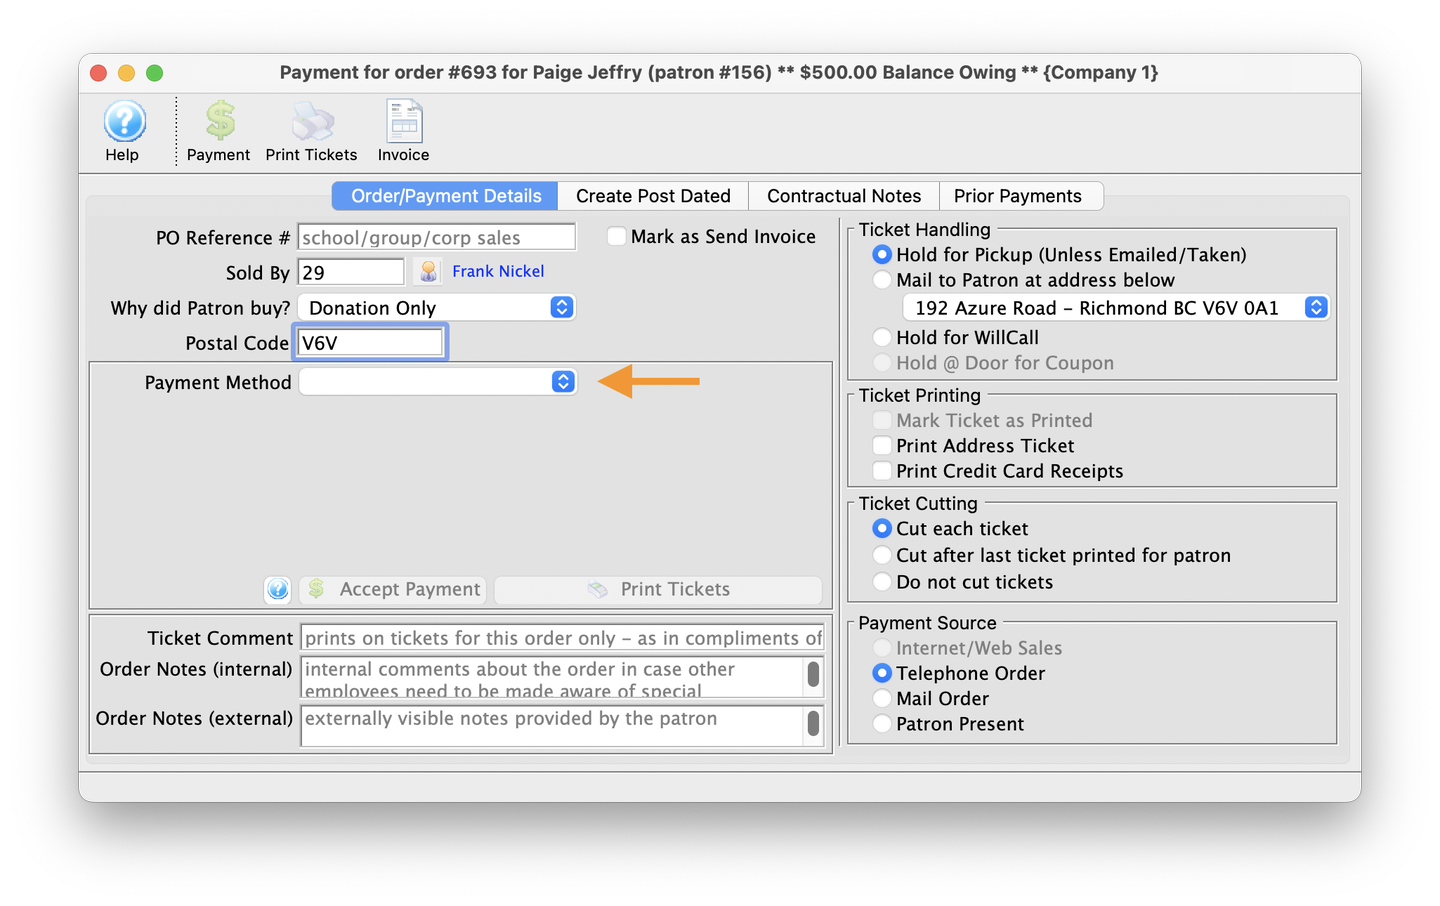
Select Payment Method
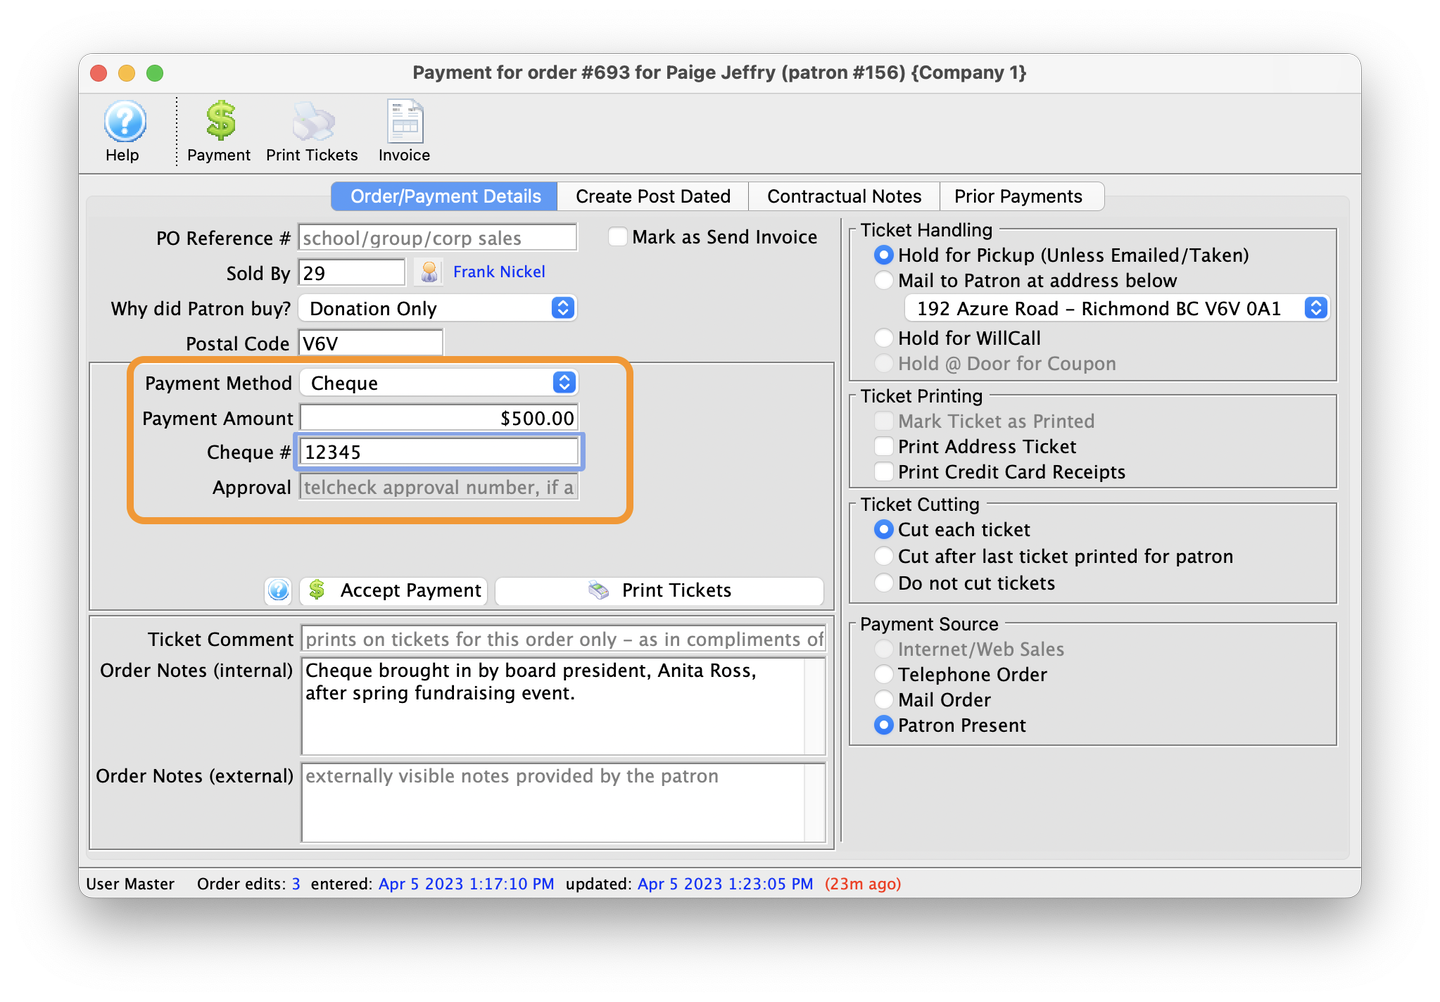
Fill In Appropriate Payment Details
- After selecting the appropriate Payment Method, fill in the required details
- For our example, we're using the Cheque/Check option, which requires a payment amount and Cheque/Check #
Enter Payment Details
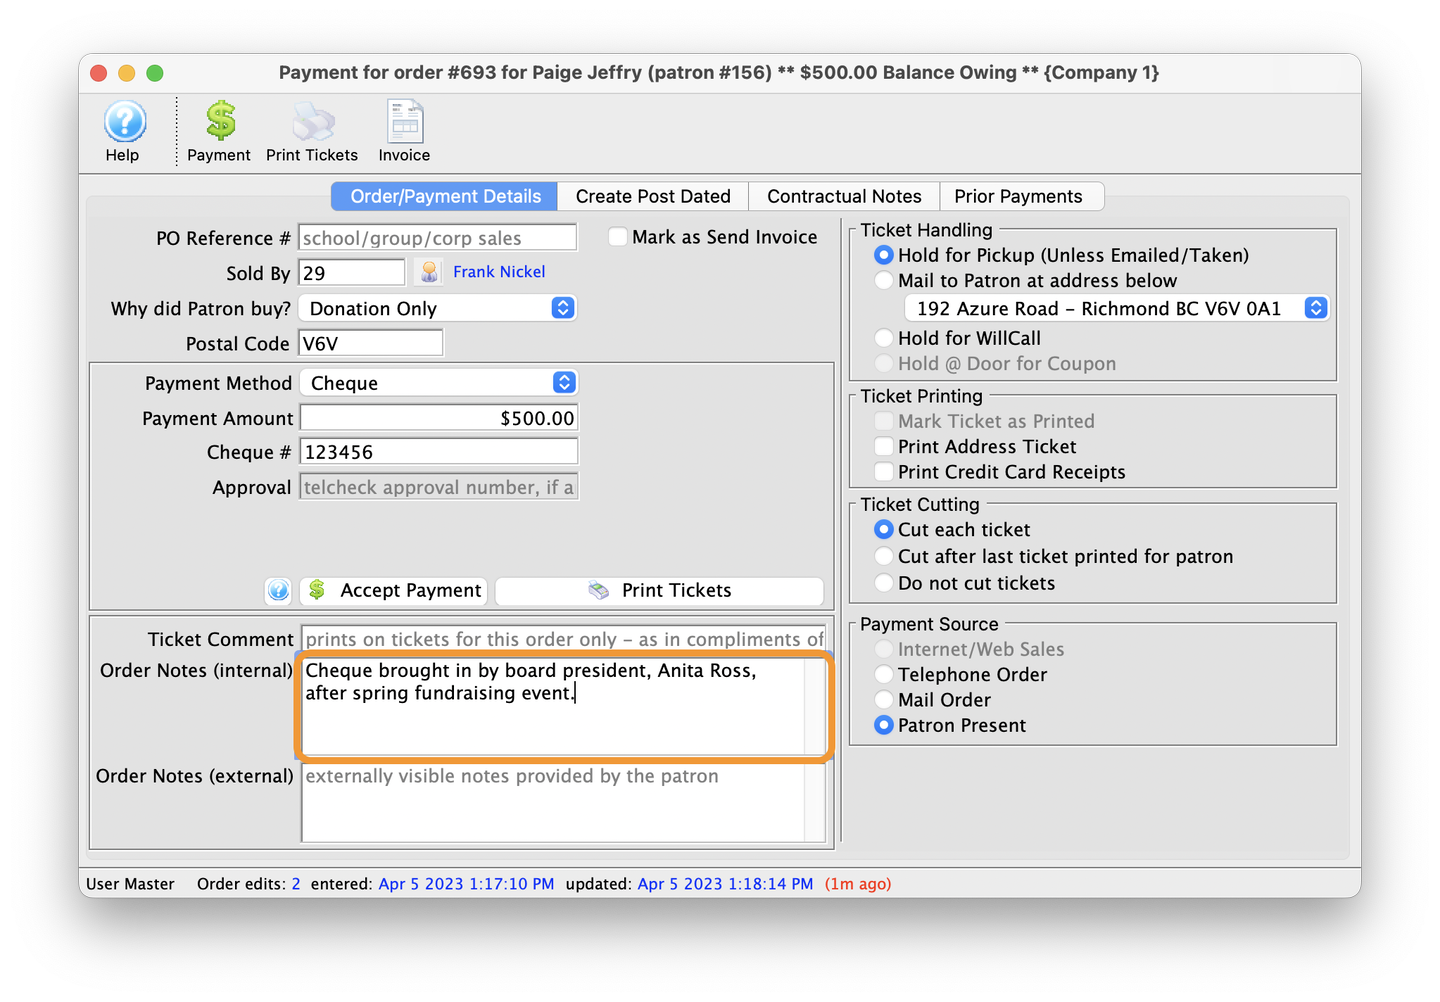
Enter Appropriate Order Notes
- If appropriate, enter any Internal Order Notes for future reference
Internal Order Notes
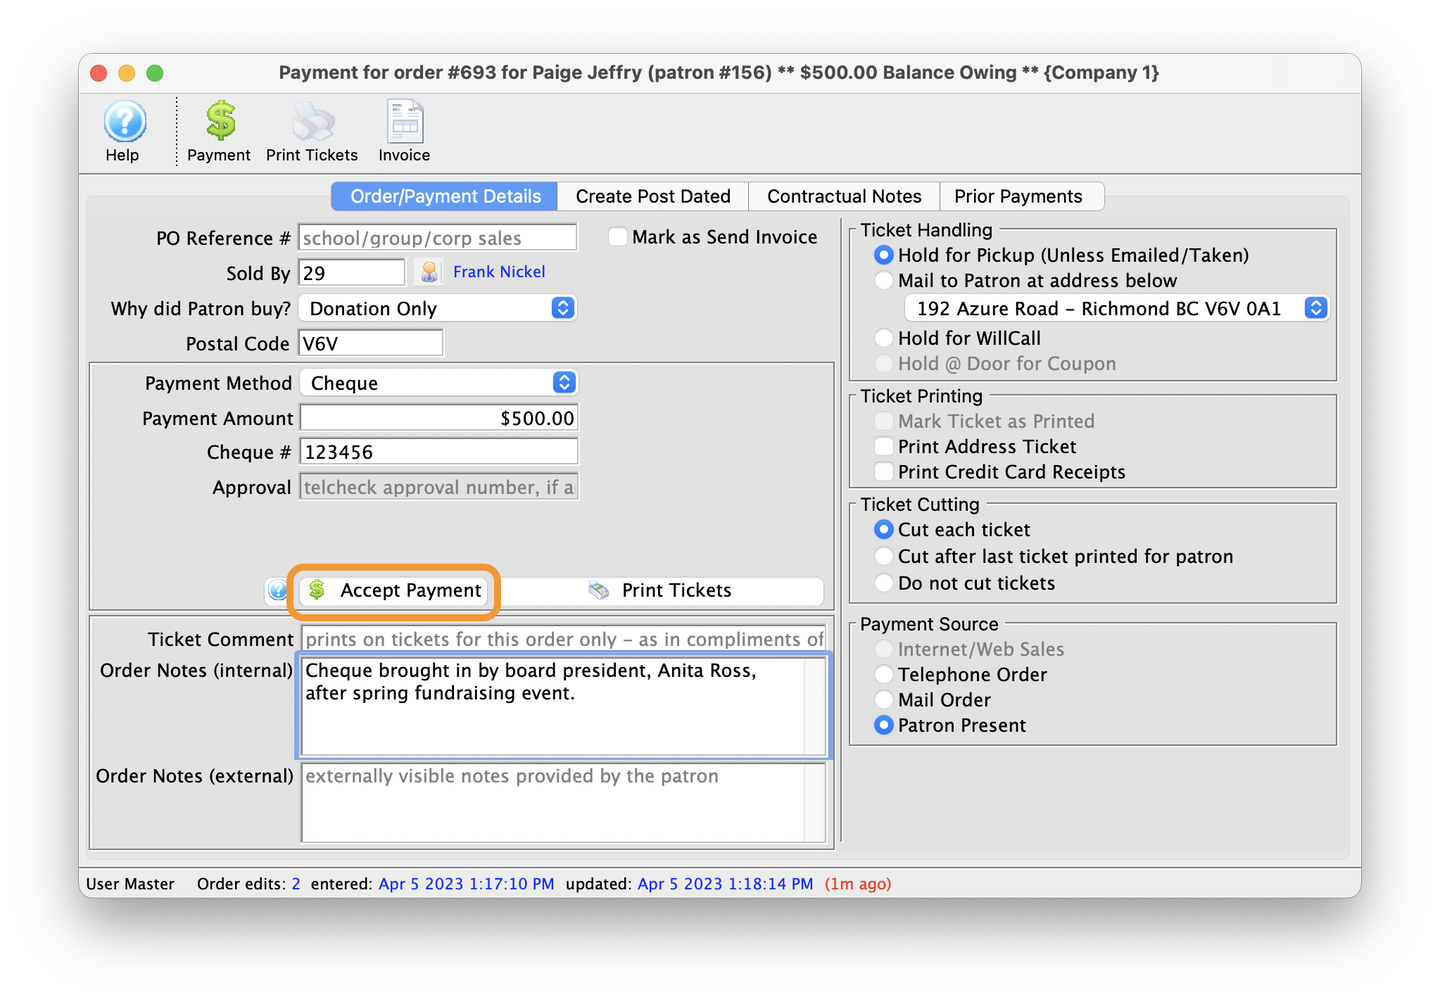
Click Accept Payment
- When ready, click Accept Payment to process the payment
- This will take you back to the Donation Details window
Accept Payment
Review Donation Details
- On the Donation Details window notice the Payment Amount is now filled in
- Close the Donation window

Review
Donation Tab With A New Donation
- Back on the Donation tab of the Patron Record you can now see the new donation for $500
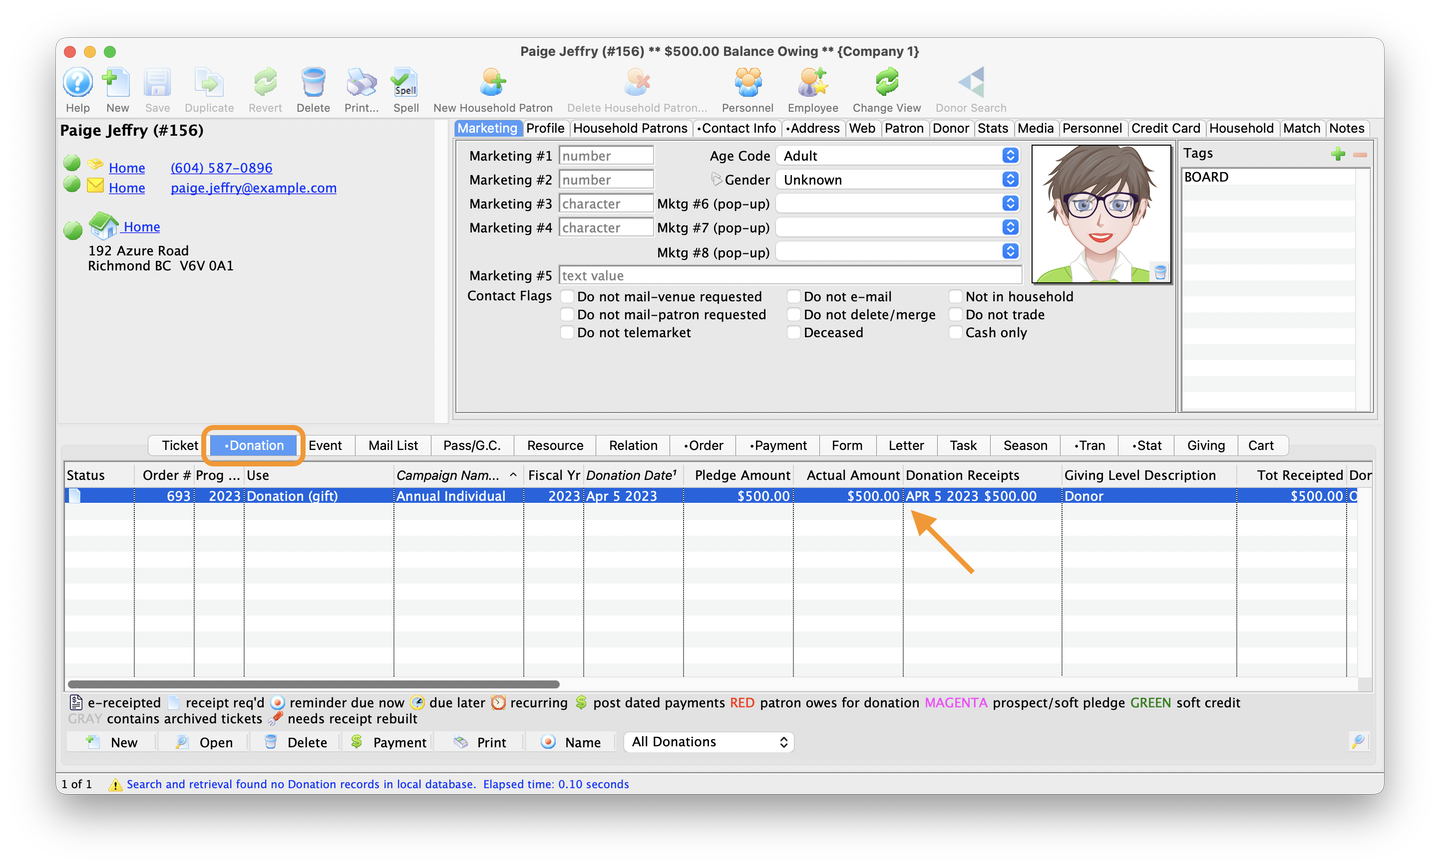
Donor Tab
Congratulations! You've just completed the tutorial for entering a new donation in Theatre Manager.
Recurring Donation Top
Recurring Donation Window
Setting up a recurring donation in Theatre Manager involves 4 basic steps:
- Open the Recurring Templates module
- Assign the Patron and Recurring Gift Amount
- Set the donation frequency
- Complete the Credit Card Payment information
The following tutorial demonstrates how to enter a recurring donation into the system.
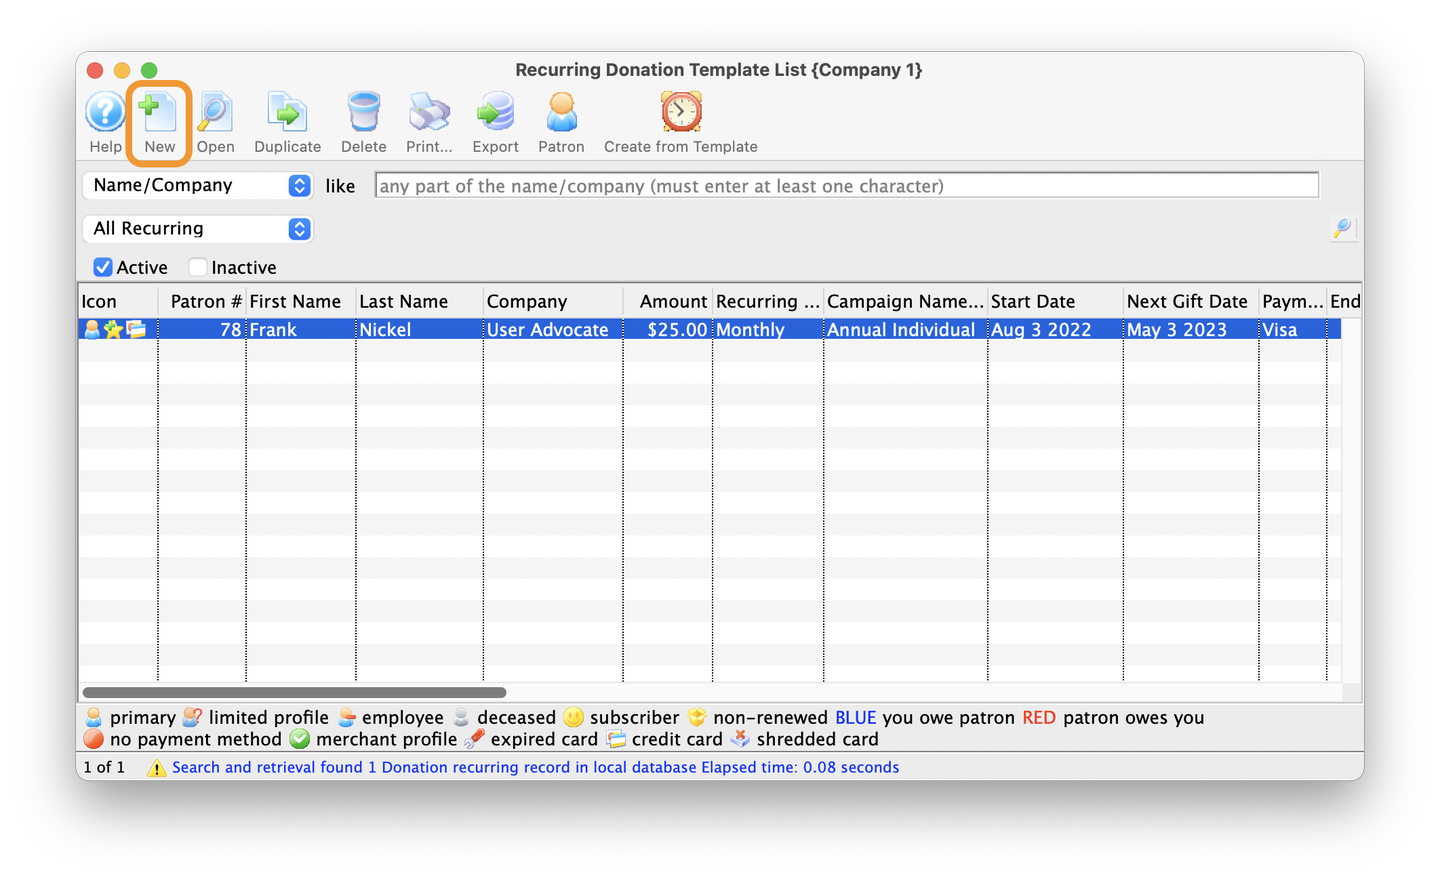
Open the Recurring Donation Templates Window
- From the File Menu select Setup -> System Tables -> Recurring Donation Templates
- This will open the Recurring Template List window
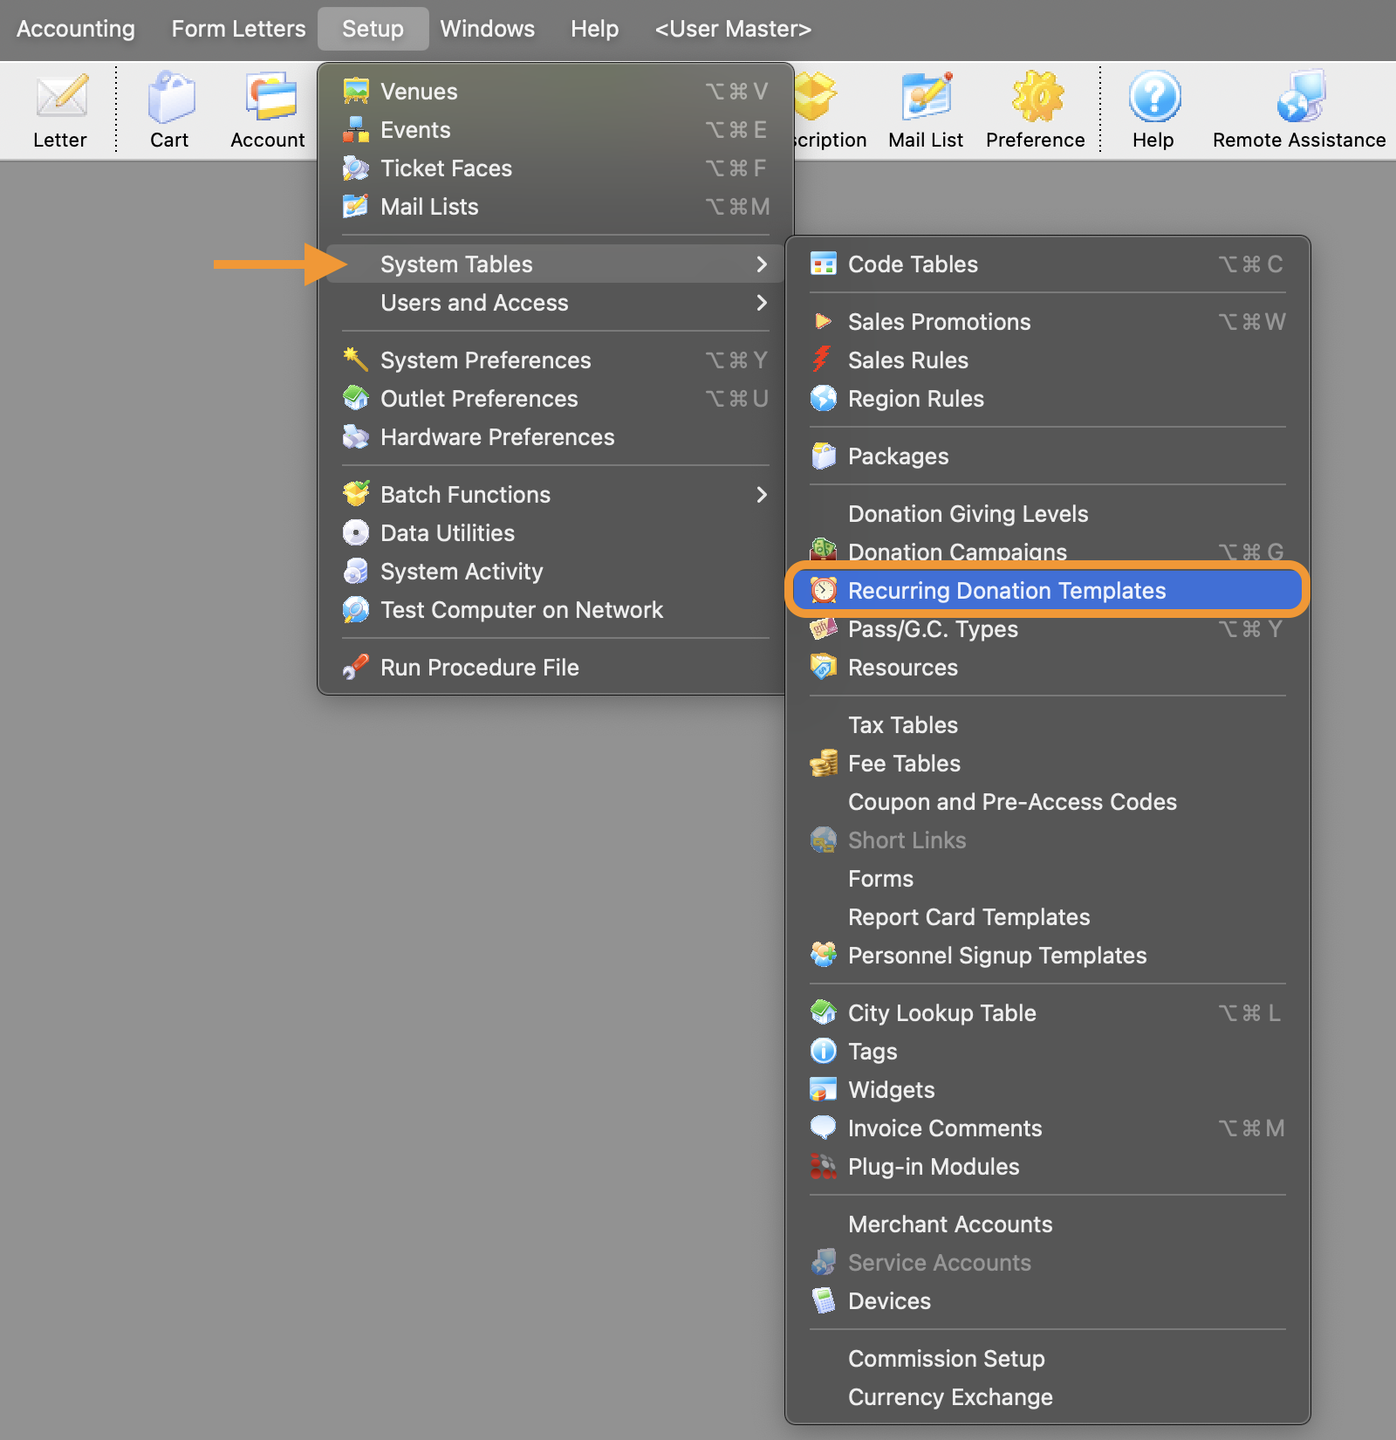
File Menu
Select the New Button from the Toolbar
- From the Recurring Template List Window*, select the New button in the toolbar
- This will open up the Recurring Donation Entry window
List Window
Click New
- From the Donation tab, click the New button in the lower row of menu options
- This will open up the Donation Detail window
New Donation Button
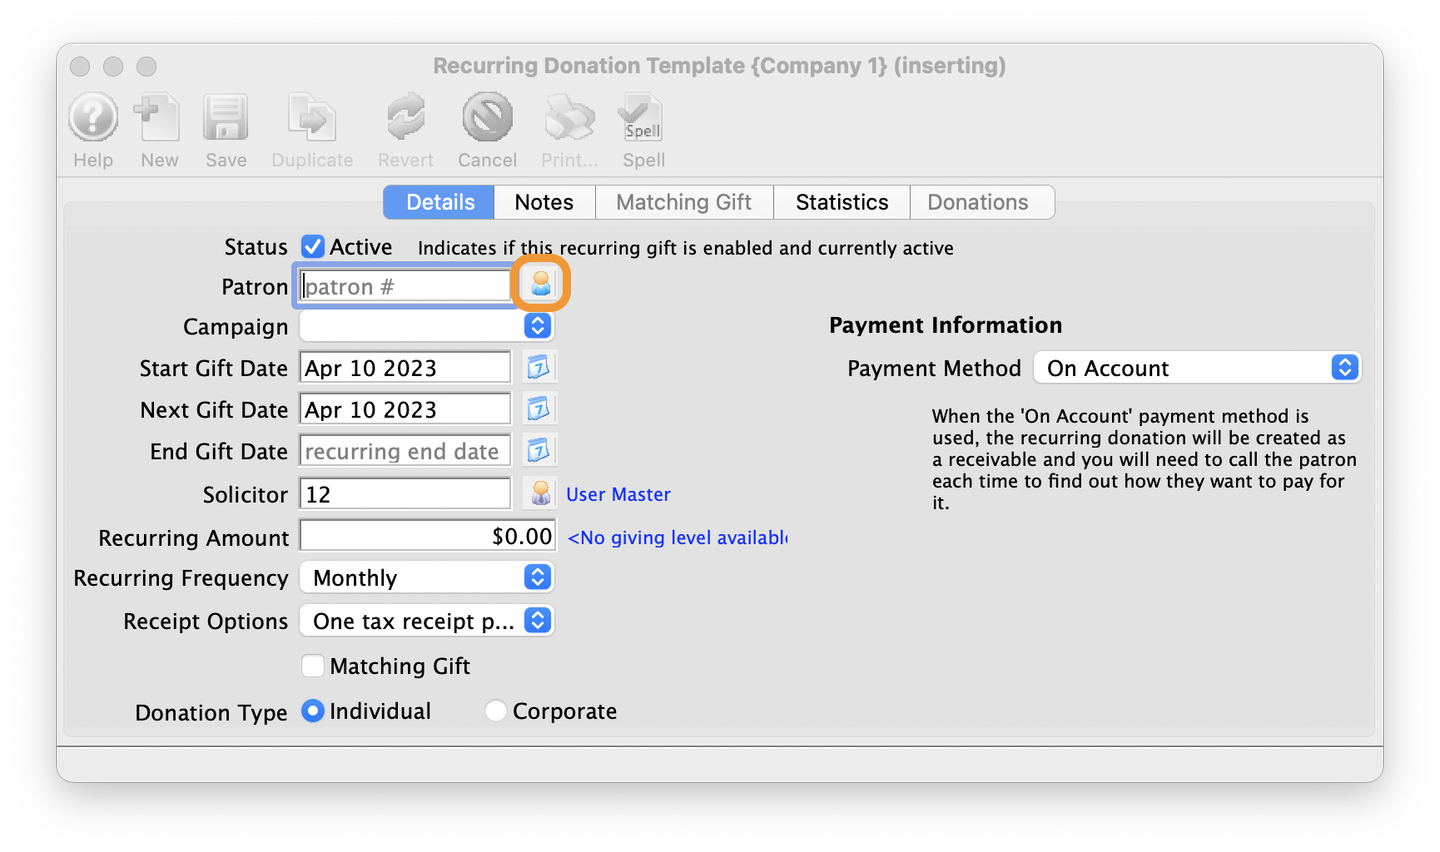
Search for the Patron
- In the Recurring Template List Window, search for the patron by clicking on the Patron Search icon to the right of the Patron # field
- This will open up the Patron Lookup window
Patron Search
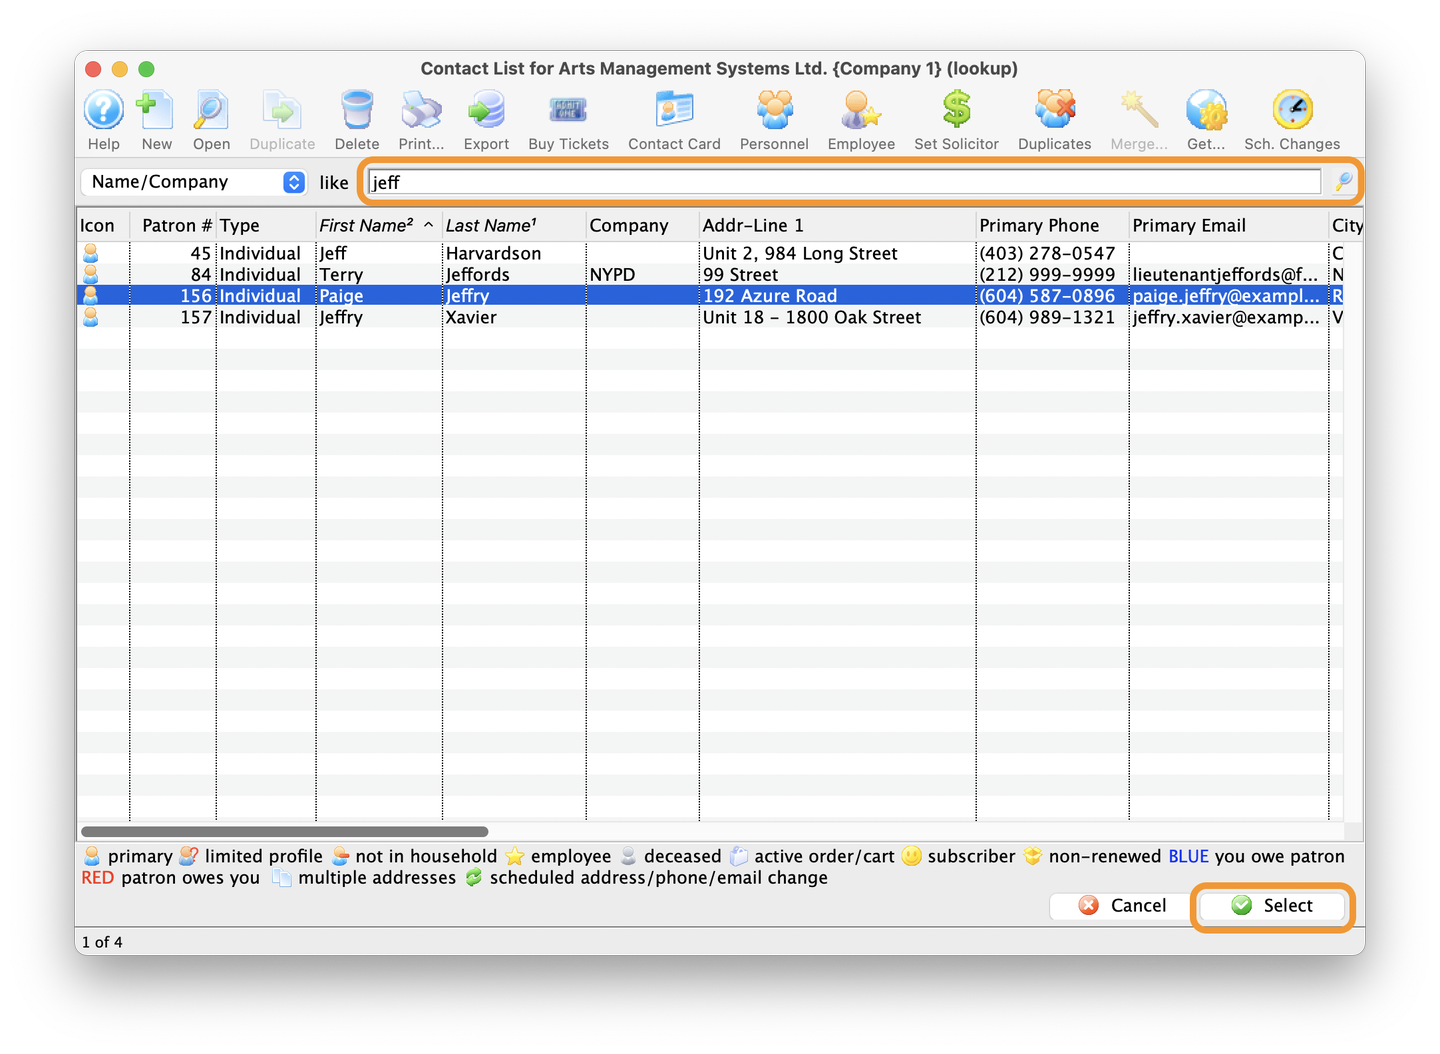
Select Patron from the Patron Lookup Window
- In the Patron Search field, enter part of the patron name to search for the patron in the database. Hit the return key on the keyboard, or click the blue magnifying glass icon to the right of the search field.
- This will populate the search results list
- Highlight the patron in the search results list
- Click Select in the lower right of the window
- This will close the Patron Lookup window
Patron Lookup
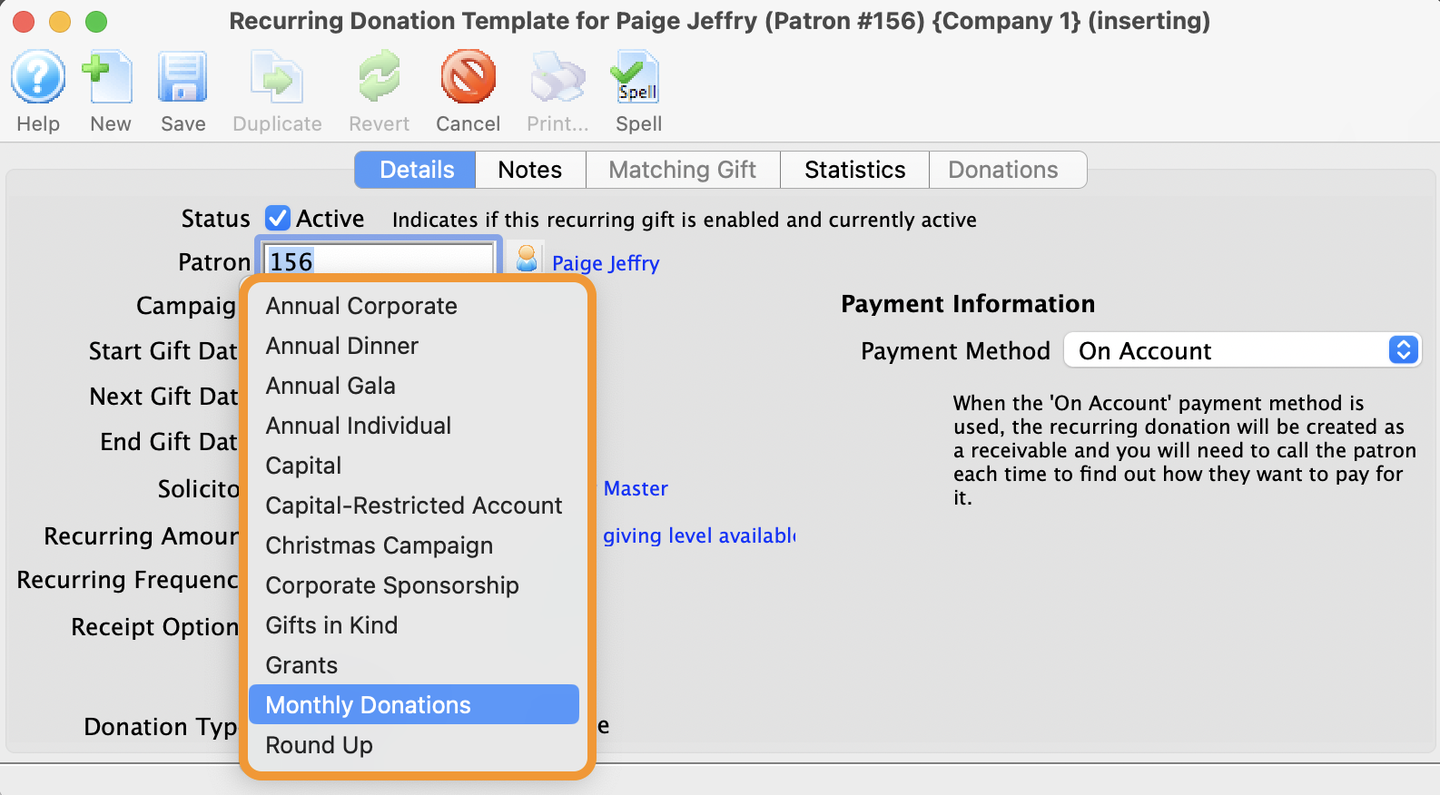
Select the Donation Campaign
- Notice the Patron field is now populated back in the Recurring Template Detail Window
- Click the Campaign pull-down menu
- Select the appropriate Donation Campaign from the list
- In this example we will choose the Monthly Donations campaign
Select Campaign
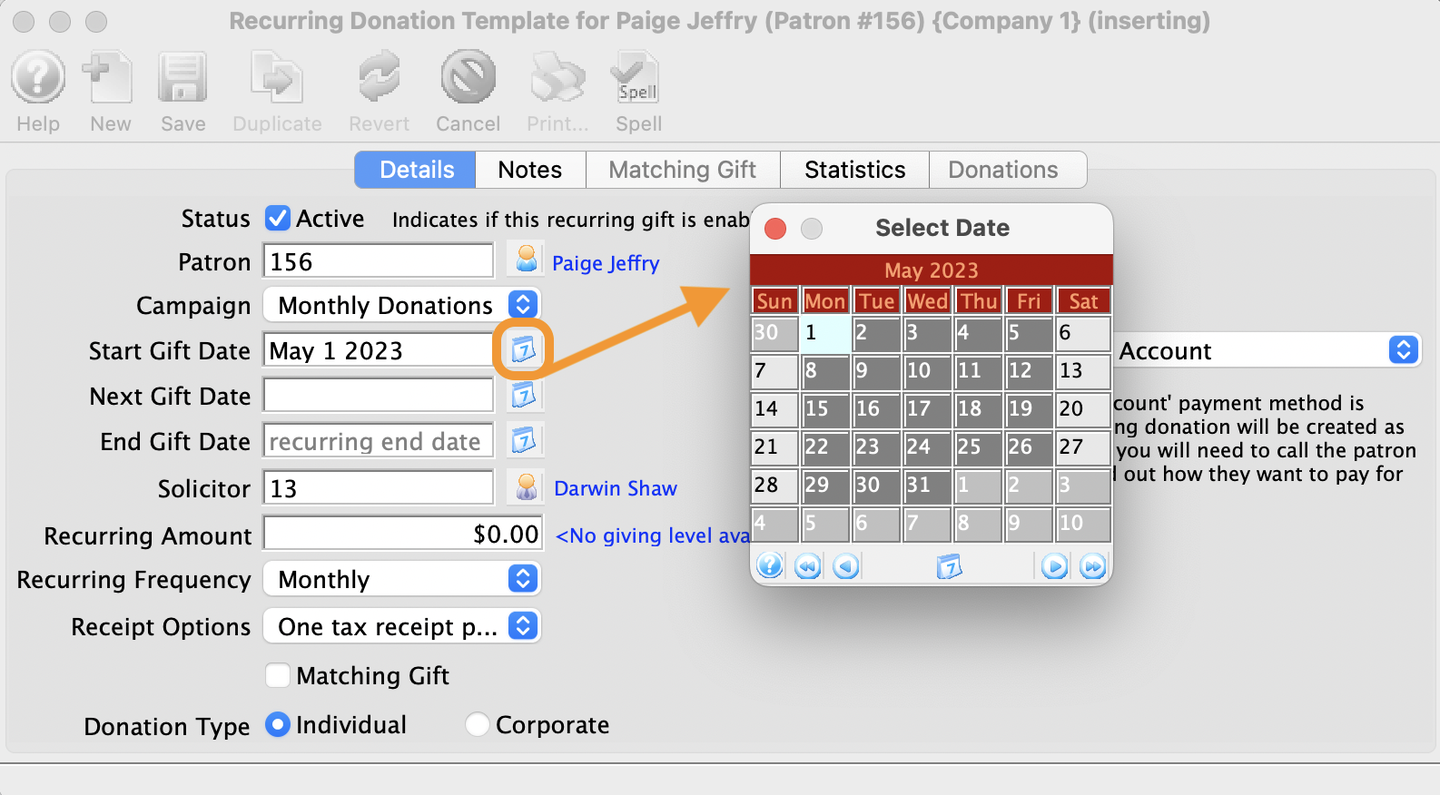
Set the Start Gift Date
- Click the Calendar icon to the right of the Start Gift Date field
- This will open up a mini-calendar
- Set the date of the recurring donation by double-clicking the appropriate date. In this example, we will select May 1st, 2023.
- This will close the mini-calendar
- The Start Gift Date is defined as the first time the recurring donation will be charged to the patron's credit card.
Start Gift Date
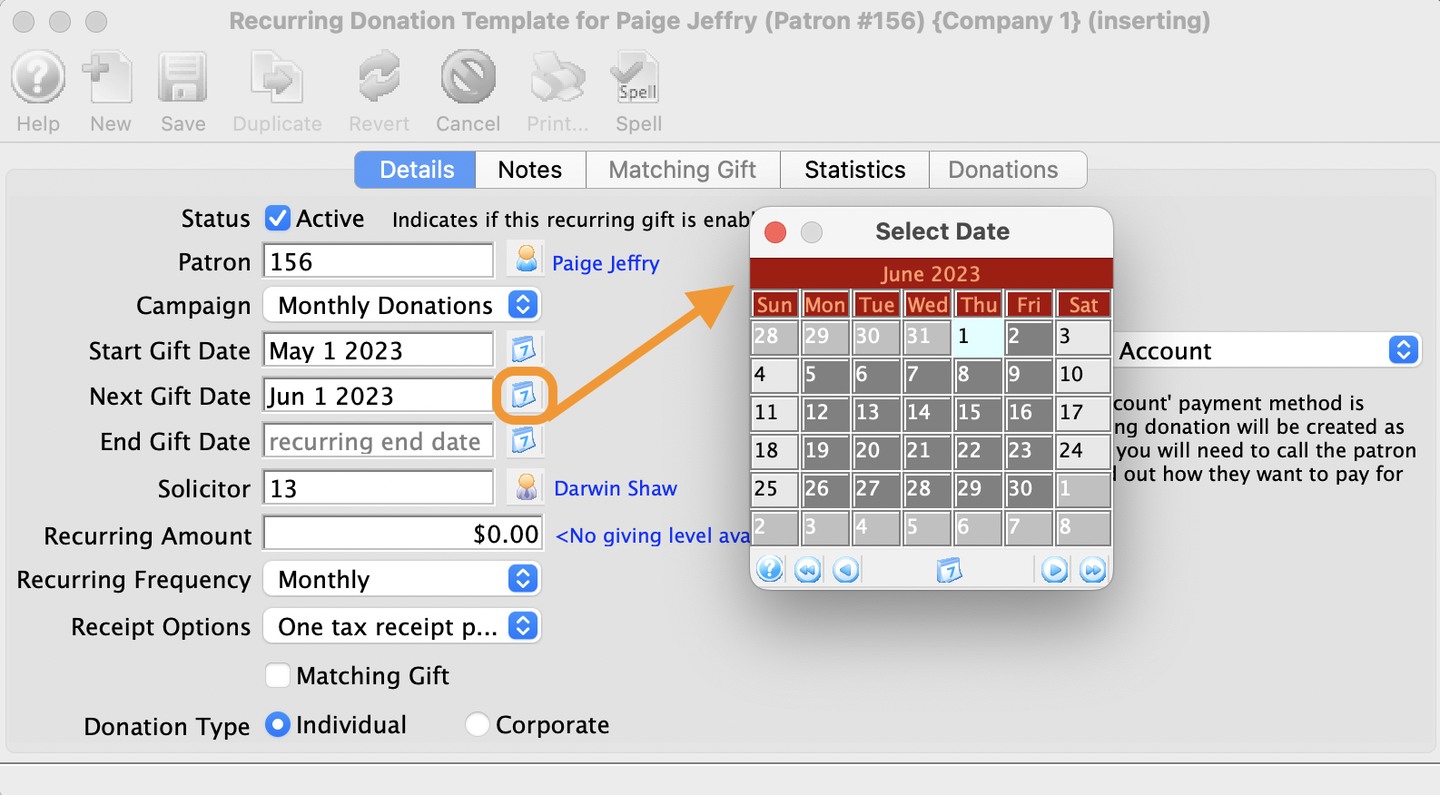
Set the Next Gift Date
- Click the Calendar icon to the right of the Next Gift Date field
- This will open up a mini-calendar
- Set the date of the next recurring donation by double-clicking the appropriate date. In this example, we will select June 1st, 2023.
- This will close the mini-calendar
- The Next Gift Date is defined as the date after the first charge to the patron's credit card.
Next Gift Date
Leave End Gift Date Blank
- Leave the End Gift Date field blank
- This means the donor hasn't indicated a future date when they would like to stop their recurring donation. When this field is left blank the recurring donation will continue indefinitely.
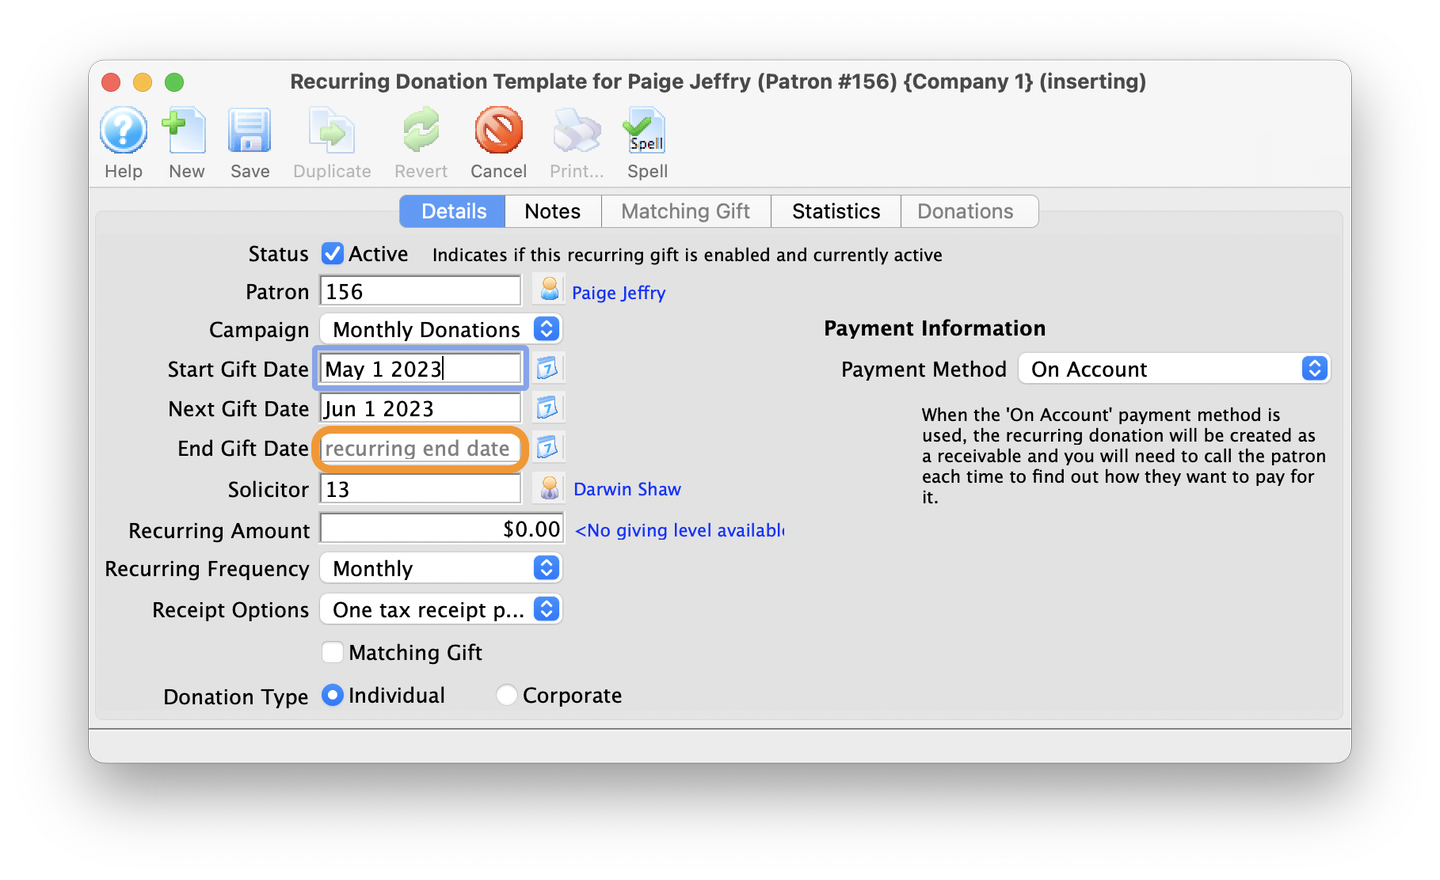
End Gift Date
Set the Amount
- Enter the donation value in the Recurring Amount field
- This indicates the amount to be charged to the patron's credit card. In this example the patron would like to give $75.00 every month.
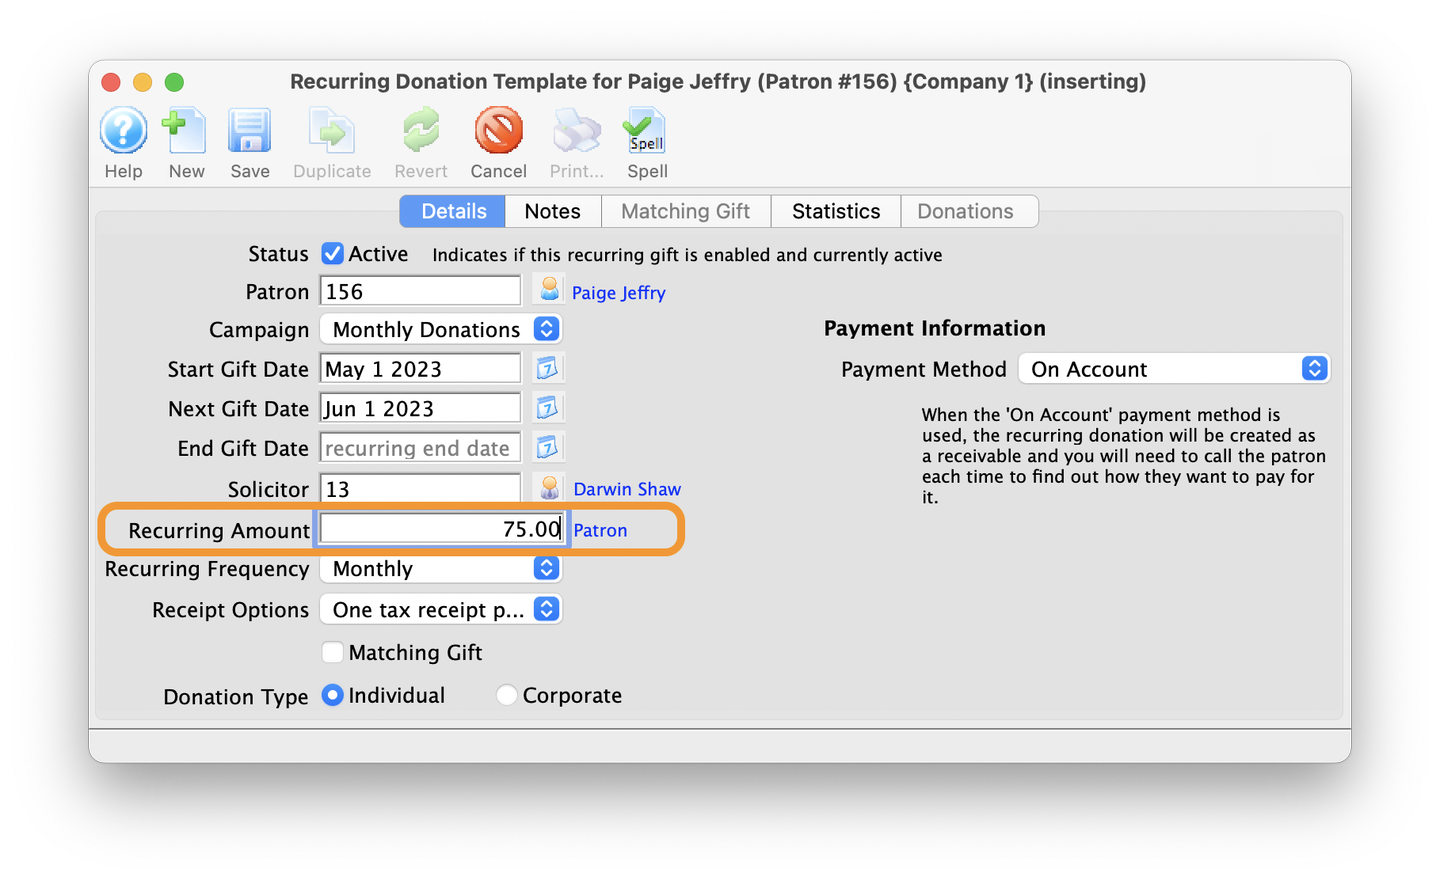
Recurring Amount
Set the Recurring Frequency
- Click the Recurring Frequency pull-down menu
- Select the frequency requested by the donor. In this example, the donor would like to give each month.
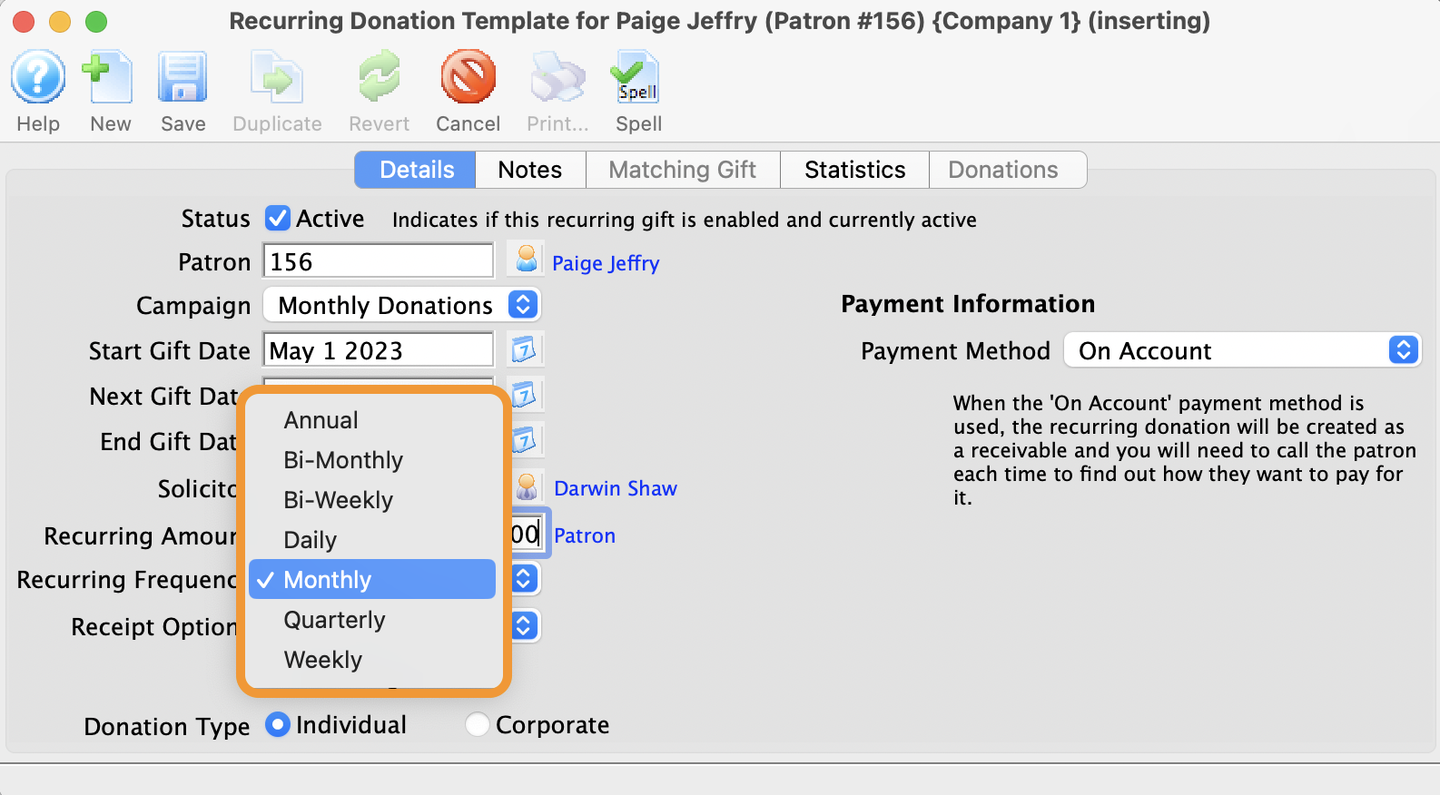
Recurring Frequency
Set the Receipt Option
- Click the Receipt Options pull-down menu
- Select the Receipt Type requested by the donor. In this example, the donor would like to receive the Annual Statement style receipt, designed to show a year's worth of donations in a single receipt.

Receipt Options
Set the Payment Method
- Click the Payment Method pull-down menu
- Select the credit card type requested by the donor. In this example, the donor would like to pay with their Visa.
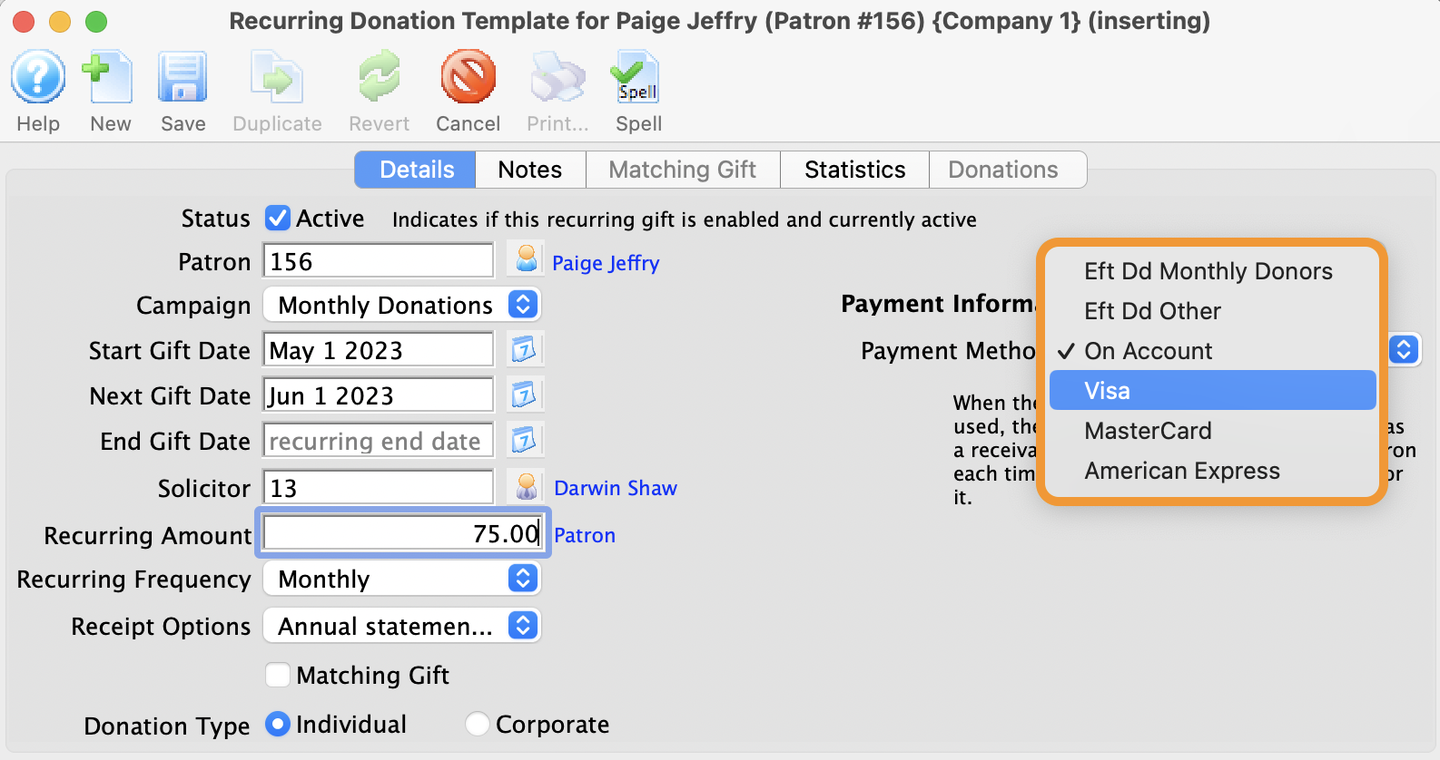
Payment Method
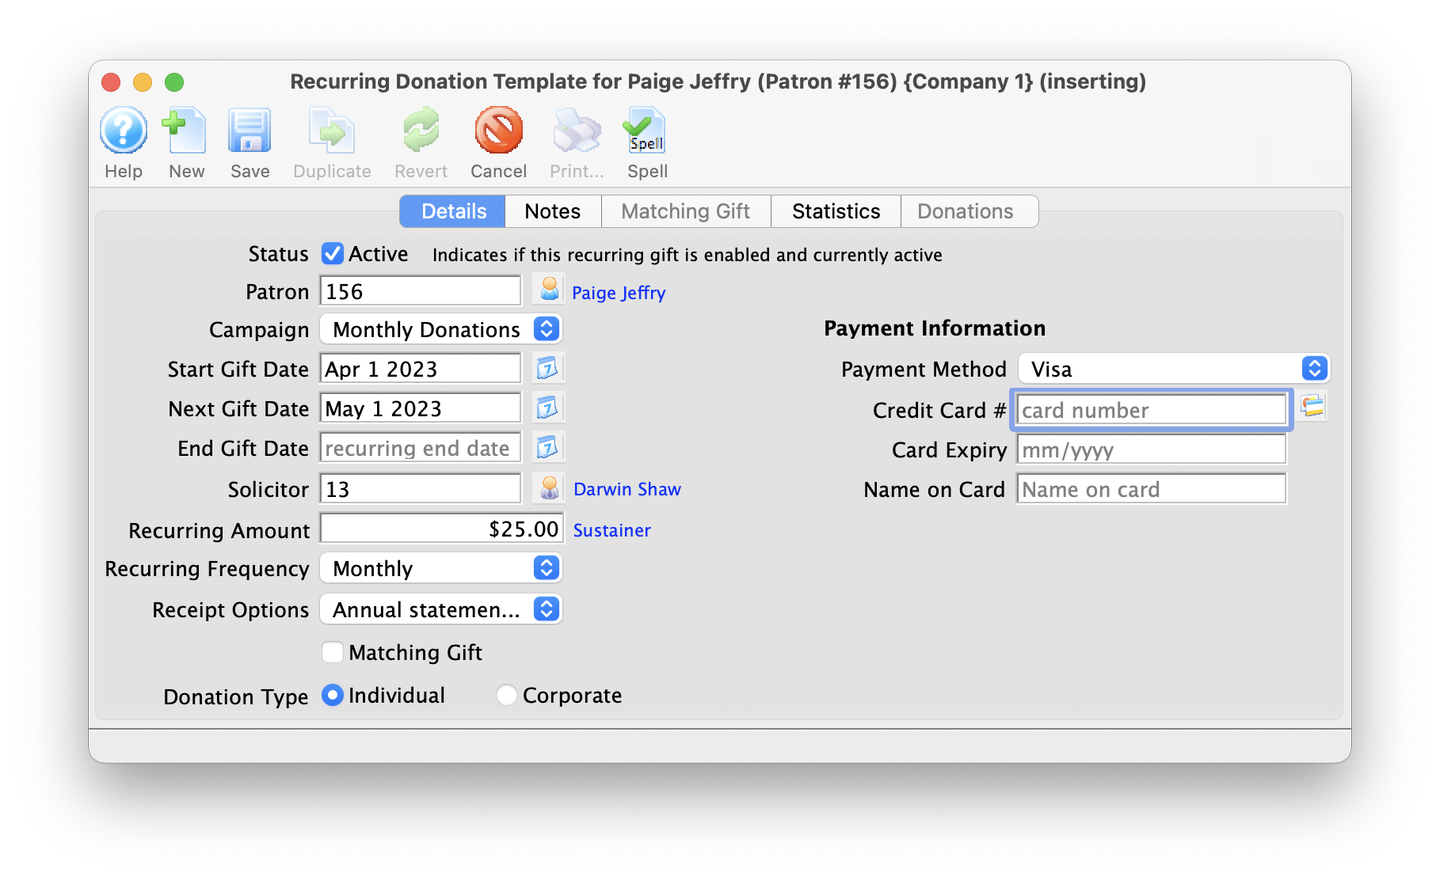
Fill Out the Credit Card Information
- Fill in the required credit card fields
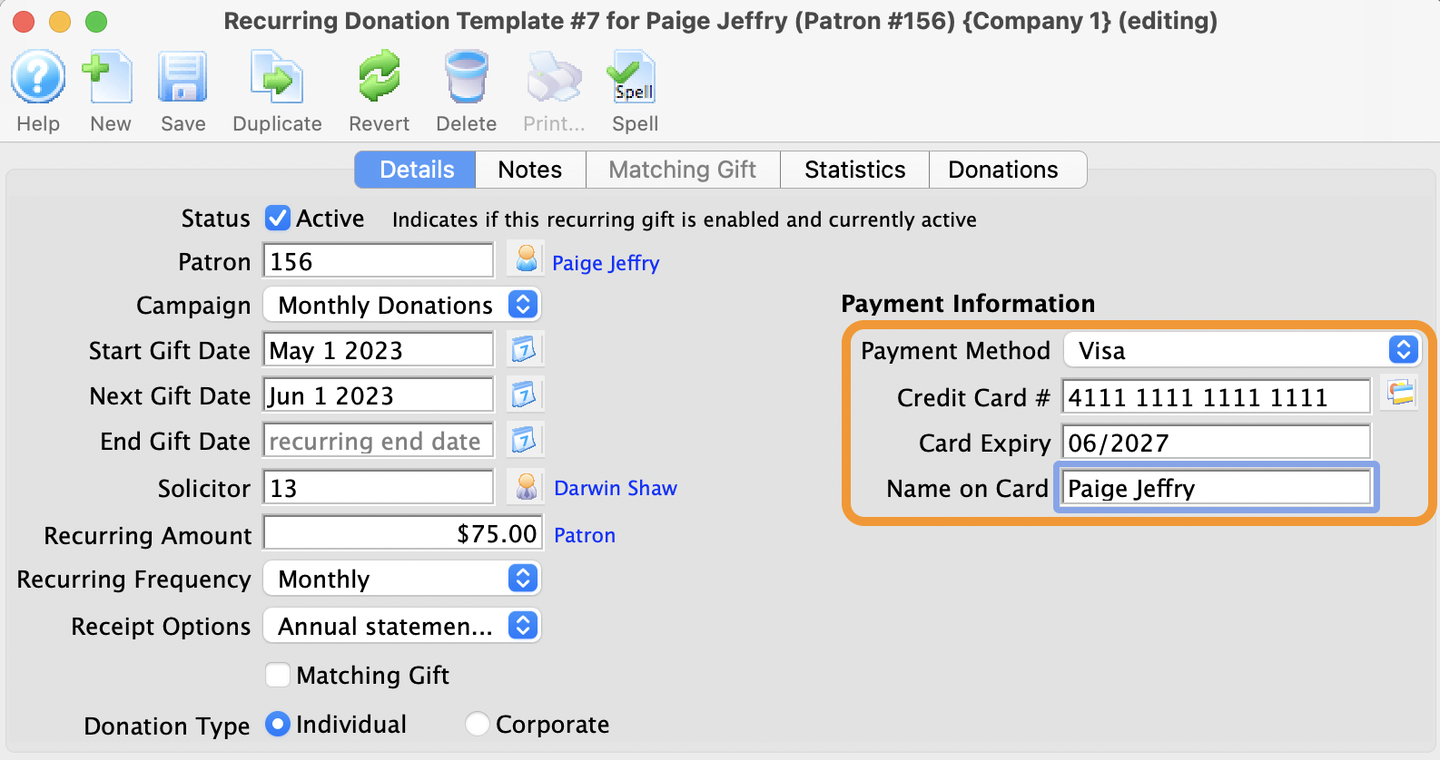
Visa Payment Fields
Click Save when Done
- When ready, click Save in the toolbar
- Click the "X" in Windows or the "red" button in macOS to close the Recurring Template Detail Window

Save Button
Review the Recurring Donor Template List Window
- Back on the Recurring Template List Window*, notice the new monthly donor
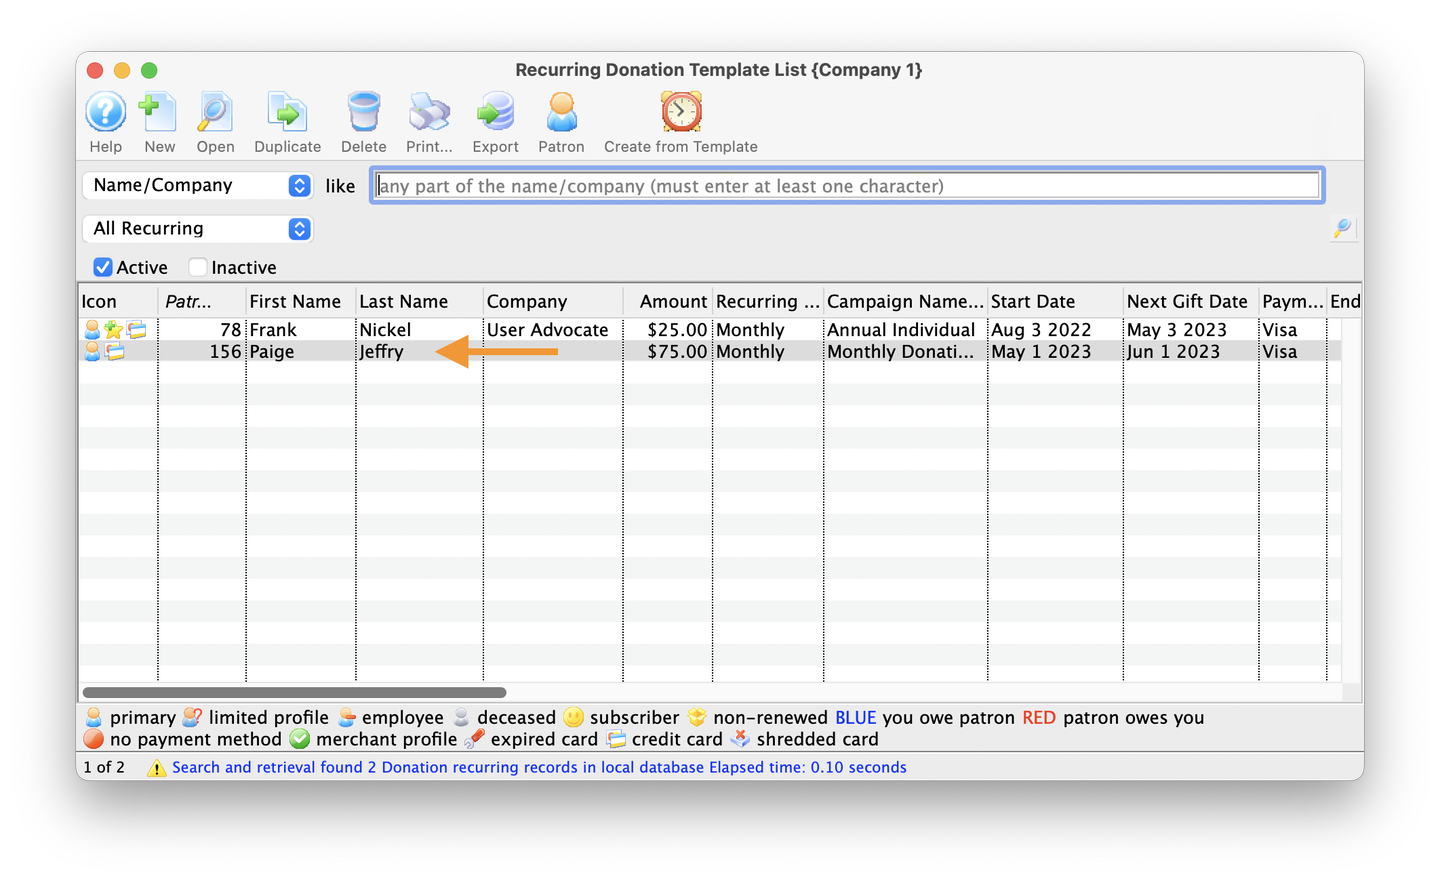
Recurring Donor List
Congratulations! You've just completed the tutorial for entering a new recurring donation in Theatre Manager.