Add GL Account Top
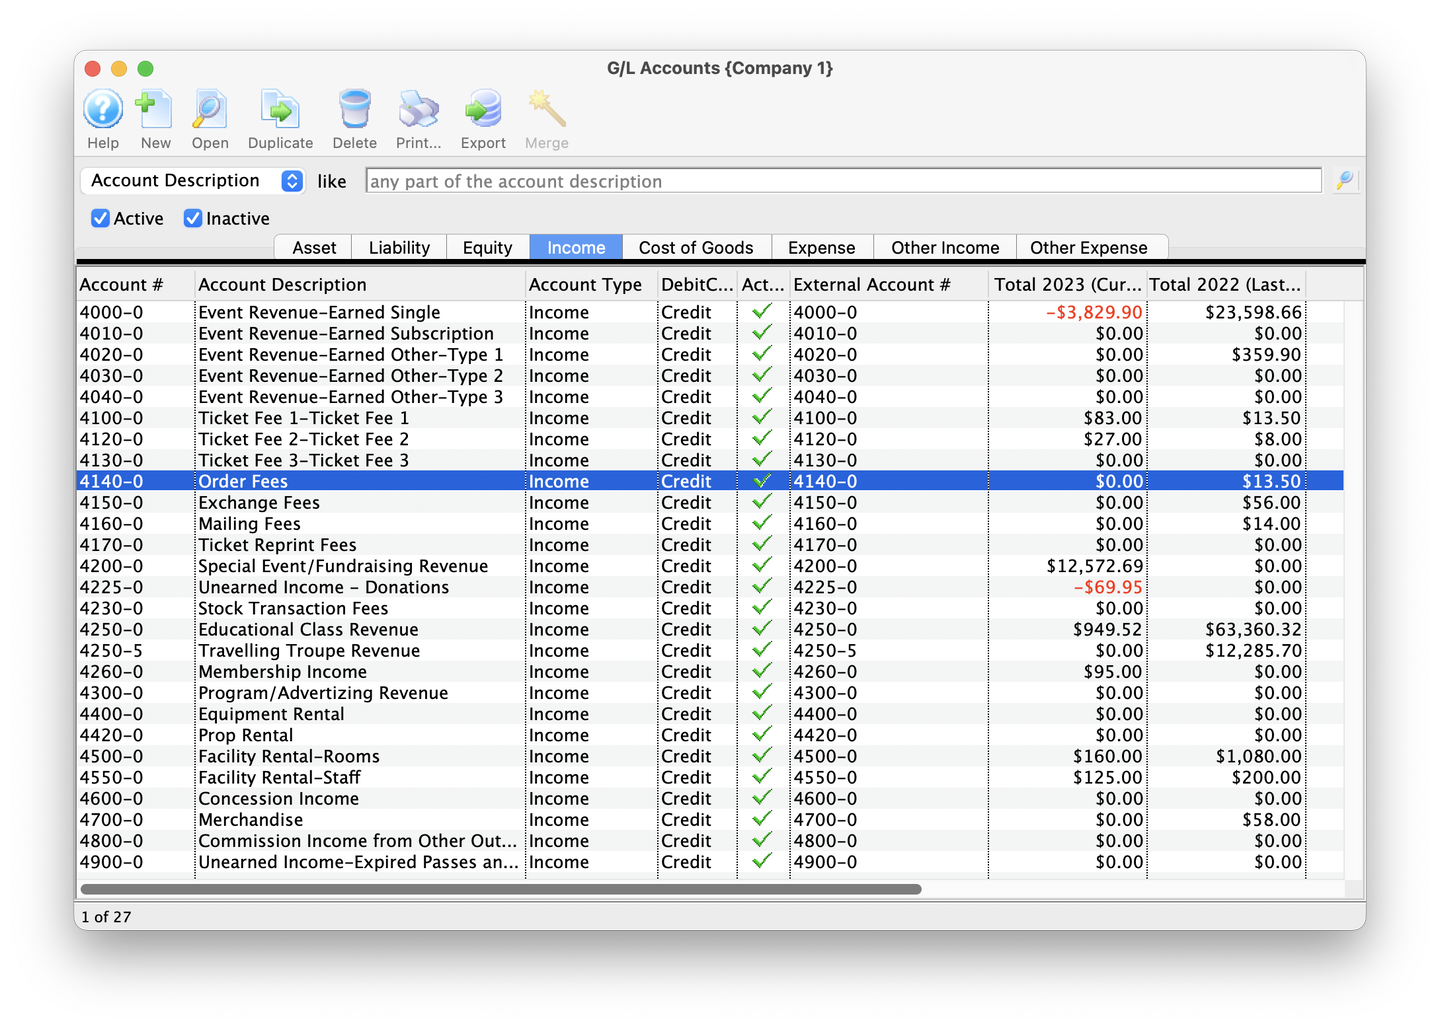
G/L Accounts Window
The General Ledger Chart of Accounts contains all the accounts your organization uses to assign funds throughout day-to-day operations. Adding a new General Ledger Account, or GL, requires 3 basic steps:
-
Assign an Account Type from the available options
-
Assign an Account Number that aligns with your existing Chart of Accounts
-
Write a description to help define what the G/L is intended for
The following tutorial demonstrates how to create a new G/L in the system.
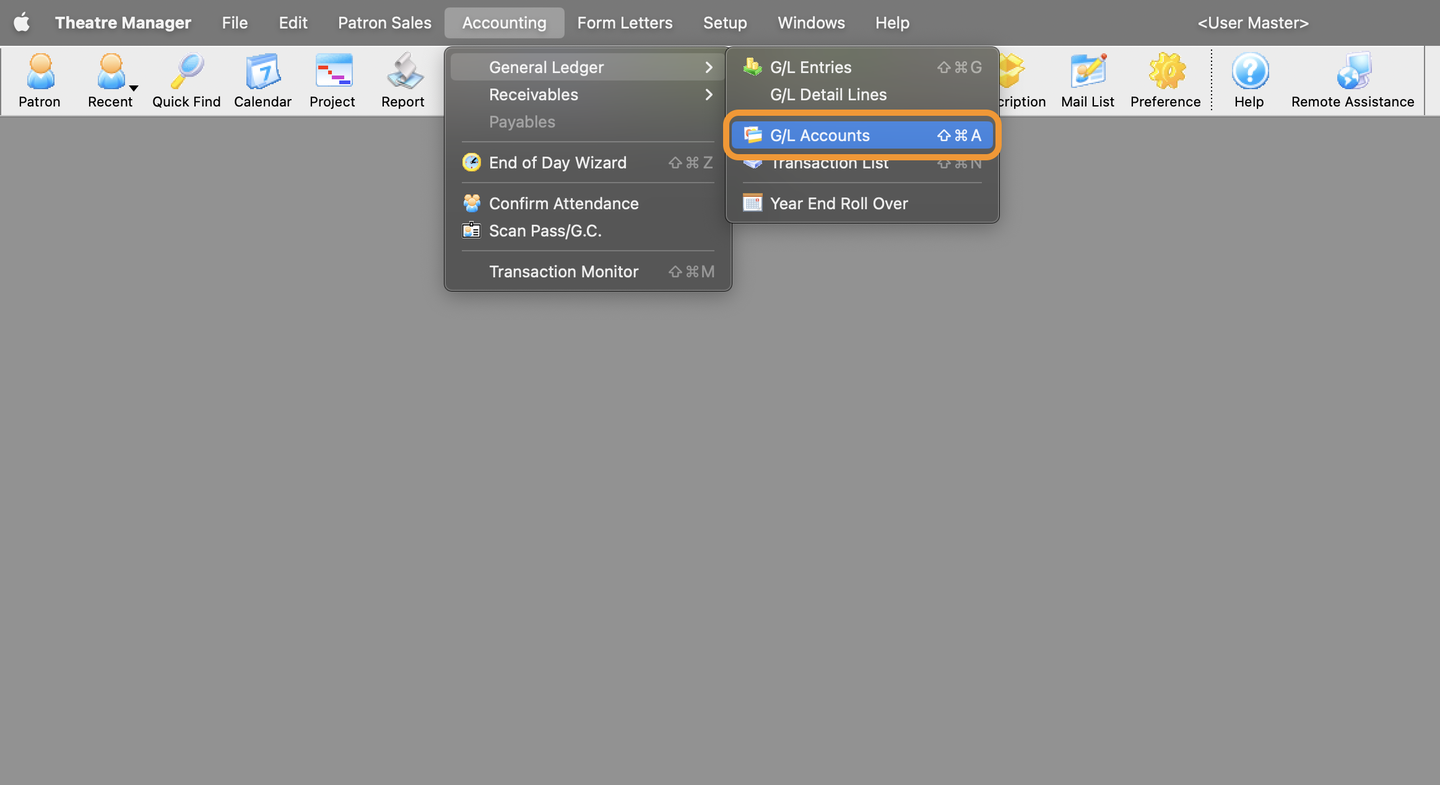
Open the G/L Accounts Window
- From the Theatre Manager file menu, click Accounting
- Expand the General Ledger option by hovering over it
- Click the G/L Accounts option on the right hand side
- This will open up the G/L Accounts window
General Ledger File Menu
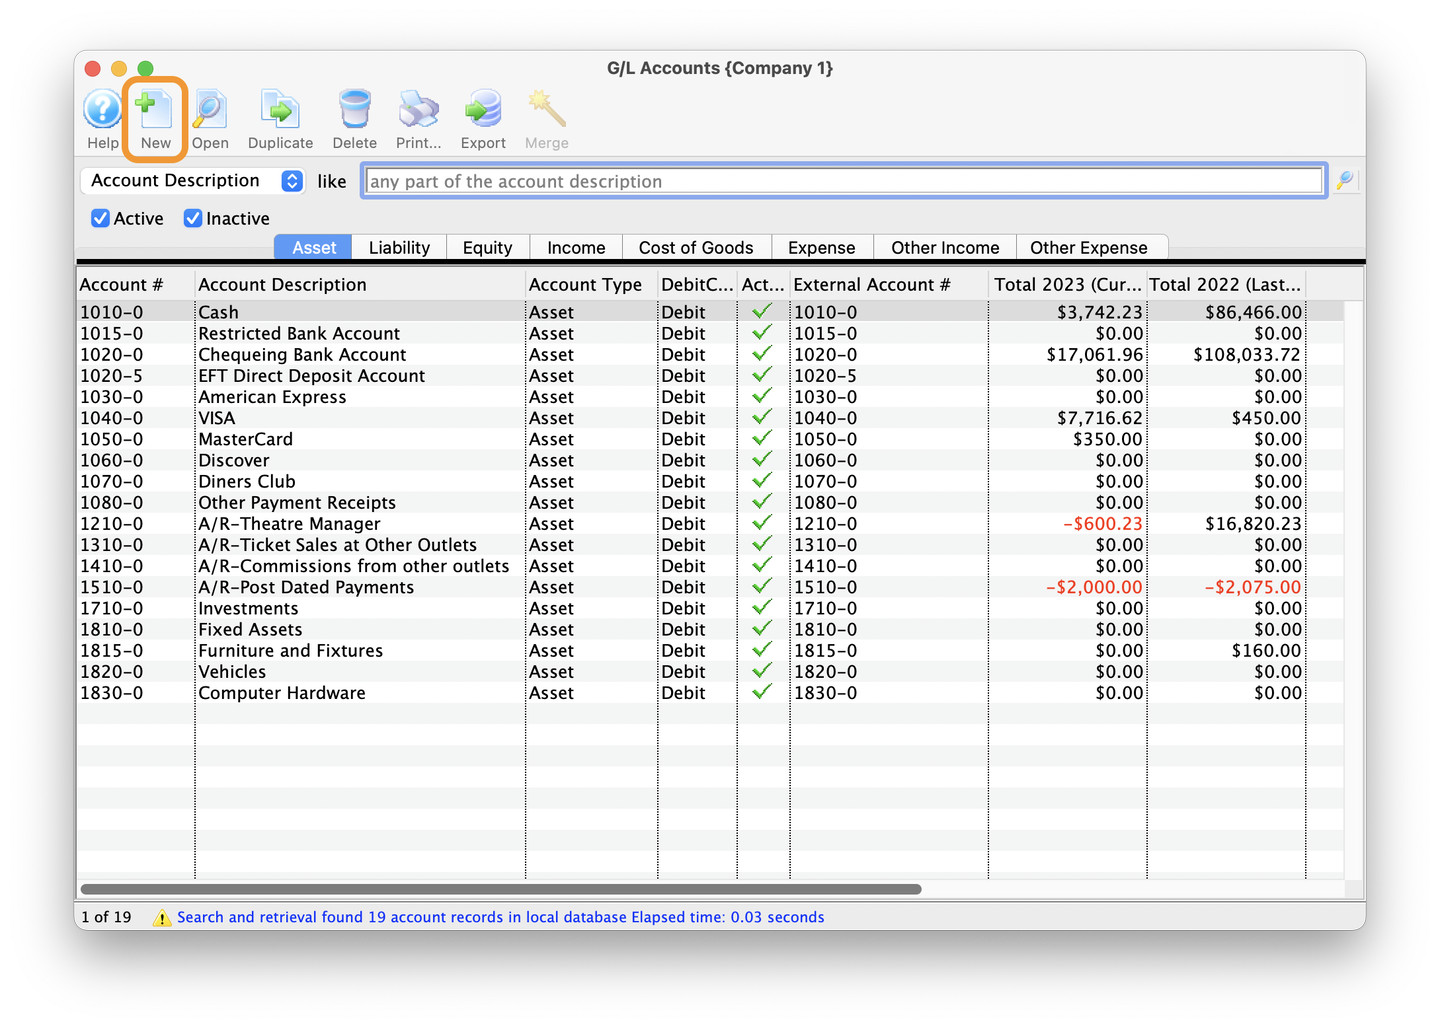
Click New in the Toolbar
- In the G/L Accounts window
- Click "New" in the G/L Accounts toolbar
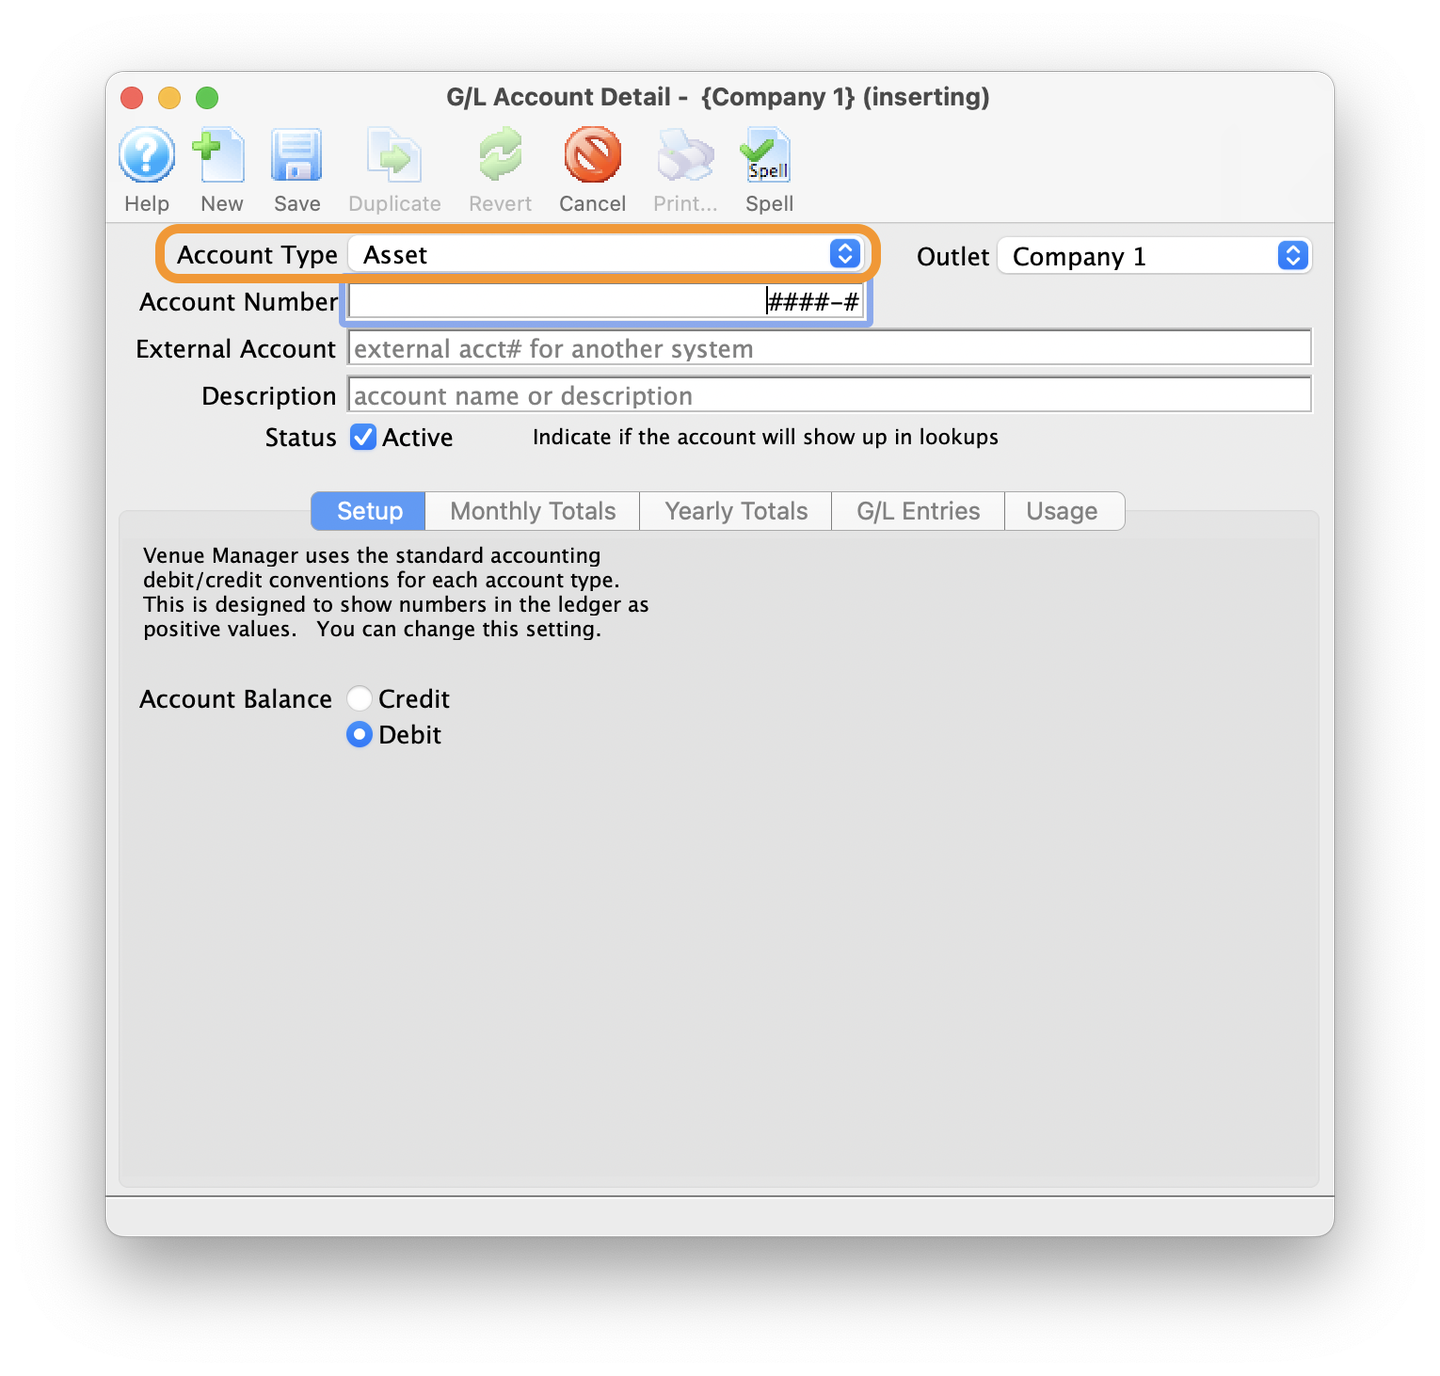
- This will open up the G/L Account Detail window
New Button
Click Account Type Pull Down Menu
- Click the Account Type pull down menu
- This will display all the available options that can be assigned to this new account
Account Type Pull Down
Select Income From the List of Options
- From the list of options select Income
- For more information on what different Account Types mean, visit Wikipedia's entry for Chart of Accounts
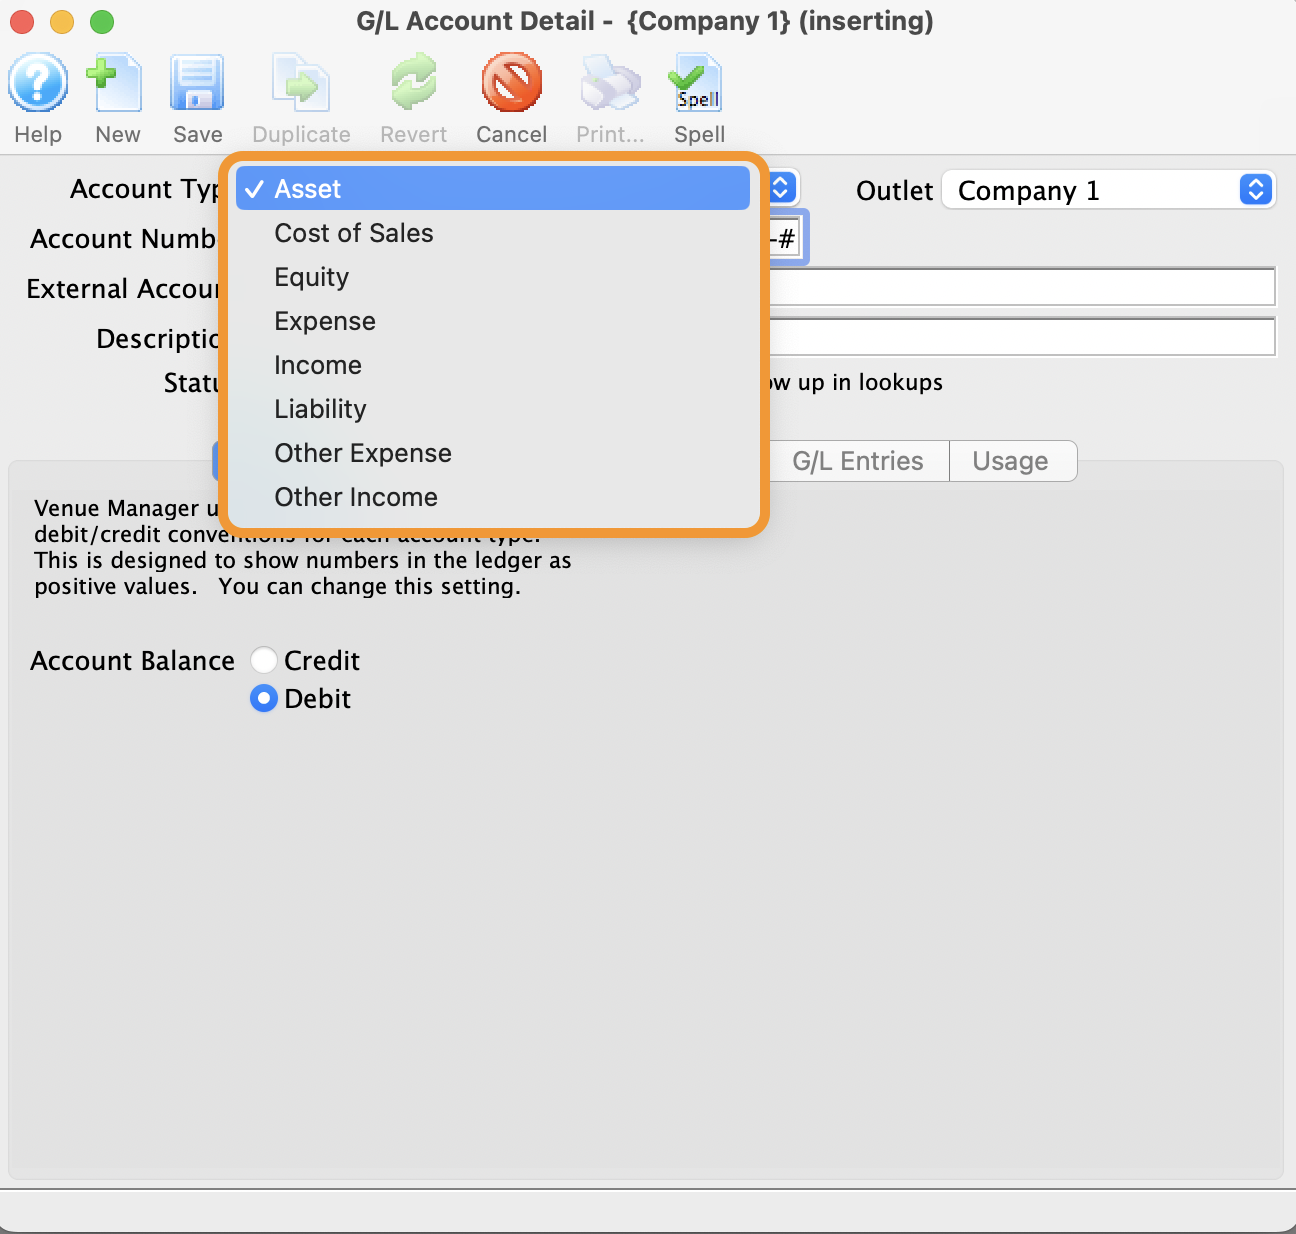
Account Type Options
Enter In Account Number
- Select the Account Number field
- Enter a 5-digit account number
- In this example, enter 4050-0
- This will serve as the Account Number for this G/L entry in the system
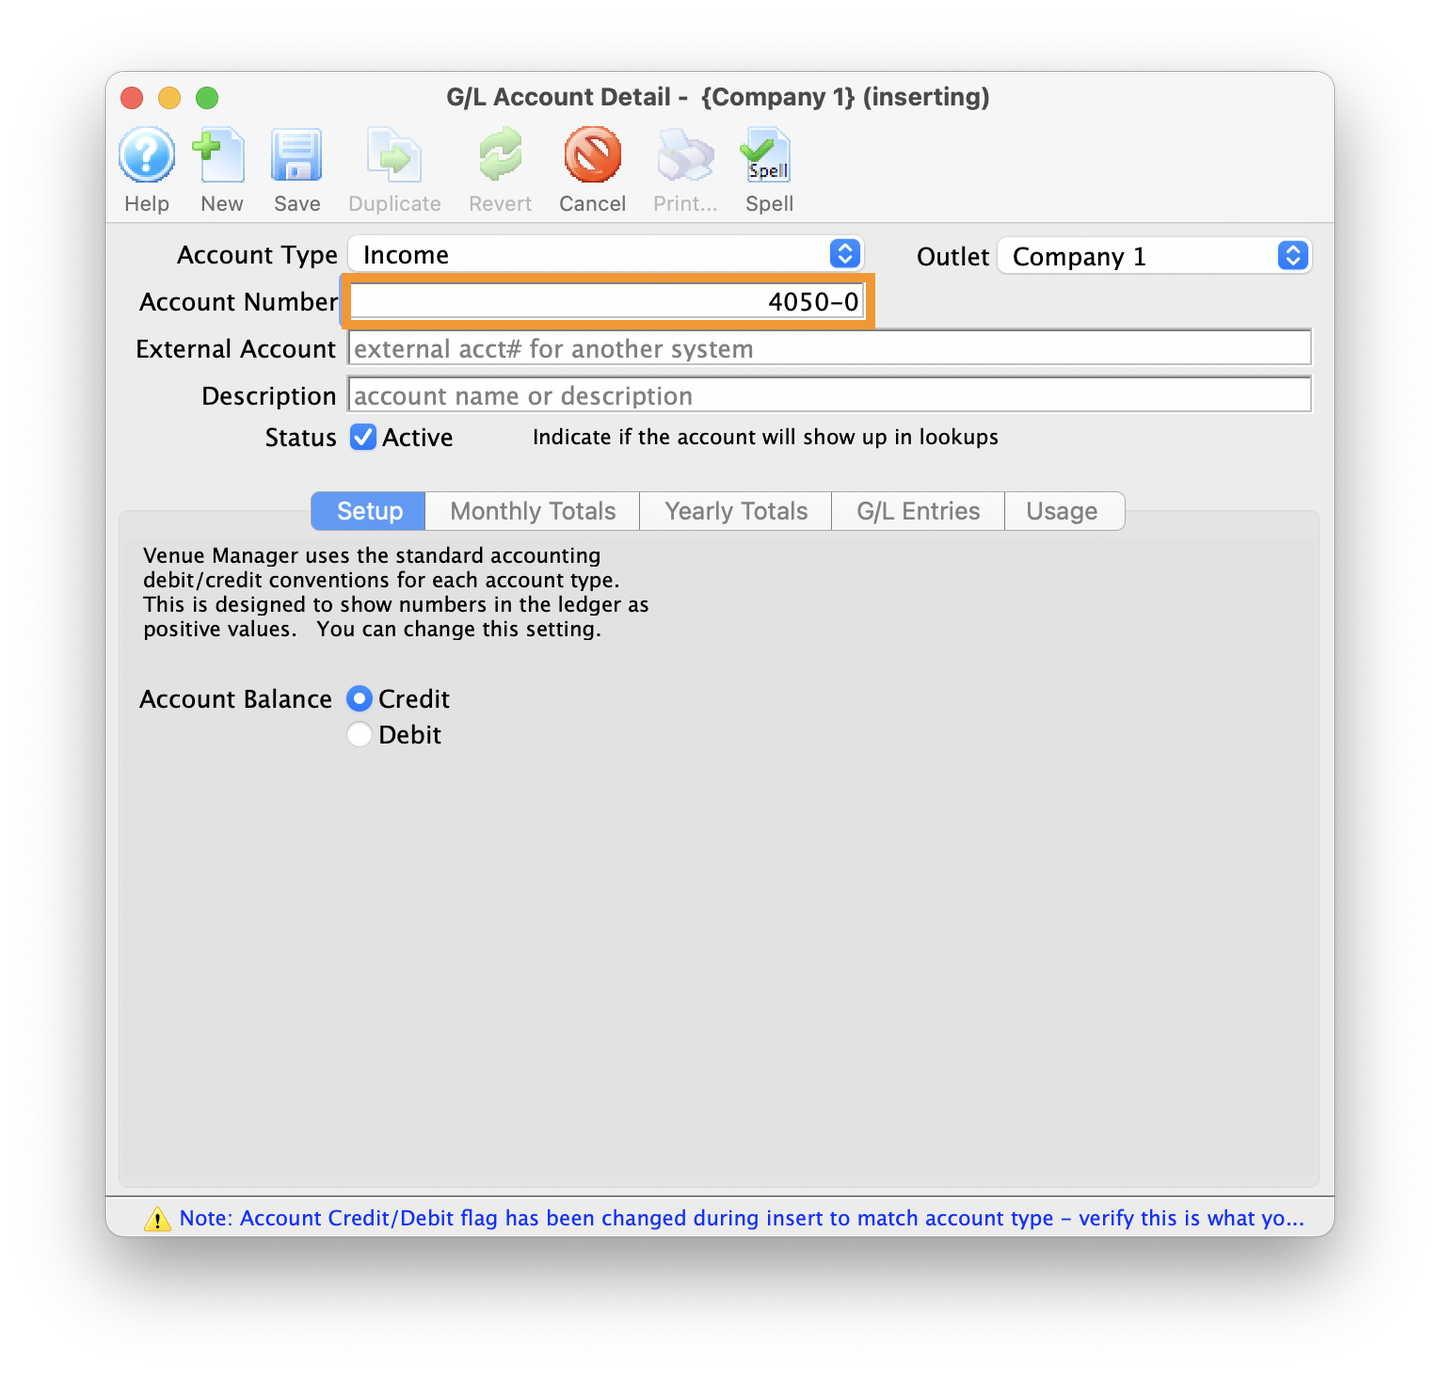
Account Number
Click into the External Account Field
- By Selecting the External Account field the system will automatically fill whatever number was entered in the Account Number field into the External Account field
- Users can also hit tab on their keyboard to move from the Account Number field into the External Account field
- In our example, by either selecting the External Account field, or, hitting tab from inside the Account Number field, the system will auto populate the number 4050-0 into the External Account field
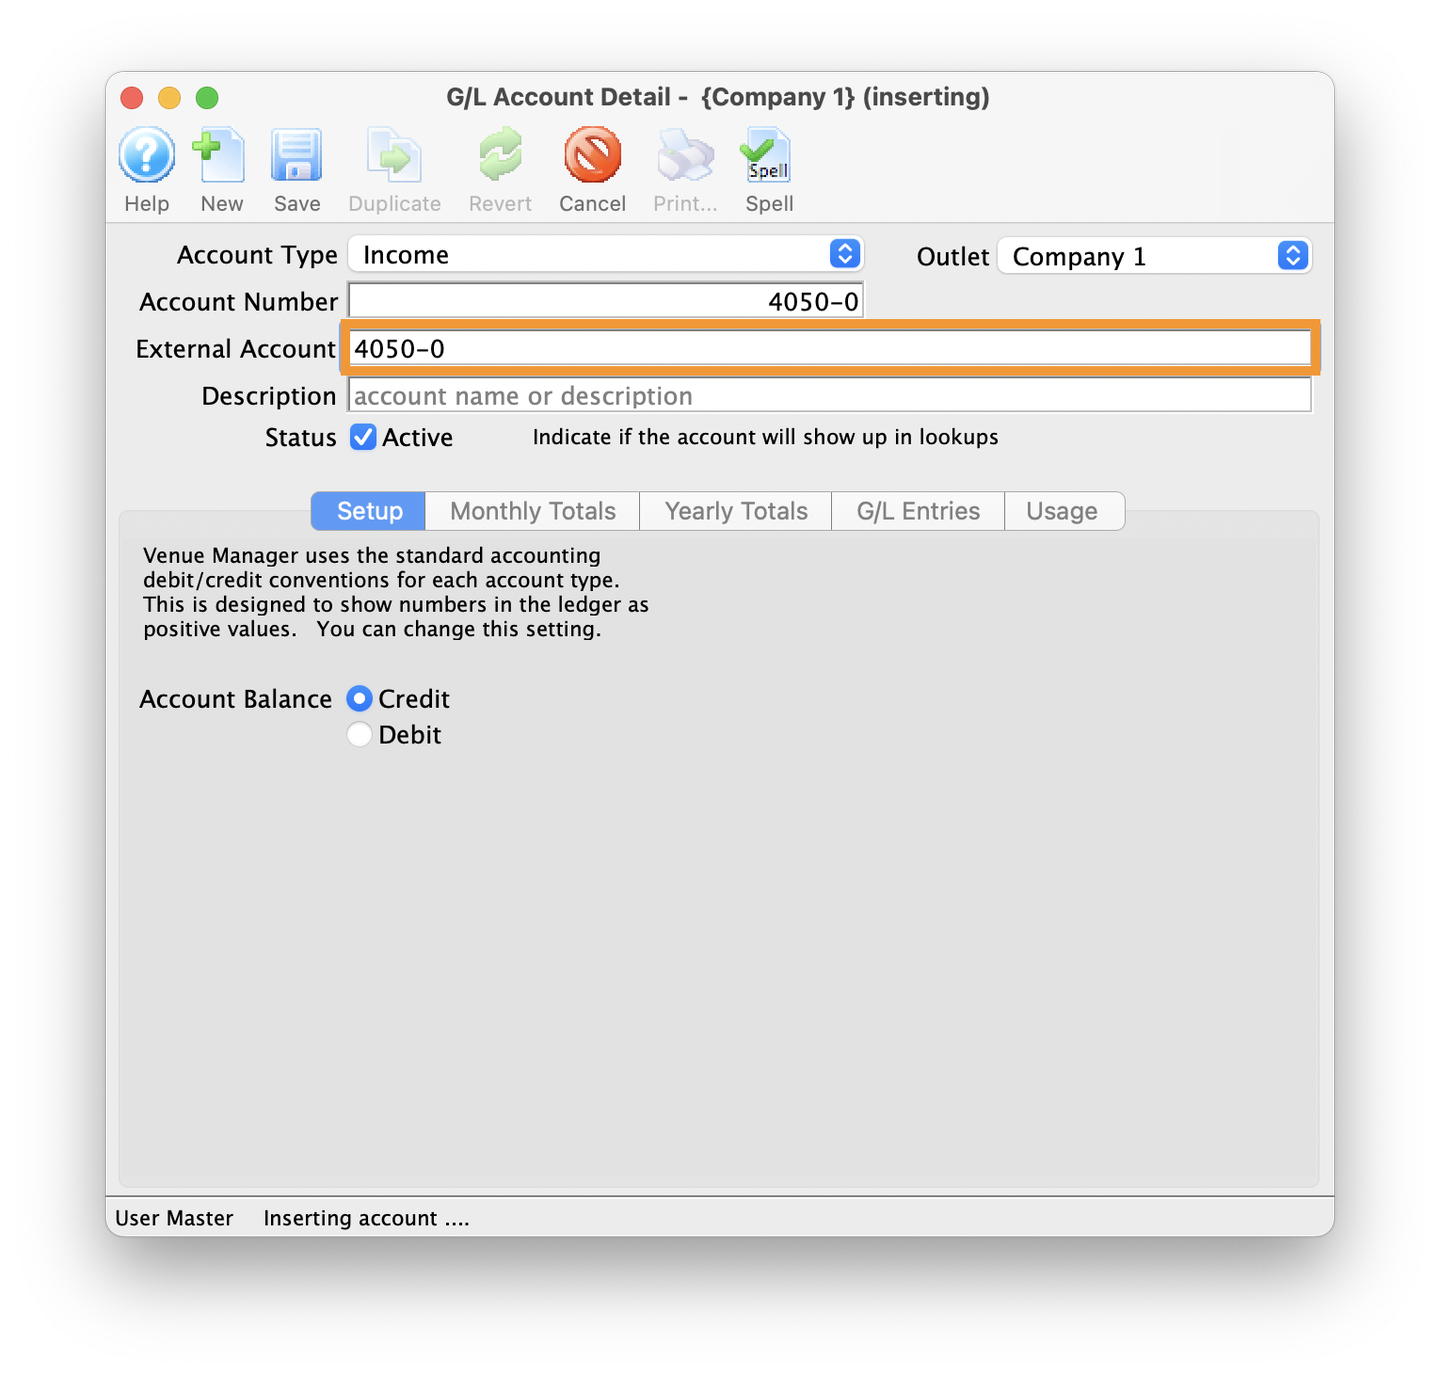
External Account
Enter Description
- Click into the Description field
- Enter an appropriate description for the new G/L
- In our example, type in "Single Ticket Income"
- This will serve as the G/L for our organizations Single Ticket Income
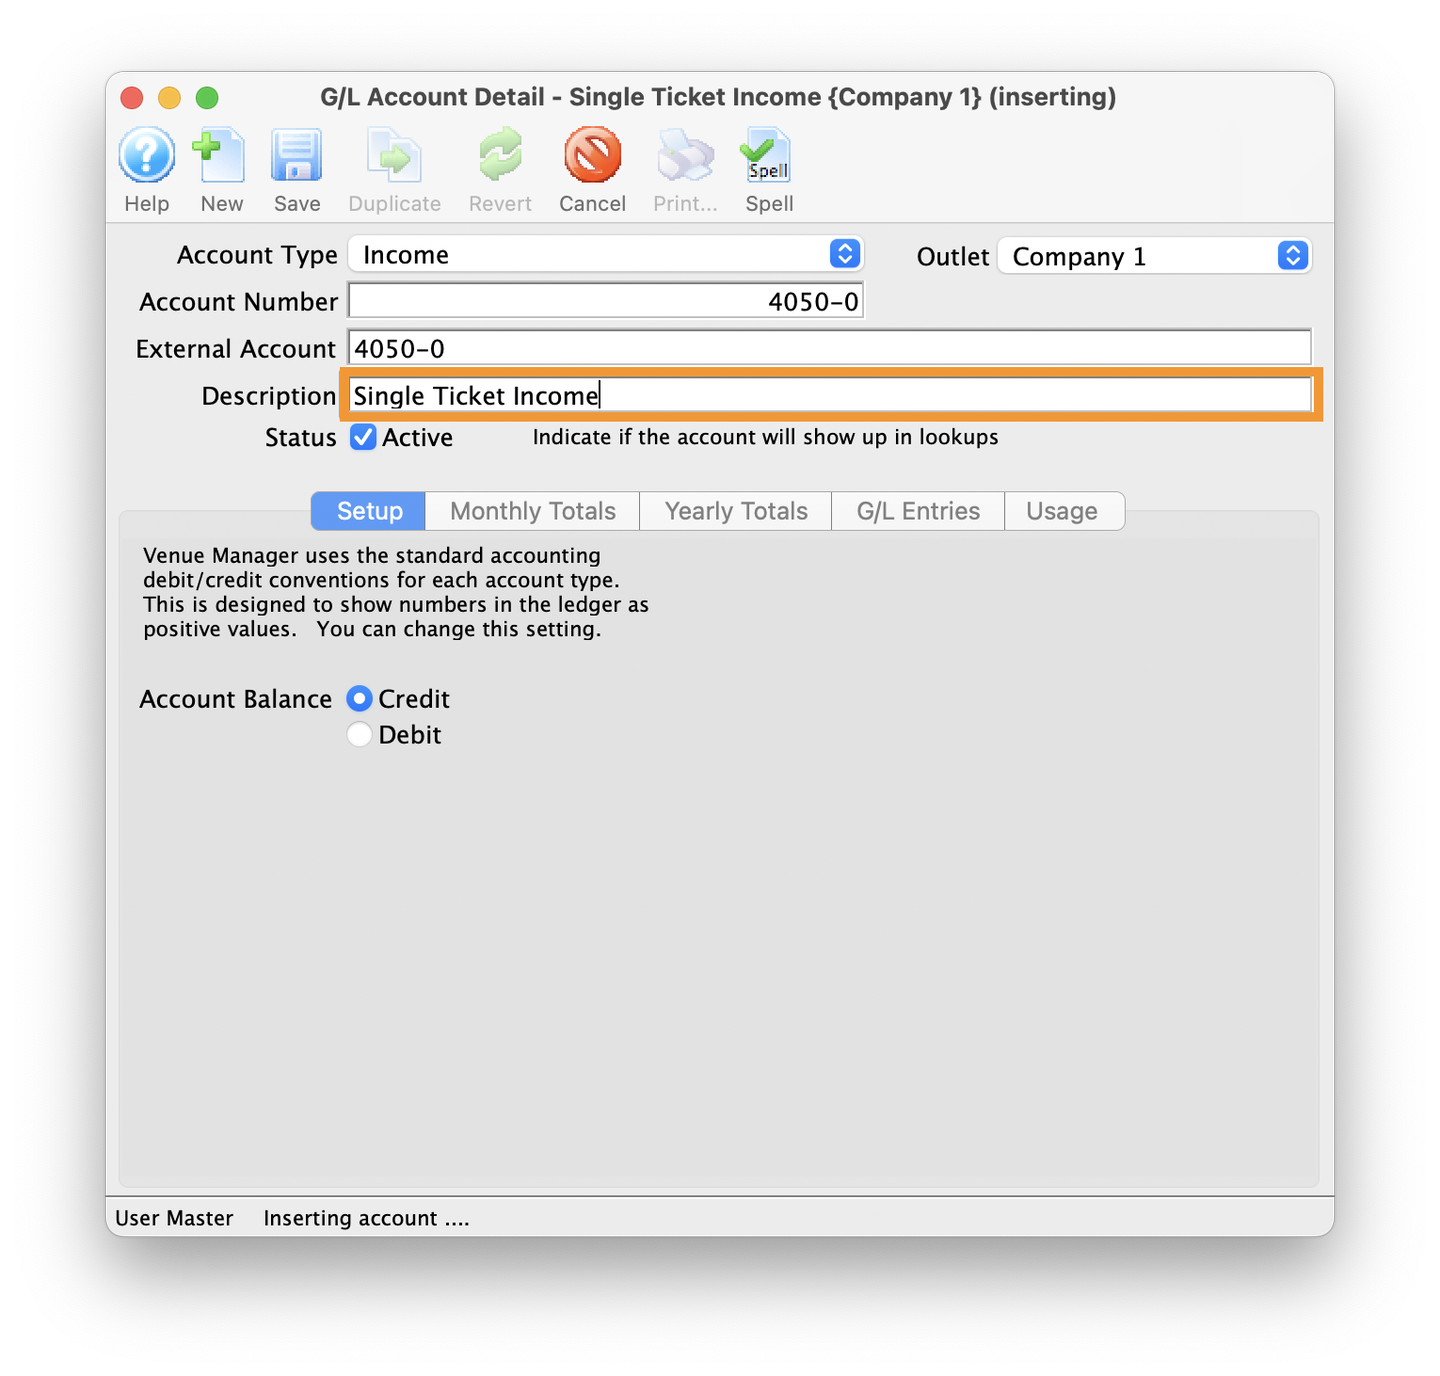
Description
Check Status is Active
- Ensure the Status for the new G/L is set to Active
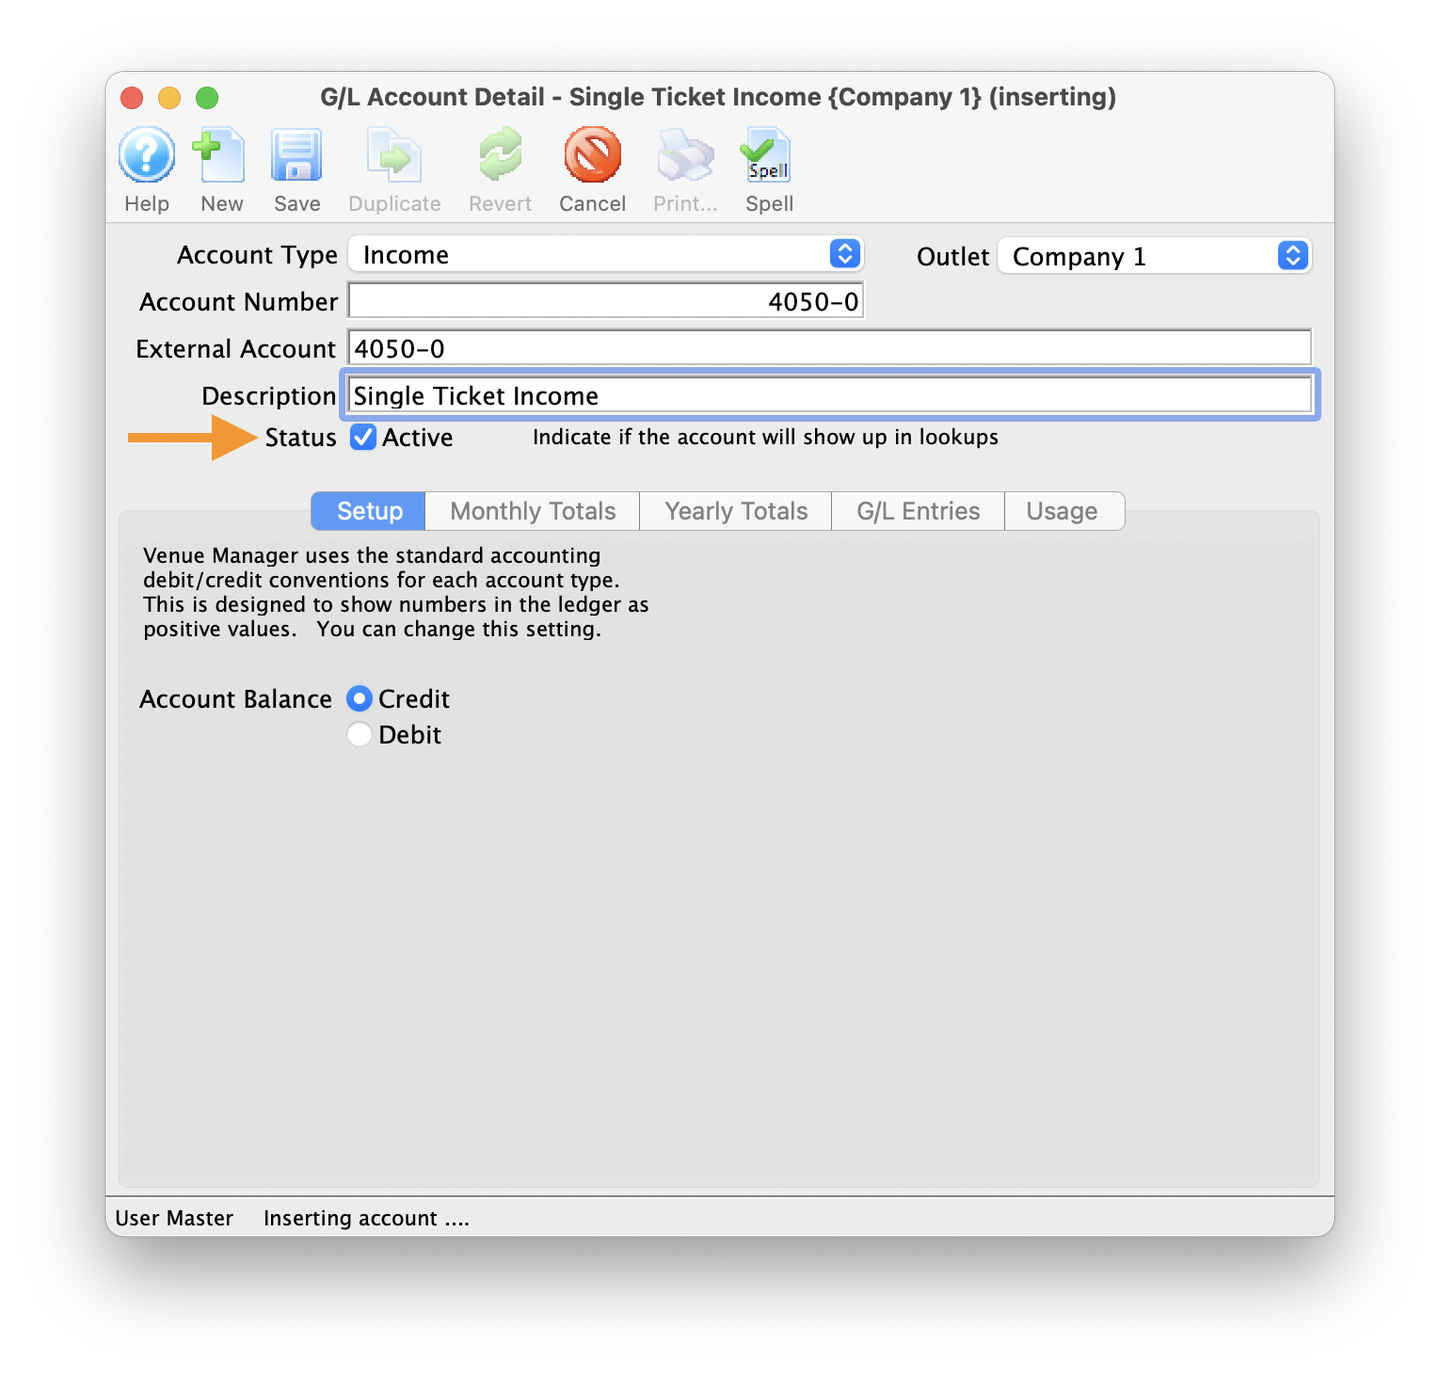
Active Checkbox
Credit or Debit
- Ensure the Account Balance is set correctly
- In our example, income accounts are always set to Credit
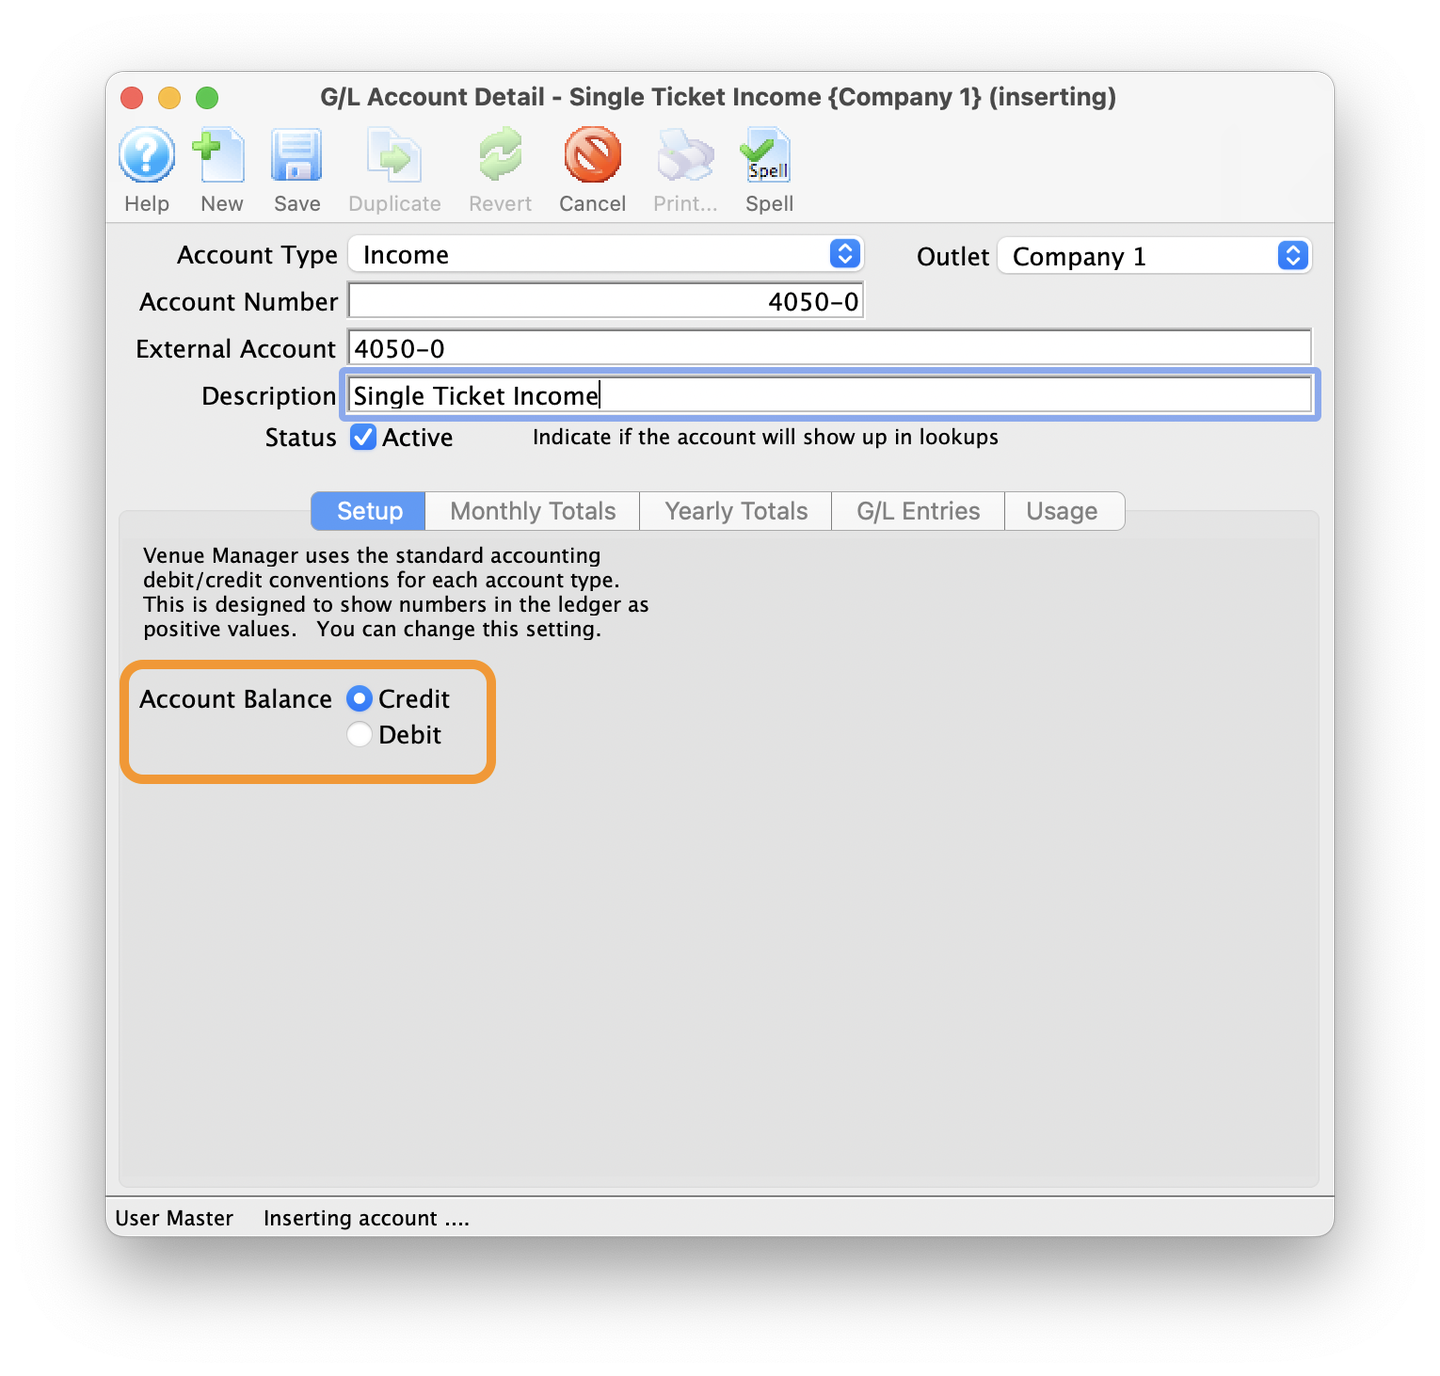
Check Account Balance Setting
Click Save
- When ready, click the Save button
- This will close the G/L Account Detail window
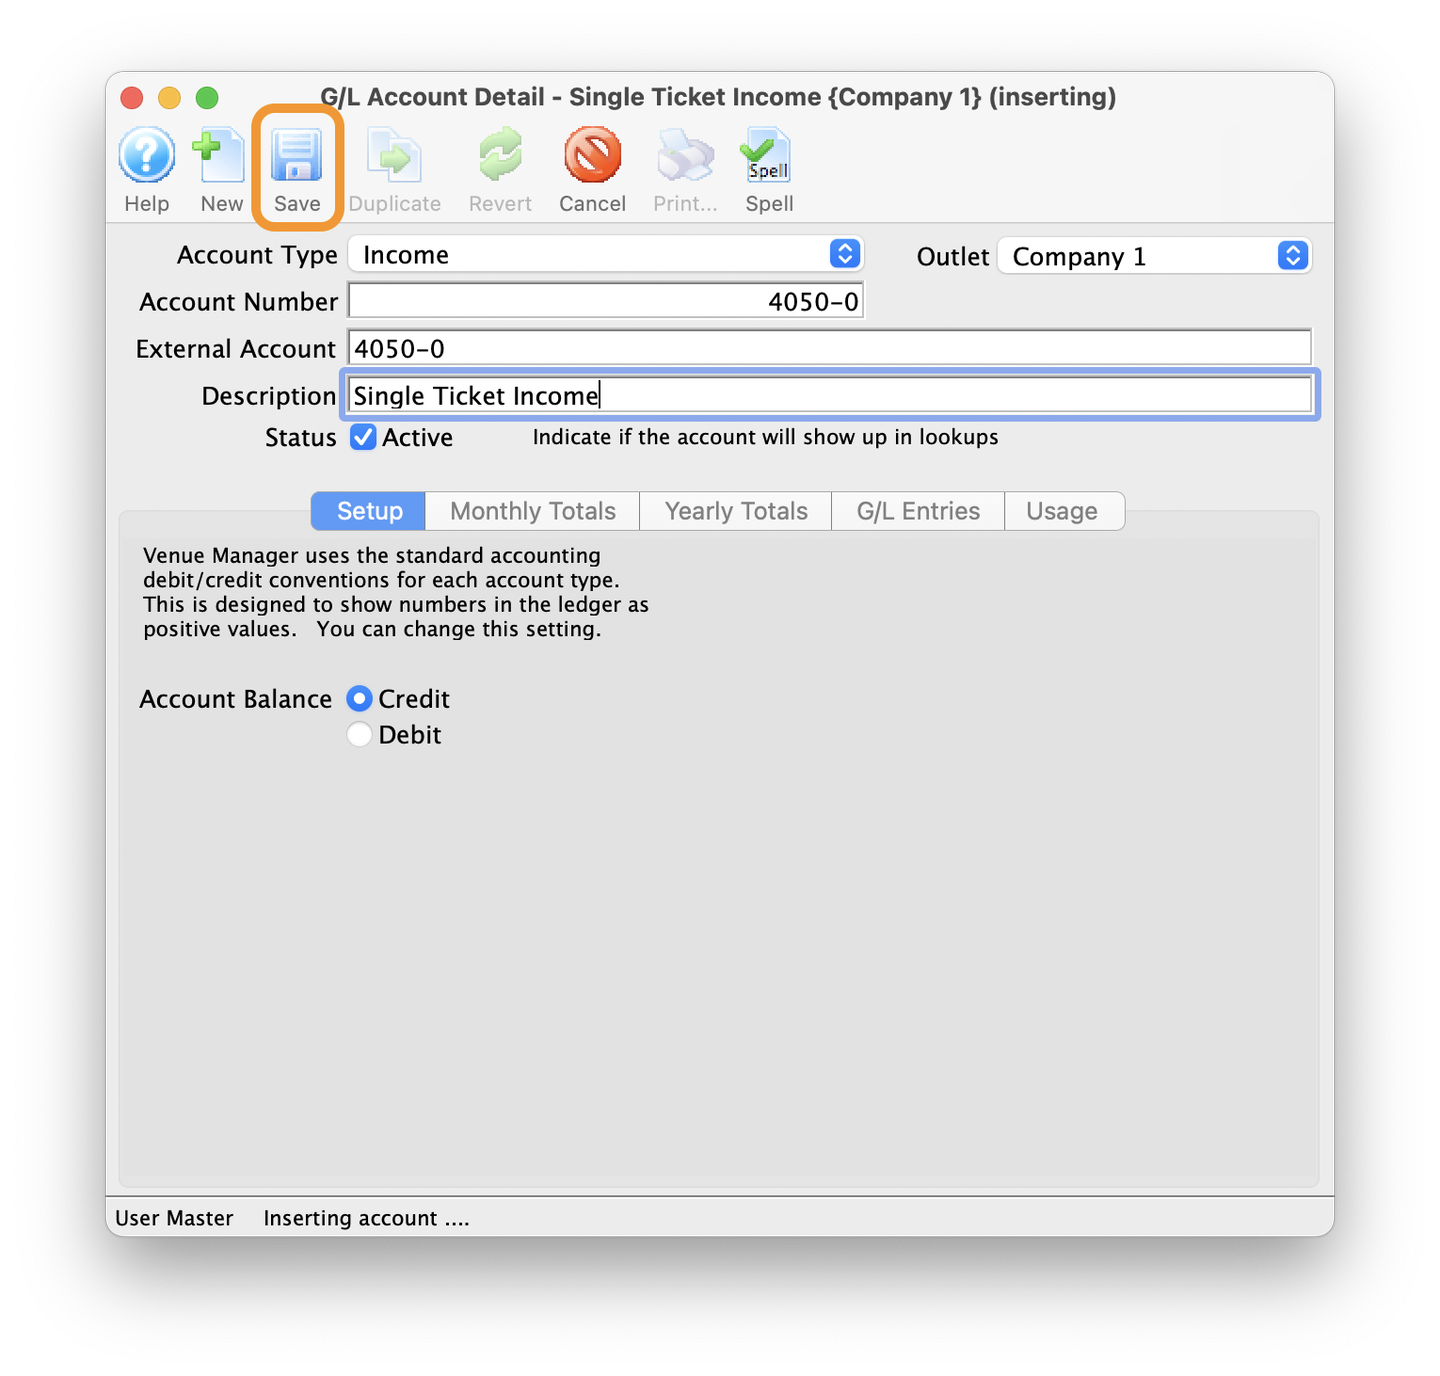
Click Save
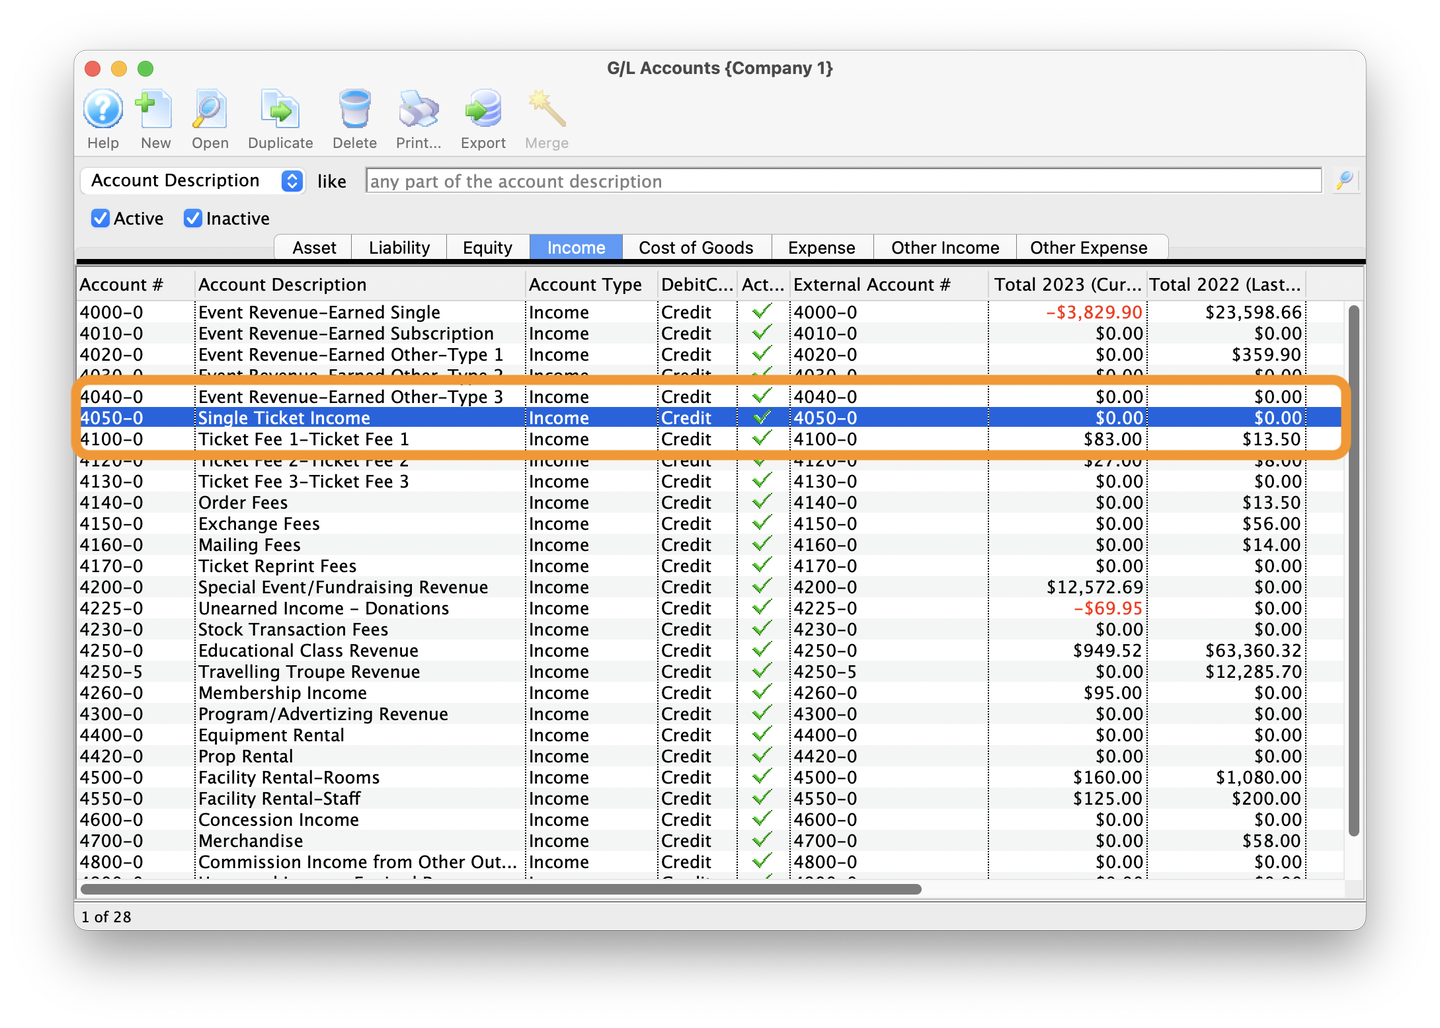
New G/L In Chart of Accounts
- Back in the G/L Accounts list window, on the Income tab there will be a new entry for:
- Account # 4050-0 Single Ticket Income
New G/L Listed
Congratulations! You've just completed the tutorial for creating a new G/L in Theatre Manager.