The following functions apply to any and all windows that contain a list of data. Customizing a list view only affects your user view. Theatre Manager will save that current custom view for the next time you login. Your custom view will also be reflected when you print a list as shown or export a list.
Sort by One Column Top
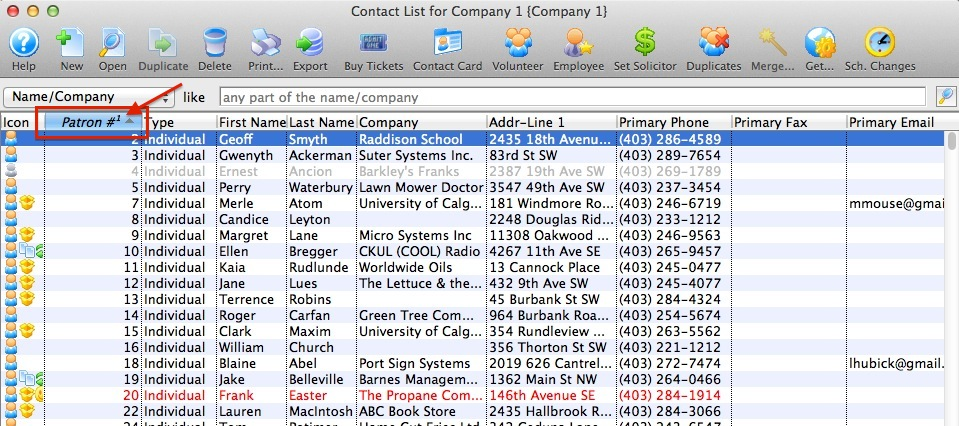
Single-click the desired column header to automatically sort the list by that value. Once sorted, the column header will now include two things to the right of the column title:
- A superscripted 1
- A small grey triangle
The 1 indicates which column the list is currently sorted by while the triangle indicates if sort is ascending (pointed up) or descending (pointed down). Ascending sorts are smallest to largest, 0 to 9, and/or A to Z. Descending sorts are largest to smallest, 9 to 0, and/or Z to A. To switch between ascending and descending, single-click the column again.
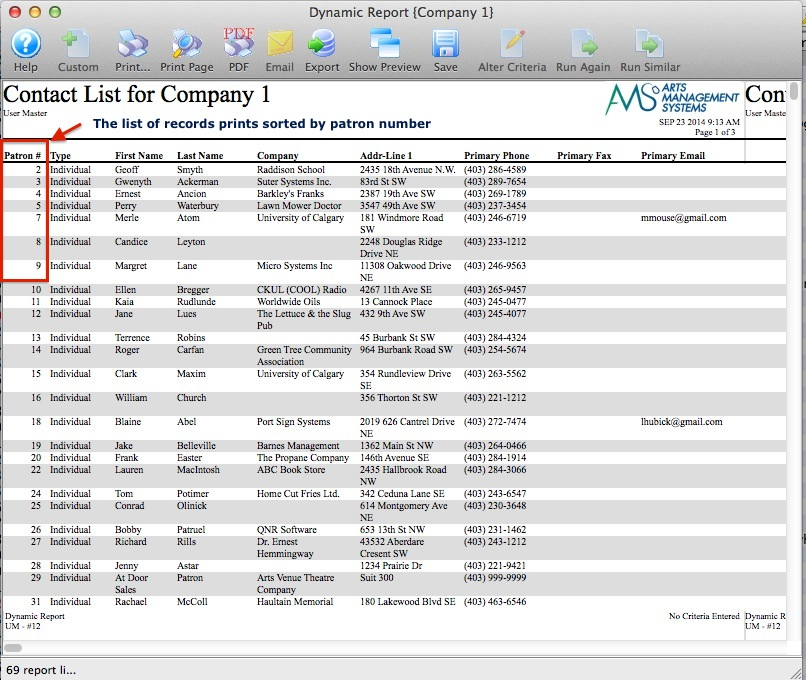
Printing the list as shown will now appear with the same sort. In this example, by patron number, ascending.
Sort by Multiple Columns Top
Make sure to check out sorting by one column before proceeding.
This function can be especially helpful when searching for duplicate patrons, performing multi-season event searches, sorting tickets within a patron's record, etc.

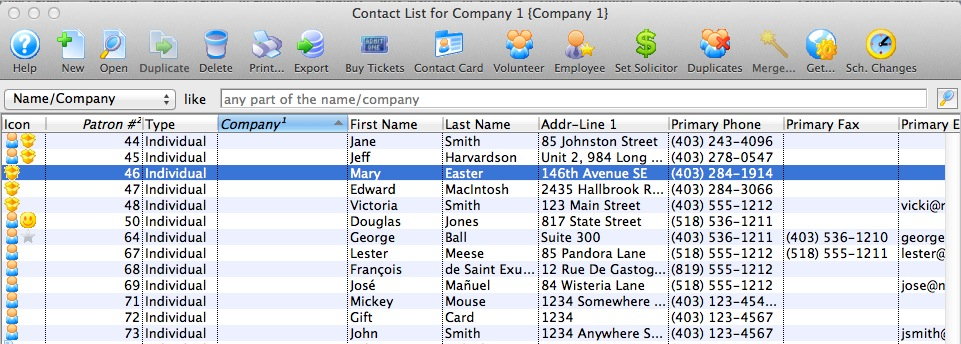
Shift-click the column headers in the desired sort order, starting with the first, then the second, etc. The column headers will show numbers indicating where they fall in the sort order. In this example, we are sorting first by Last Name, then by First Name, then by a column not shown, then by Primary Phone, and finally by Patron #.

To change the ascending or descending status of a column in your multi-sort, click the column header twice while holding the shift key.
Performing a single column sort (clicking once on a column header) will remove the additional sorts.
Change Column Order Top

Click and hold on the column header you wish to relocate and use your mouse to drag it left/right to the desired new location.
In this example, note that the Company Name column has moved from the right of Last Name to the left of First Name.
Change Visible Columns Top
This feature is especially useful when preparing to export data from a list as the export reflects the current custom view.
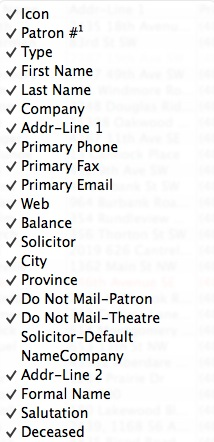
Right-click (Control-click on a Mac) on any of the column headers in the list you wish to change. This opens a sublist of all the available columns for the list.
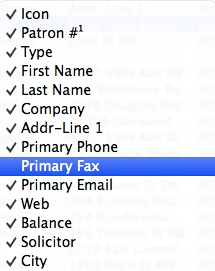
Click the desired items on the sublist select which items are displayed versus hidden. A check to the left of the list item indicates that the column is currently displayed in the list. No check means that the item is hidden from the current list display.
Alter Column Order and Visibility Top
This is another great way to change which columns are visible and the order in which the columns appear for any list in Theatre Manager all at once.
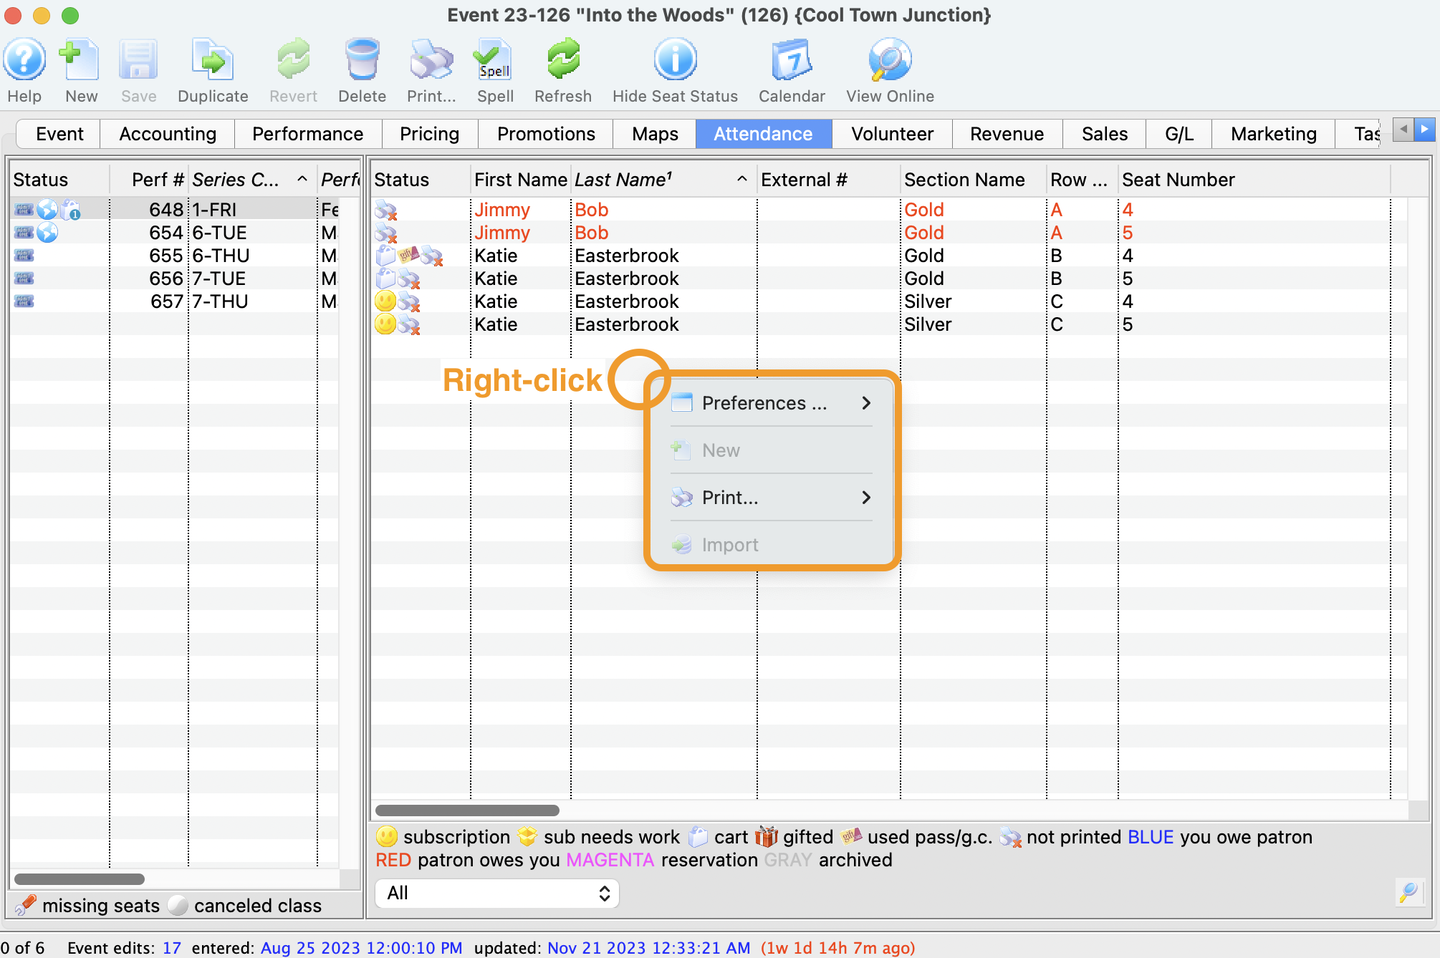
Right-click (Control-click on a Mac) anywhere in the list to bring up the context menu.
In the context menu, navigate through Preferences to select the Alter Column Order and Visibility option. In the resulting Window, you can view all columns that can be available to be viewed on the list.
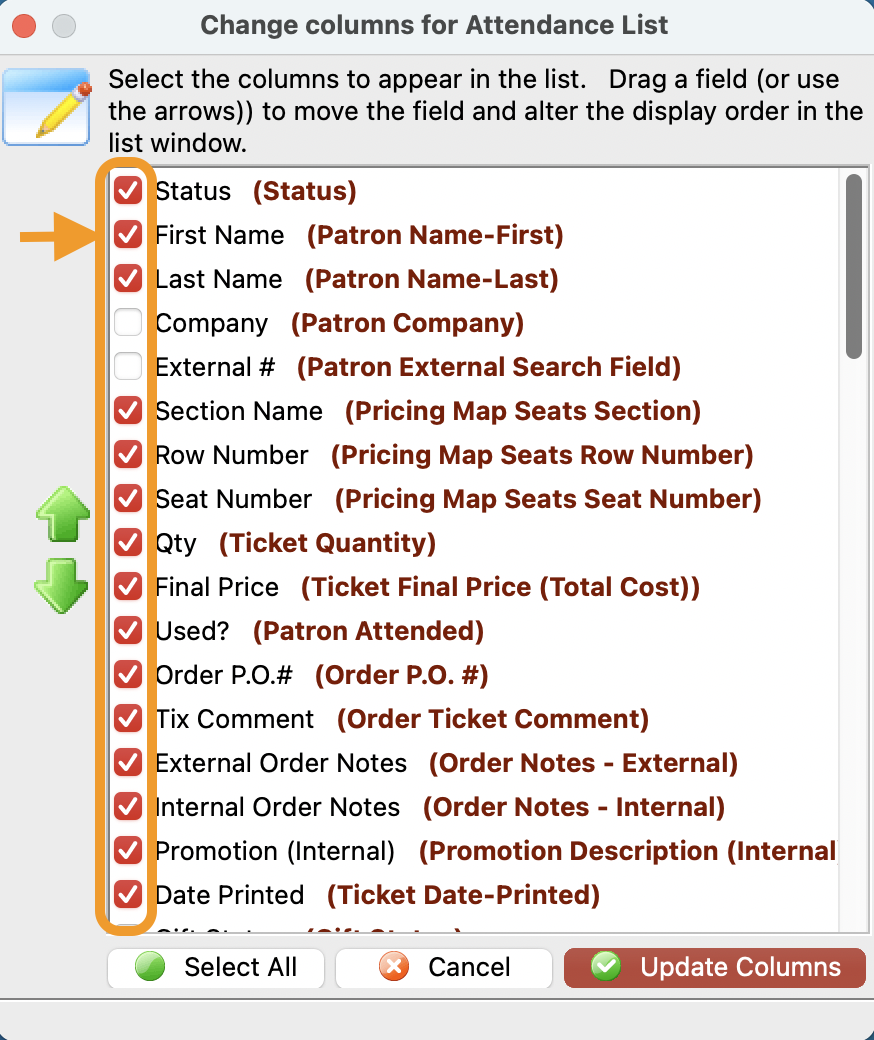
Enable or disable any Column for viewing using the checkboxes beside the Column Names.
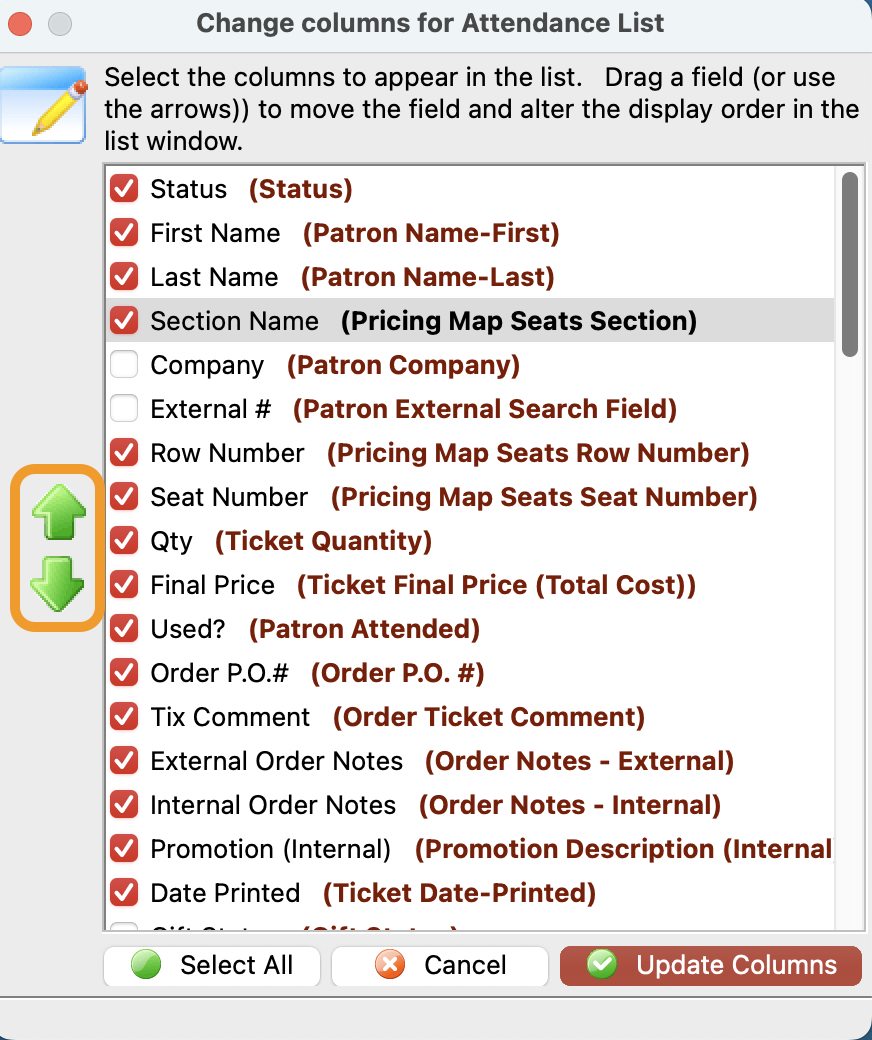
Change the order in which the columns will appear on your list by highlighting a column name and using the arrows on the left side of the window.
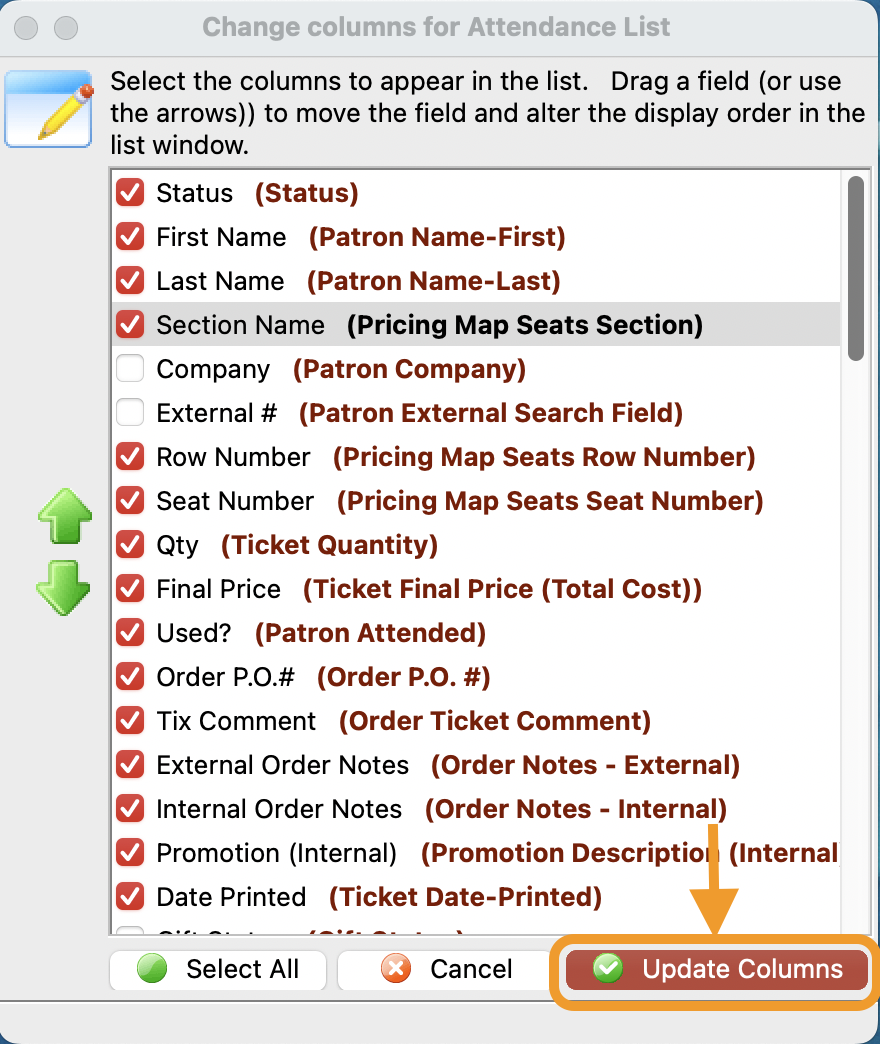
Select the Update Columns button to confirm changes.