Before proceeding, read about workflow notifications.
There are four parts to creating a workflow notification:
- Write a letter to serve as the email subject and body (e.g. a new donation notification using donation data to pull the database fields).
- Setup a Code Table entry for the new workflow notification. The code table entry should reflect the same types of categories available for selection as you choose for data when you create your letter.
- Create the workflow notification, attach it to your letter, and select which employees should receive the email.
- Once you select the workflow notification in the drop down of the right event, promotion, pass type, etc, an email will be sent to your selected recipients using the letter template.
Here are the steps in full detail:
Create a letter
- Create a letter for the workflow notification to use as a template in emails
- Make sure to select the correct data file for your intended purpose (e.g. Donation Sales Data for notifications of a new donation, Ticket Sales Data for notifications of new sales for a fundraiser event, etc)
Create a workflow notification name
- Go to Setup >> System Tables >> Code Tables to setup a new workflow notification type
Open the Workflow Notification List Window
- Go to Setup >> Users and Access >> Workflow Notifications
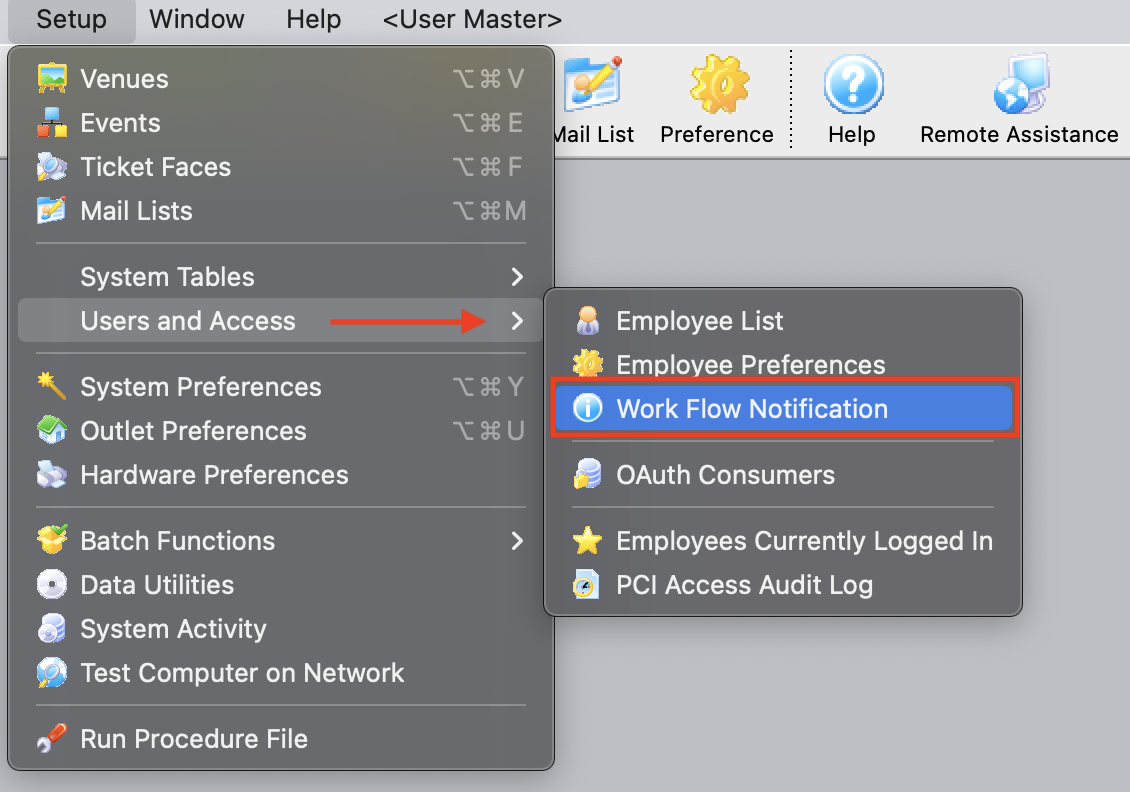
Setup >> Users and Access >> Workflow Notifications
Start a new workflow notification
- Click the New button from the Workflow Notification List Window

Workflow Notifications List Window
Select the notification type and enter the transaction types and notes
- From the Notification dropdown on the Workflow Notification Detail Window, select your newly created workflow notification type
- Check or uncheck the boxes for A record is to control which types of transactions will trigger an email notification (add, changed, and/or delete)
- Enter notes to describe what this notification is for
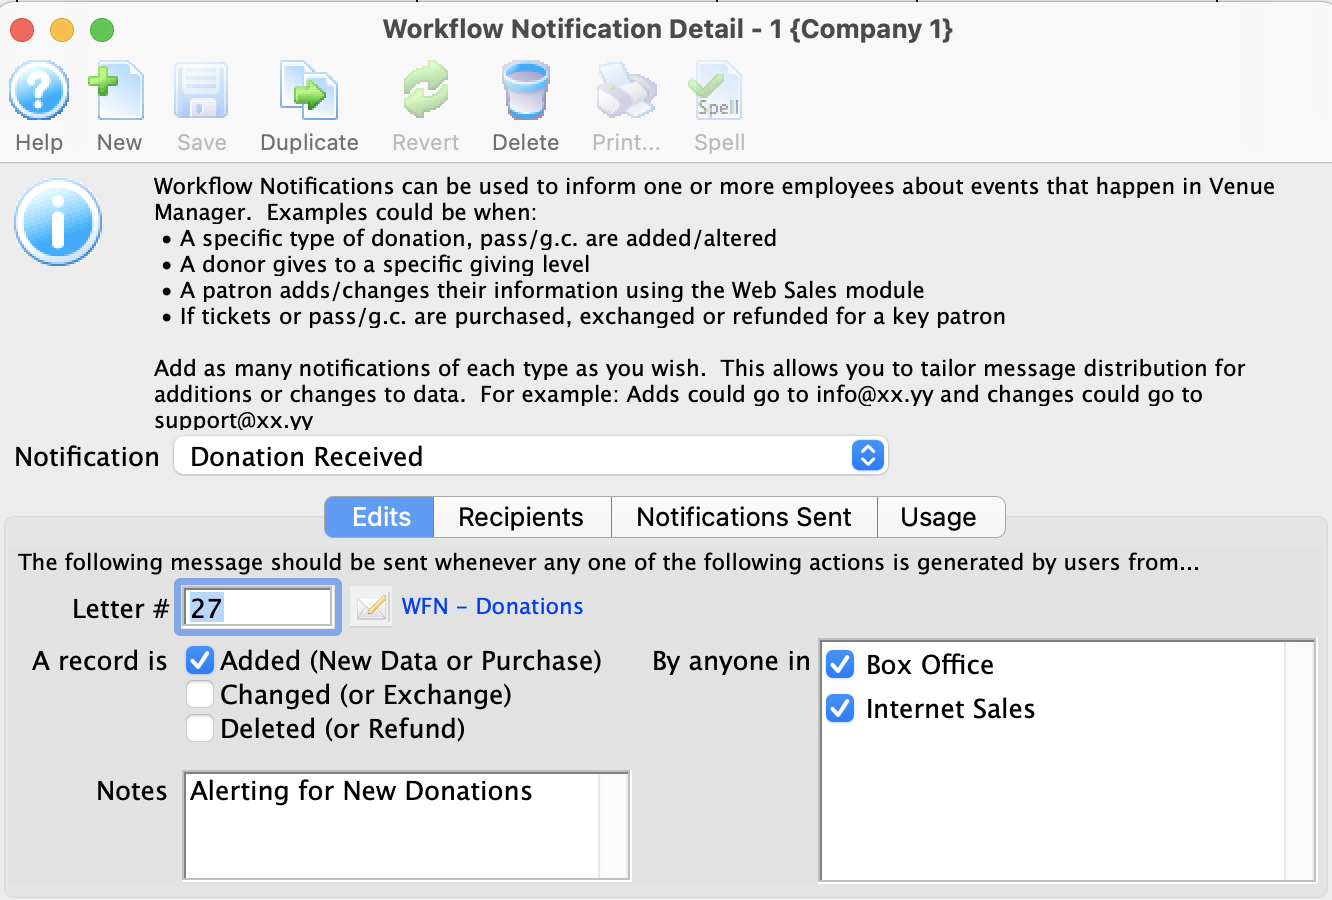
Workflow Notification Detail Window
Find and attach the letter
- Click the search button to open a Letter Selection Window
- Search for the correct letter that you created for this purpose
- Double-click to attach the letter to the workflow notification and close the Letter Selection Window
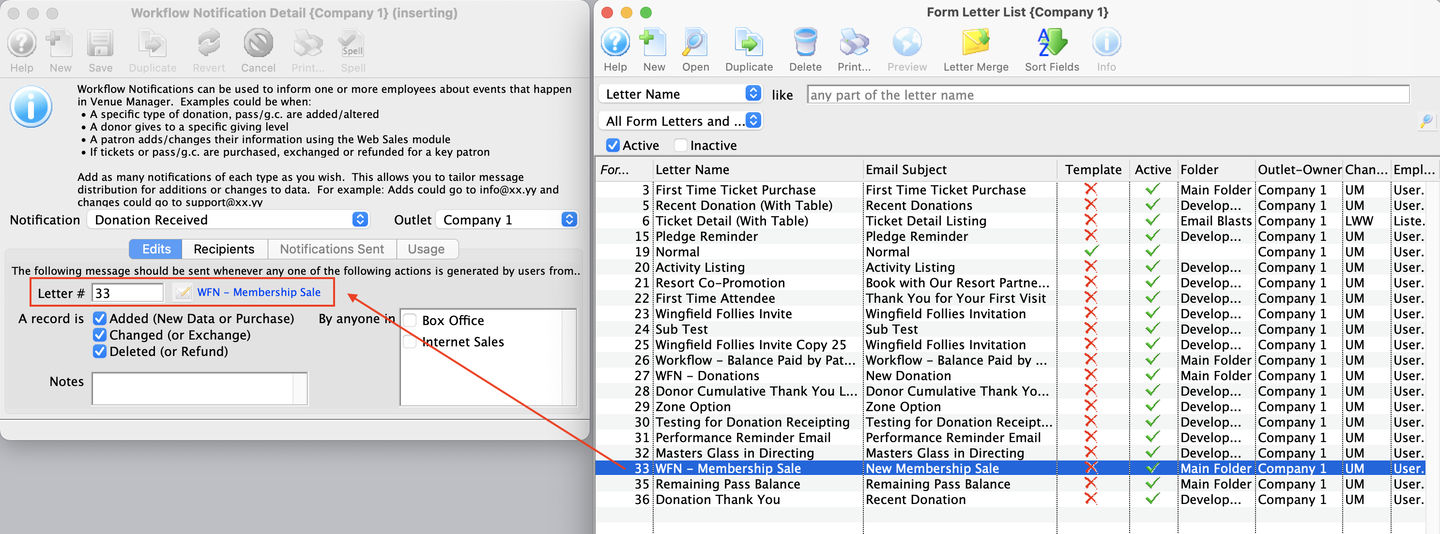
Edit Tab Letter Search and Selection
Edit the access group restrictions
- Choose if the notification will be sent for transactions created by Box Office, Internet, or both
- If you have created additional access groups and attached employees to them, these will be listed here for selection as well
- These options allow you to set up and send emails to different employees for different situations (e.g. not all employees will need to be notified if a donation is changed, but more will be on the list for donations being added)
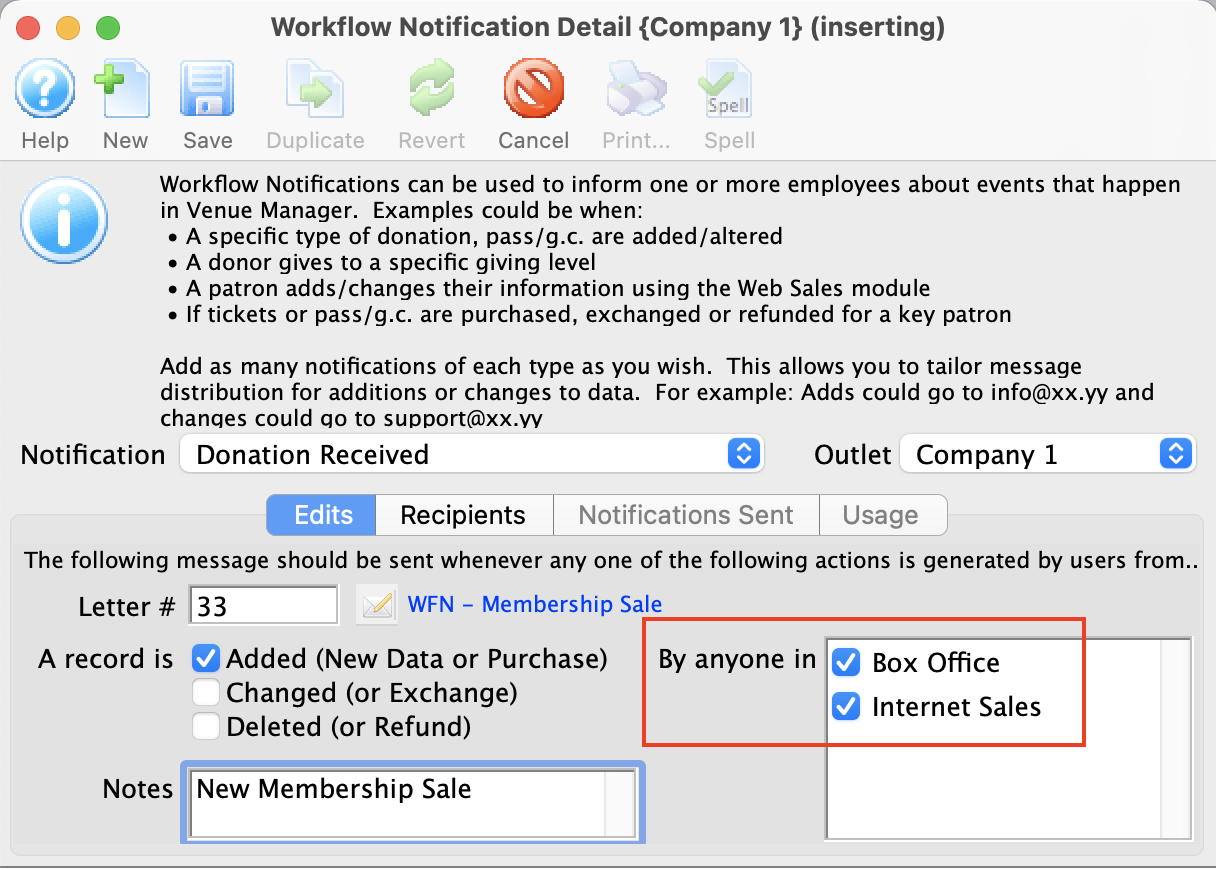
Workflow Notification Detail Edits Tab
Select the employees to receive the notification
- Go to the Recipients Tab and check which employees should receive the email notifications
- If an employee does not have an email address, you will need to enter one for them to be added to a notification
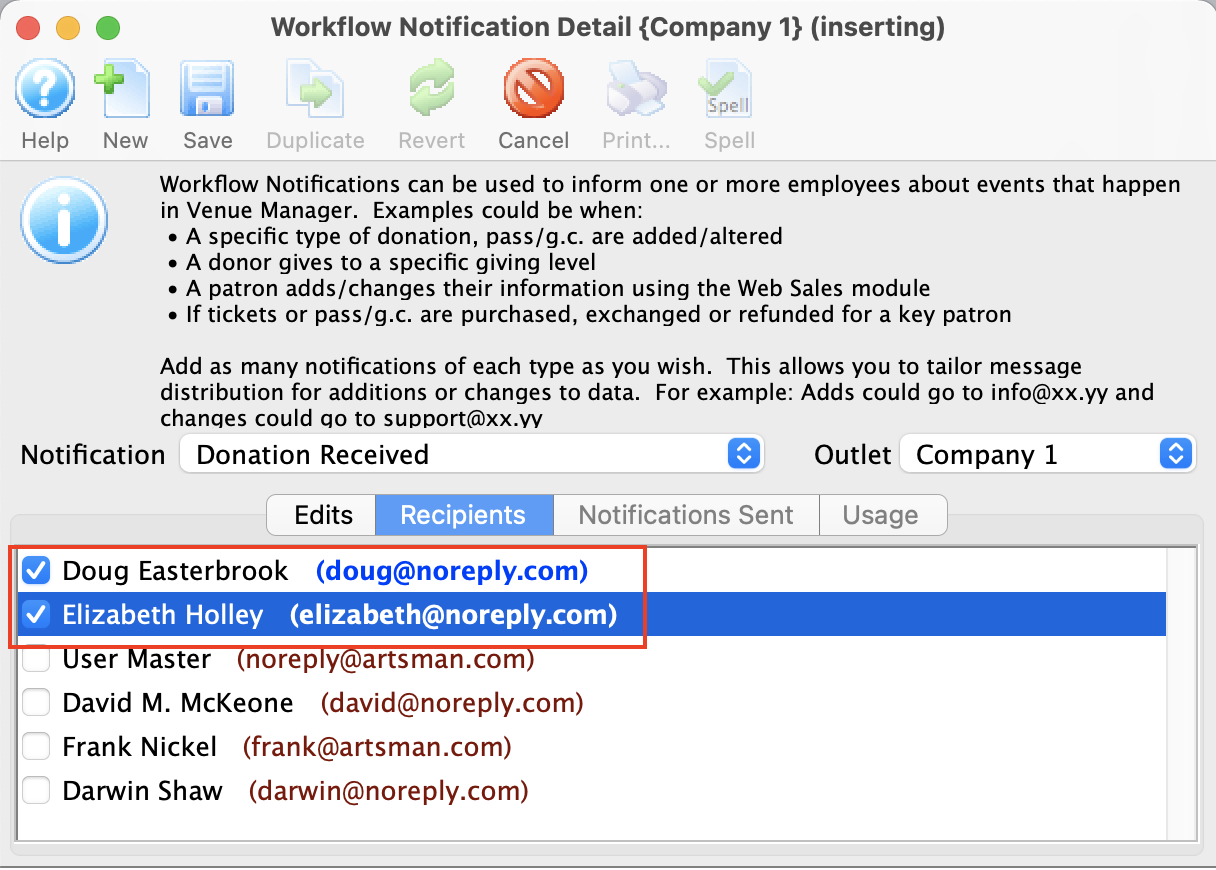
Workflow Notification Detail Recipients Tab
Save your setup
- Click the Save button and close the window

Save Button
Add the workflow notification to the appropriate item in Theatre Manager
- Attach the notification to the appropriate item (e.g. event, donation campaign, pass type, performance, sales promotion, etc)
You should now check your notifications are being sent. To test the notification, set a ticket or pass notification to be triggered only at the Box Office. Then sell the ticket or membership in the Box Office, and check your inbox. The notification should be sent by the system within 30 seconds. If the notification is not in the inbox, check your junk or spam folder. If the notification is for online sales only, web transactions will trigger the notification as soon as the online order has finished checkout.