
You can enable specific personnel in the database to view event revenue through the online ticketing portal. This allows non-employees, like outside promoters and producers to have real-time access to ticket revenue.
There are 4 basic steps to setting up a Personnel Position to allow revenue to be viewed online:
- Setup the Personnel Activity inside Code Tables
- Add a Position to the Personnel record
- Add a Personnel Activity to the Personnel record for each Event/Performance
- Have the personnel (patron) log in to the online ticketing site to view the revenue reports
The Personnel Activity will be set up once and can be used for all personnel accessing promoter reports online. Adding a Position will need to be done for each Personnel requiring access to the reports online. Adding an Activity will be a repeatable step based on the event/performances the personnel should have access to. All personnel will follow the same steps to access the reports online.
Below is a step-by-step on how to enable Personnel Activities to view performance revenue.
Setup Personnel Activity Top
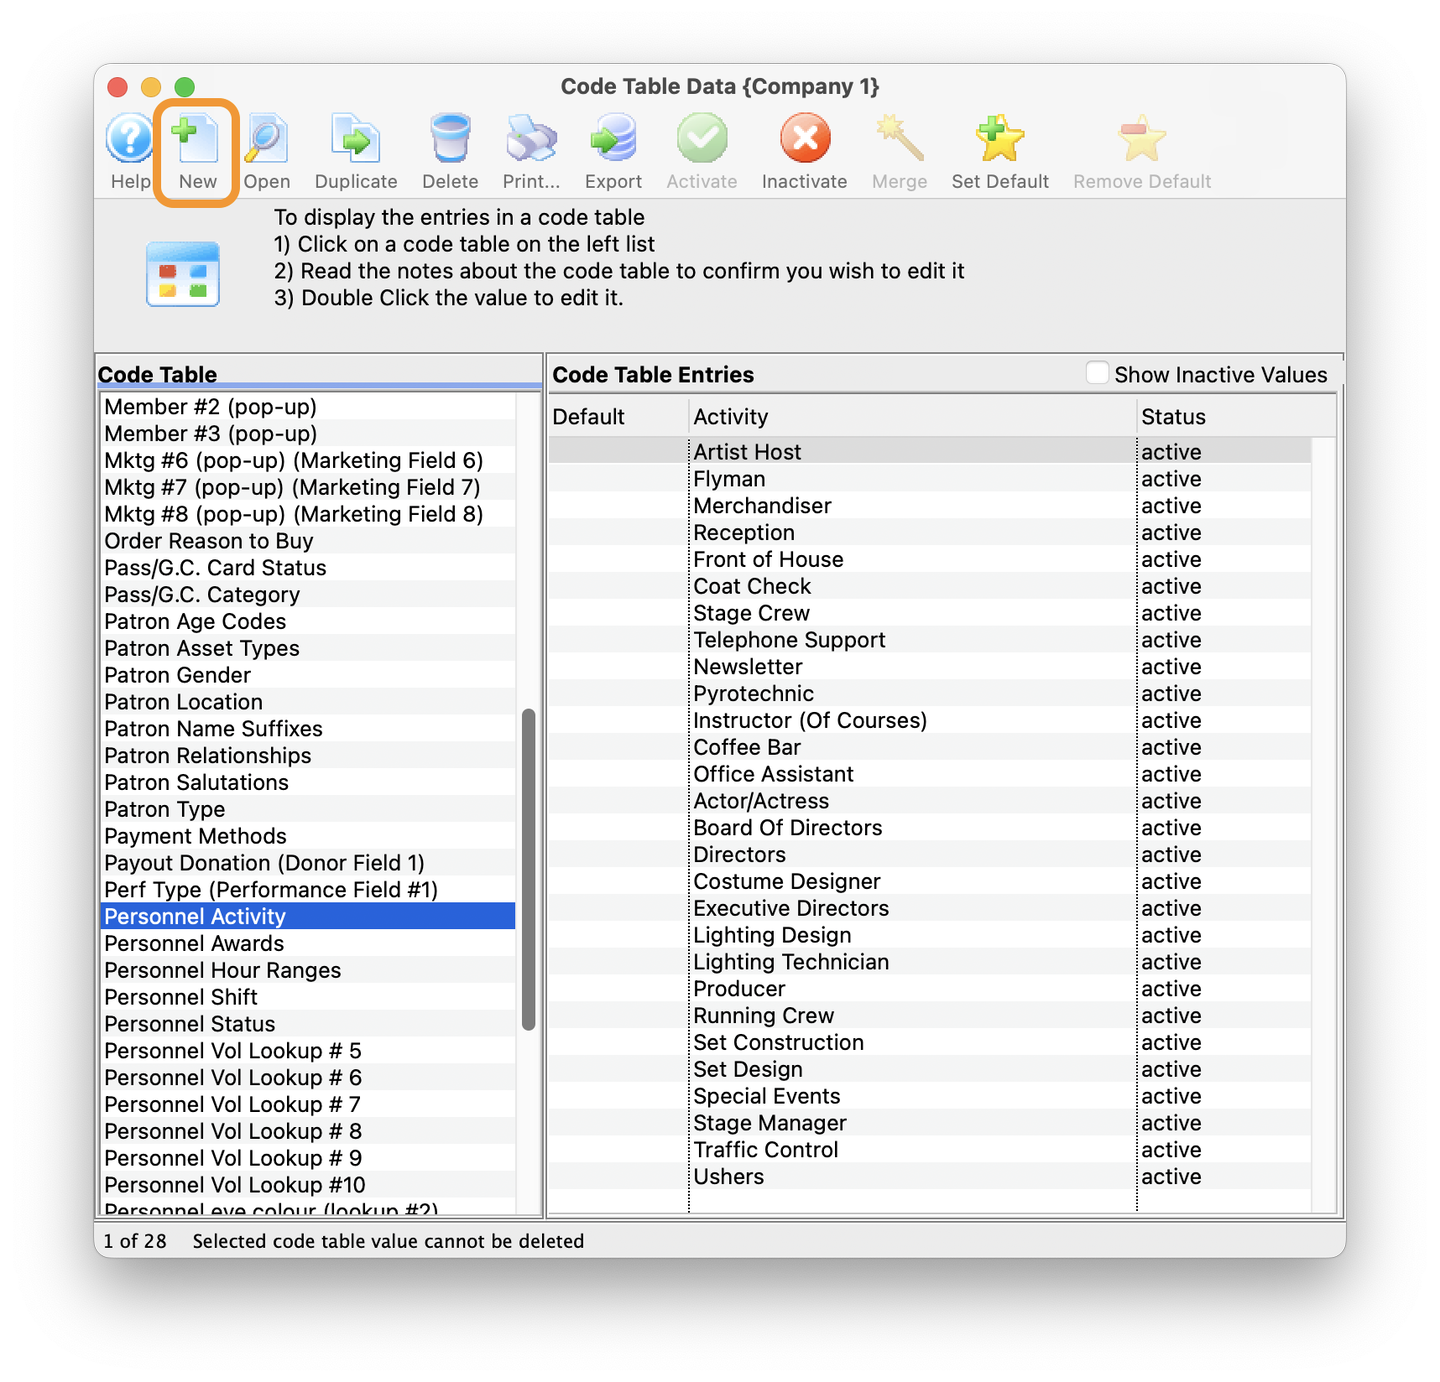
Open Code Tables
- From the File Menu, select Setup -> System Tables -> Code Tables
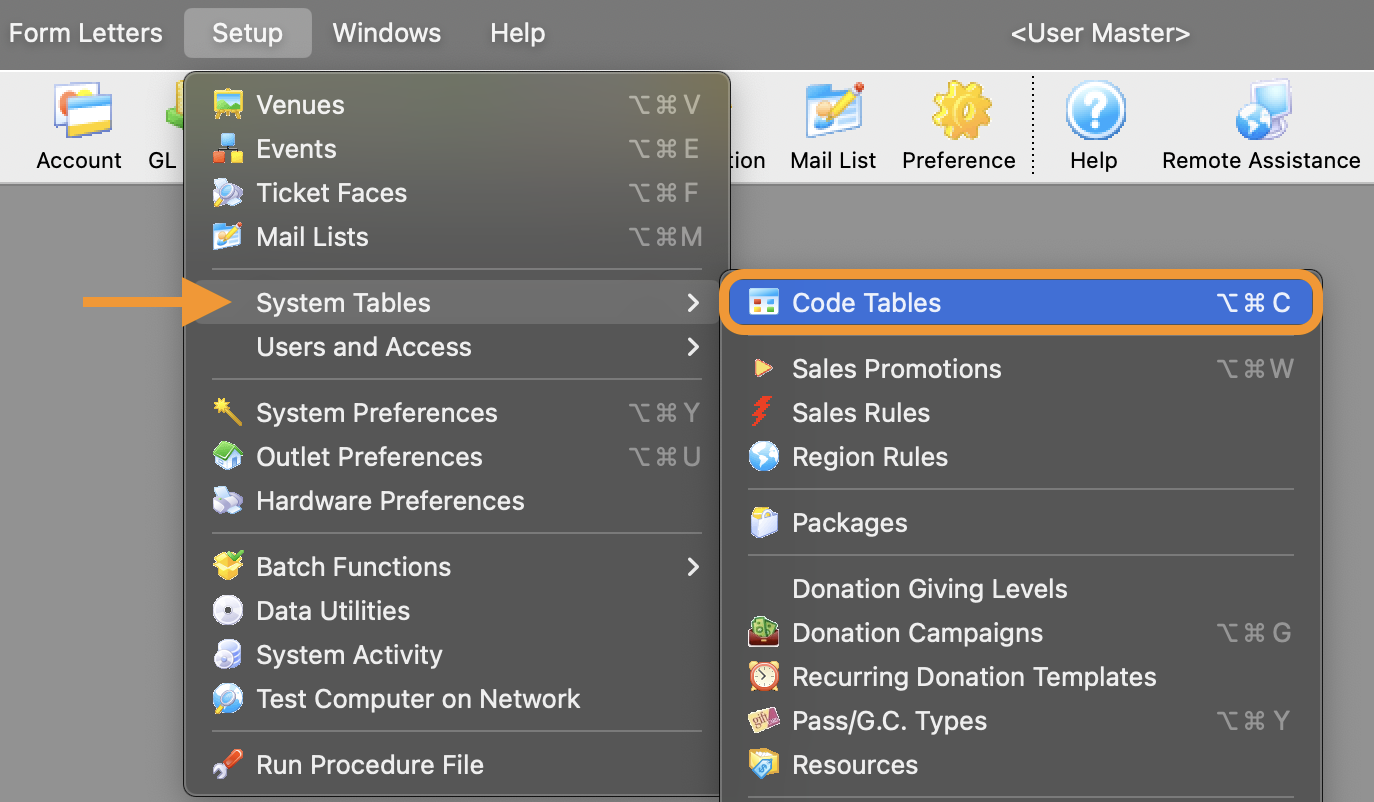
Select Personnel Activity
- From the list on the left, select Personnel Activity
- After selecting Personnel Activity the options on the right will change
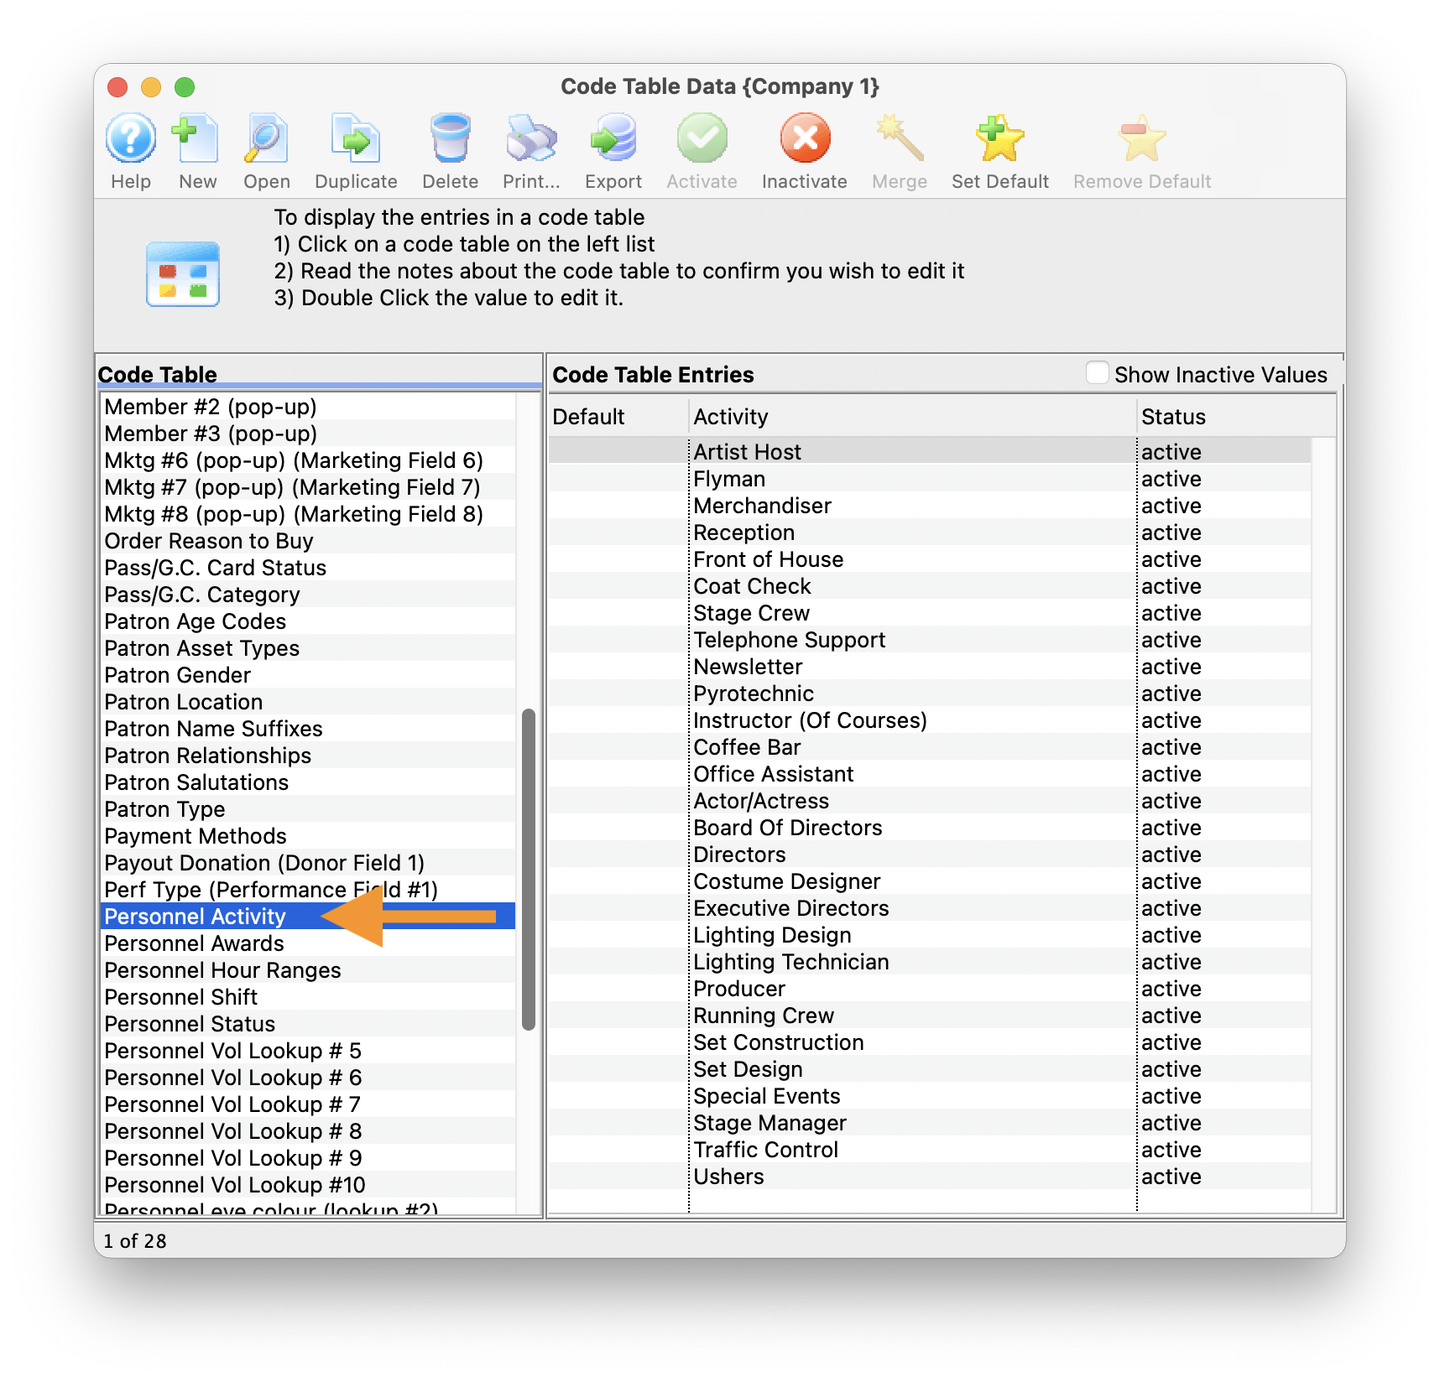
Create a New Entry
- From the Code Tables window, select New from the toolbar
- This will open up the Personnel Position Detail window
- NOTE: An existing activity can be updated if an available naming convention exists. In this example, we're using an industry-standard title of "Promoter" for the remainder of this exercise
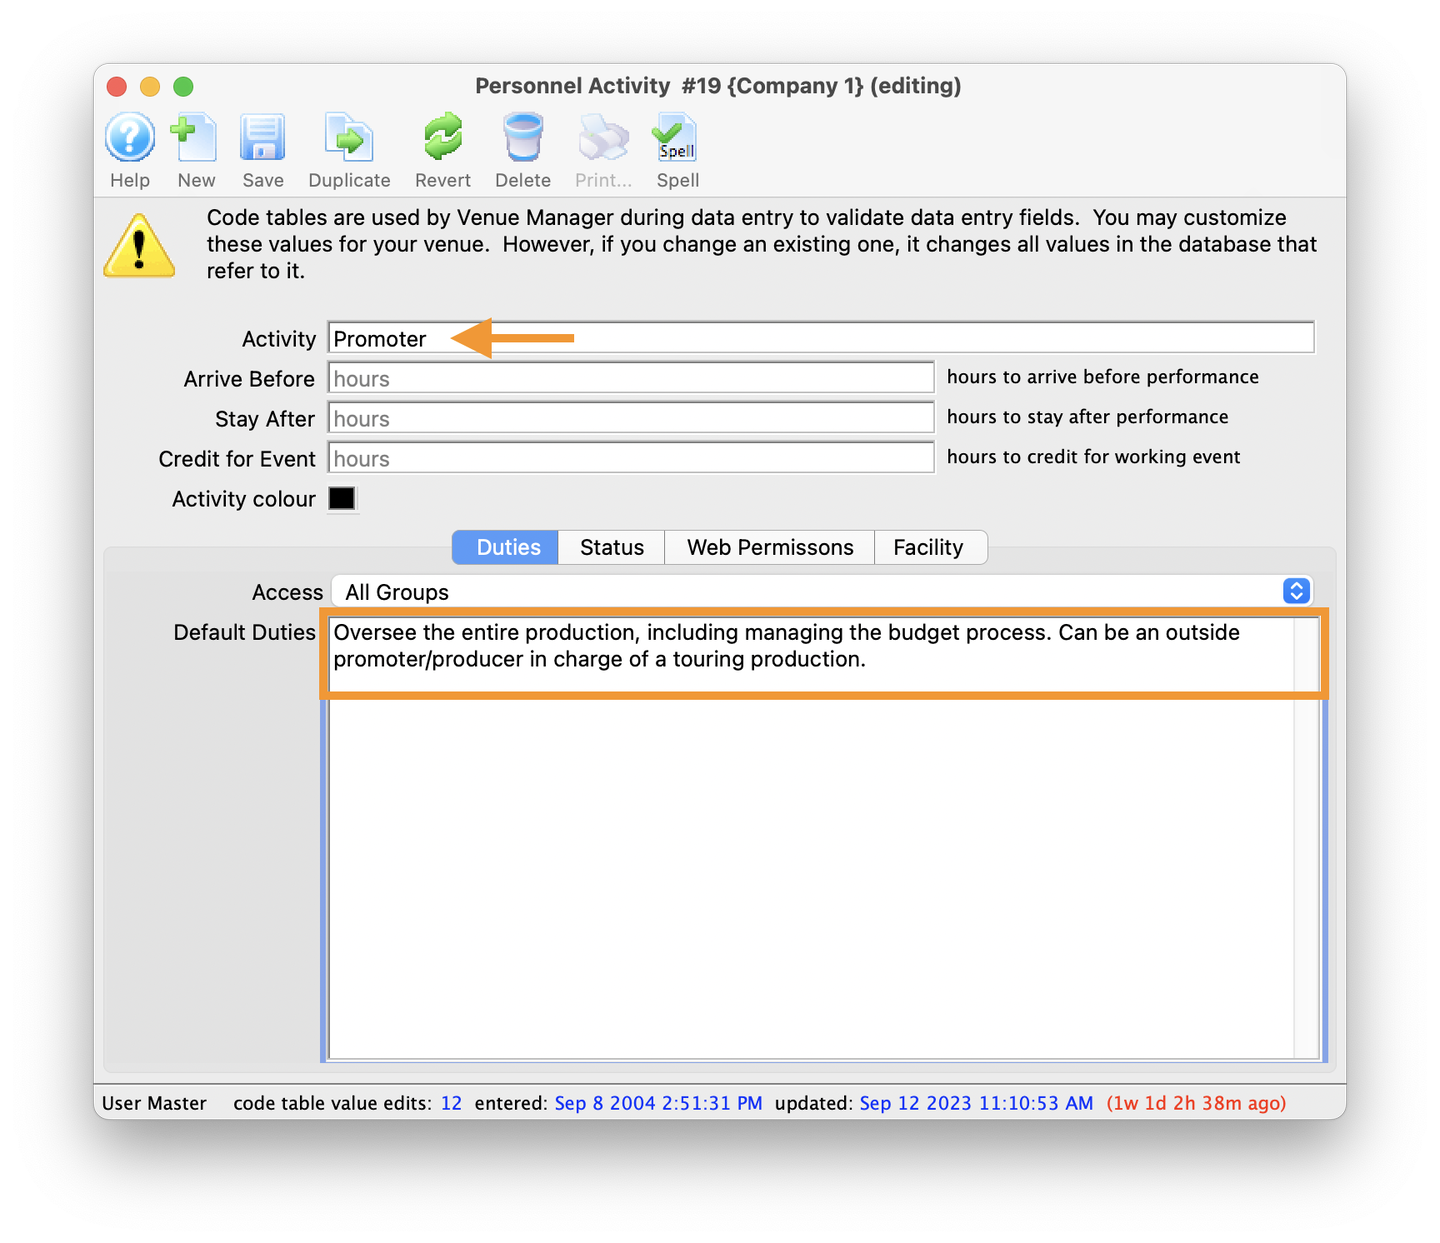
Duties Tab
- On the Duties tab of the Personnel Activity window, in the Activity field, enter "Promoter" (or any similar description that works best for your organization)
- Enter a short description in the Default Duties text field
Edit Web Permissions
- Select the Web Permissions tab
- Under Permitted To check View Performance Revenue

Edit Facility Tab
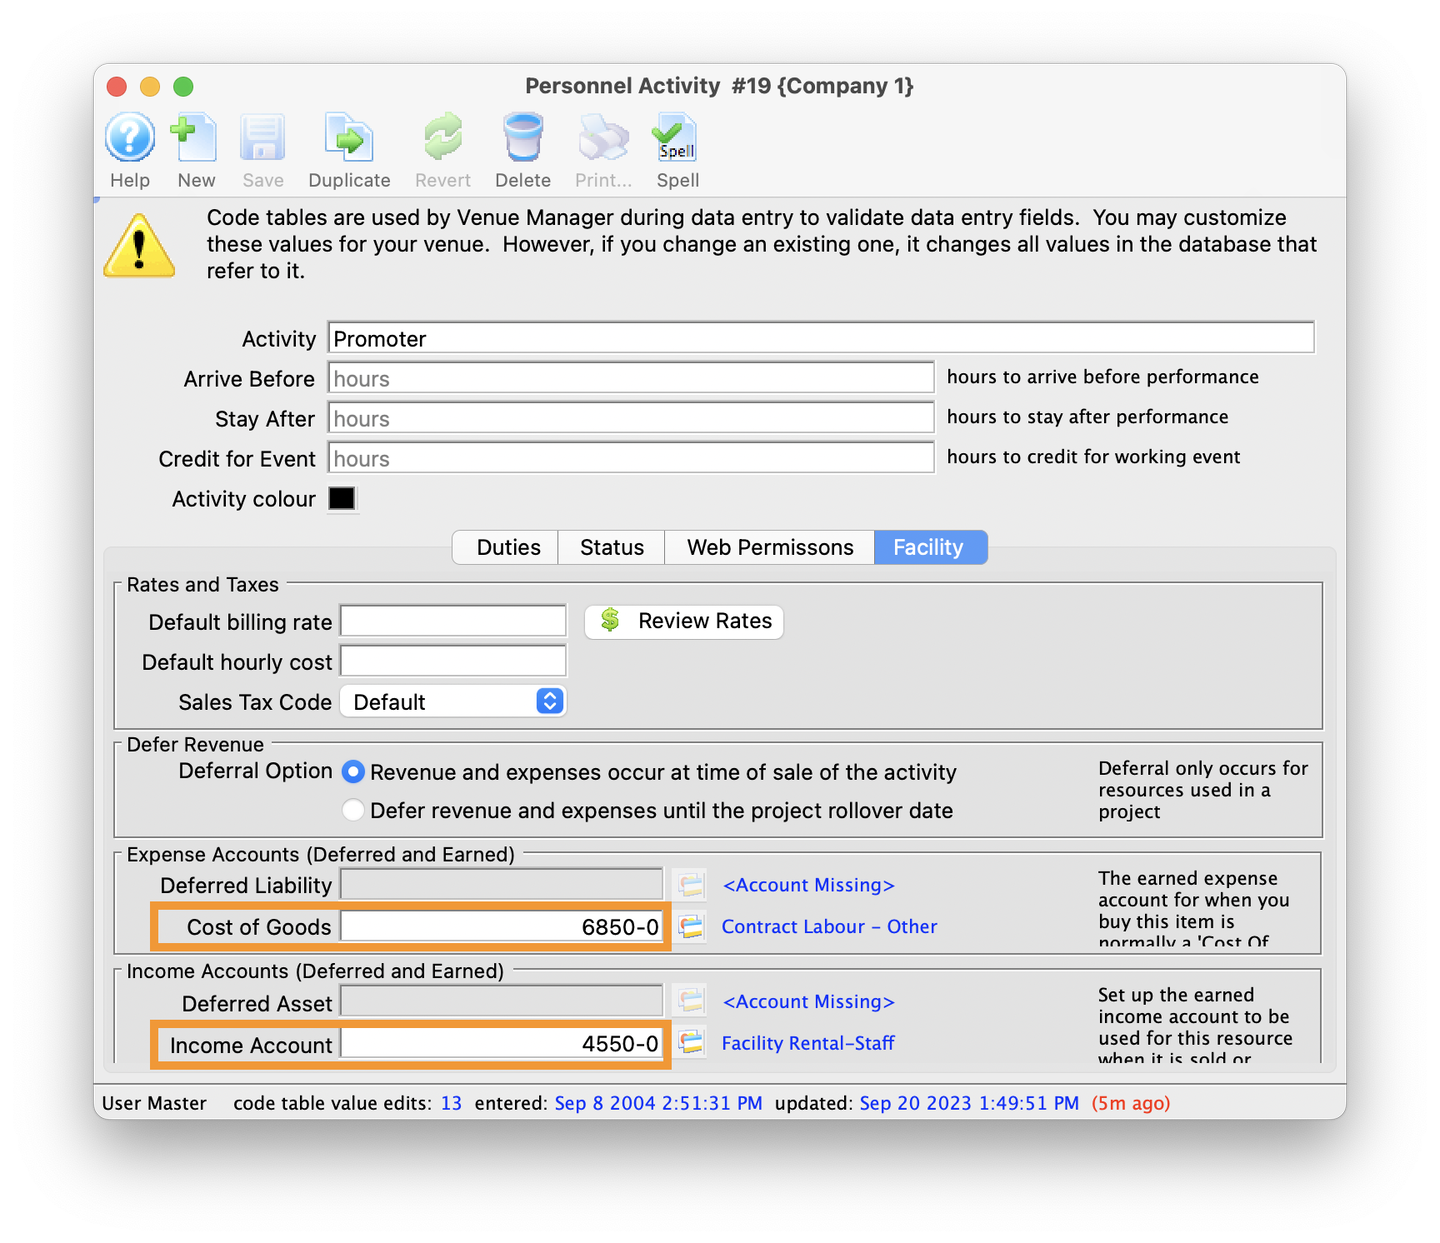
- Select the Facility tab
- Enter a GL code for the Cost of Goods field
- Enter a GL code for the Income Account field
- These two GL fields pertain to the Facility Managment Module and require a GL account to be entered before a new Personnel Activity can be saved.
- Close the window to save.
This completes the Personnel Activity portion of the setup
Add Position to Personnel Record Top
Create/Open the Patron Record
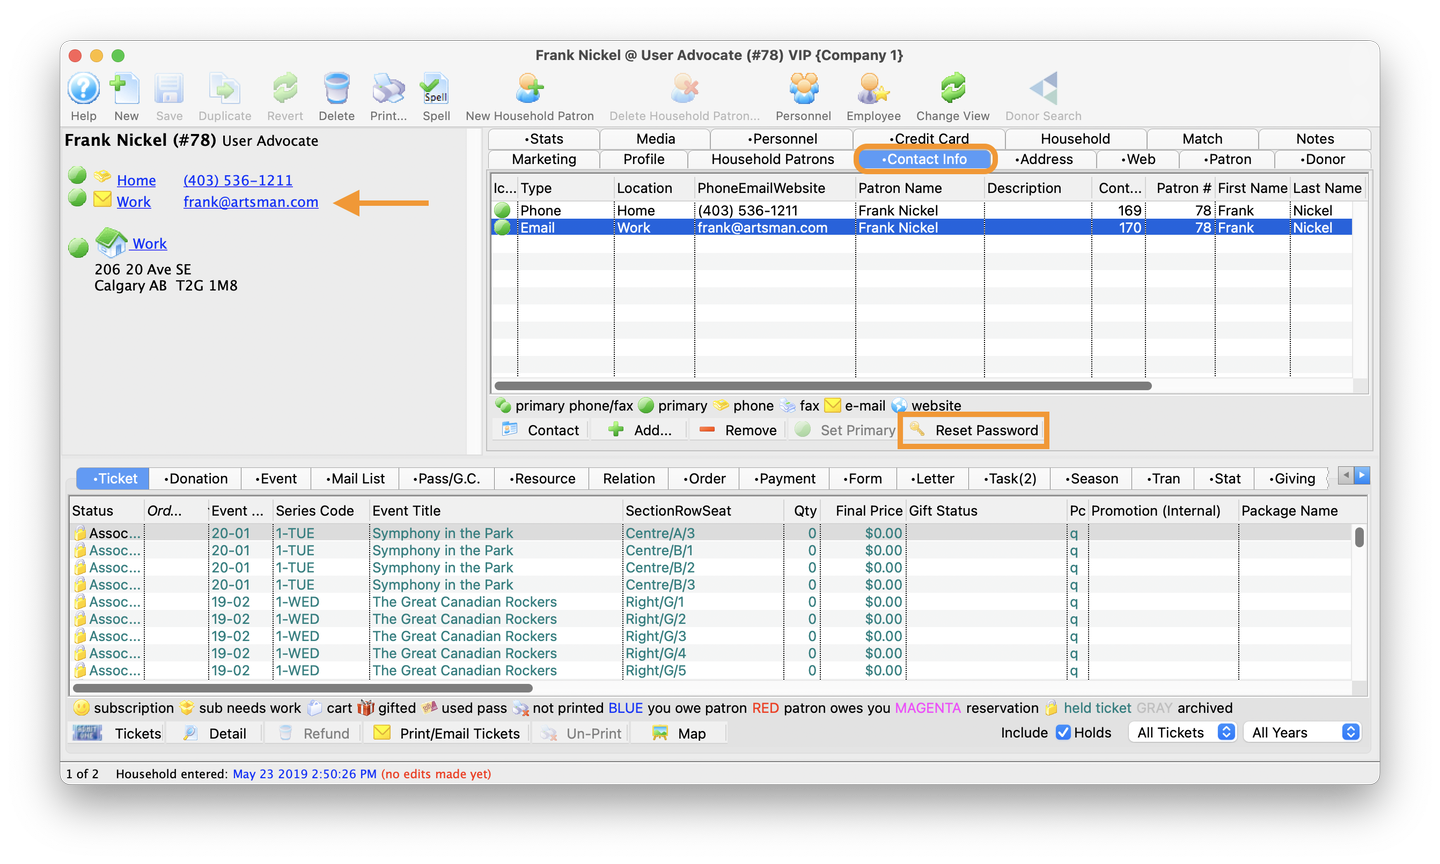
- This step assumes the individual who is being granted the View Performance Revenue access already has a Patron Record in the database. If they do not, create one.
Ensure Patron Has An Email Address
- To log into the online ticketing system the patron will require an email address
- If a new patron record is being created, or, a new email address is being entered, users can click the Reset Password button on the Contact Info tab of the Patron Record. This will send a Password Reset Email to the patron so they can log in for the first time.
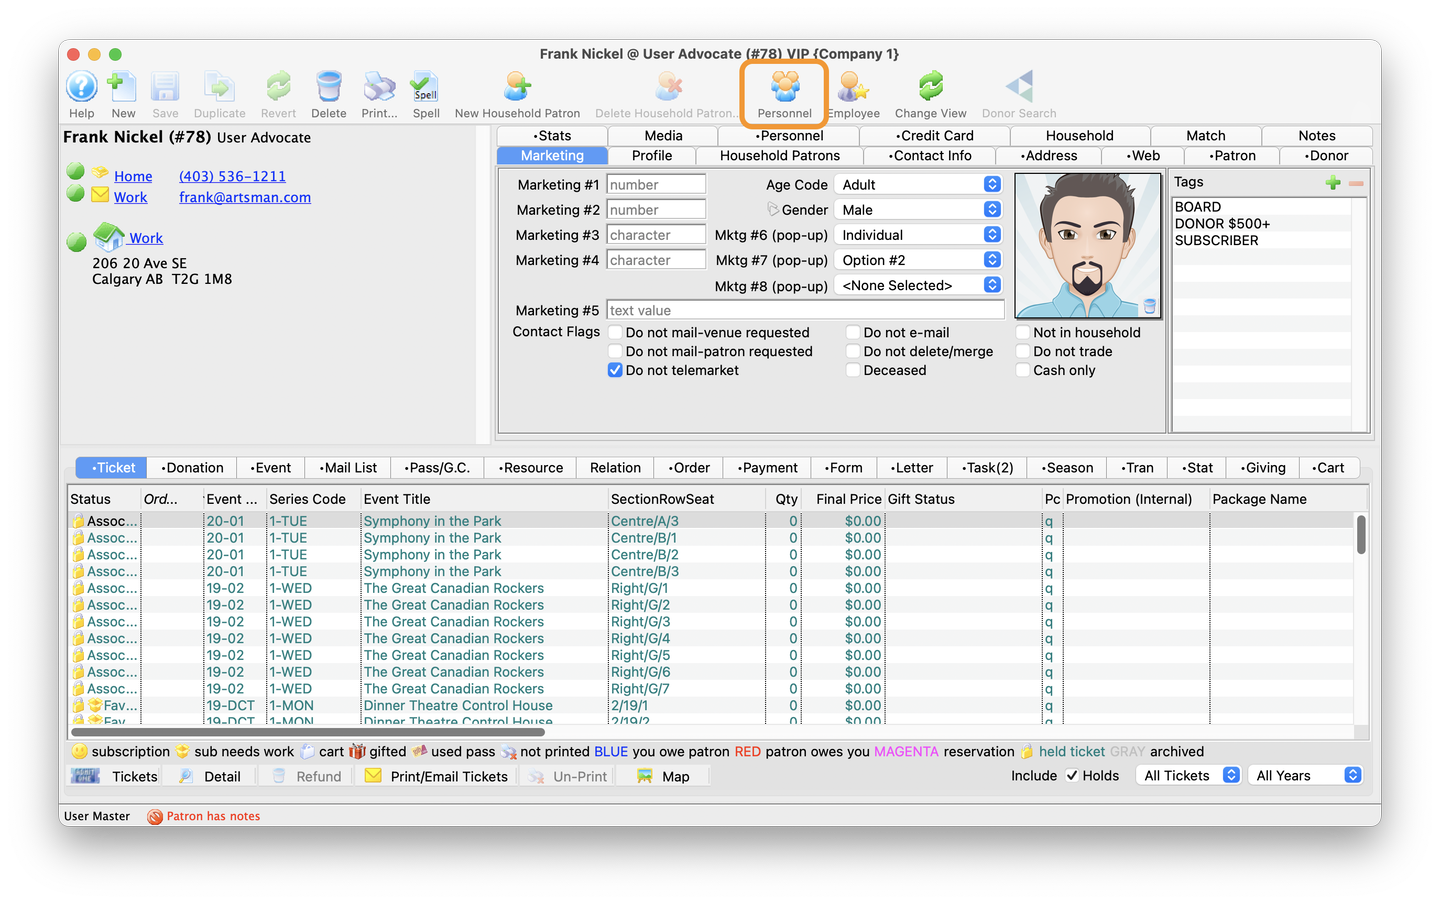
Open the Personnel Module
- Click the Personnel button in the toolbar
- This will open the Personnel Position window
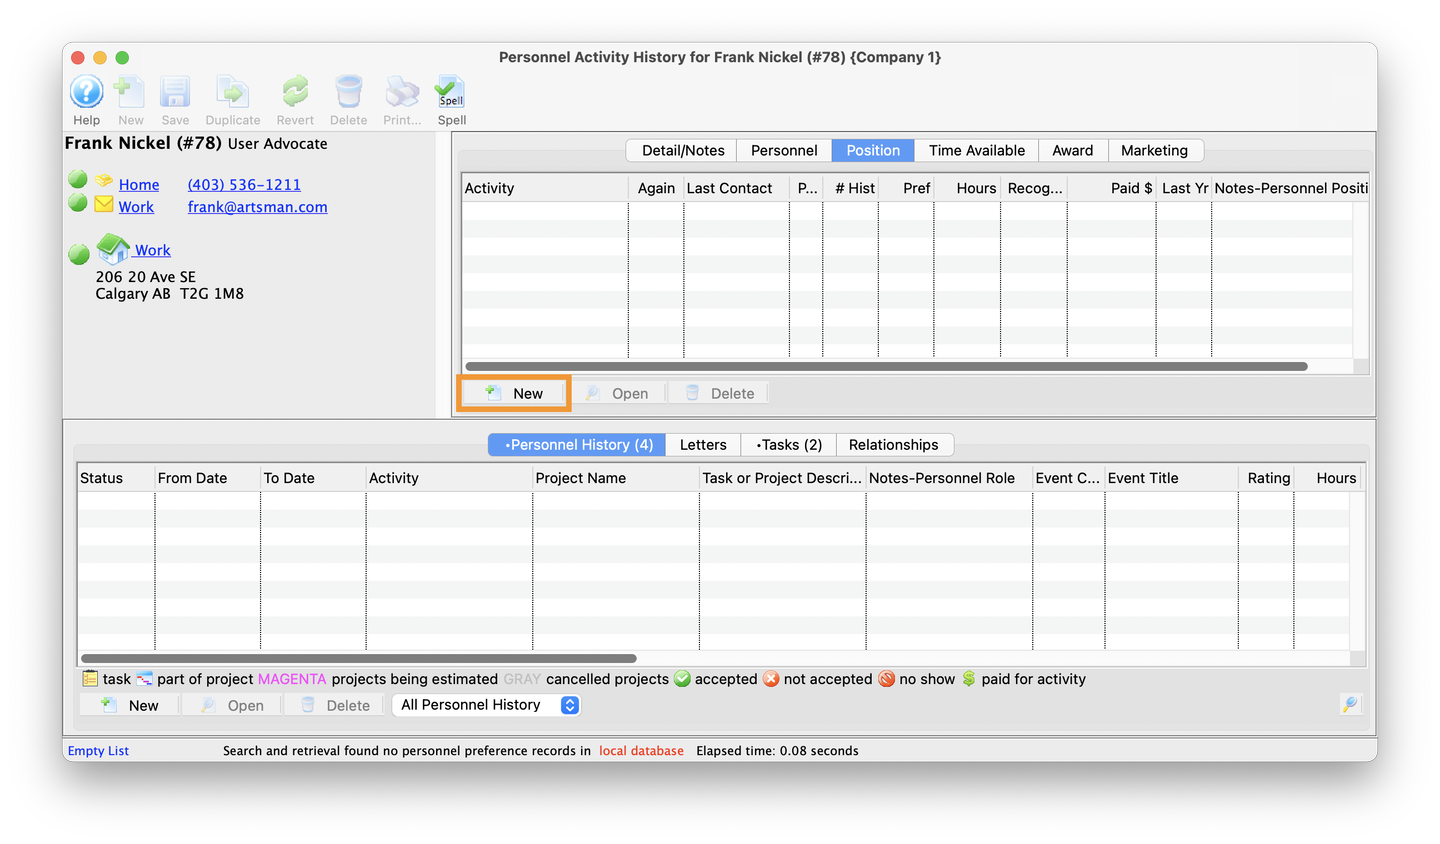
Add New Activity
- Click the New button on the Position tab
- This will open up the Activity Detail window
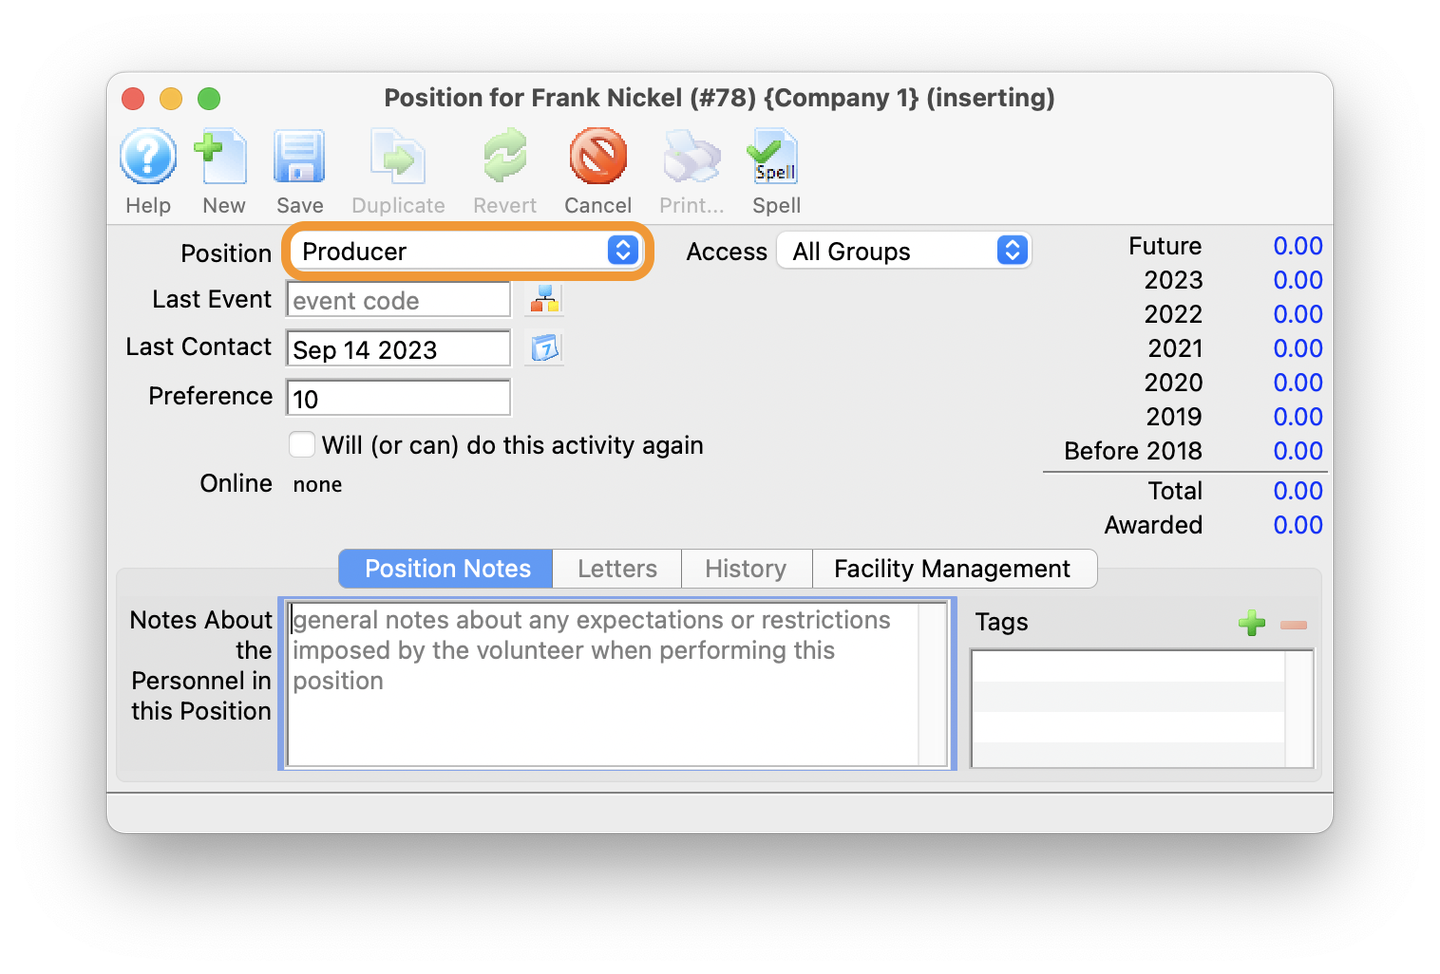
Add Promoter Position
- From the Position pull-down menu, select the "Promoter" option
- The remaining fields can be filled out but are not required
- When ready, click the Save button or close out of the window
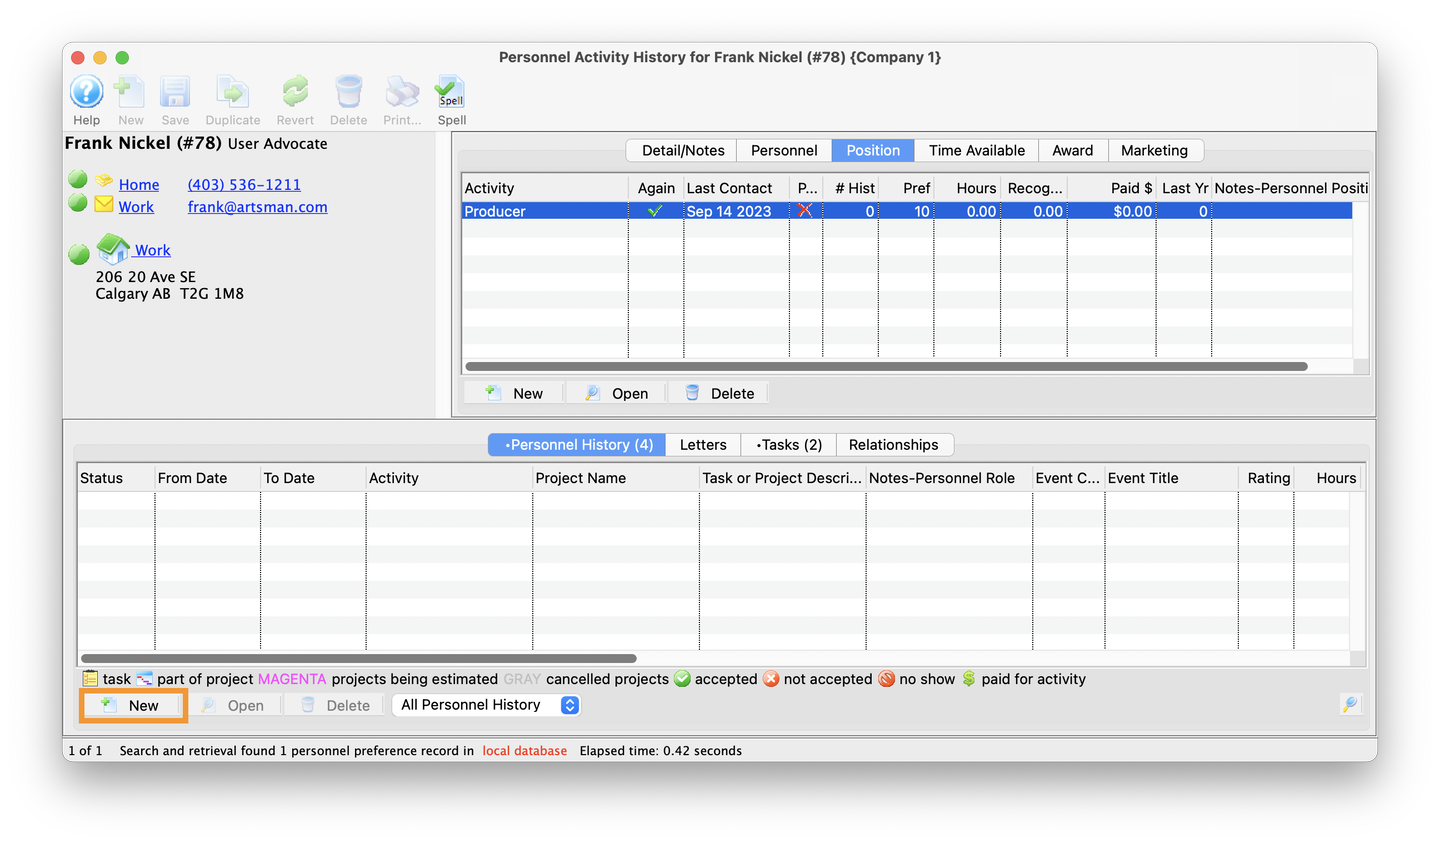
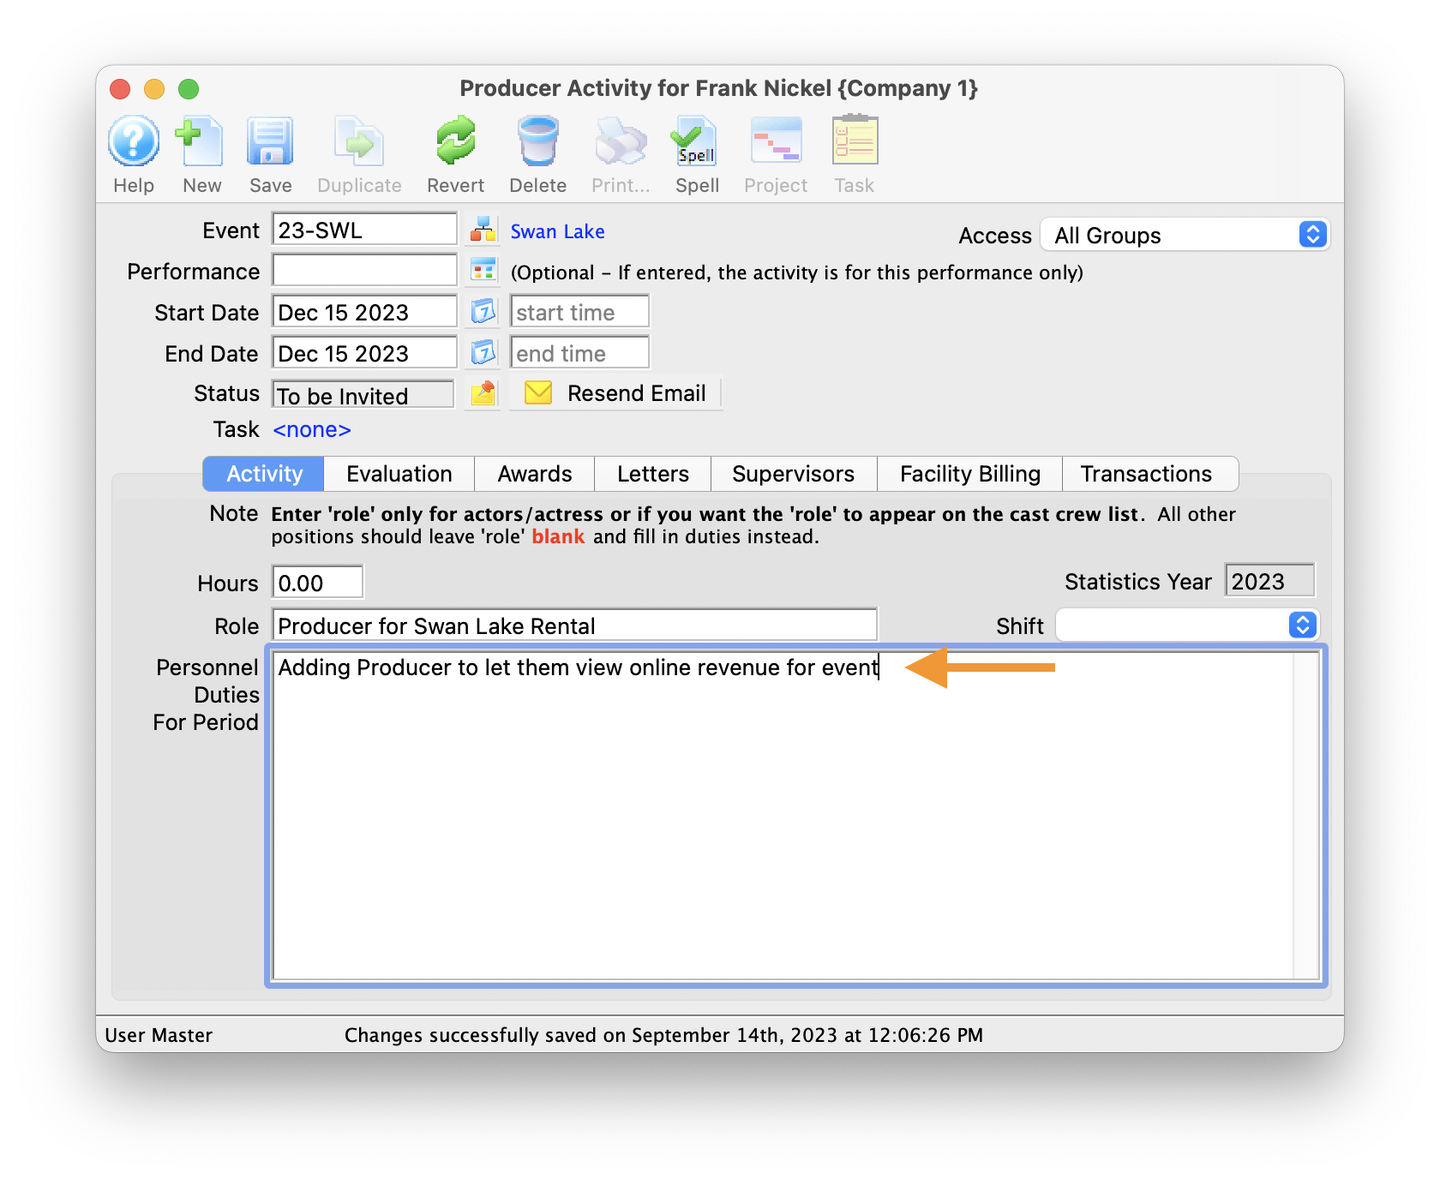
Add Activity to Personnel Record Top
Insert New Promoter Activity
- From the Personnel History tab, click the New button
- This will open the "Promoter History" window
New Promoter History Window
- There are 3 required fields to be filled in:
- Event: This is the event you want the patron to be able to View Performance Revenue for
- Role: Text describing their role
- Personnel Duties: Text describing the duties associated with the activity
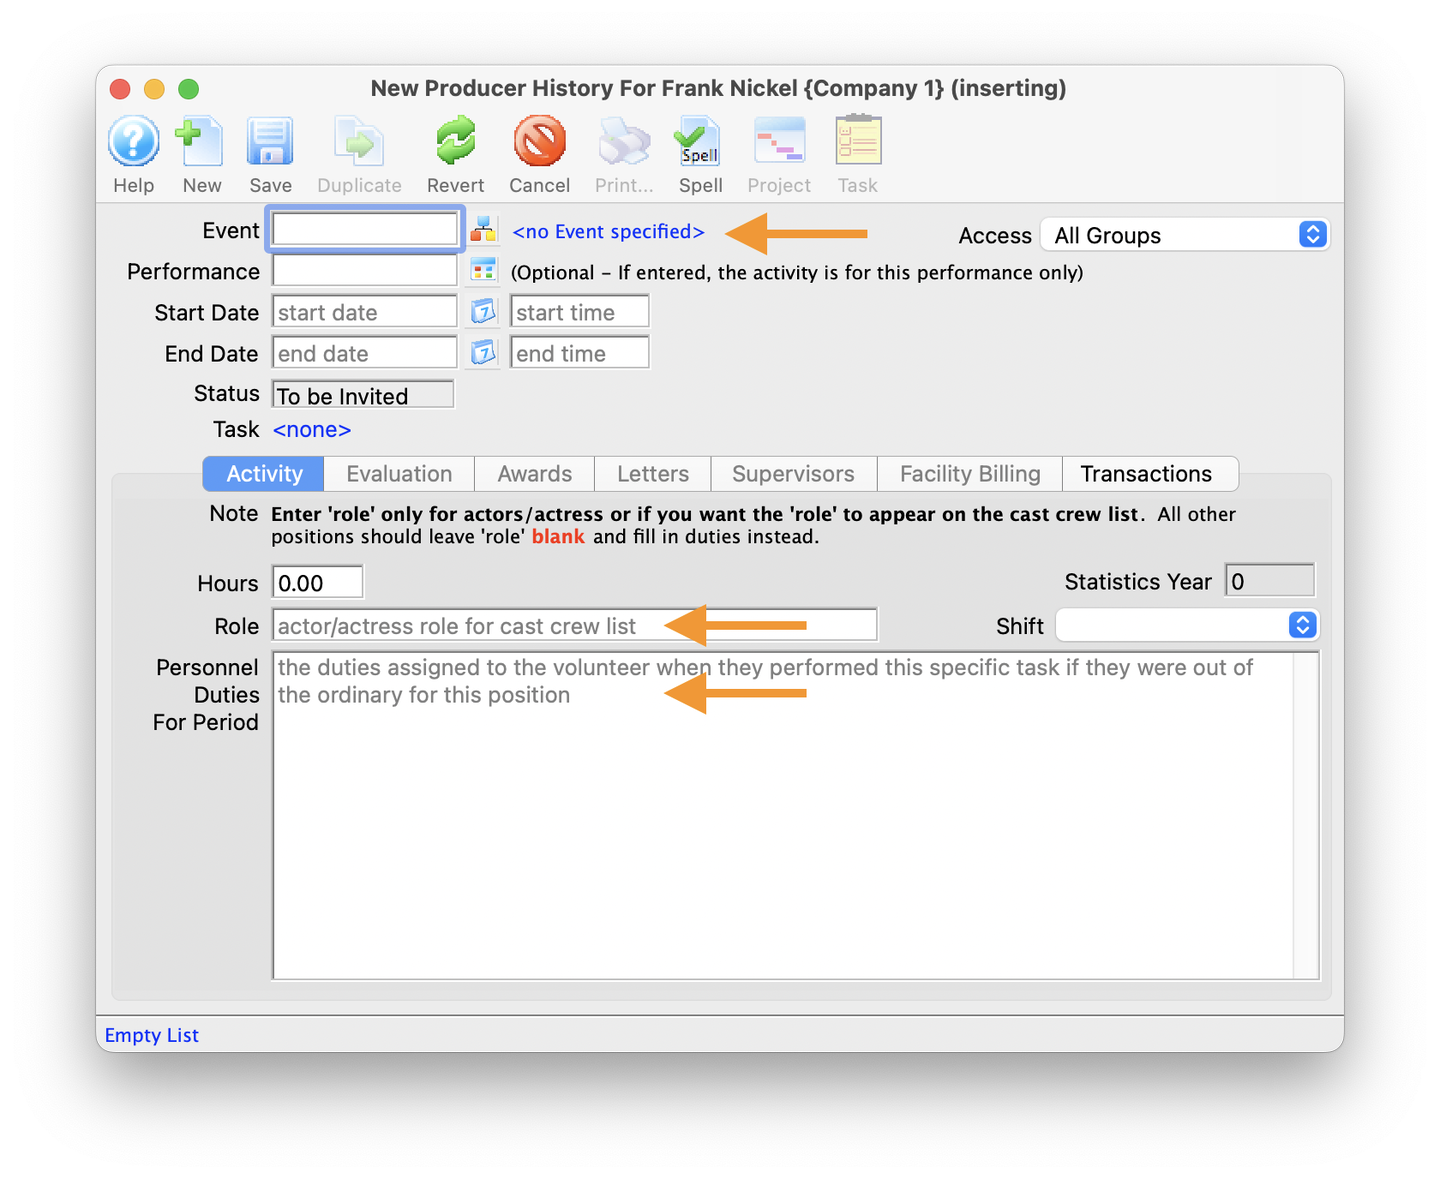
Add Event
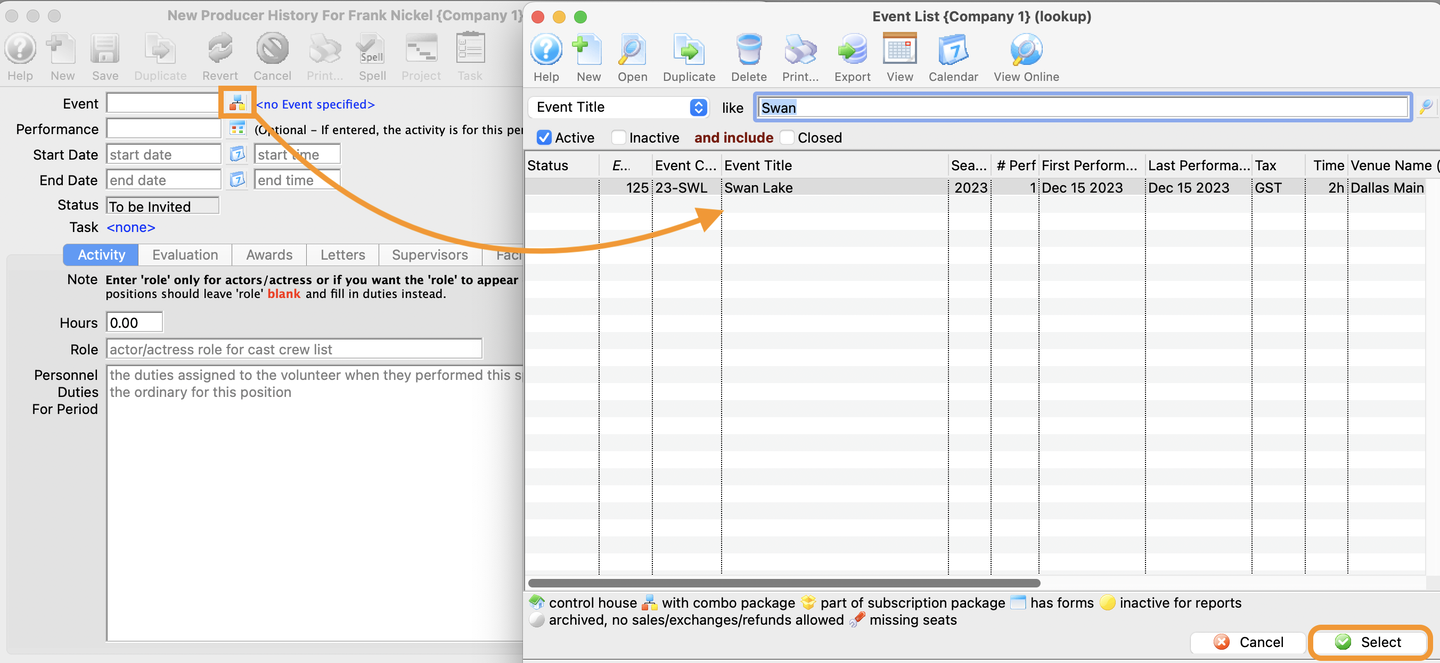
- Click the Event Icon button to the right of the Event field
- This will open up the Event List window
- Add the event
- Double-click the event, or click the Select button to add the event and close the Event List window
Role Field
- Fill in the Role text field
Duties Field
- Fill in the Personnel Duties for Period text field
- This can be as generic or descriptive as needed
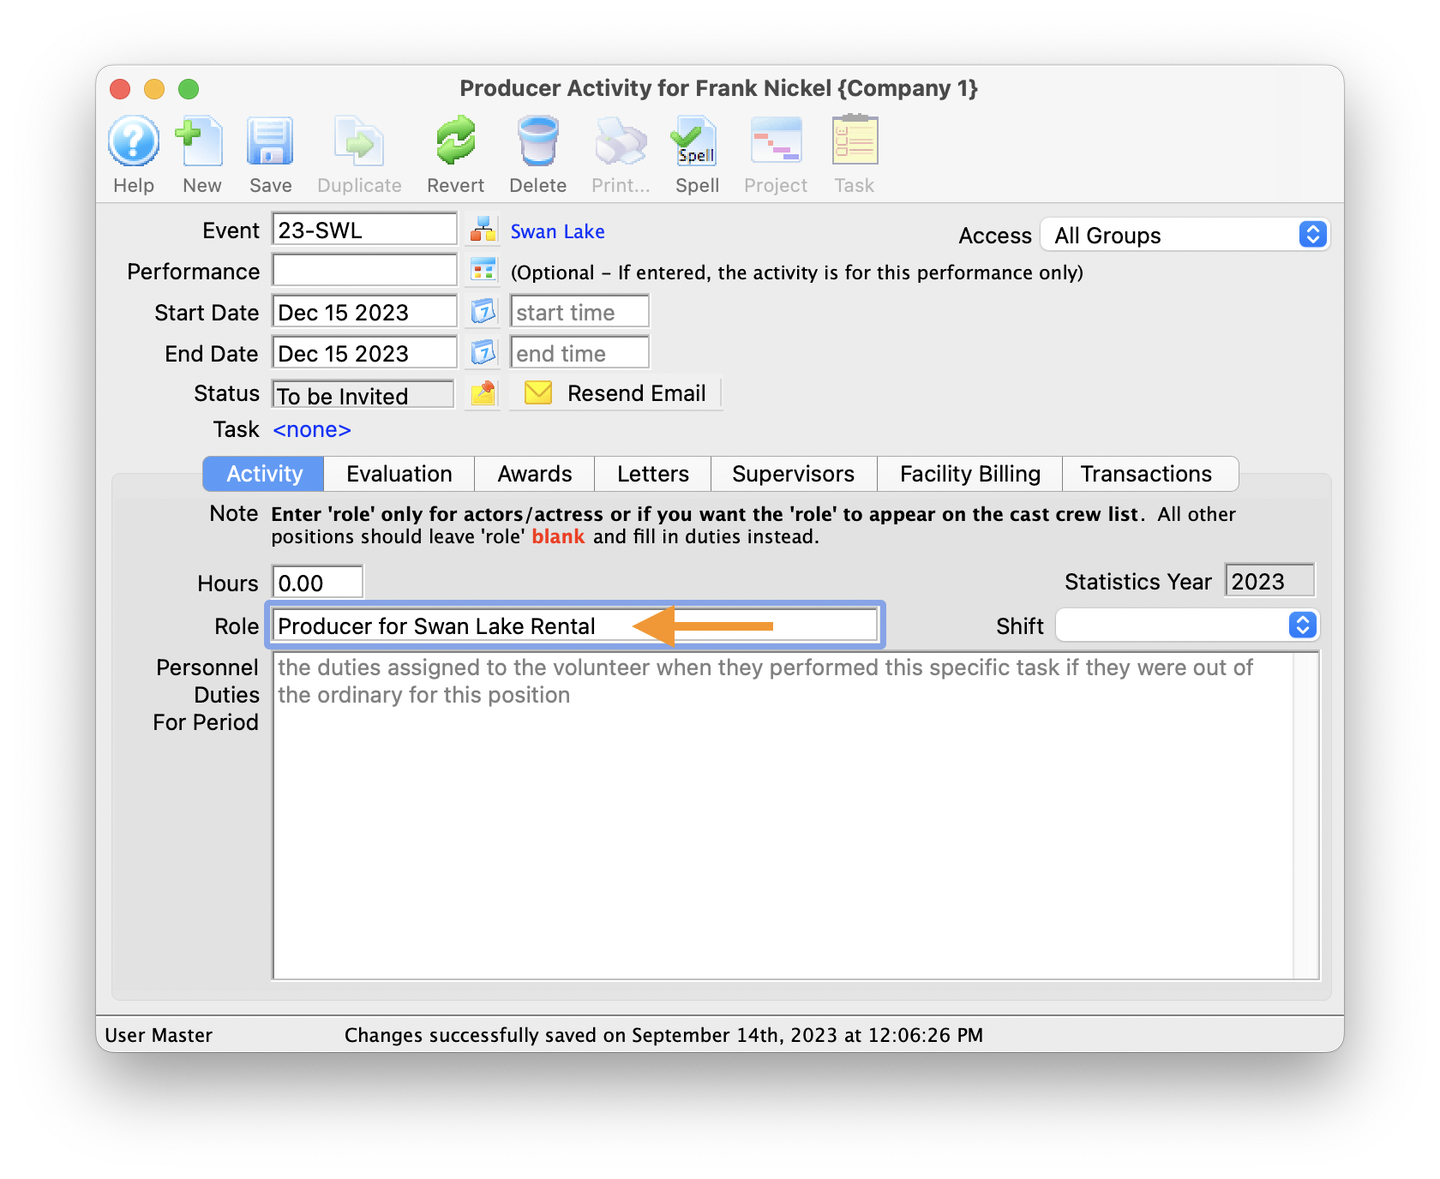
- With the Event, Role and Duties fields now filled in, users can close the window
- This will take you back to the Personnel Activity History window
Completed Personnel Activity Window
- The Personnel Activity History should now have:
- In the upper Position tab, the Activity should now list "Promoter"
- In the lower Promoter History tab, an entry for Promoter that includes the event you wish to grant View Performance Revenue permissions to
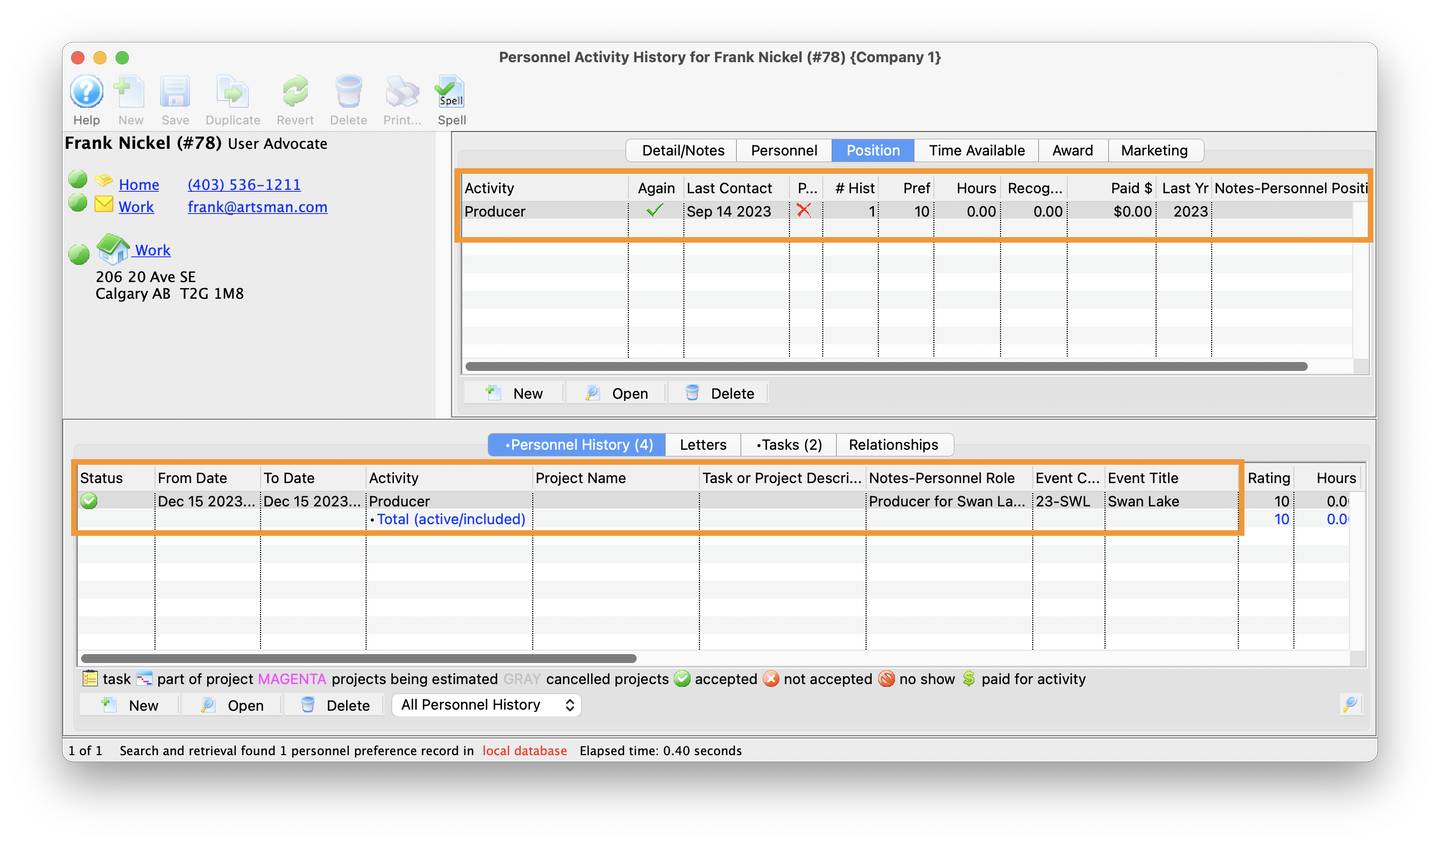
This completes adding the Personnel Position and Activity to the Patron Record
Online View Top
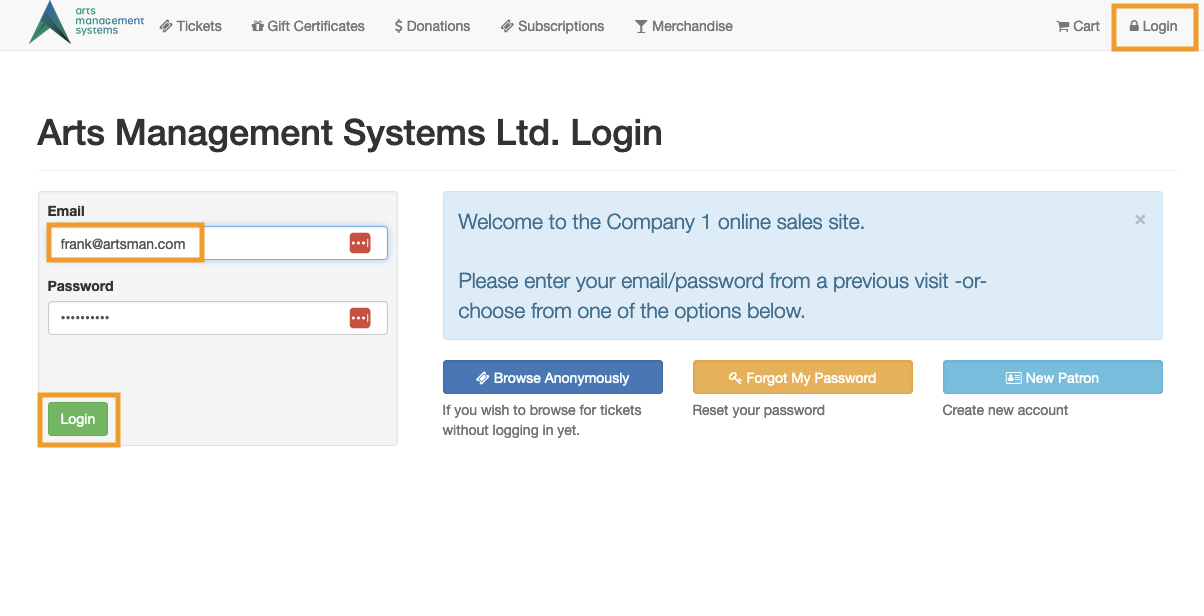
Ticking Site Login
- Navigate to the ticketing site's Login page
- The patron must log in with the email address attached to the Patron Record that has the Personnel Position with permission to View Performance Revenue
- NOTE: If the patron has never logged in before, they will need to use the Forgot My Password option to facilitate first time log in
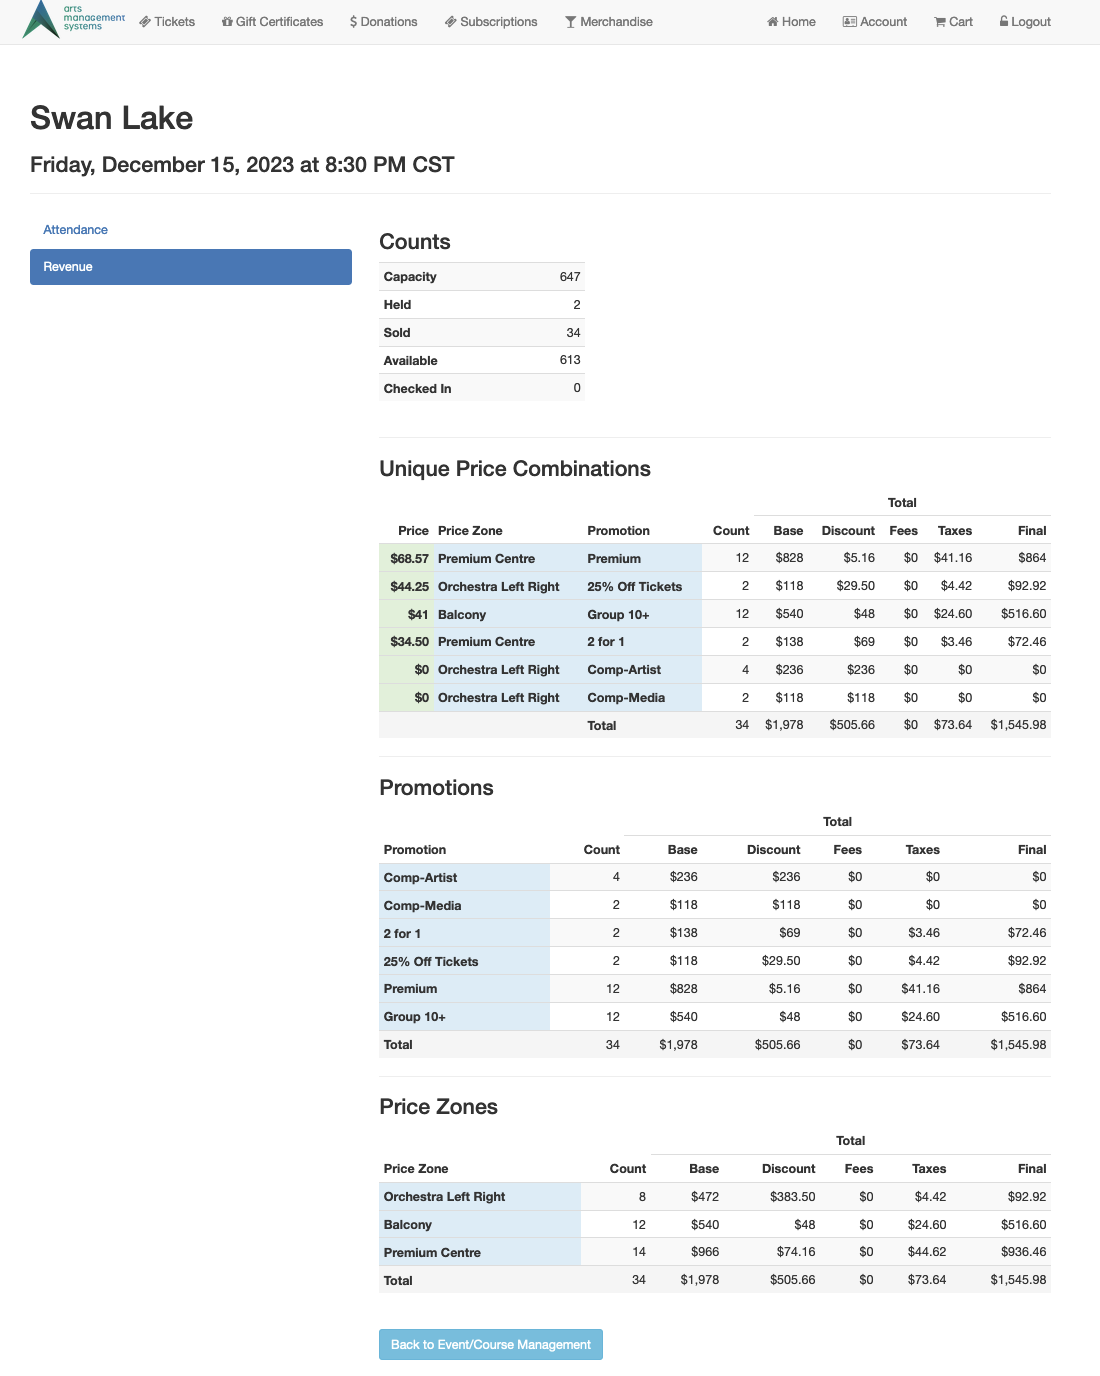
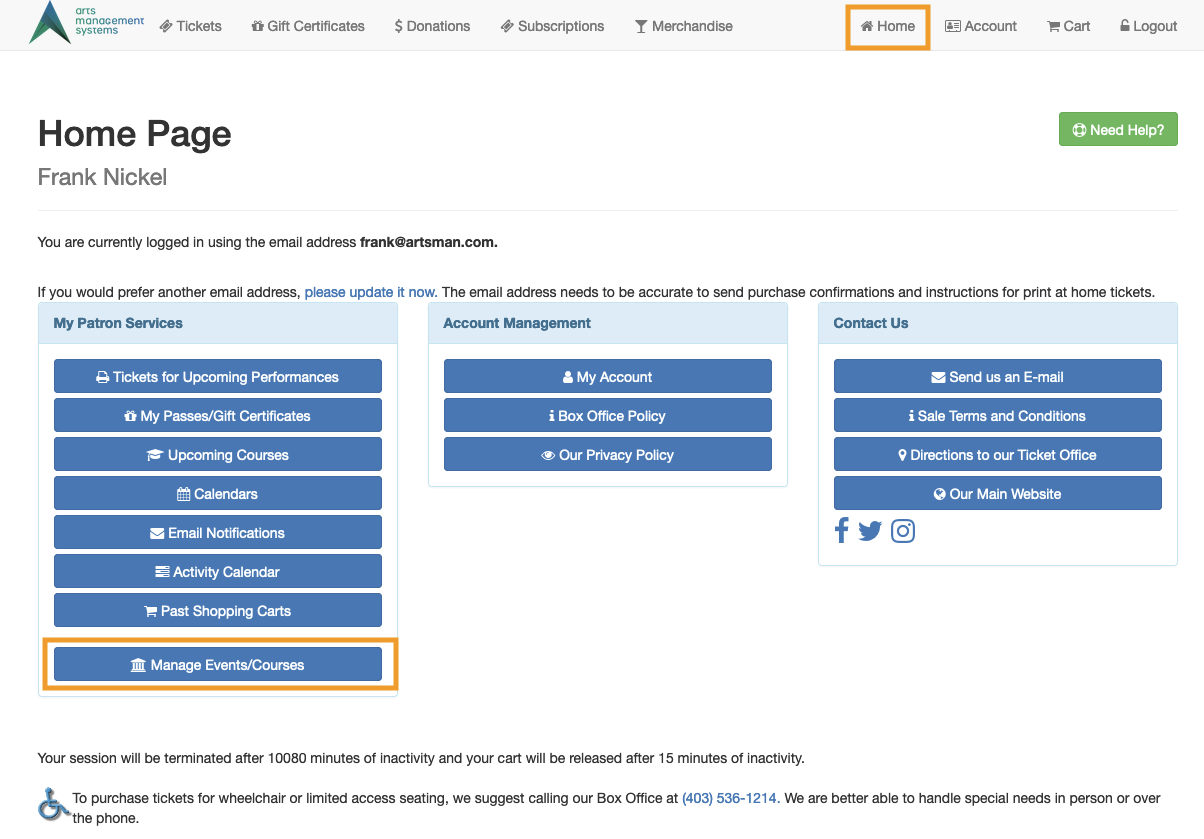
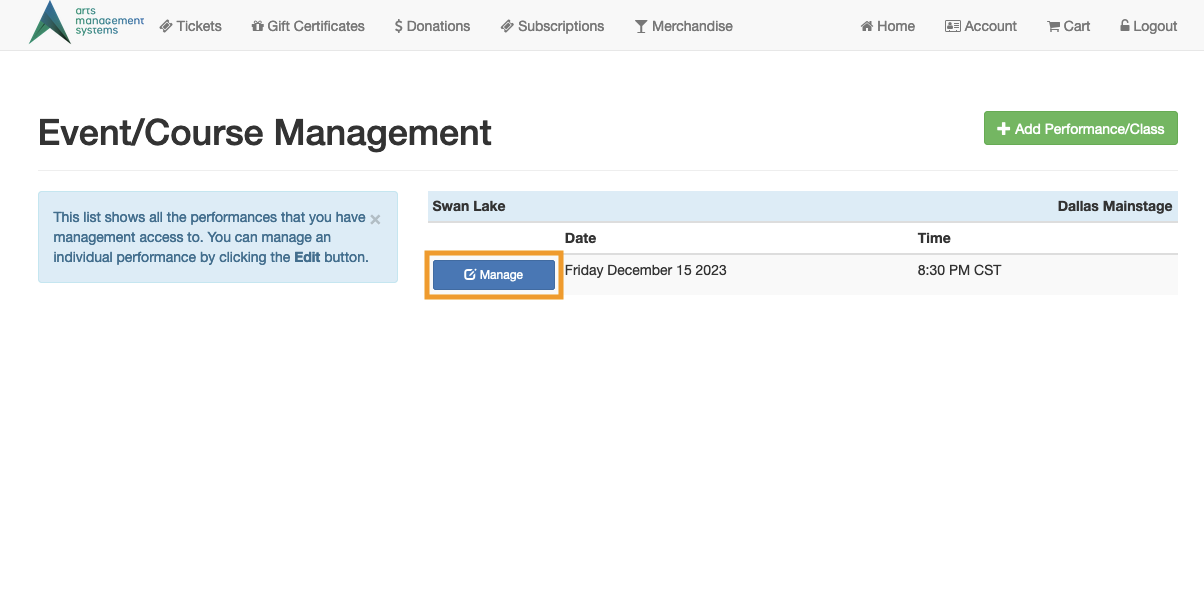
Manage Events/Courses
- From the Home Page, click on the Manage Events/Courses button under My Patron Services
Click Manage
- From the Event/Course Management page, click on the Manage button next to the performance you want to view revenue data for
- NOTE There may be more than 1 performance if an event has more than a single performance.
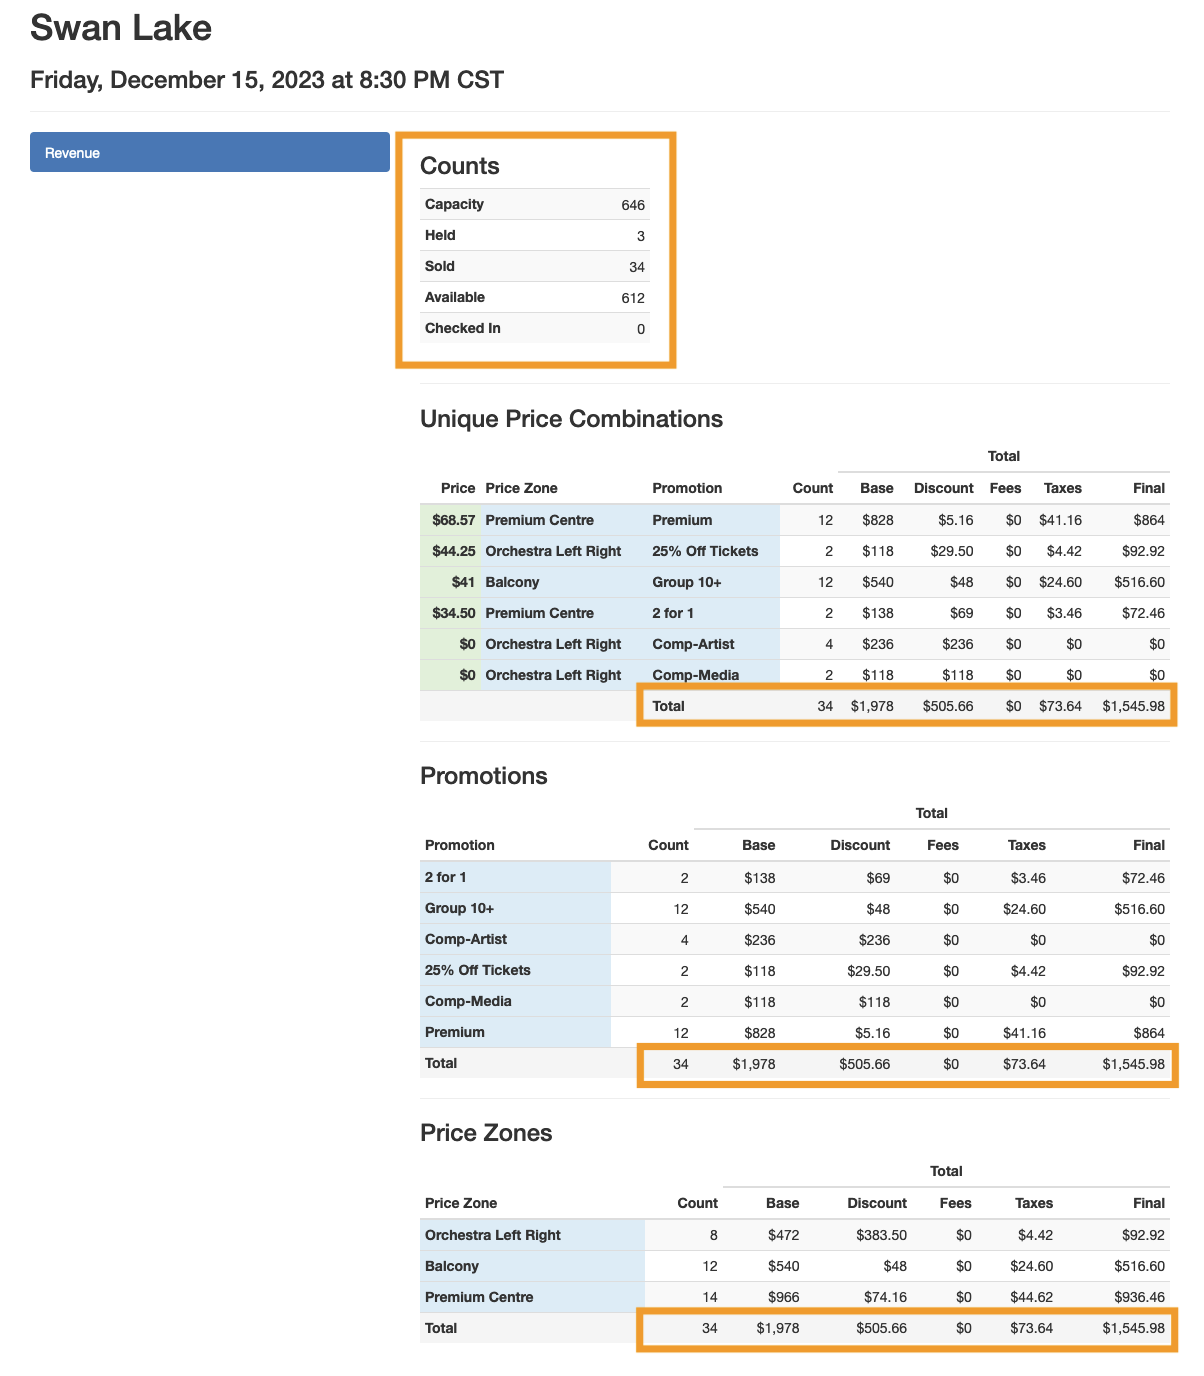
Performance Revenue
- The Revenue page is broken out into 4 sections:
- Counts: displays a summary of tickets by numerical count
- Unique Price Combinations: breaks out each Price Zone and Sales Promotion combination
- Promotions: displays only the Sales Promotions by count and revenue
- Price Zones: displays only the Price Zones by count and revenue