If a personnel knows what times they will be available. You can set them up under the Time Available Tab.
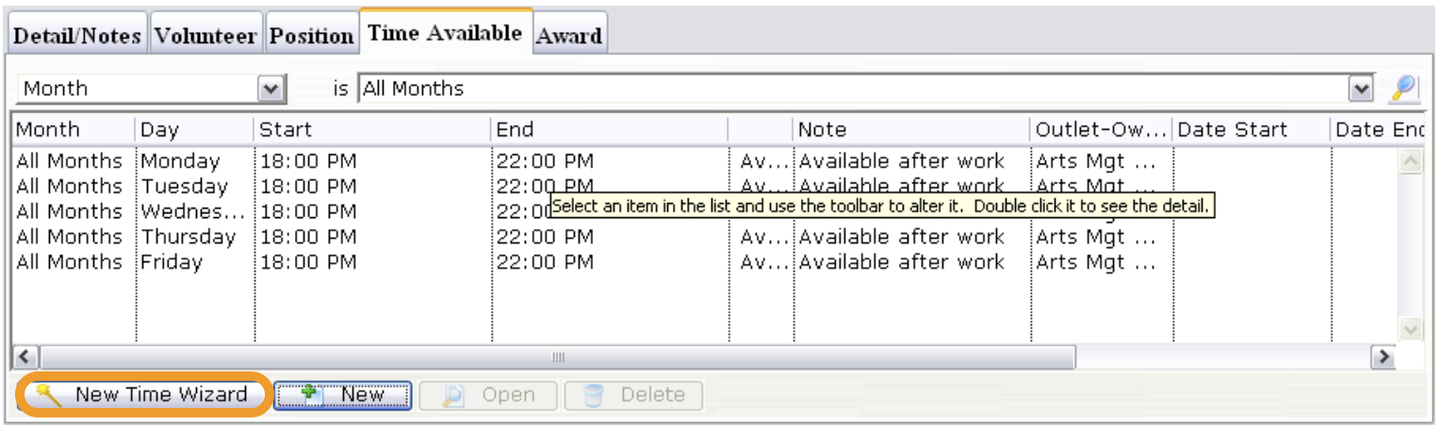
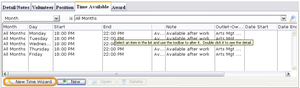
1. Click the New Time Wizard button.

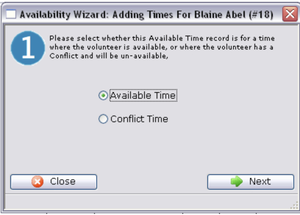
2. Select the availability type.
-
You can choose whether the time being entered is time that the volunteer is available or whether there is a conflict. If it is a conflict time, then a to and from window will appear next.
-
Click the Next
 button to proceed.
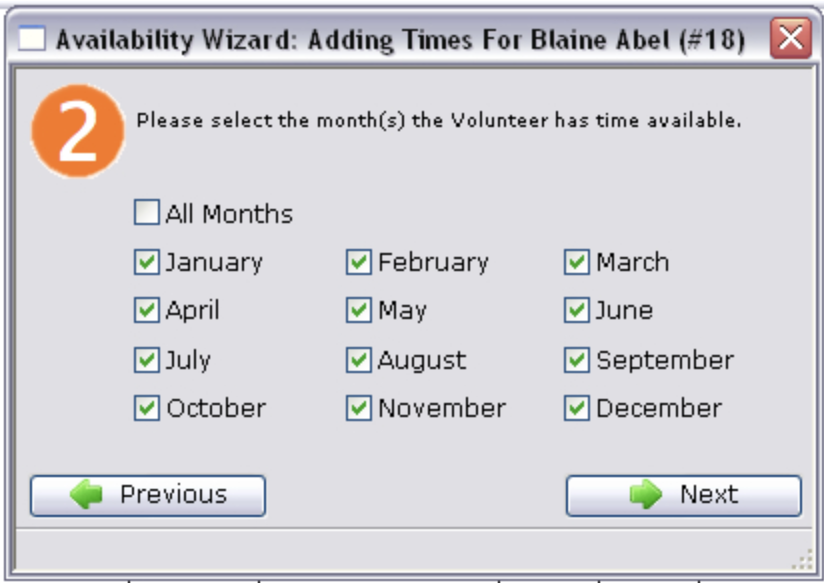

3. Select the months which the personnel is available.
- Click the Next
button.
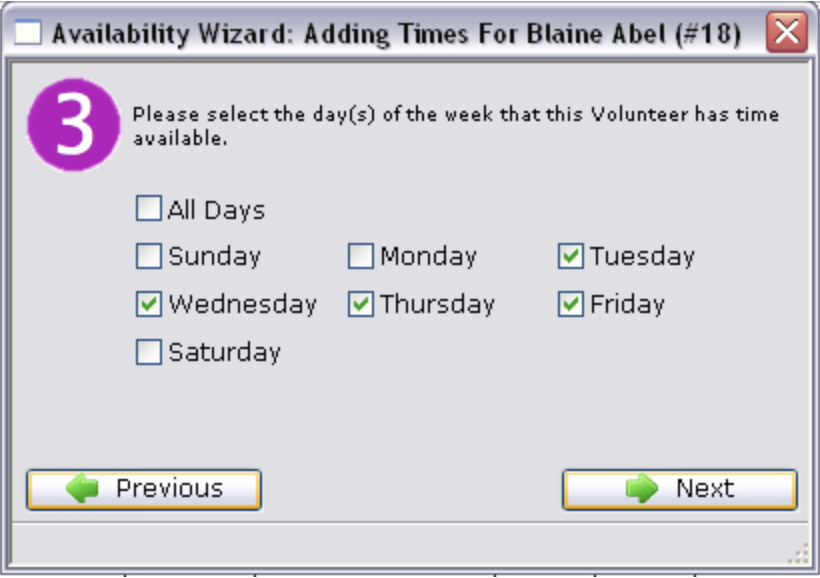

4. Select the days of the week the personnel is available.
- Click the Next
button.
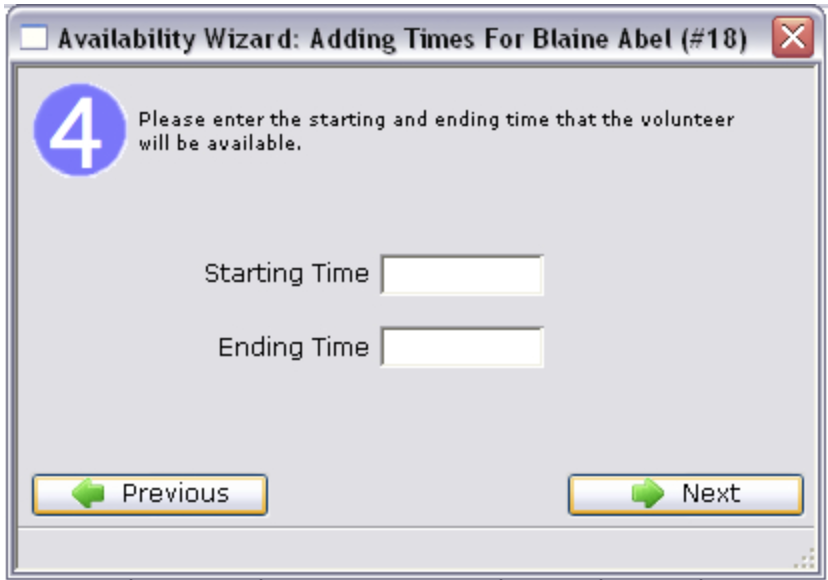
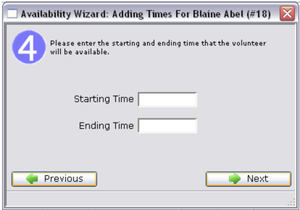
5. Enter the Starting and Ending times.
-
Click the Next
button. -
For available times these times will be the time of day. Whereas with conflict dates they will be actual dates i.e. month, day, year.

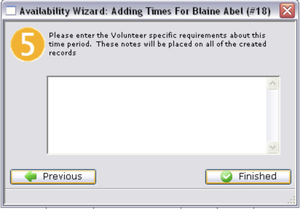
6.Enter any notes associated with the time and click the Finished button.
- Click the Finished
 button.
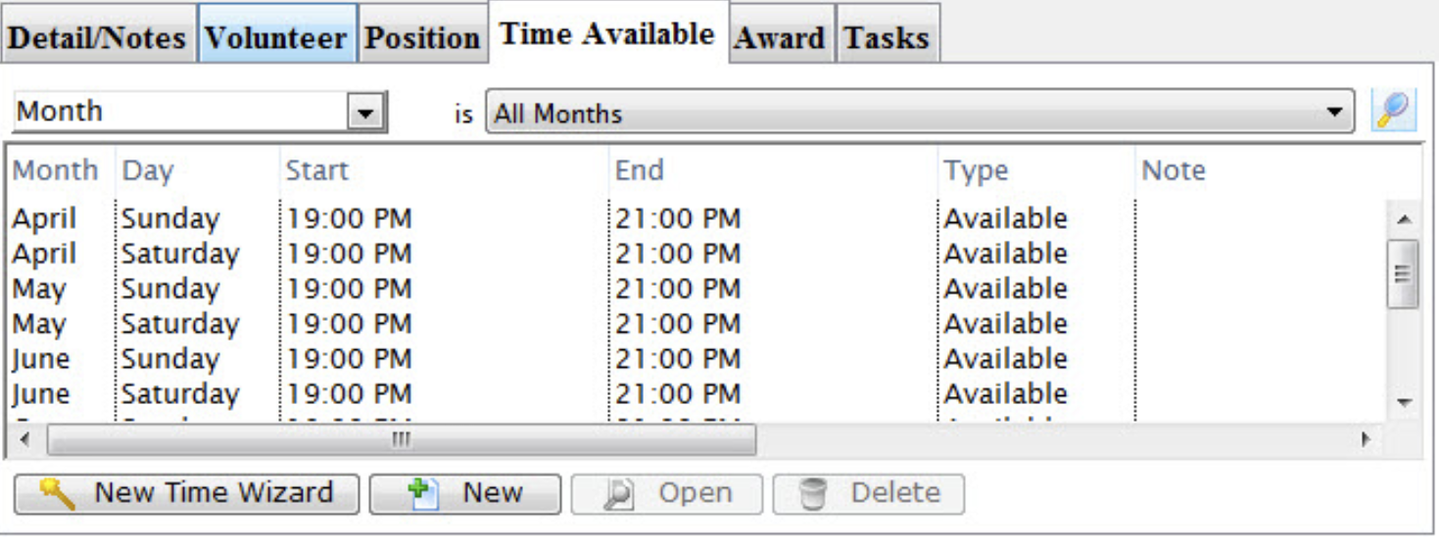
The new times will be displayed under the tab.
Create Times by a Single New Entry Top
This will allow you to enter a single record of either available or conflicting time.
1. Start by clicking the New
 button on the Times Available Tab.
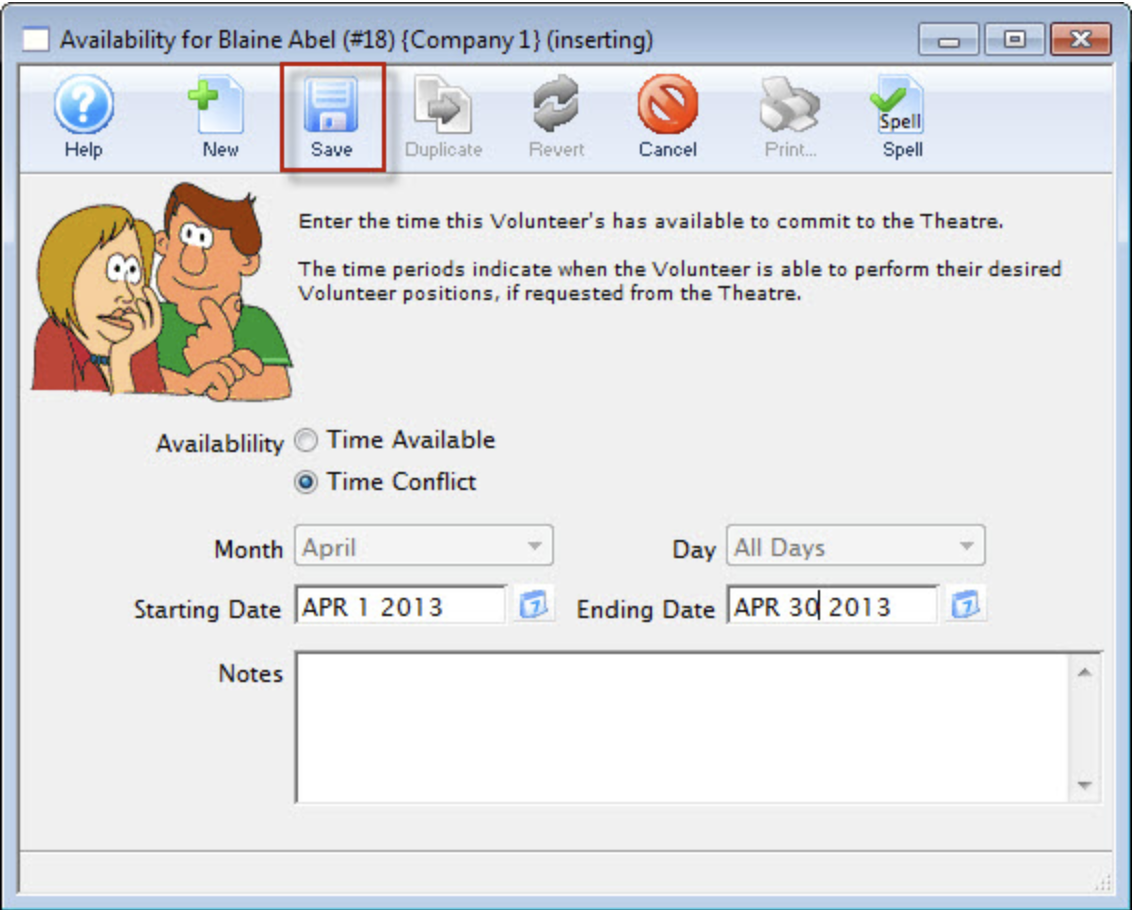
2. Choose either "Time Available" or "Time Conflict".
3. Select the month and the day of the week for the time.
4.Enter the start time and the end time of the time.
5.Enter any notes about the time.
6. Click Save
 button to finish creating the new record.