Payment Method Cash Top
To accept a payment:
Select Cash from the Payment Method drop down.
- Thanks
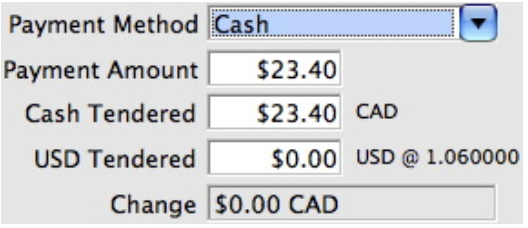
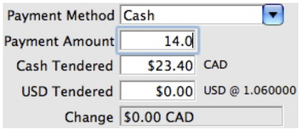
Verify the Payment Amount. If this will be a partial payment, change the payment amount.
- Thanks
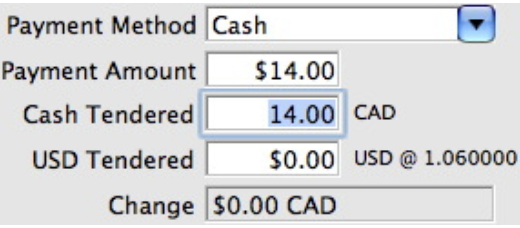
3. Click the tab key on the keyboard. The Payment Amount will reflect the new amount due.

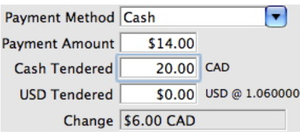
4.Enter the cash tendered from the patron and click the tab key.
- The amount of change due to the patron will be calculated and displayed.

5. If foreign currency is tendered from the patron, enter this amount in the second Cash Tendered line.
- The amount of change due to the patron will be calculated and displayed. This amount will be in the local currency, not the foreign currency. The value of the foreign currency is determined from the exchange rate in the Currency Exchange code table.
Payment Method Check/Cheque Top
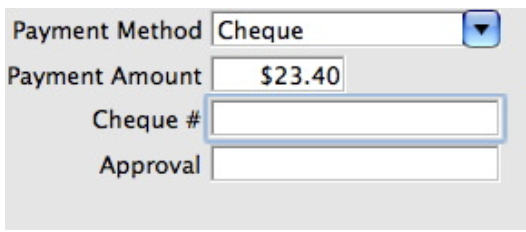
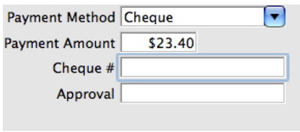
**1. Select Cheque or Check from the Payment Method drop down. **
2.Verify the Payment Amount. If this will be a partial payment, change the payment amount.
3. Enter the cheque number.
- This can be made a mandatory field by a master user in the Payment Methods section of the Code Tables.

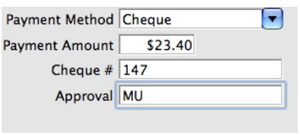
4.Enter the employees name or initials who approved the cheque for accuracy.
Payment Method Credit Card (EMV Pin Pad) Top
EMV Pin Pads are only valid for Moneris at this time.
You can verify the correct communication steps are occurring with the pin pad device by looking at the web listener log for EMV devices
If you expect to do a lot of manual card entries into the pin pad machine from phone sales, then please make sure your Authorization Timeout is 90 seconds - or at least sufficiently long enough to handle the process of manually putting the card number into the pinpad and getting an authorization.
Moneris does not allow voiding payments taken via a pin pad. Instead, you must create a REFUND payment

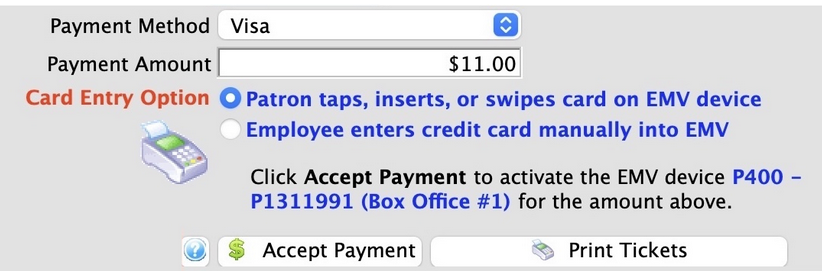
1. Select ANY credit card type from the Payment Method drop down.
- It doesn't matter which card you pick if all are being processed by the pin pad. The EMV device will determine that card automatically and send that back to Theatre Manager. It allows the customer to use debit, credit, apple pay or any other approved device without needing to tell you.
2.Verify the Payment Amount.
- If this will be a partial payment, change the payment amount
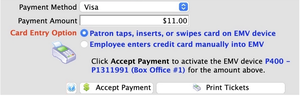
**3. Card Entry Option **
-
Patron taps, inserts or swipes the card on the EMV device. The default usage for an EMV device taking a payment (or doing a refund) is to enable the pin pad so that the patron taps, inserts, or swipes their card on the device and selects options as appropriate for Visa, INTERAC, etc.
-
Employee enters credit card manually into the EMV device. ONLY CLICK THIS if you are doing a phone or mail order and you need to manually type in the credit card and expiry date on the EMV device.
Do not use this optionif the customer is present and they will be tapping, inserting chip card, swiping the credit card, or using something like Apple-Pay.
4. Click the Accept Payment button:
- The EMV device will activate and a message will appear on screen.
- If a card is accepted successfully, the payment window will close.
- If there is an issue with card acceptance, to start over you may need to:
- use the red cancel button on the on the pinpad. This may also close the wait screen in TM.
- if not, click cancel on the Theatre Manager screen as well
You many see a button on the lower left that says Type Card if you have been given permission to bypass use of the EMV device for manual card entry in employee security setup
This feature allows you to type the card, expiry, cvv2 into Theatre Manager and select a billing address. Payments taken this way allow future linked refunds, yet increase your PCI audit scope to Schedule 'C' or 'D'
Payment Method Credit Card (USB SWIPE or Manual) Top

1. Select the Credit Card type from the Payment Method drop down.
- Refer to the Payment Methods section of the Code Tables for defining the credit card types.
2.Verify the Payment Amount.
- If this will be a PARTIAL PAYMENT, change the payment amount.
- If this is a REFUND, then type the payment as a negative number
3. The Payment Amount will reflect the new amount due.
- This can be made a mandatory field by a master user in the Payment Methods section of the Code Tables.
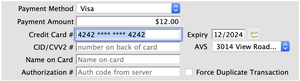
4. Enter the credit card number.
- Theatre Manager checks the credit card number entered to ensure it is a valid sequence of numbers. This helps prevents card numbers from being typed in wrong.
If your Workstation is equipped with a credit card swipe device, swipe the card and Theatre Manager will insert the number, card type and expiry date automatically. In addition if the card swipe is setup to read "track 2" of the card the name of the card owner will be placed in the order notes section of the Payment Window.
5. Enter the credit card expiry date in the mm/yy format.
- Example: 321, 0321, and 03/21 all mean March 2021. You can enter any format you wish and Theatre Manager will convert it to display 03/21
6. Enter the CID/CVV2 number.
- This is the number on he back of the card and is generally required for all purchases.
7.Select the Address Verification System (AVS) address
- If the patron has multiple addresses, the field AVS will appear with all addresses known to the patron. You may need to select the patrons credit card billing address from the popup. If this field is not present and the card is declined because of address verification, you can add the credit card address to the patrons record and then redo the payment.
8. Select the Address Verification System (AVS) address
Theatre Manager will send the card data to the Merchant provider to be authorized.
- If accepted, you will see the authorization number in a popup window
- If rejected, you will see a message about the rejection. Contact your merchant provider about the rejection if you have any questions about it. Theatre Manager does not approve a credit card charge - it just conveys the information to the bank. Only the merchant provider can accept a card
9. (Optional and Rare) Enter the credit card authorization number.
Normally, you NEVER enter the authorization number as that is collected by Theatre Manager automatically when the charge is approved.
In rare cases, after pressing the accept payment button when attempting to authorize a credit card charge, you might get a message like 'call centre'. That means
- you need to contact the merchant provider pertaining to this use of this card.
- Depending on what they say on the phone, you might get given a manual authorization number over the phone that you would type in this field.
- The authorization number becomes a one-time code to accept this card this time only
Payment Method Credit Card (EMV Pin Pad) Top
EMV Pin Pads are only valid for Moneris at this time.
You can verify the correct communication steps are occurring with the pin pad device by looking at the web listener log for EMV devices
If you expect to do a lot of manual card entries into the pin pad machine from phone sales, then please make sure your Authorization Timeout is 90 seconds - or at least sufficiently long enough to handle the process of manually putting the card number into the pinpad and getting an authorization.
Moneris does not allow voiding payments taken via a pin pad. Instead, you must create a REFUND payment

1. Select the Credit Card type from the Payment Method drop down.
- It doesn't matter which card you pick if all are being processed by the pin pad. The EMV device will determine that card automatically and send that back to Theatre Manager. It allows the customer to use debit, credit, apple pay or any other approved device without needing to tell you.
2.Verify the Payment Amount.
- If this will be a PARTIAL PAYMENT, change the payment amount.
3. Card Entry Option.
-
Patron taps, inserts or swipes the card on the EMV device. The default usage for an EMV device taking a payment (or doing a refund) is to enable the pin pad so that the patron taps, inserts, or swipes their card on the device and selects options as appropriate for Visa, INTERAC, etc.
-
Employee enters credit card manually into the EMV device. ONLY CLICK THIS if you are doing a phone or mail order and you need to manually type in the credit card and expiry date on the EMV device.
-
Do not use this optionif the customer is present and they will be tapping, inserting chip card, swiping the credit card, or using something like Apple-Pay.
4. Click the Accept Payment button:
- The EMV device will activate and a message will appear on screen.
- If a card is accepted successfully, the payment window will close.
- If there is an issue with card acceptance, to start over you may need to: * use the red cancel button on the on the pinpad. This may also close the wait screen in TM. * if not, click cancel on the Theatre Manager screen as well
{% end %}
Payment Method EFT (Electronic Funds Transfer) Top
Using EFT for direct deposit on the payment window is described in detail.
You must have set up a merchant account for your EFT details along with creating the payment in the code tables.
Payment Method Credit Card (Linked Refund) Top
https://help.theatremanager.com/theatre-manager-online-help/payment-method-credit-card-linked-refund
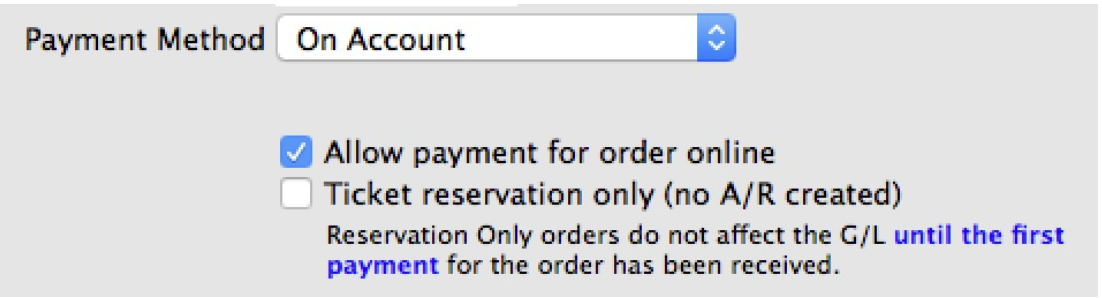
Payment Method On Account Top

1. Select the Credit Card type from the Payment Method drop down.
No payment will be received at this time, so the amount due on the order will be placed as an outstanding balance due on the patron's account. You will be able to exit the order, but you will still need to deal with the non-zero order balance later in order to clear your books.
In addition to leaving an outstanding balance for an order, there are two sub options. You can:
- allow the order to appear under the patrons account so that they can pay for the balance online. It may be useful for corporate accounts, tour groups or even pre-booked subscriptions if you want to encourage the patron to pay for them without needing to call the box office.
If you enable the payment of the balance online, we suggest entering a useful comment in the order's external notes. eg. Course registration for 'Bob' or 'fundraising trip to London for Meg & Harry'. or 'subscriptions for the entire family'.
We suggest putting some recognizable comment in the external order notes.
- mark the order as reservation only - which means that the order will sit in the system without creating any accounting entries until a payment is made. This feature must have been enabled in company preferences [accounting tab](/reference/company-preferences#accounting-tab and is not a recommended setting.
Payment Method Other Top
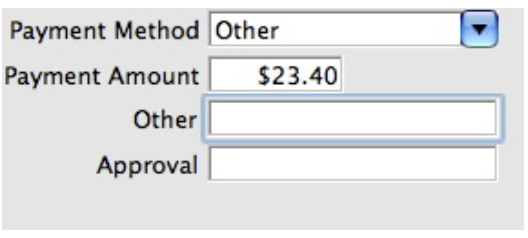

1. Select Other from the Payment Method drop down.
2.Verify the Payment Amount. If this will be a partial payment, change the payment amount.
3. The Payment Amount will reflect the new amount due.
4. Enter a description for the other form of payment.
5. Enter the employees name or initials who approved the payment.
Payment Method Promissory Note / Voucher Top
A Promissory Note/Voucher is a payment method used to record a voucher or pass purchased elsewhere, another outlet, another Vendor or sold not using Theatre Manager's Membership/Pass system.
To add a Promissory Note/Voucher payment you would perform the following steps:
1. Selecting the Payment button in the Order window.
The order window can be accessed through the Orders Tab or when Purchasing tickets. Click here for a detailed description of this window and it's functions.