There are several ways to sell a pass in Theatre Manager. The right option depends on the situation:
- From the Order Window
- Good for handling a more complex patron request that requires multiple passes and/or multiple items (e.g. a pass, a donation, and several tickets)
- From the Patron Window
- Good for quickly selling only one pass to a patron
- En Masse from a Mail List
- Good for specific situations when you need to add the same exact pass details to many patrons at once (especially for easy online online redemption), such as:
- Giving volunteers working an event free access
- Providing staff comps for a predetermined number of shows during the year
- Adding benefit passes to qualifying annual donors
- Good for specific situations when you need to add the same exact pass details to many patrons at once (especially for easy online online redemption), such as:
- Via Duplication
- Good for selling multiple passes with the same settings to the same patron
Sell a Pass from the Order Window Top
Follow these steps to sell a pass from the Order Window:
Open the pass screen of an open order
- Find the correct patron
- Open the Patron Detail Window
- Either start a new order or open an existing order
- Click the Pass/G.C. Tile to open the Pass Screen
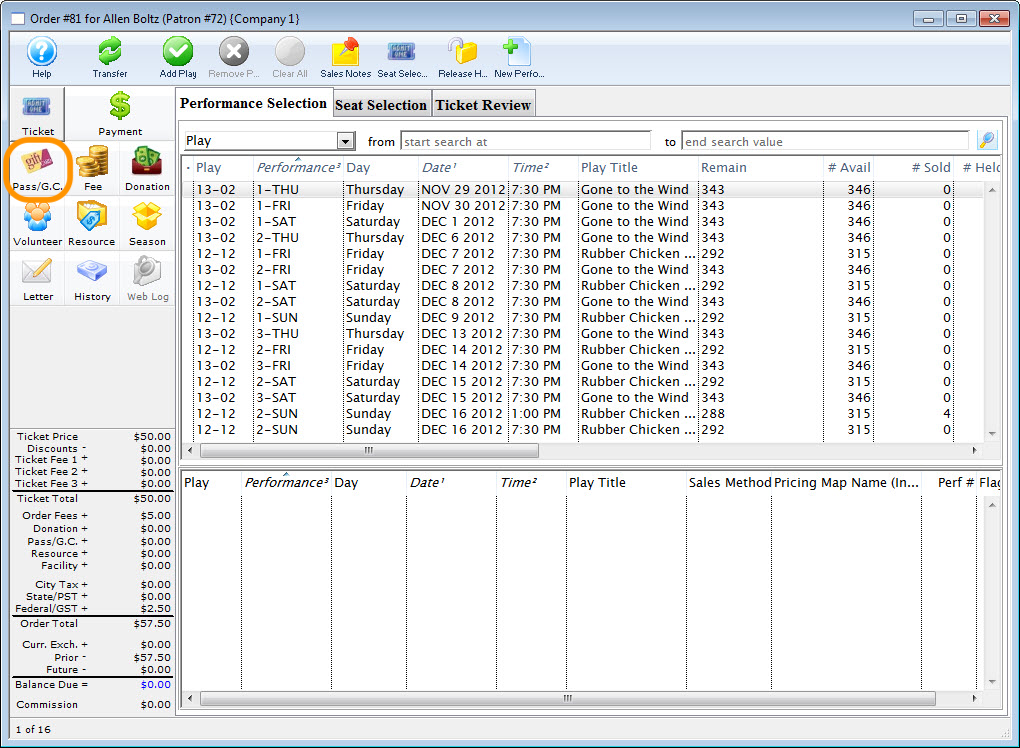

Add a new pass
- Click the New button from the top of the Pass Screen to open a blank Pass Detail Window


Enter the pertinent pass details
- Use the dropdown to select the appropriate Pass Type, which will control which other fields are available for editing on this screen
- If applicable, adjust:
- The Start Date
- The Purchase Amount (and/or Issued Passes Amount in certain rare cases)
- Any valid events
- If applicable, adjust:
- Choose between Individual or Corporate to indicate who "owns" this pass, the person or the company the person represents
- (optional) Enter a Source for marketing reference
- (optional) Go to the Notes Tab and add any relevant notes about this specific pass sale
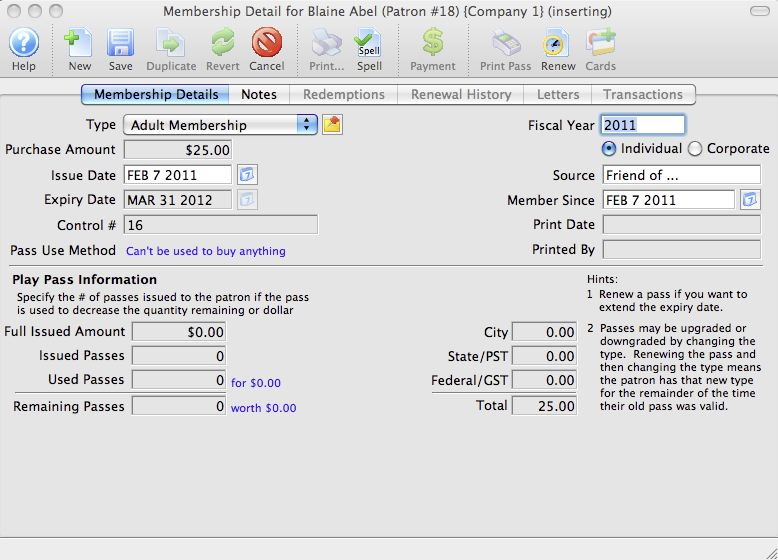

Save the pass and close the detail window
- Click the Save button and close the Pass Detail Window


Repeat prior steps until all desired passes have been added to the order
- If necessary, use the New button to add more passes to the order
- If necessary, visit the other parts of the Order Detail Window to add donation(s), ticket(s), fee(s), etc.
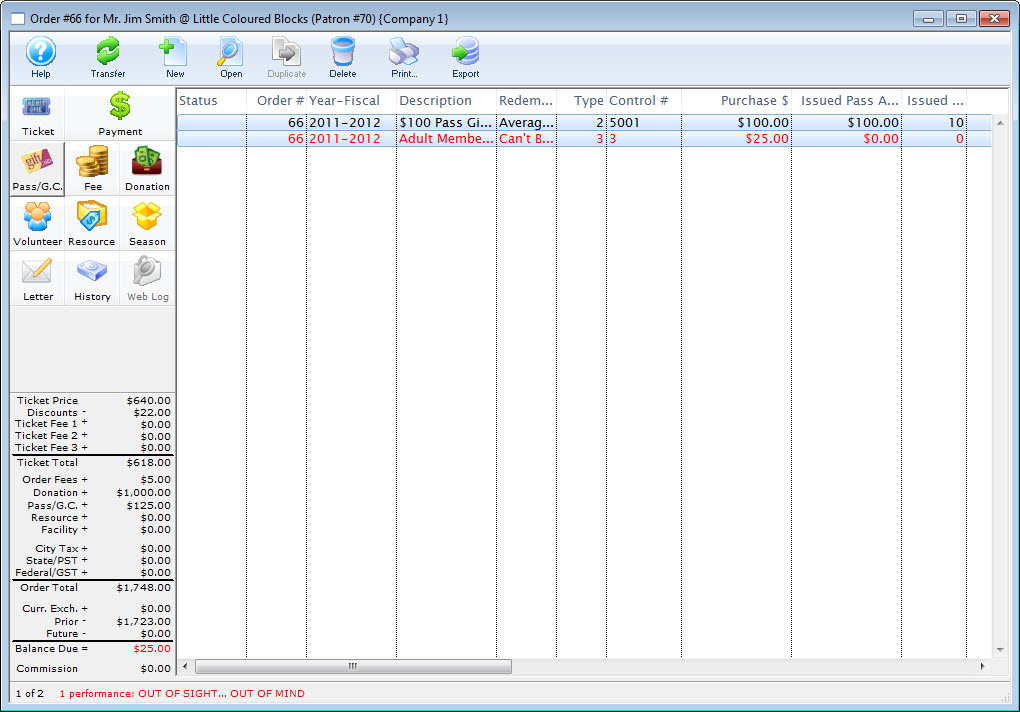

Take payment for the order
- Once the order contains all accurate items, click the Payment tile to open the Payment Screen
- Take payment


The pass has now been sold and paid for and will be available for review and editing on the Patron Pass Tab, including adding a letter and/or adding access cards.
Sell a Pass from the Patron Window Top
Follow these steps to sell a pass from the Patron Window:
Open the patron account


Start a new pass sale
- Click the Buy button on the bottom right of the Pass/G.C. Tab


Select new pass purchase
- If a context menu appears (when a patron has a renewable pass already on their account), choose to Purchase New Pass/G.C.


Enter the pertinent pass details
- On the Pass Detail Window, use the dropdown to select the appropriate Pass Type, which will control which other fields are available for editing on this screen
- If applicable, adjust:
- The Start Date
- The Purchase Amount (and/or Issued Passes Amount in certain rare cases)
- Any valid events
- If applicable, adjust:
- Choose between Individual or Corporate to indicate who "owns" this pass, the person or the company the person represents
- (optional) Enter a Source for marketing reference
- (optional) Go to the Notes Tab and add any relevant notes about this specific pass sale
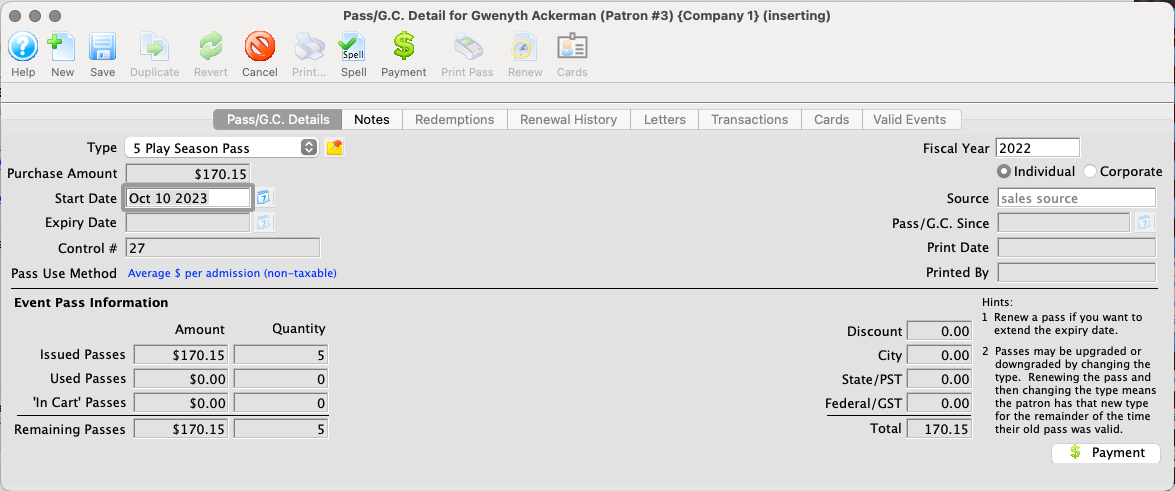

Proceed to take payment
- Click the Payment button, which saves the pass information and opens the connected order's payment screen


Enter the payment details
- On the Order Detail Window >> Payment Screen, select the correct payment method and relevant details
- Enter any relevant Internal Order Notes for future reference
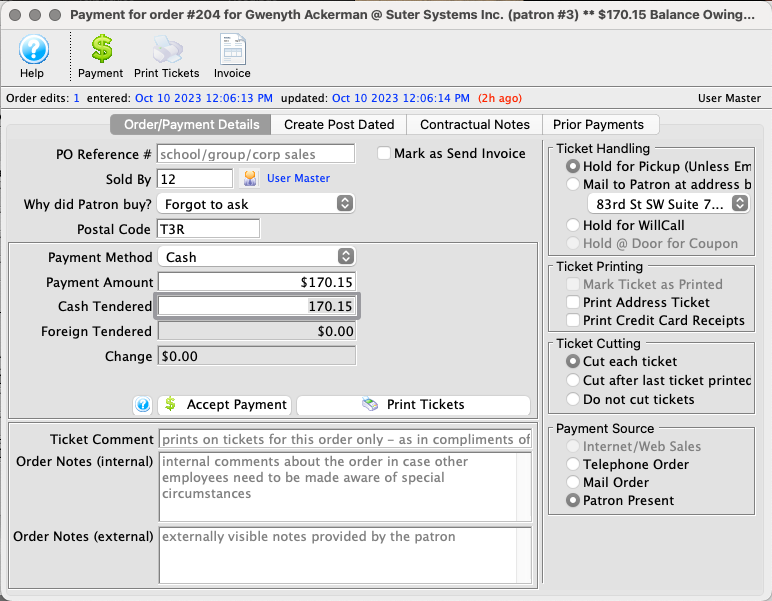

Confirm and close the order
- Click Accept Payment to complete the sale and close the Payment Screen
- The Pass Detail Window remains open, so you can quickly, if needed:


The pass has now been saved and paid for on a new order number with the current date.
Sell Passes En Masse from a Mail List Top
Caution
This process can sell a lot of passes or gift certificates quickly. It does not provide a process to pay for any that generate a balance owing by the customer. If passes are sold that require payment, you may find it easier to pay for them on the Patron Tab in the Pass Setup Window.
To add passes to patrons en masse, follow the following steps:
Open the mail list containing the patrons who need the pass
- Open a Mail List that contains the people that you want to add passes to and navigate to the Who's In Tab
- Select the appropriate patrons
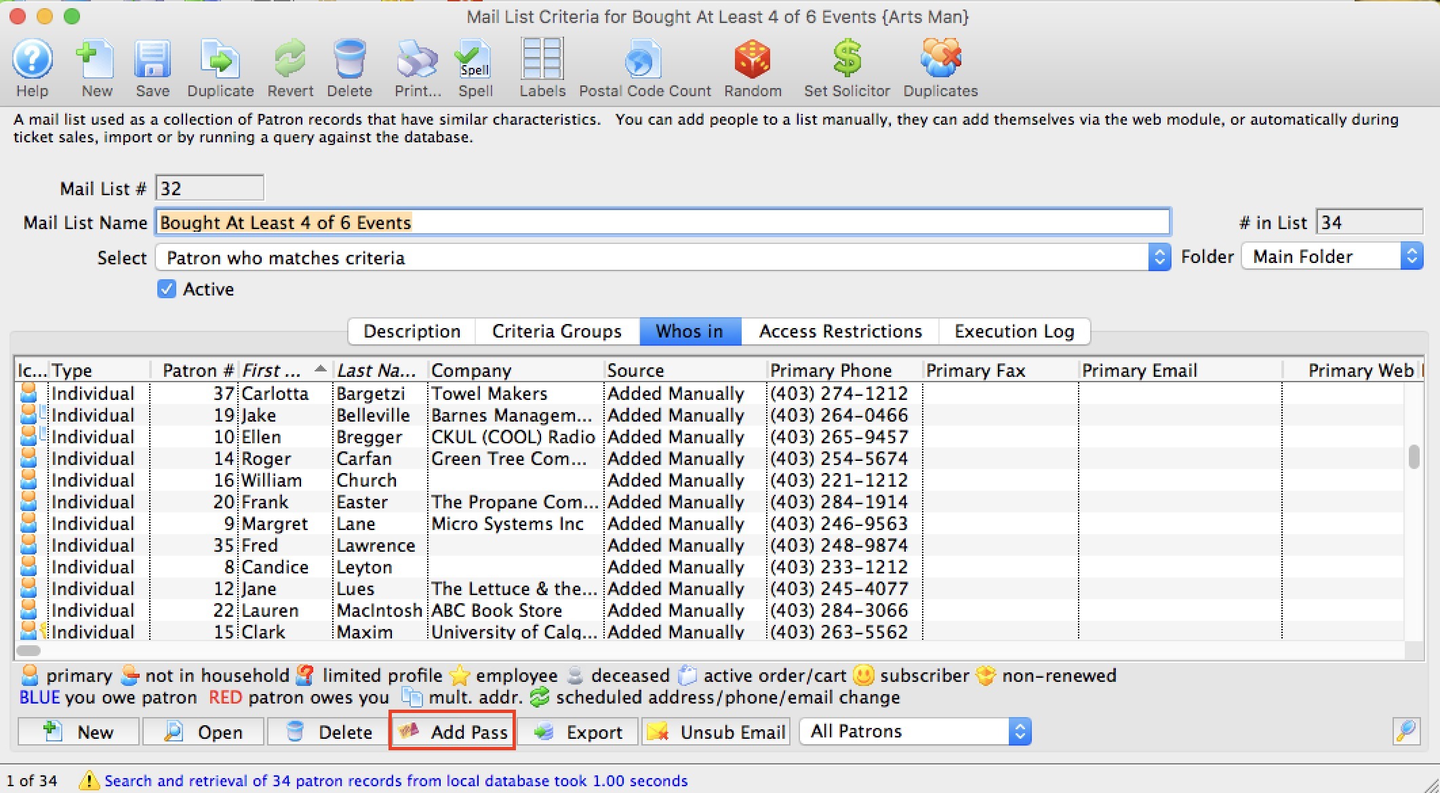

Select the pass type to sell
- Do ONE of the following:
- Click the Add Pass button and then pick the correct Pass/G.C. Type from the pop-up list
- Open the Pass Type List, select the correct Pass/G.C. Type, and drag it onto the selected patrons
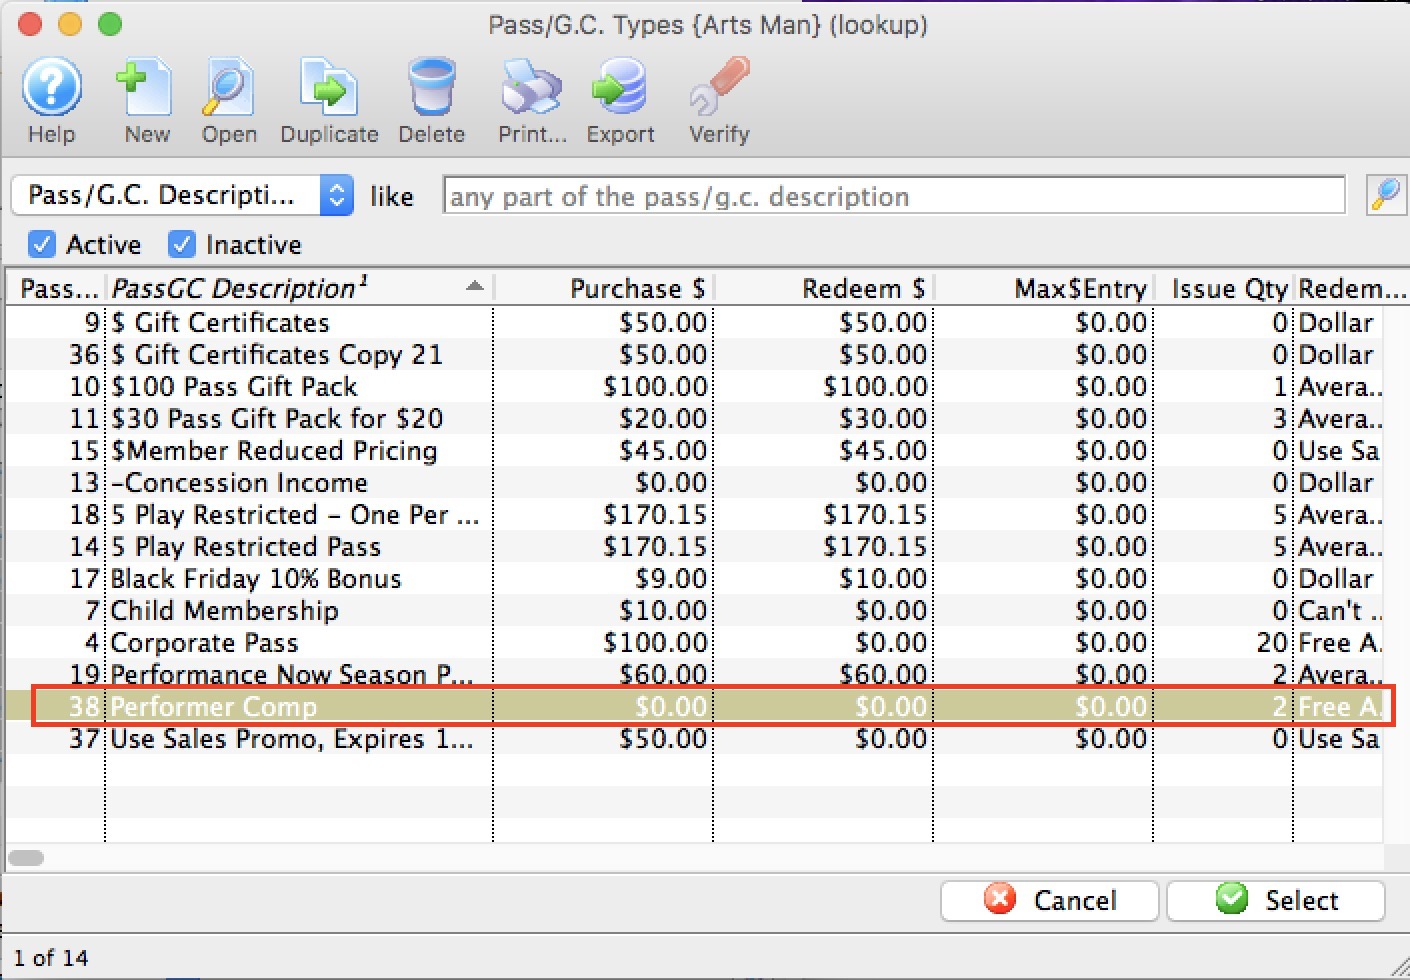

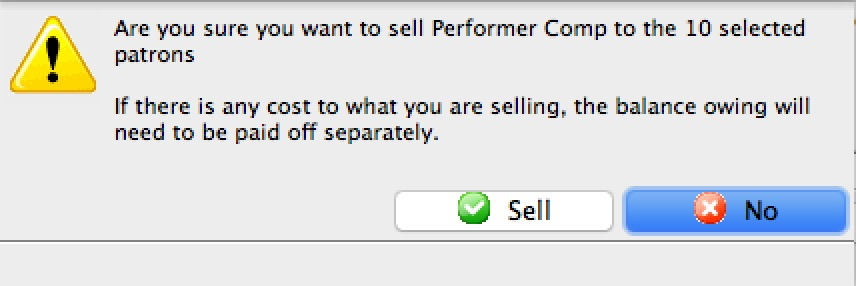
Confirm your choice
- On the Confirmation Pop-Up, click Sell to proceed
- Depending on the number of selected patrons, this process may take a little time

Duplicate an Existing Pass Top
Caution
Not all passes can be duplicated. To be eligible for duplication, a pass must:
- Be valid (the start/end date is either blank or contains the current date)
- NOT allow renewal
- Have a control number type set to either Theatre Manager Defined (recommended) or Last Used Pass/G.C. # (NOT Defined by User)
- Have already been saved
The following steps illustrate the duplication process from a Pass Detail Window opened from the Patron Detail Window >> Pass Tab, but the process can also be started from:
- The Pass Tab of a patron account (via the context menu)
- The open Order Detail Window >> Pass Screen (via either the context menu or the Duplicate button on the Pass Detail Window)
- The Patrons Tab of the Pass Setup Detail Window (via the context menu)
To duplicate a pass, follow these steps:
Find and open the pass
- Locate the pass to be duplicated (in this example from the Patron Pass Tab)
- Single-click and hit Open (or double-click) to open the Pass Detail Window
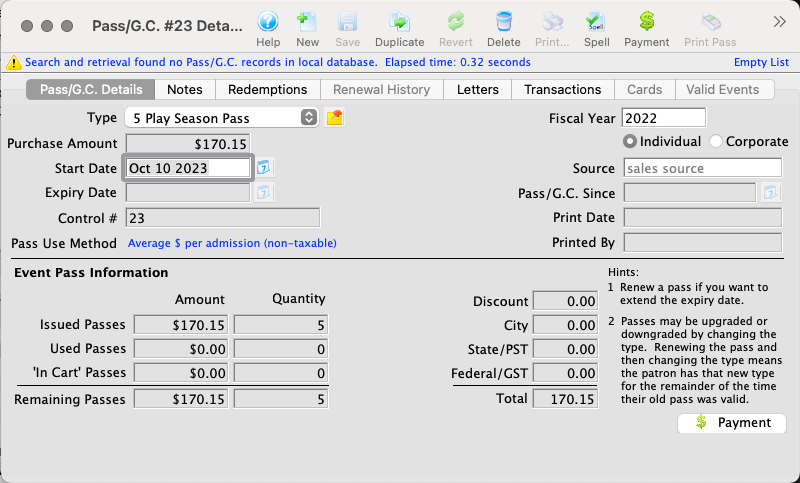

Start the duplication process
- Click the Duplicate button
- If it is greyed out and unavailable, review the eligibility requirements for duplication listed at the top of this guide
- Commonly the user creates the pass to be duplicated immediately before duplicating and forgets to first save the initial pass record


Enter the number of duplicates to be created
- On the duplication dialogue, review the description of what will happen when you proceed
- Enter the number of new passes you want generated
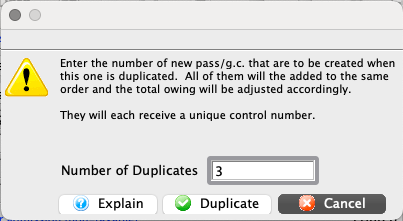

Confirm your choice
- Click the Duplicate button to proceed
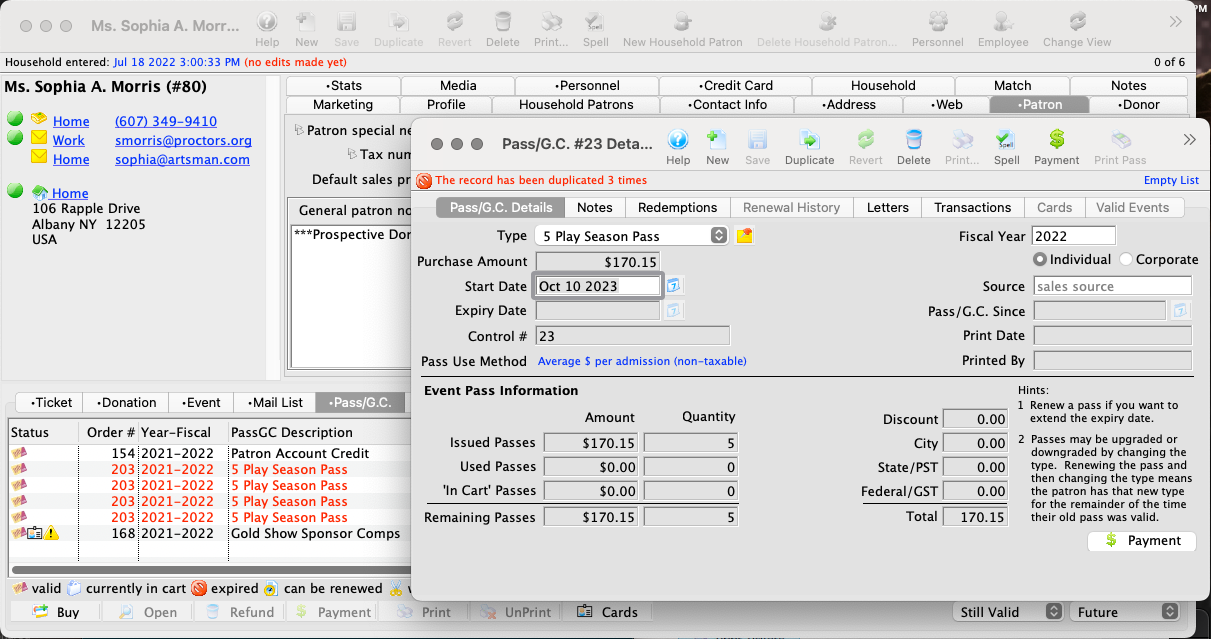

Review and pay for the newly created duplicates as needed
- The new duplicated passes are added to the same order as the original pass (and the total balance owing adjusted accordingly)
- Make any per pass adjustments as needed
- Proceed to take payment on the order, either using the Payment button on the Pass Detail Window or via the Order Tab of the patron account.
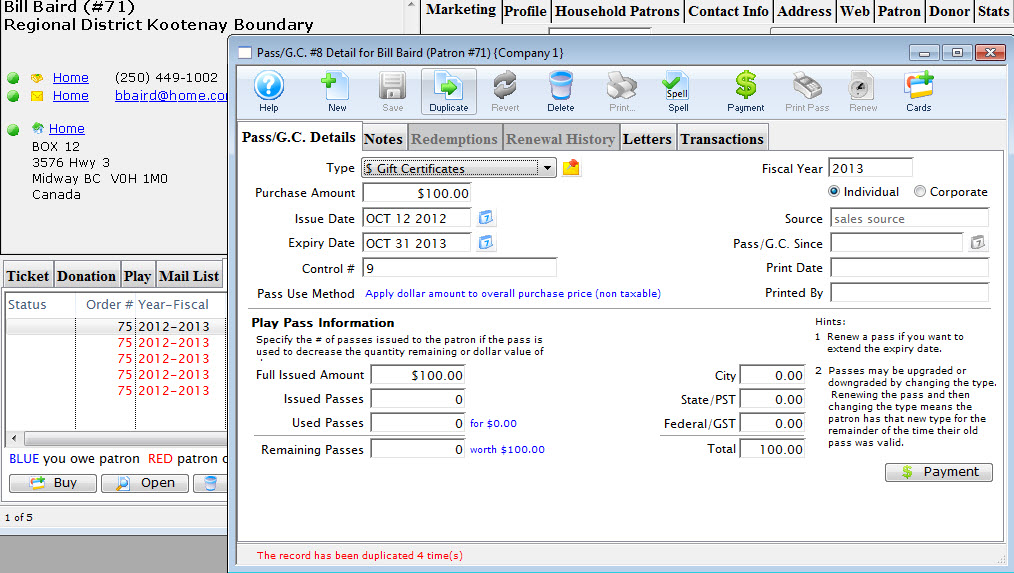

Each duplicated pass will have its own unique control number and must now be edited and redeemed individually.