Setting up the P400 Pin-Pad for use with credit cards and INTERAC has 8 basic steps:
- Pre-Preparation with Moneris
- Turn Off Power-Saving for Workstations Using the P400
- P400 Pin-Pad First Time Setup
- Update Moneris Merchant Account in Theatre Manager
- Create Device Record(s) in Theatre Manager
- Associate the P400 Pin-Pad via Hardware Setup
- Add Payment Method in Theatre Manager
- Test a Transaction with the P400 Pin-Pad
Each of the above has multiple steps which are broken out below.
Only Canadian Organizations Certified to Use Pin-Pad Devices
At this time Only Canadian sites are certified to use pin-pad devices with Theatre Manager.
Pre-Preparation with Moneris Top
You will need a Moneris E-Select+ account to use the P400 Pin-Pad EMV device, herein referred to as the P-400 Pin-Pad.
If your organization already uses Moneris as your merchant provider then all that is needed is to contact your Moneris representative and order the number of P400 Pin-Pad devices your organization will need.
Artsman suggests having one P400 Pin-Pad for each box office window that will be selling tickets to in-person patrons. That said, Theatre Manager does allow the sharing of Pin-Pads between workstations, so it's up to each organization how they wish to set up the devices between box office stations.
If you do not use Moneris as your merchant provider, there are a few options:
- Switching your merchant provider to Moneris
- Keeping your existing merchant provider and adding a Moneirs E-Select+ account
If you are considering switching merchant providers to Moneris, Artsman suggests contacting the Theatre Manager CRM Team to talk through the Pro's and Con's of moving over to Moneris and what the logistics of switching merchant providers entail.
Once you have an E-select+ account, you must tell Moneris that you are using it with Theatre Manager because Moneris must provision it with their software. As part of this process, your team will need to work with the Moneris representative to get the required merchant account information and P400 Pin-Pad set up in the E-select+ account.
Important Note: Do Not allow Moneris to settle the EMV devices automatically. Theatre Manager will settle the device(s) at the End of Day.
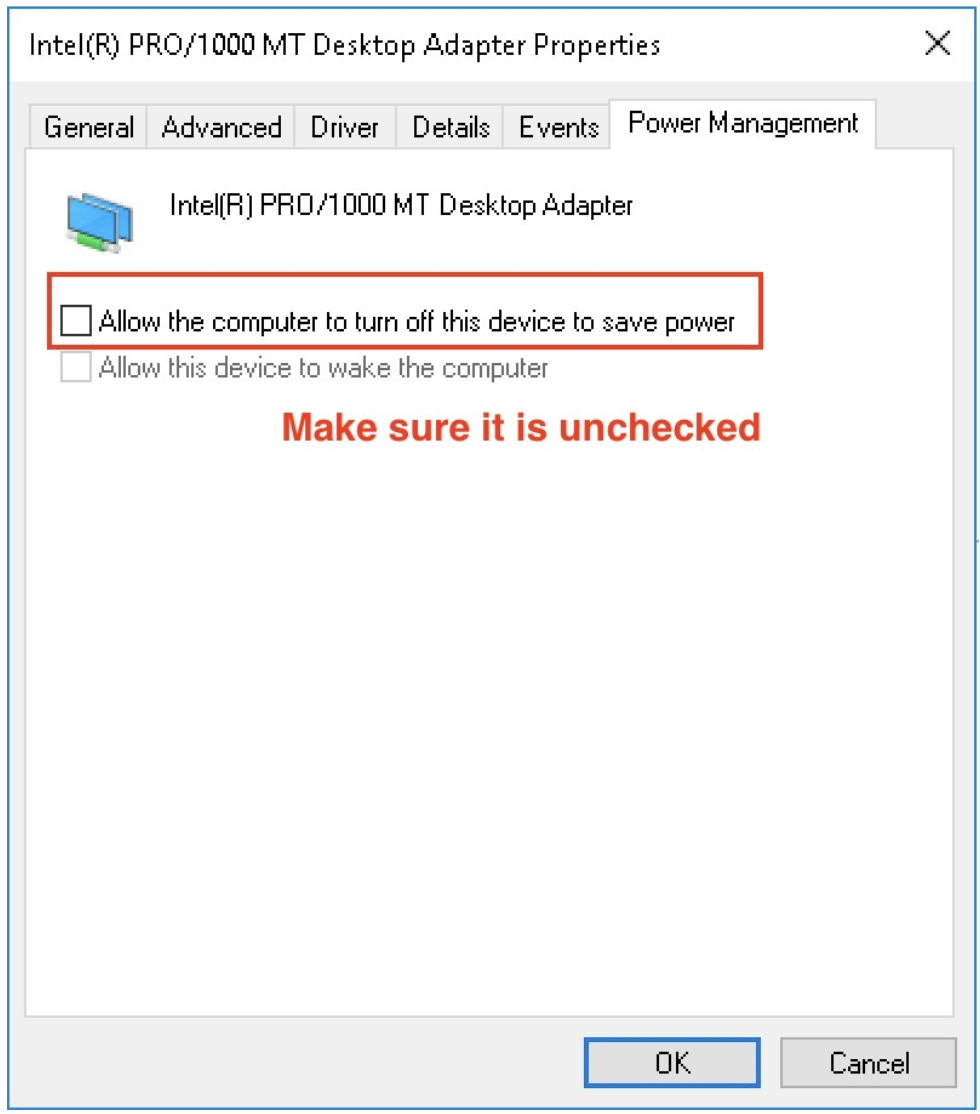
Turn Off Power-Saving Top
Turn Off Power Saving
- The pin-pad requires a constant connection to the database while the authorization is occurring.
- On macOS make sure that the computer is set to never go to sleep
- On Windows make sure the ethernet connection is set so that the computer can't sleep
- Open Windows Control Panel
- Select Network and Internet
- Pick Network Connections
- Click the network card
- Right-click and show properties
- Click configure
- Click on the Power Management tab and uncheck Allow the computer to turn off this device to save power
P400 First-Time Setup Top
Download Moneris P400 Pin-Pad Quick Install Guide
- Download the Moneris P400 Pin-Pad Quick Install Guide
- This manual will walk users through the hardware setup steps 1a through 1f.
- At Step 2 of the Quick Install Guide users can come back to this how-to-guide to continue the pin-pad setup process.
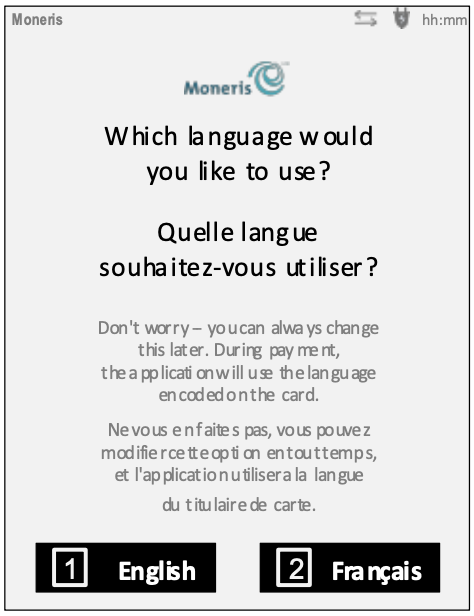
Select Language
- On the "Which language would you like to use?" screen, select a default display language for the P400 PIN Pad:
- To select English, tap English.
- To select French, tap Français.
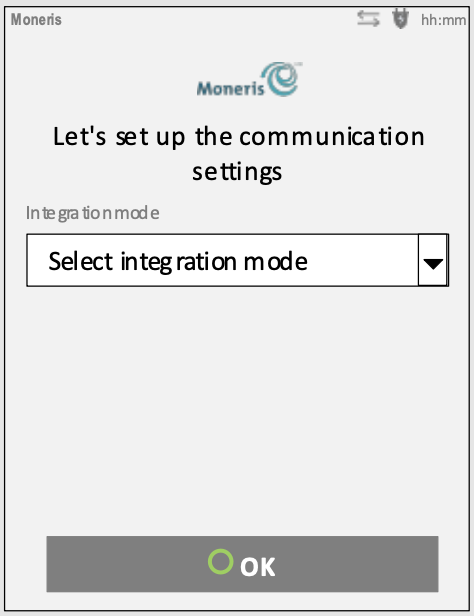
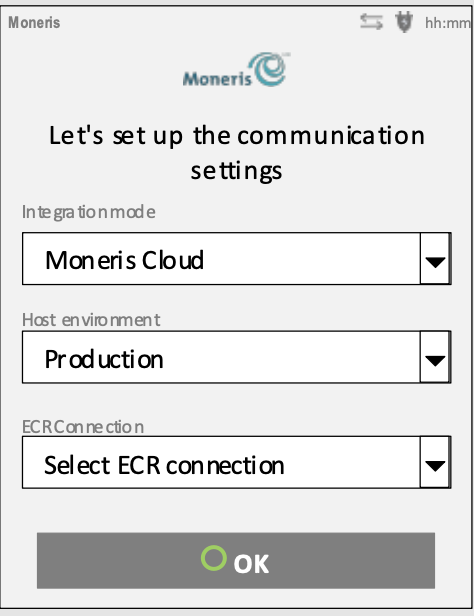
Communication Settings
- When the "Let's set up the communication settings" screen displays, go to the "Integration mode" parameter, and tap Select integration mode.
- Tap OK to move on to the next step
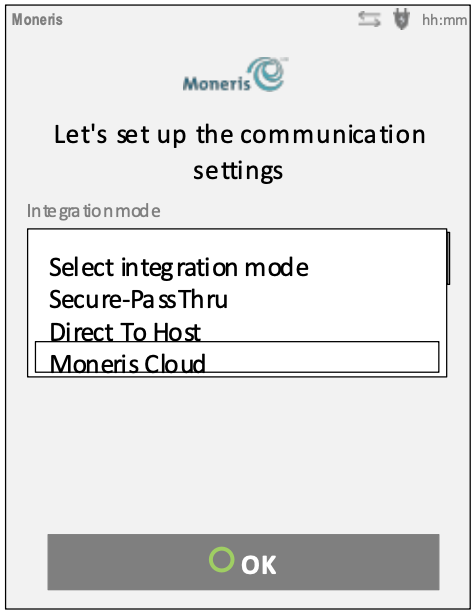
Select Moneris Cloud
- In the expanded "Integration Mode" drop-down, tap Moneris Cloud.
- Tap OK to move on to the next step
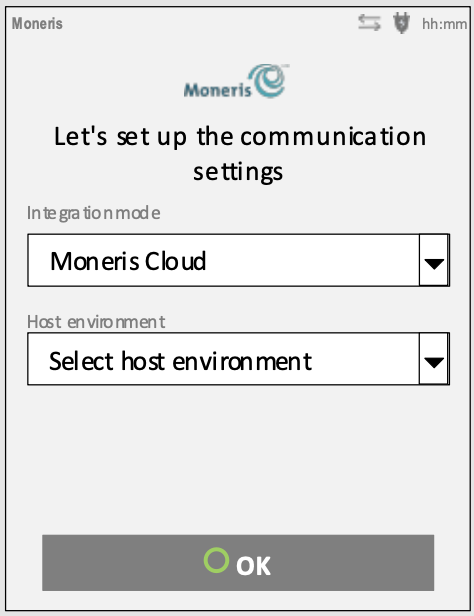
Select Host Environment
- Go to the "Host Environment" parameter, and tap Select host environment.
- Tap OK to move on to the next step
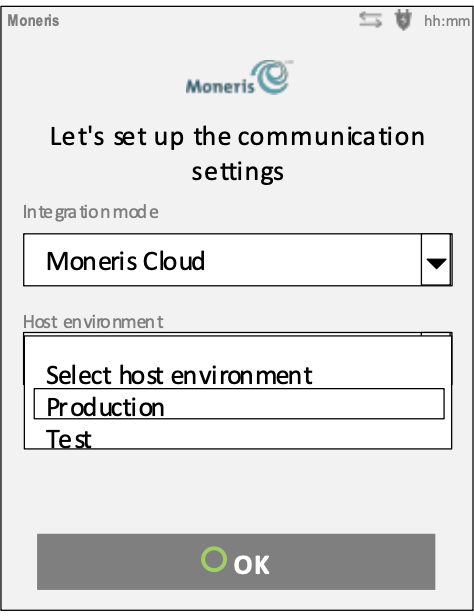
Select Production
- In the expanded "Host environment" drop-down, tap Production.
- Tap OK to move on to the next step
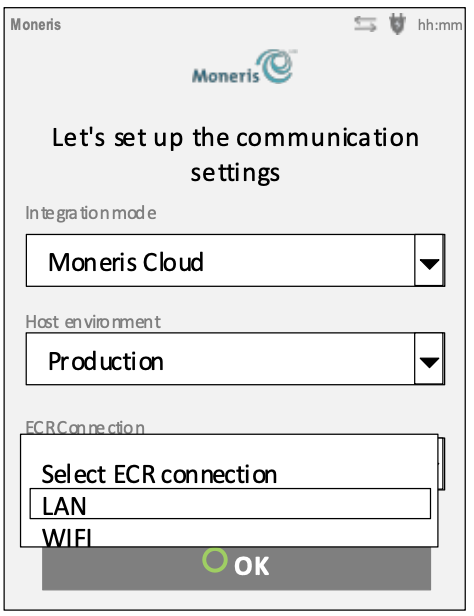
Select ECR Connection
- Go to the "ECR Connection" parameter, and tap Select ECR connection.
- Tap OK to move on to the next step
Select LAN
- In the expanded "ECR Connection" drop-down, tap LAN.
- Tap OK to move on to the next step
Enable the P400 PIN Pad to use dynamic IP
- On the "Let's set up the communication settings" screen, tap OK.
- Note: Dynamic IP is enabled by default; therefore, you do not have to configure any dynamic IP parameters.
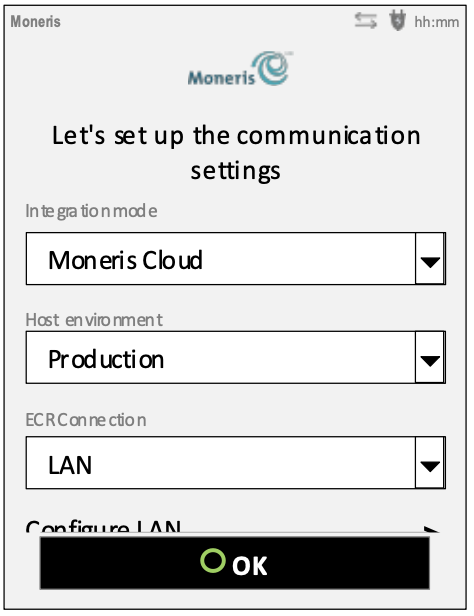
- Leave the P400 Pin-Pad for the moment.
Update Moneris Merchant Account Top
Best Practice
If the organization already has a Moneris account, Artsman suggests updating the existing Moneris Merchant Account in Theatre Manager, rather than creating a second record.
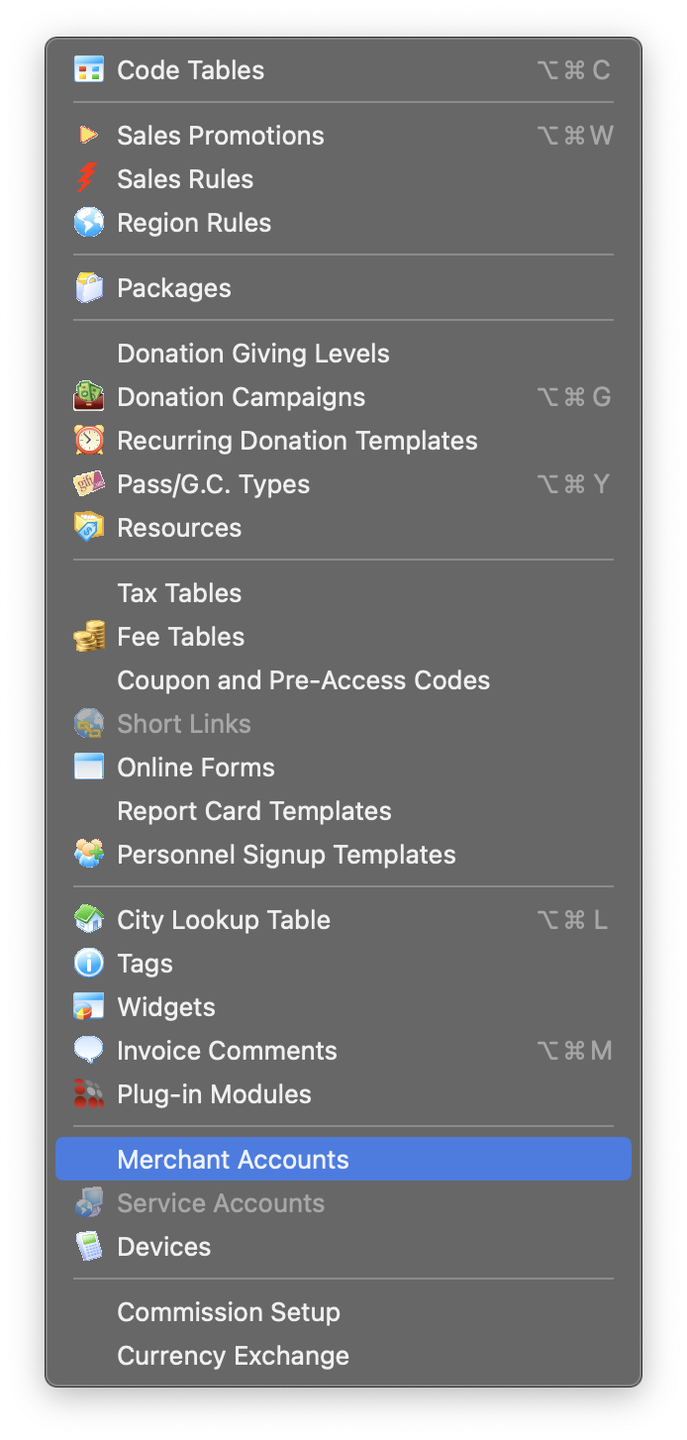
Open Merchant Accounts
- Navigate to Merchant Accounts by going to Setup -> System Tables -> Merchant Accounts
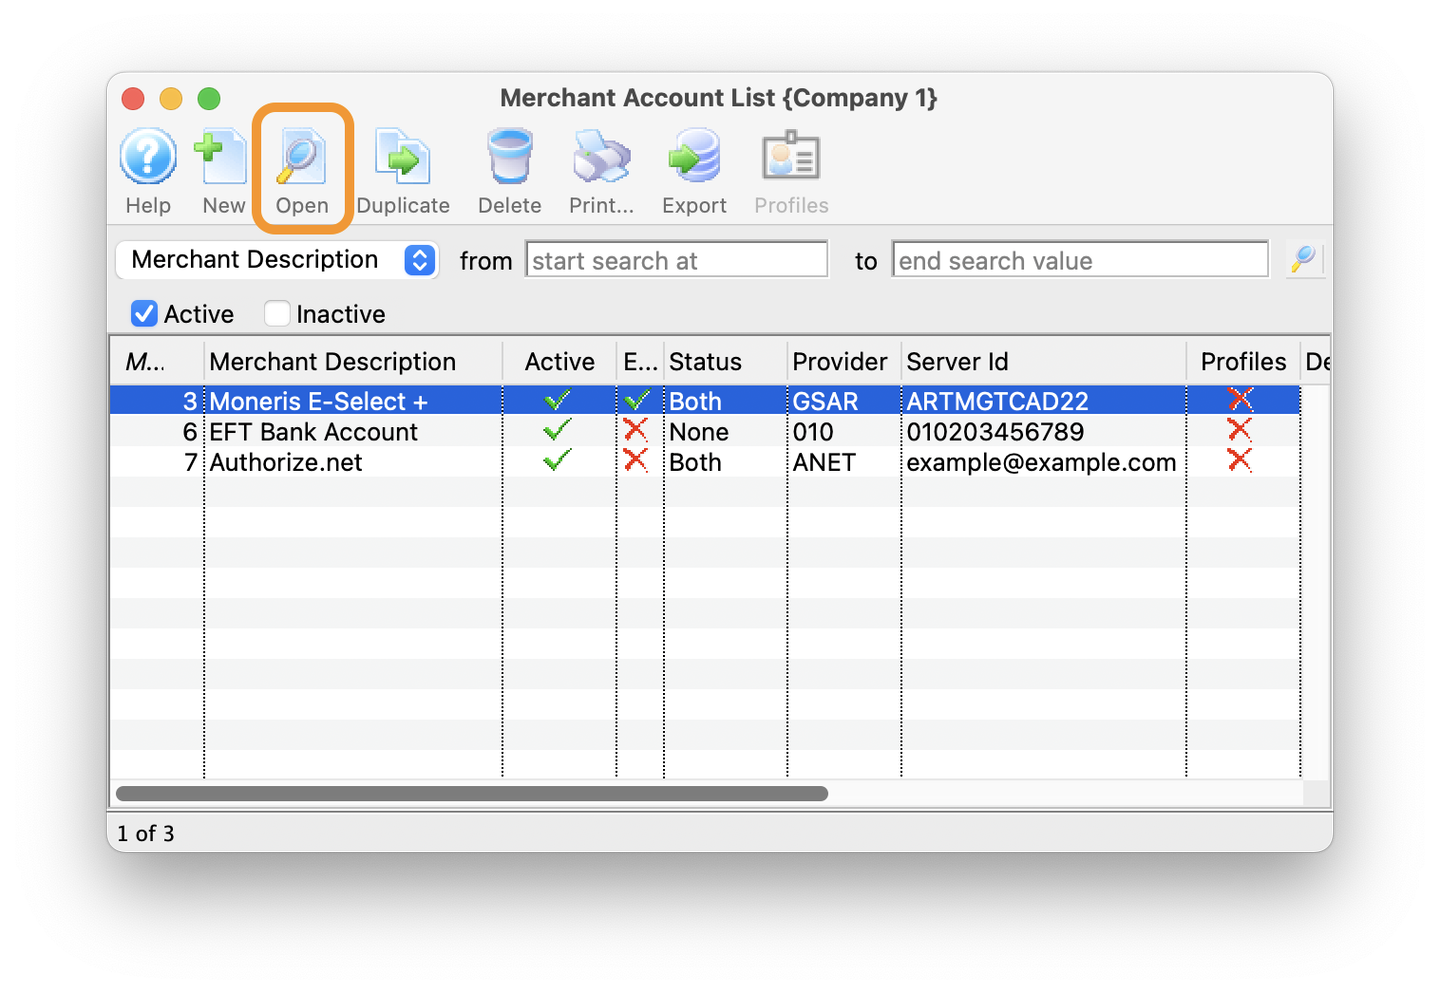
Open Moneris Merchant Account
- Hit Enter on the keyboard, click the spyglass icon to populate the Merchant Account list window
- Select the Moneris account and use the Open button in the toolbar, or double-click to open
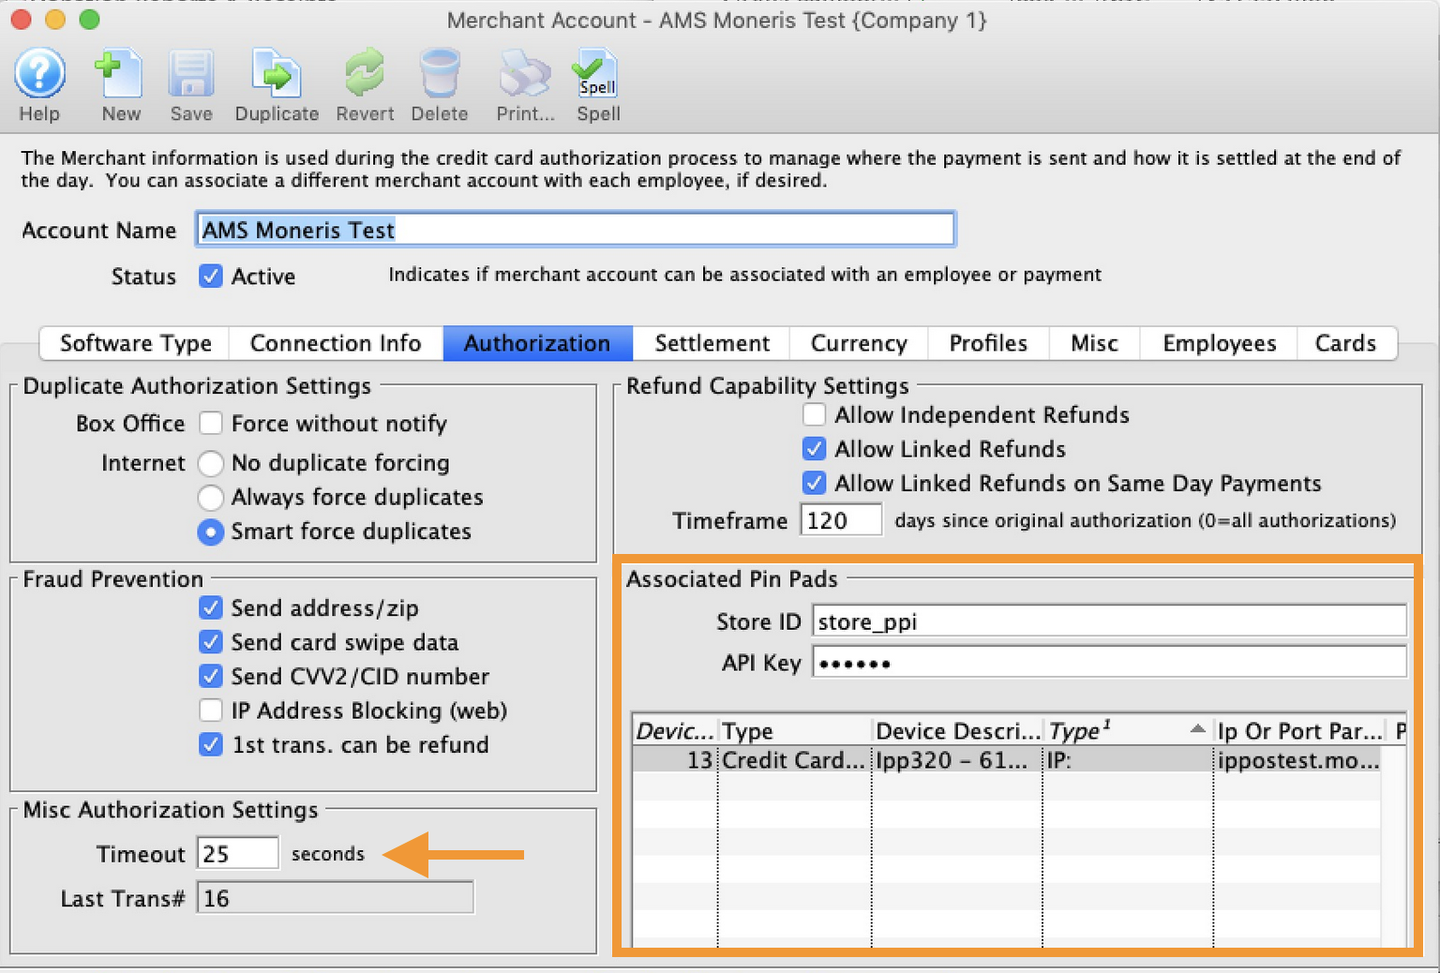
Input Credentials on Authorization Tab
- Click on the Authorization tab
- In the Associated Pin-Pads section
- Enter the StoreID provided by Moneris
- Enter the API key provided by Moneris
- In the Misc Authorization Settings section
- Change the Timeout to 90 seconds to allow for manual entry of card data for phone orders
- Close the window to save changes
Device Record(s) Top
Users will need to create a new Device Record for each P400 Pin-Pad being deployed. For example, if the box office is setting up 2 pin-pads and the admin office is setting up a 3rd device, a total of 3 Device Records will need to be created, one for each location.
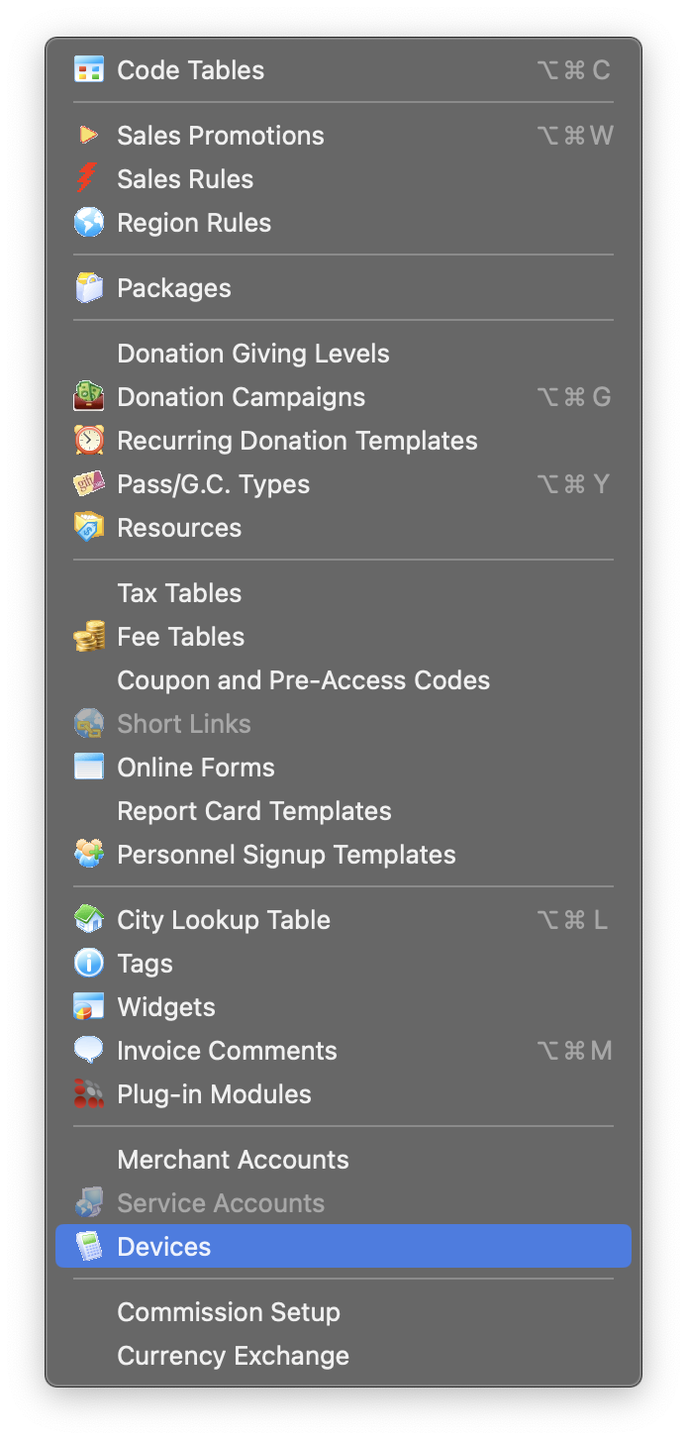
Open Devices Menu
- Navigate to the Devices menu by going to Setup -> System Tables -> Devices
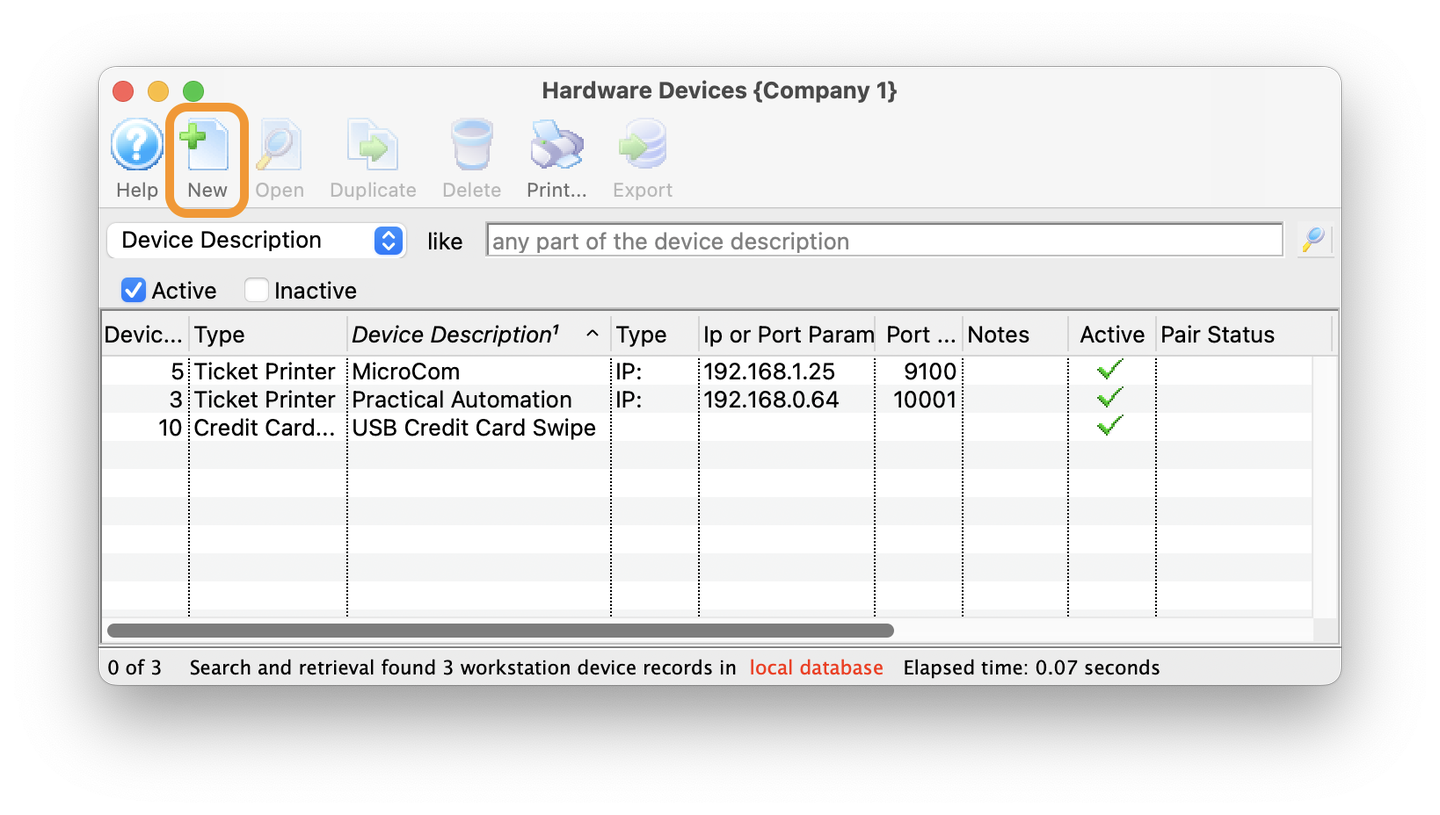
Add New Device
- Hit Enter on the keyboard, click the spyglass icon to populate the Merchant Account list window
- Click the New button in the toolbar to add a new Device Record
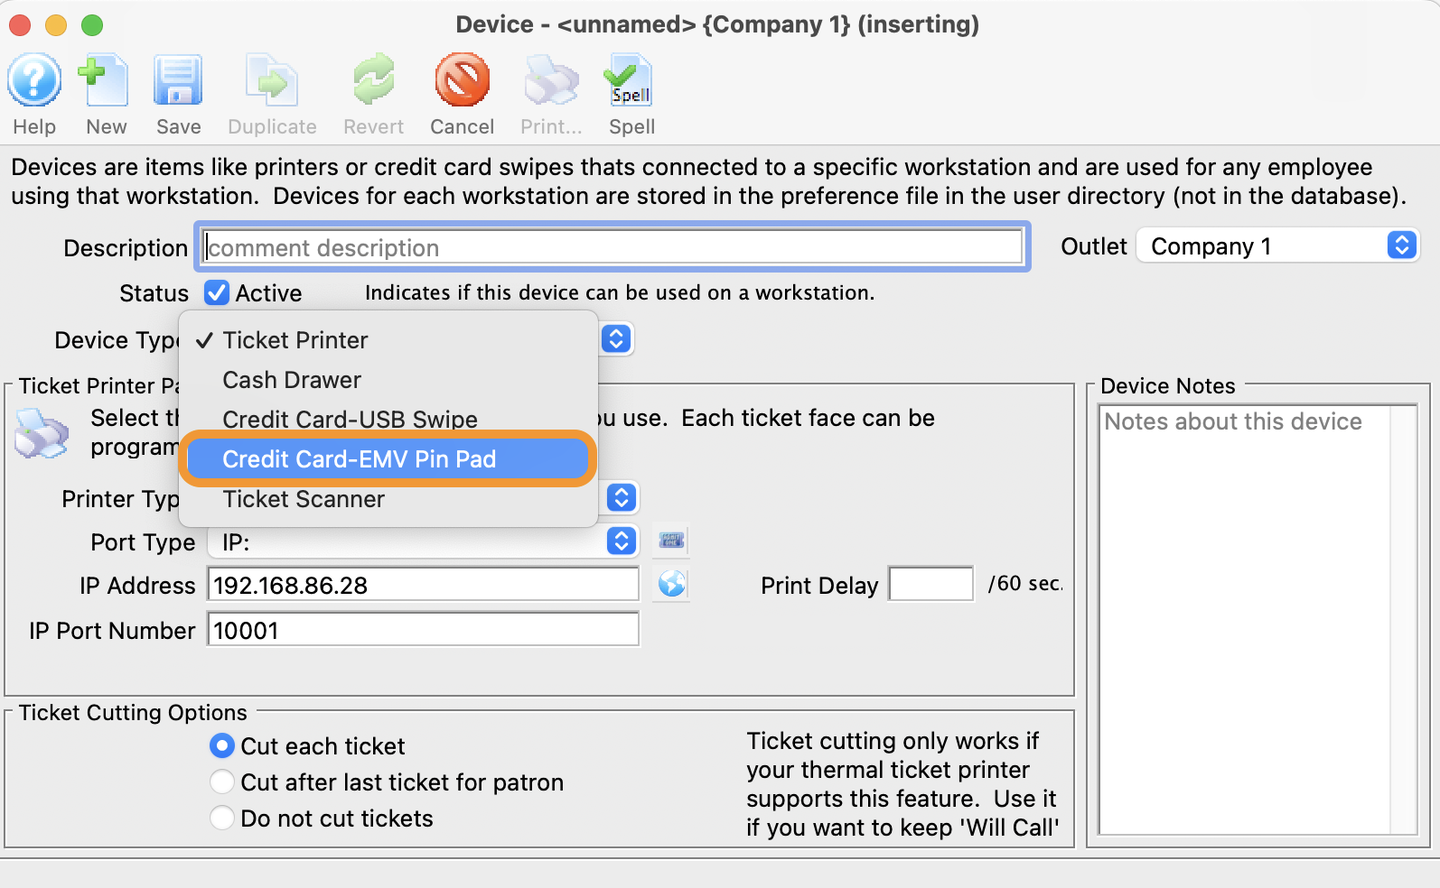
Select Device Type
- Click the Device Type pull-down menu
- Select Credit Card-EMV Pin Pad
- Once selected the window will update for Pin-Pad only options
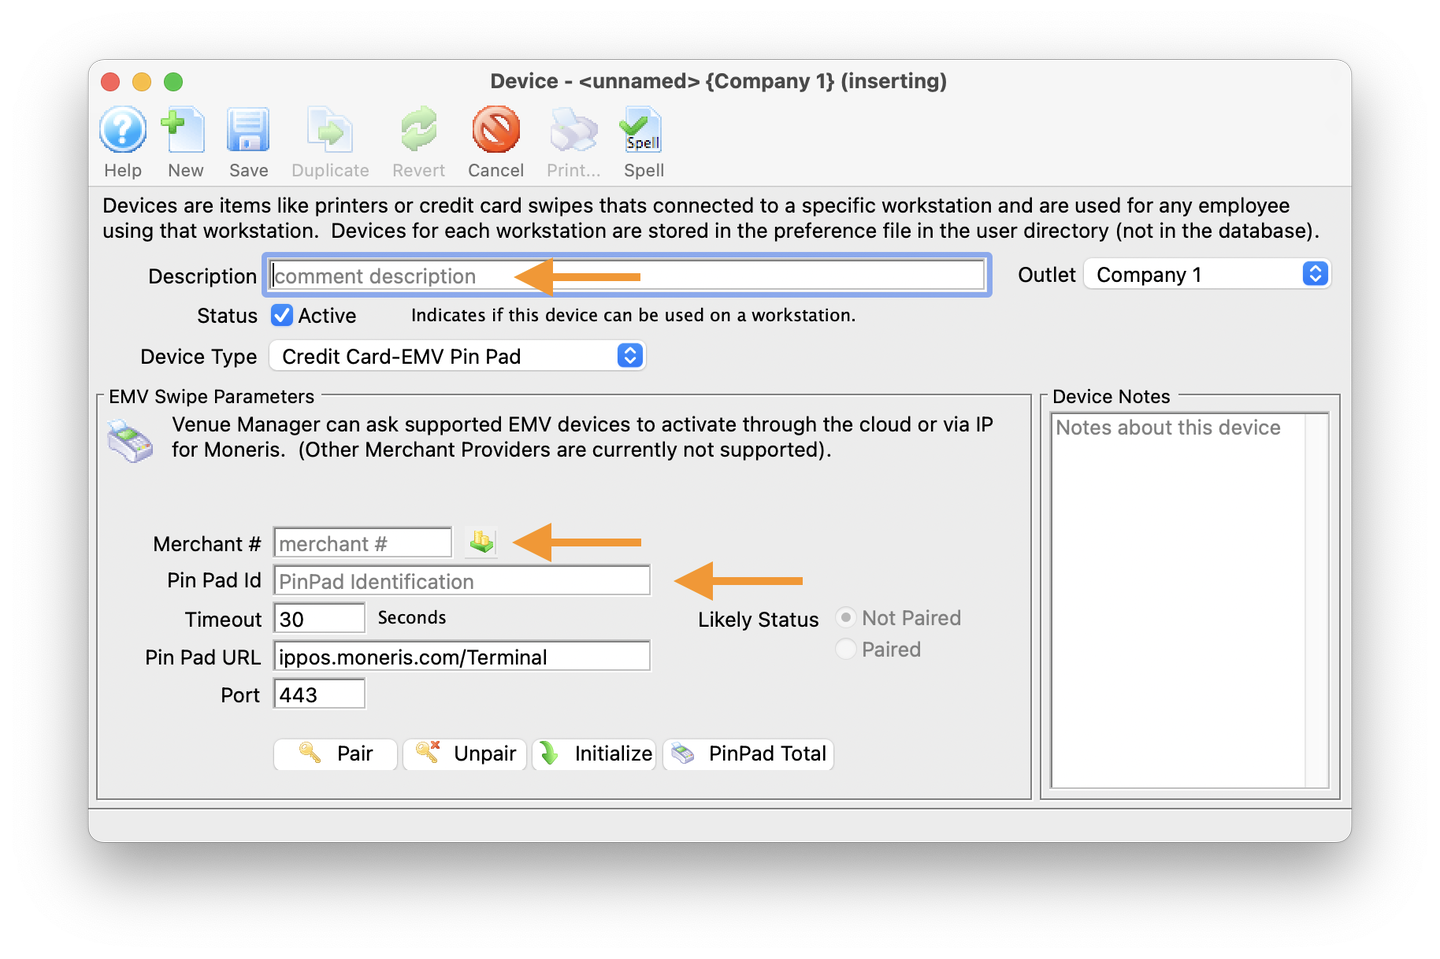
Enter Pin-Pad Device Info
- Enter a description with a suggested format including the Type, ID and location
- For example: P400 - 61041516 - BoxOffice Stn 1
- The Theatre Manager Merchant Account Number (click on the icon to the right of the field to lookup the Moneris Merchant Account number)
- The Pin Pad Number provided by Moneris. This number is unique to each device (this is provided by Moneris as part of the P400 order)
- Optional: Add text to the Device Notes that may prove useful in the future. For example, "Setup for use at workstation 3 in the admin office"
- The remainder of the fields will auto-populate, including: Timeout, Pin Pad URL and Port
- Click Save to update the record
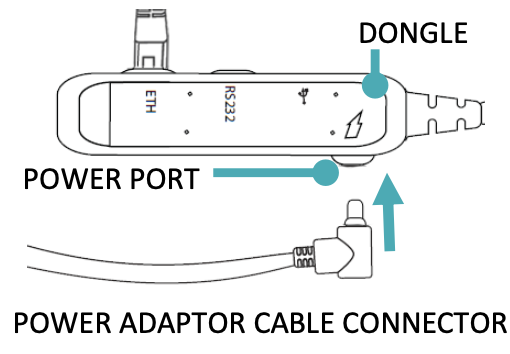
Power Cycle P400 Device
- Place the devices where you think they will be best used for your box office and administration areas.
- If not already done, physically plug the P400 Pin-Pad(s) devices in, power them up and connect them to your ethernet network.
- The EMV devices will go through a startup process and should eventually show a screen with a Pair Code.
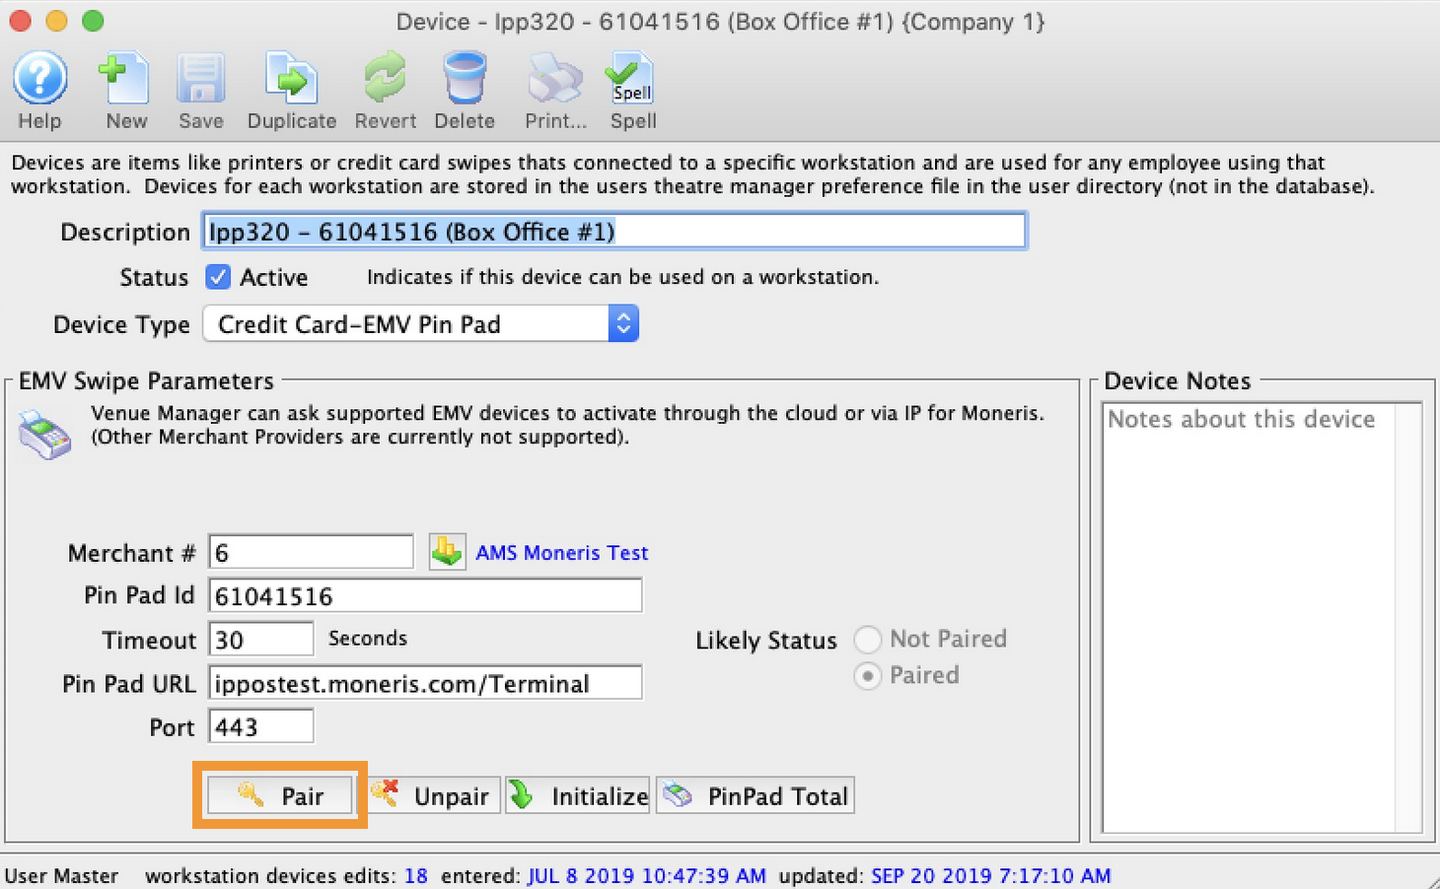
Pair Device
- Click the Pair button
- This will open the Pair Device window
- Refer to the P400 Pin-Pad being setup, write down the Pair Code displayed on the device
- Enter the Pair Code that you see on the device to associate it with this record. After pairing, the device should go to a ready mode.
Caution
If you cannot pair with the device, contact Moneris to make sure the device is on the cloud setting.
Only Moneris cloud setup is supported (direct connection is not).
Hardware Setup Top
Associate Pin-Pad with Each Workstation
Each workstation that needs to use the P400 Pin-Pad will need to be "associated" with the device in Theatre Manager's Hardware Preferences.
For Example:
- Each box office computer could be associated with its own device.
- All Admin computers could be associated with a common device for manual card entry.
This step can only be completed once the above Device Setup steps have been finished.
Open Hardware Prferences
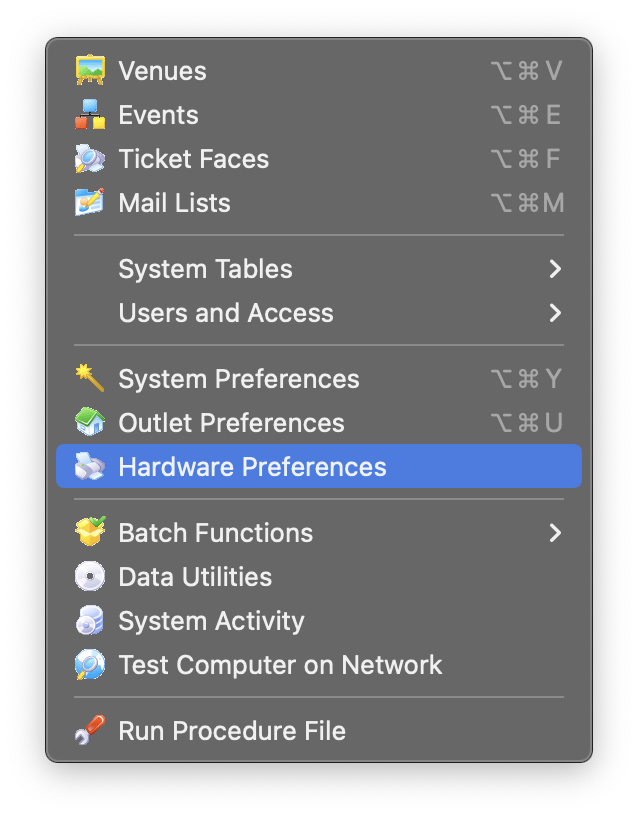
- Navigate to Hardware Preferences menu by going to Setup -> Hardware Preferences
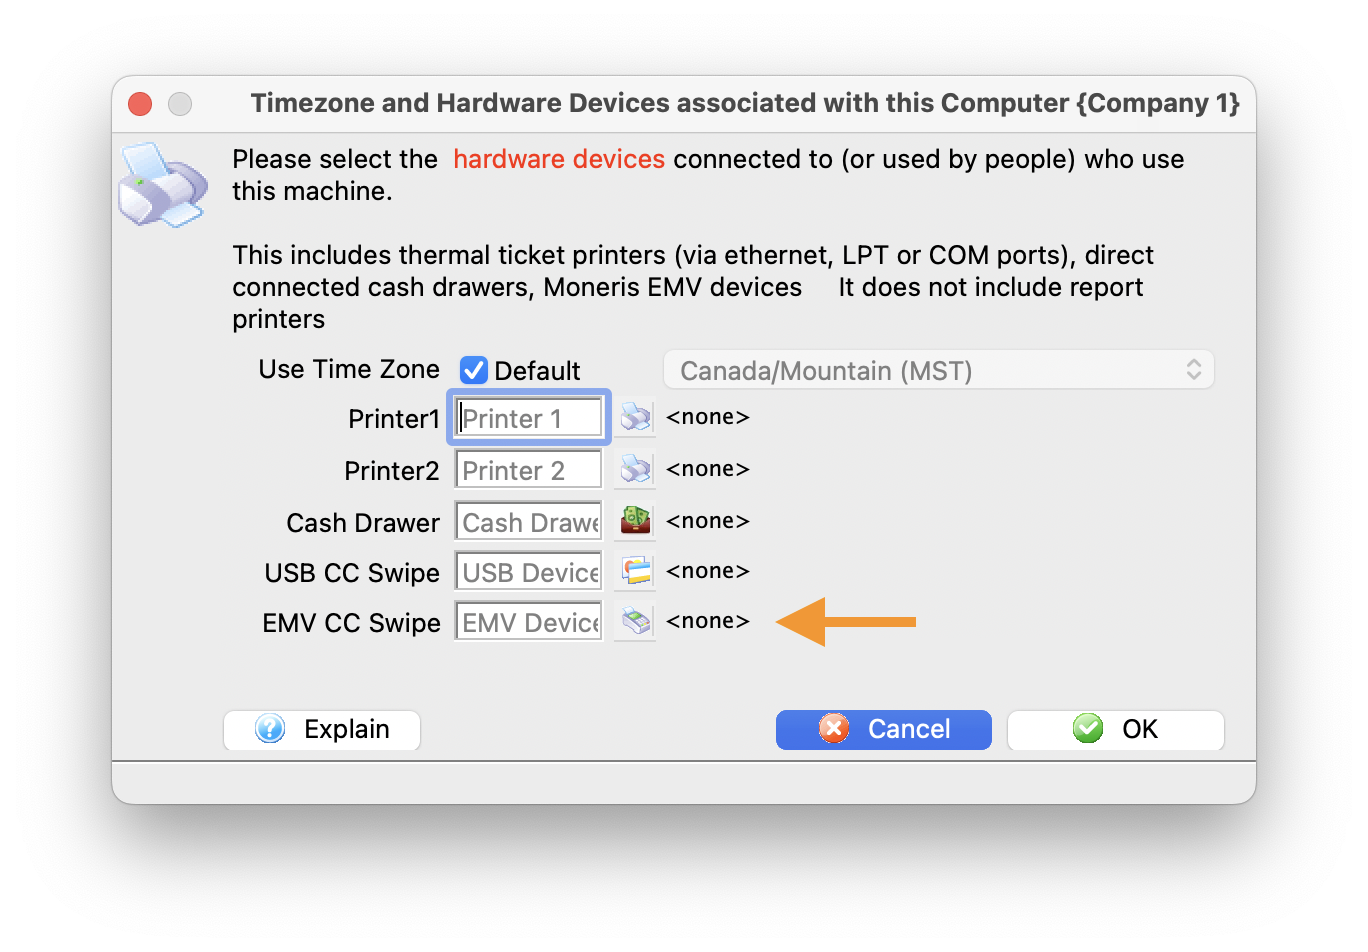
- This will open the Timezone and Hardware Devices Associated with this Computer window
Select EMV CC Swipe
- Click the icon next to the field for EMV CC Swipe
- This will open the list of P400 Devices that have been successfully setup
- Select the Device that this workstation will use
- Click OK to confirm the changes
- Reminder: P400 Pin-Pads can be shared between users
Payment Methods Top
Using the new P400 Pin-Pad will require setting up new Payment Methods so the system can differentiate when to use the Pin-Pad or not. At a minimum, a new method for processing debit cards (INTRAC) will need to be setup.
Open Code Tables
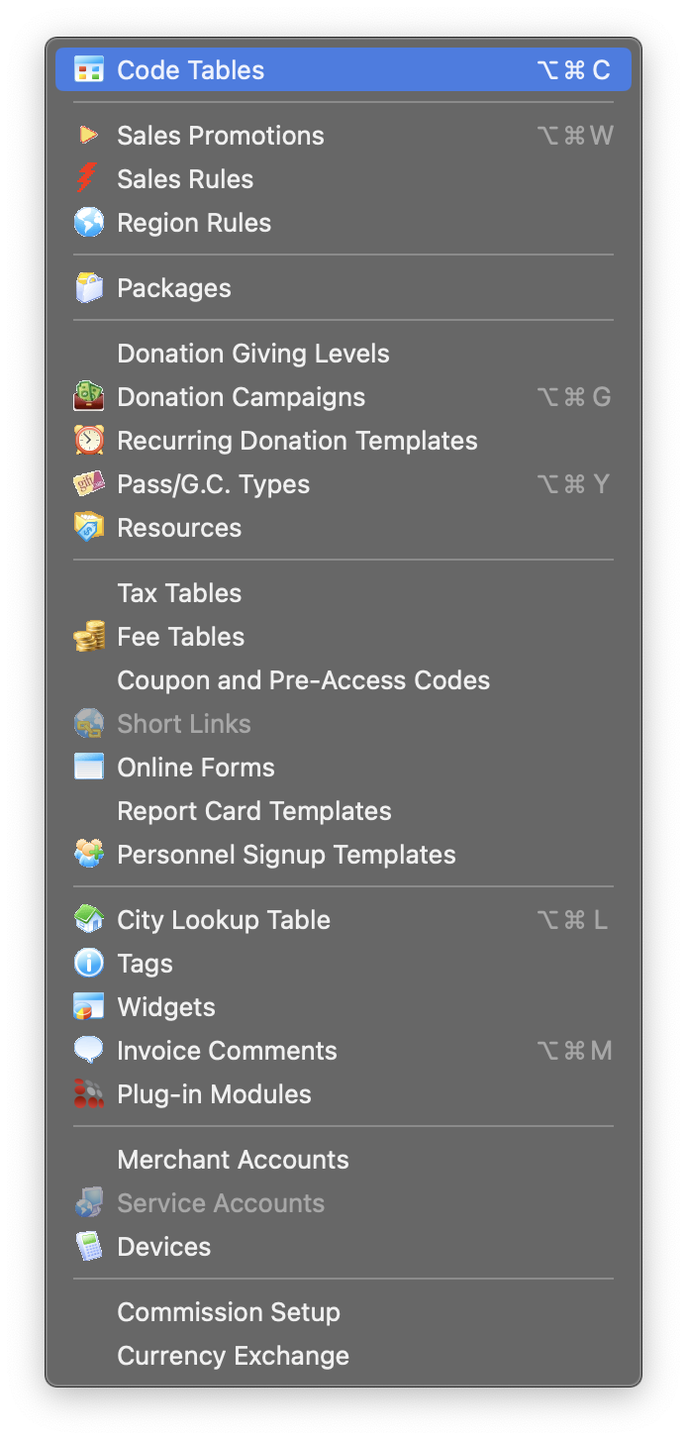
- Navigate to Payment Methods in Code Tables by going to Setup -> System Tables -> Code Tables ->
- This will open the Code Tables window
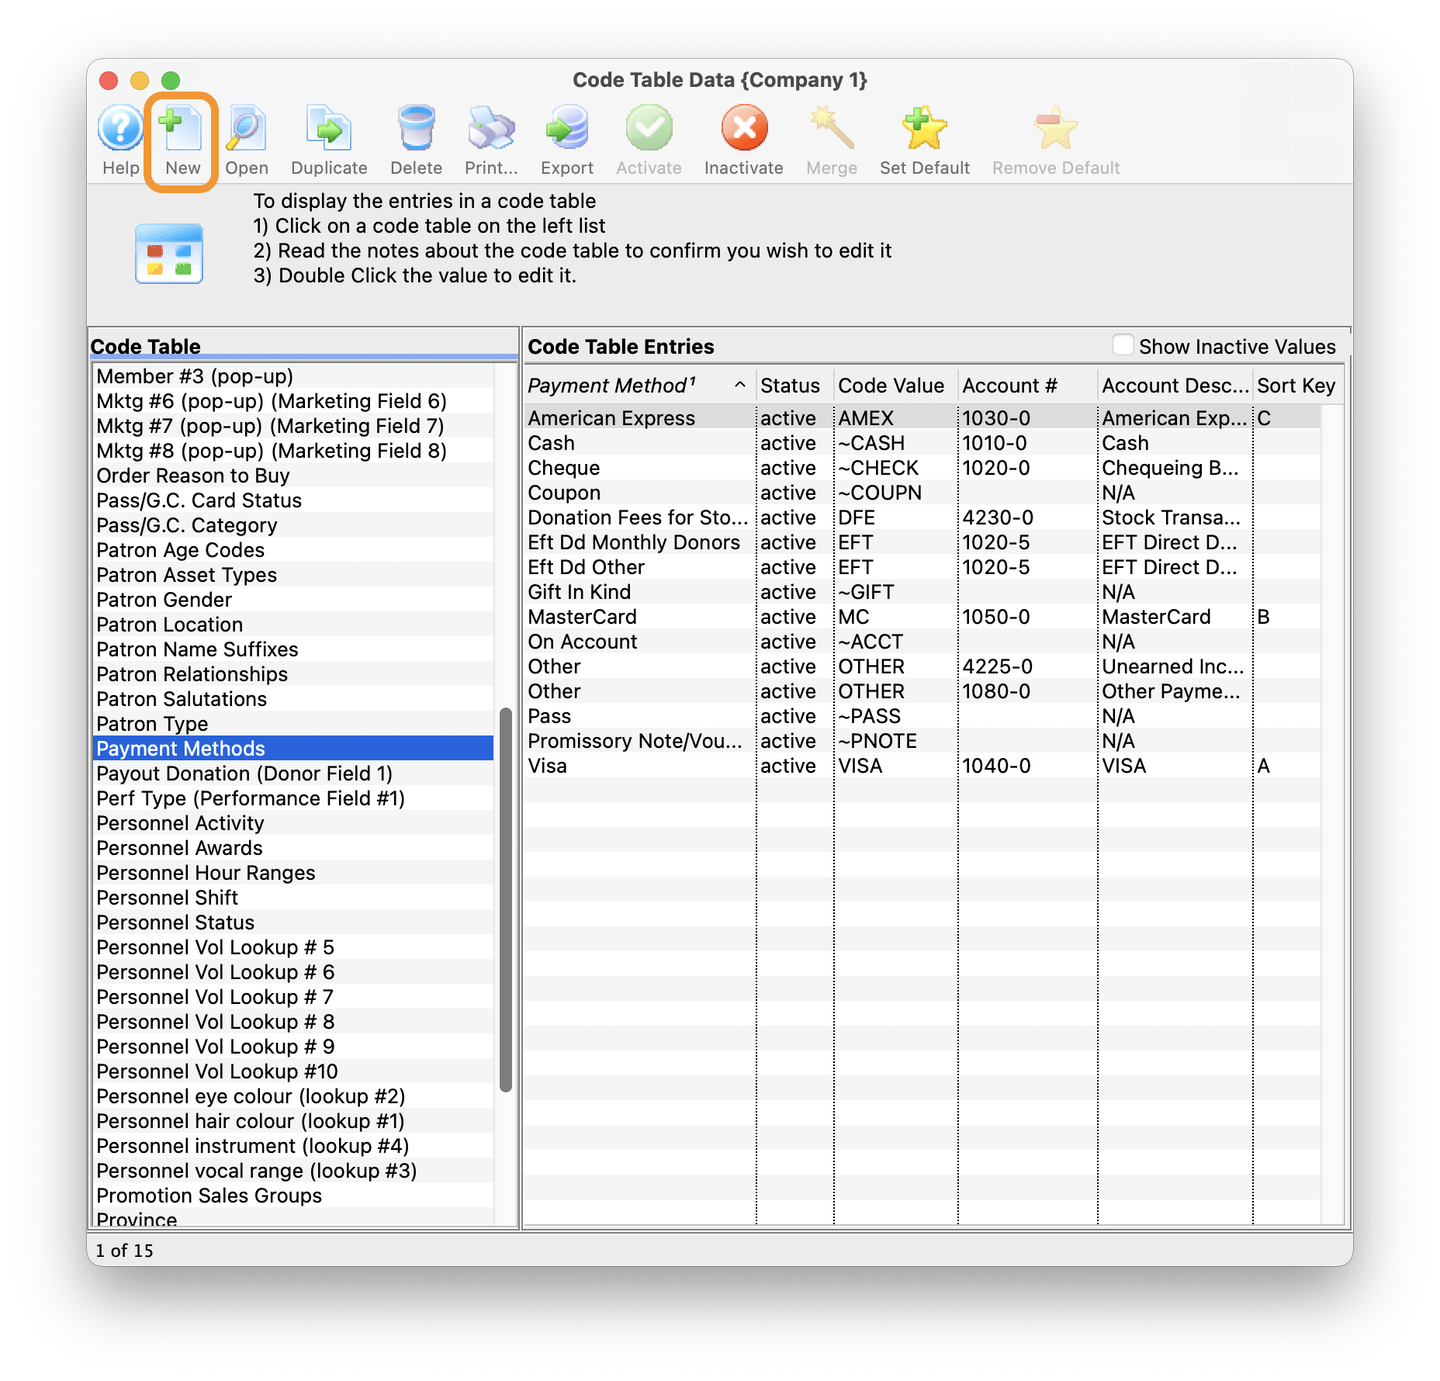
Add New Payment Method
- On the left-hand side of the window click on Payment Methods
- Once selected the right side of the window will display current options
- Click on the New button in the toolbar to add a new option
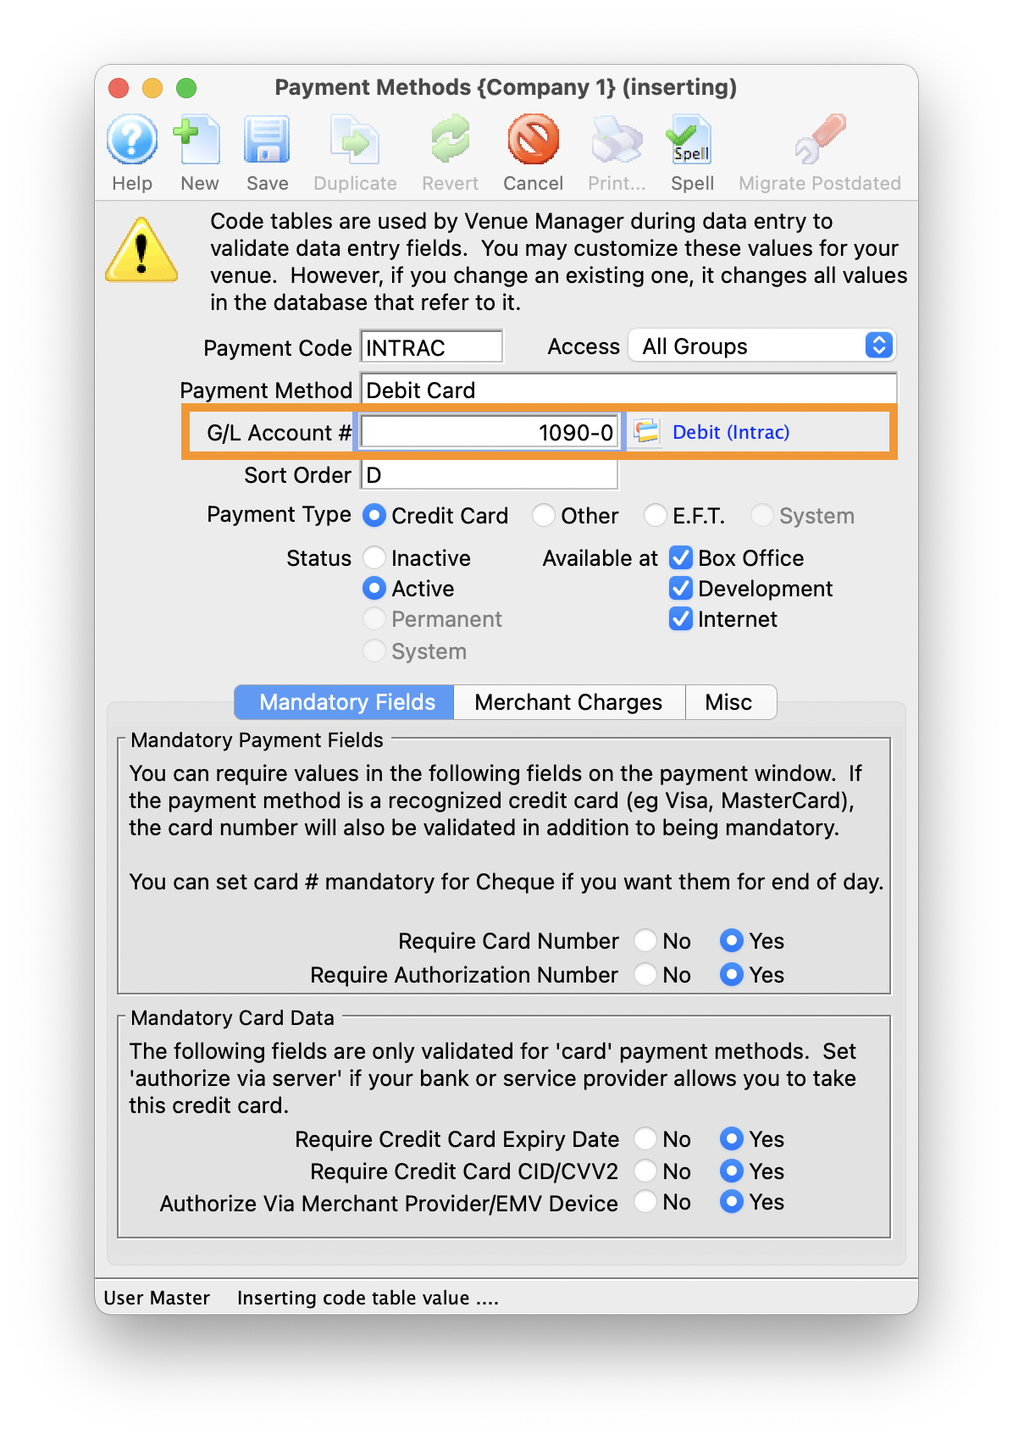
Add Details for Debit Card (INTRAC)
- Enter "INTRAC" in the Payment Code field (code is case sensitive)
- Enter a description in the Payment Method text field (this can be whatever best describes what your patrons would recognize as a debit card)

Enter GL Account #
- Click on the icon next to the GL Account # field to open up the GL Accounts window
- Select the account you wish to post Debit Card payments to
- In this example we using GL# 1090-0, but the GL# will be specific to your organization
- Optional: Set the Sort Order
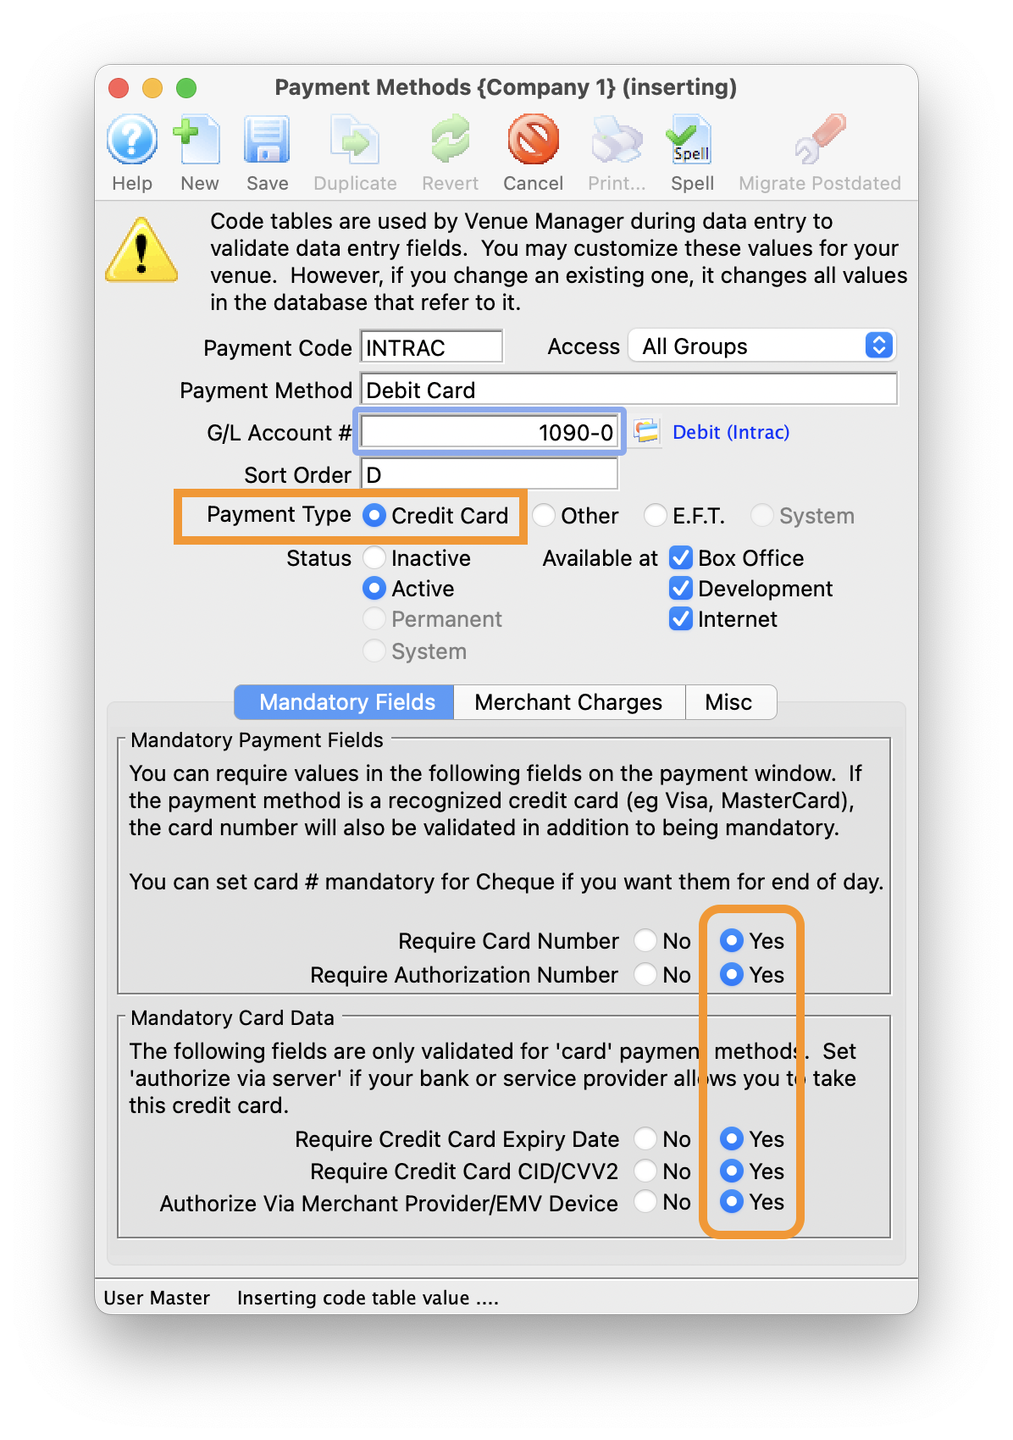
Set Payment Type to Credit Card
- Select Credit Card for the Payment Type
- Once you do the Mandatory Fields will become available. Set all the bullet points to Yes
- Require Card Number = YES
- Require Authorization Number = YES
- Require Credit Card Expiry Date = YES
- Require Credit Card CID/CVV2 = YES
- Authorize Via Merchant Provider/EMV Device = YES
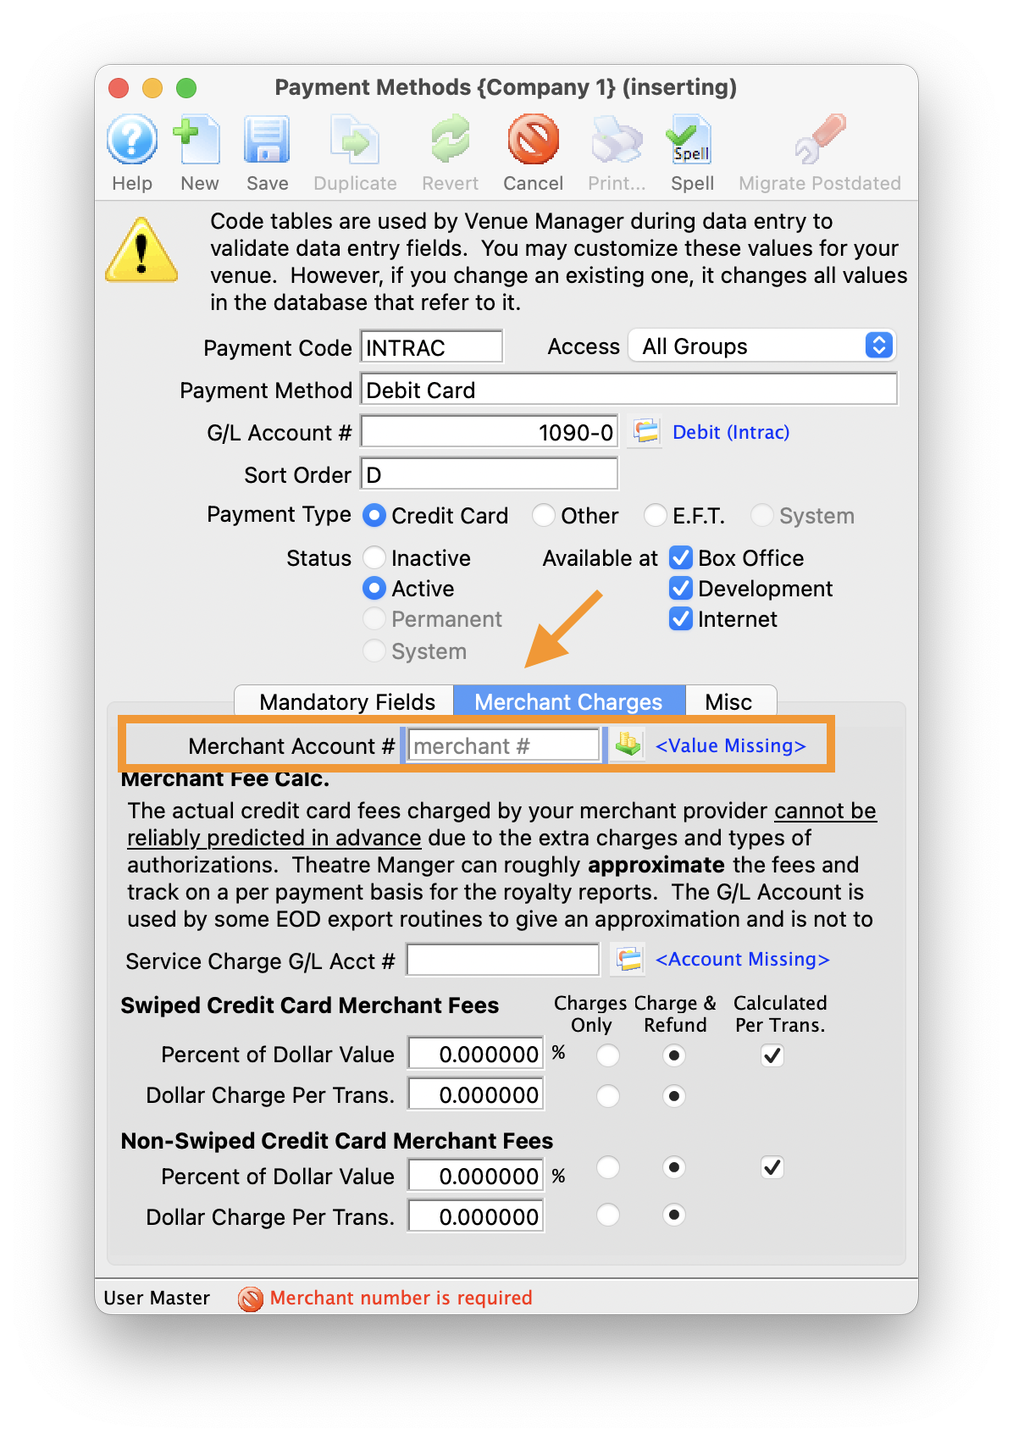
Set Payment Type to Credit Card
- Click on the Merchant Charges tab
- Click on the icon next to the Merchant Account# field to open up the Merchant Account List window
- Select the Moneris account
- Click Save and close out of the window
Test Transaction Top
Restart Theatre Manager
With all of the above steps completed, it is time to run a test transaction using the P400 Pin-Pad. Before testing Theatre Manager requires a restart to properly cache all of the new settings.