To create a new Merchant Account, perform the following steps:
Open the Merchant Accounts List Window
- Go to Setup >> System Tables >> Merchant Account
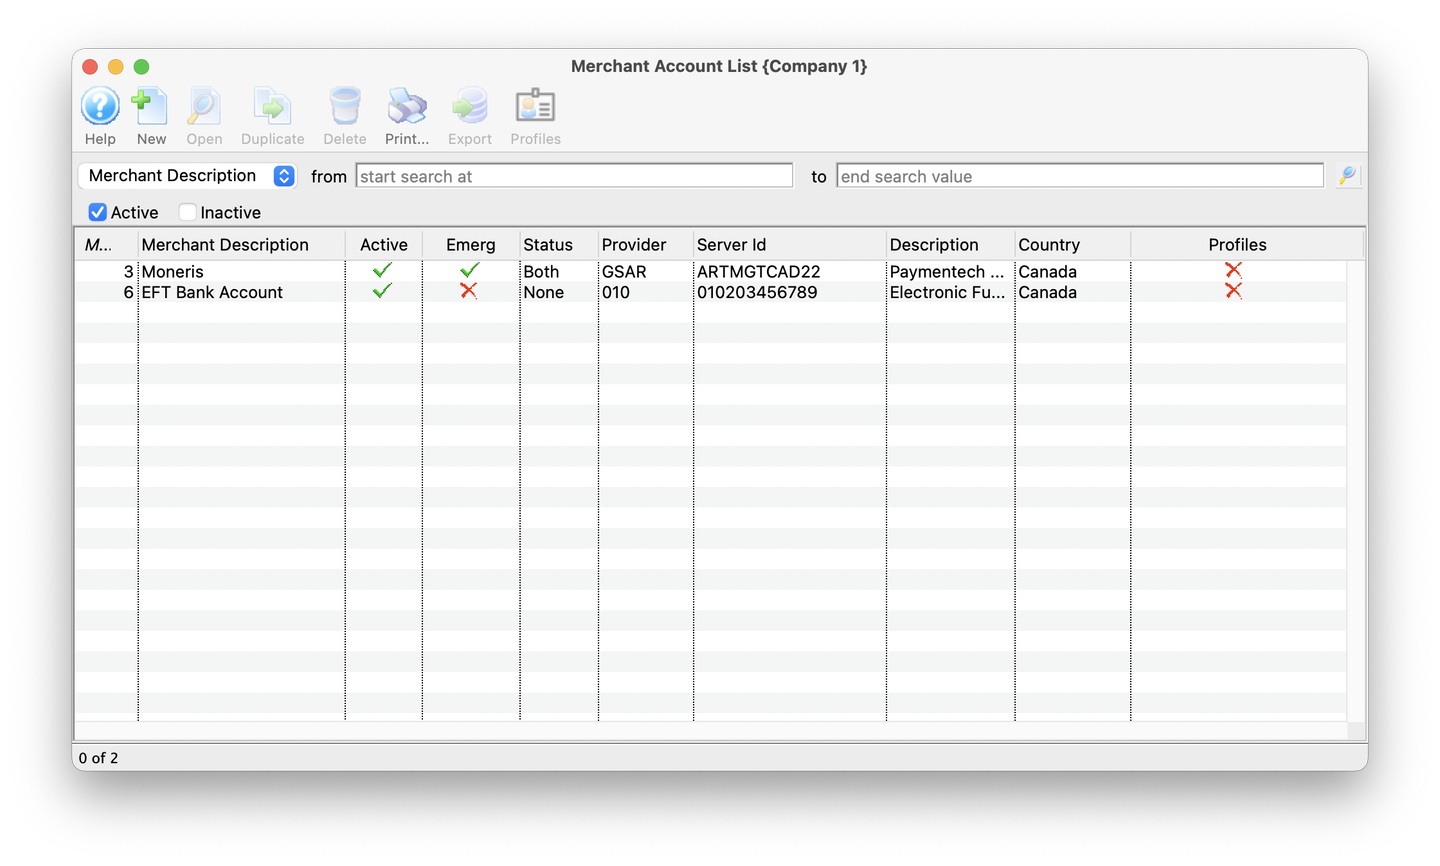
List Window
Add New Merchant Account
- In the toolbar, click the New button
- This will open the Merchant Account details window
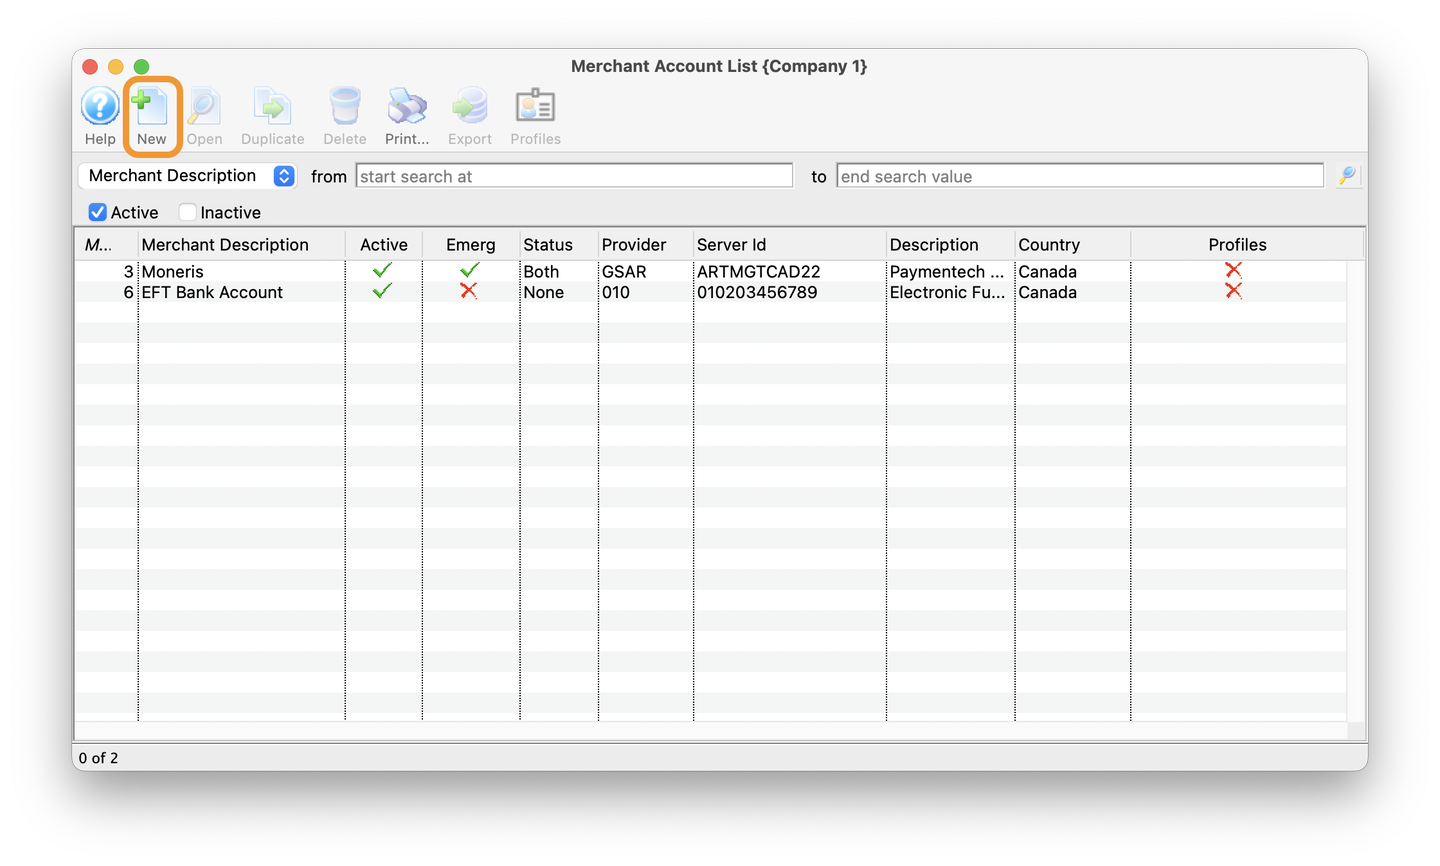
New Button
Deselect the Active Checkbox
- Ensure the Status is set to Inactive by unchecking the Active checkbox
- Once the set up is complete, the last step will be turn on the Merchant Account by checking the Active checkbox
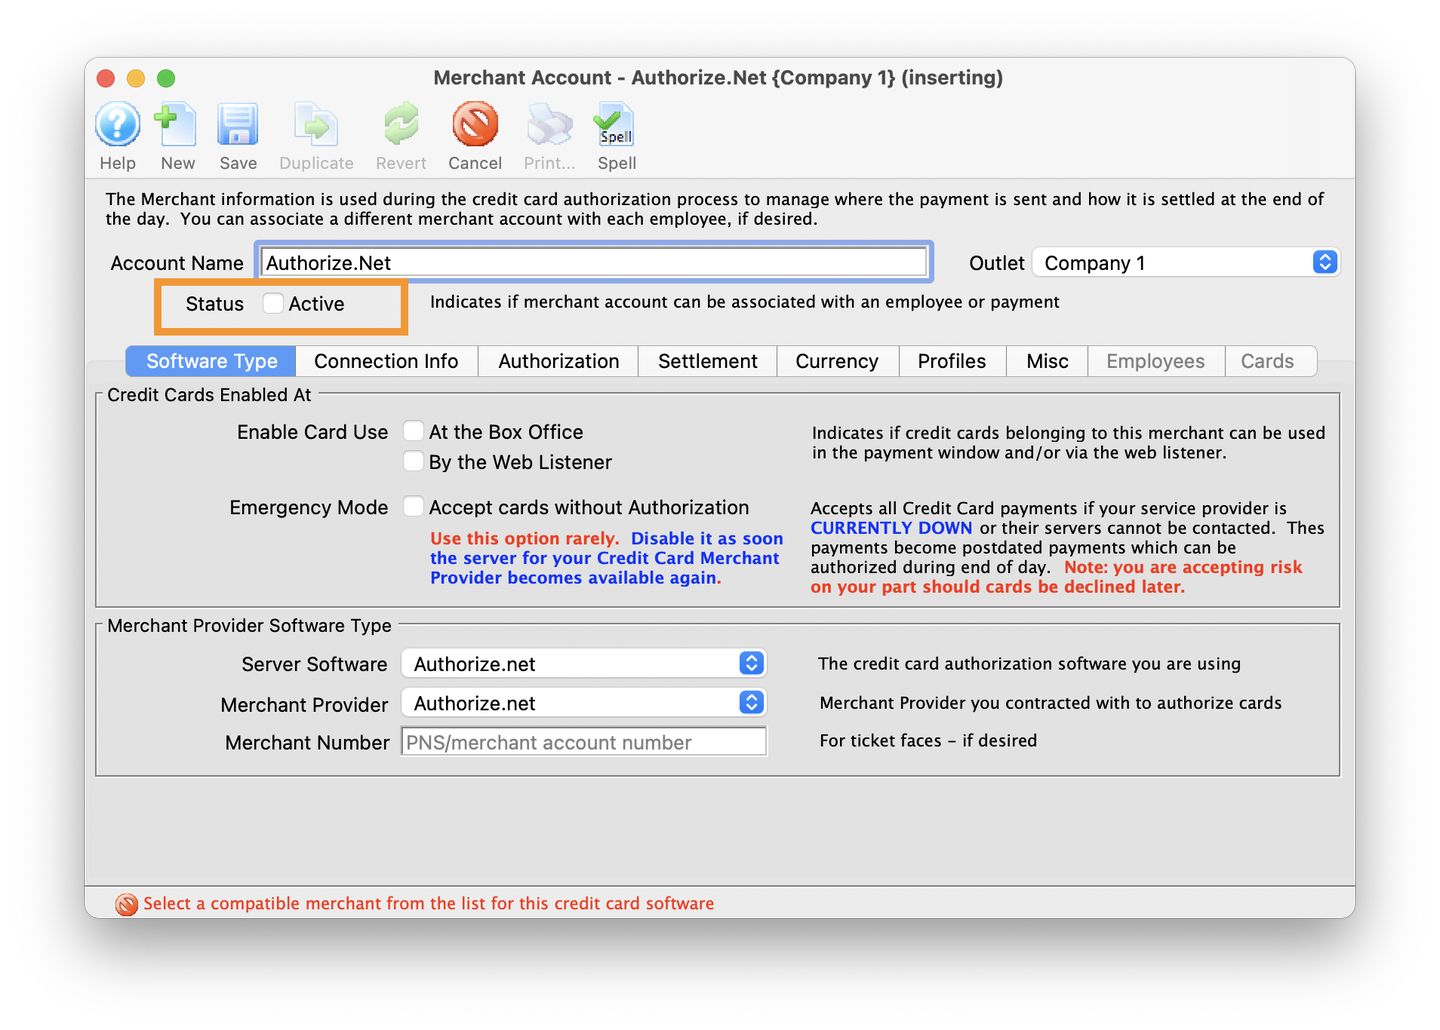
Uncheck Active
Select Server Software
-
In the Merchant Provider Software Type section, use the Server Software pull-down menu to select the payment provider. Theatre Manager supports 7 optional payment providers in Canada and the US, including:
- Authorize.Net
- Bambora
- Elavon (Miami Dade-Private)
- Elavon Virtual Merchant
- Electronic Funds Transfer (EFT) Service
- Moneris
- Paymentech Orbital
-
After selecting a Server Software option, the system will automatically fill in the Account Name field and the Merchant Provider pull-down menu
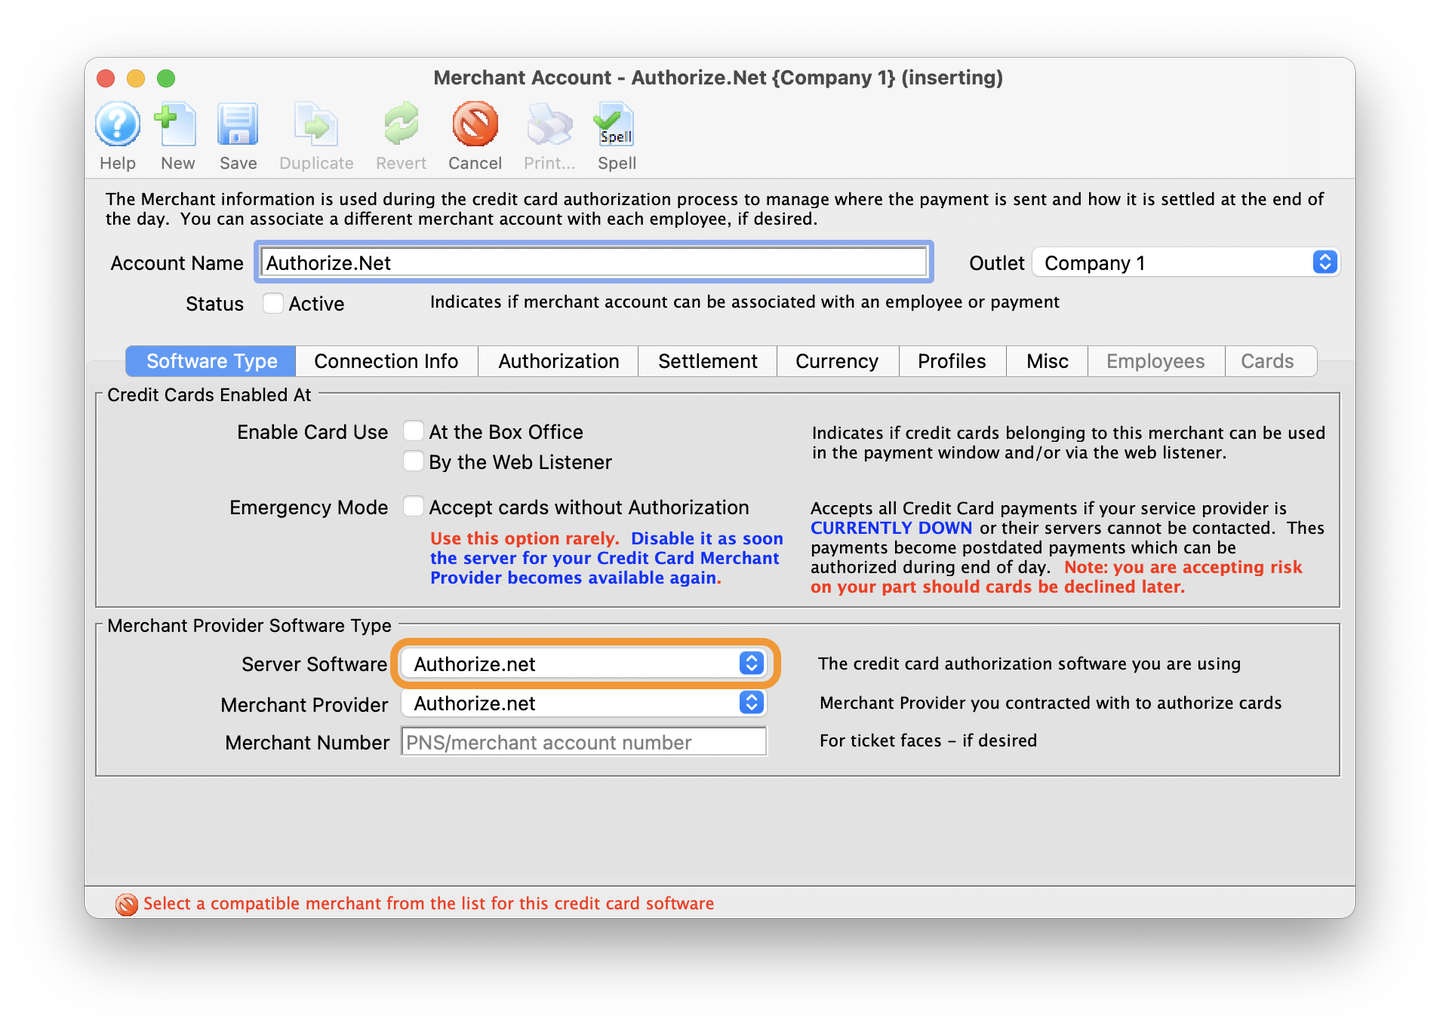
Server Software
Enter Merchant Number
- In the Merchant Provider Software Type section, in the Merchant Number field enter the merchant number for the account
- The merchant account number is provided by the payment provider used by the organization
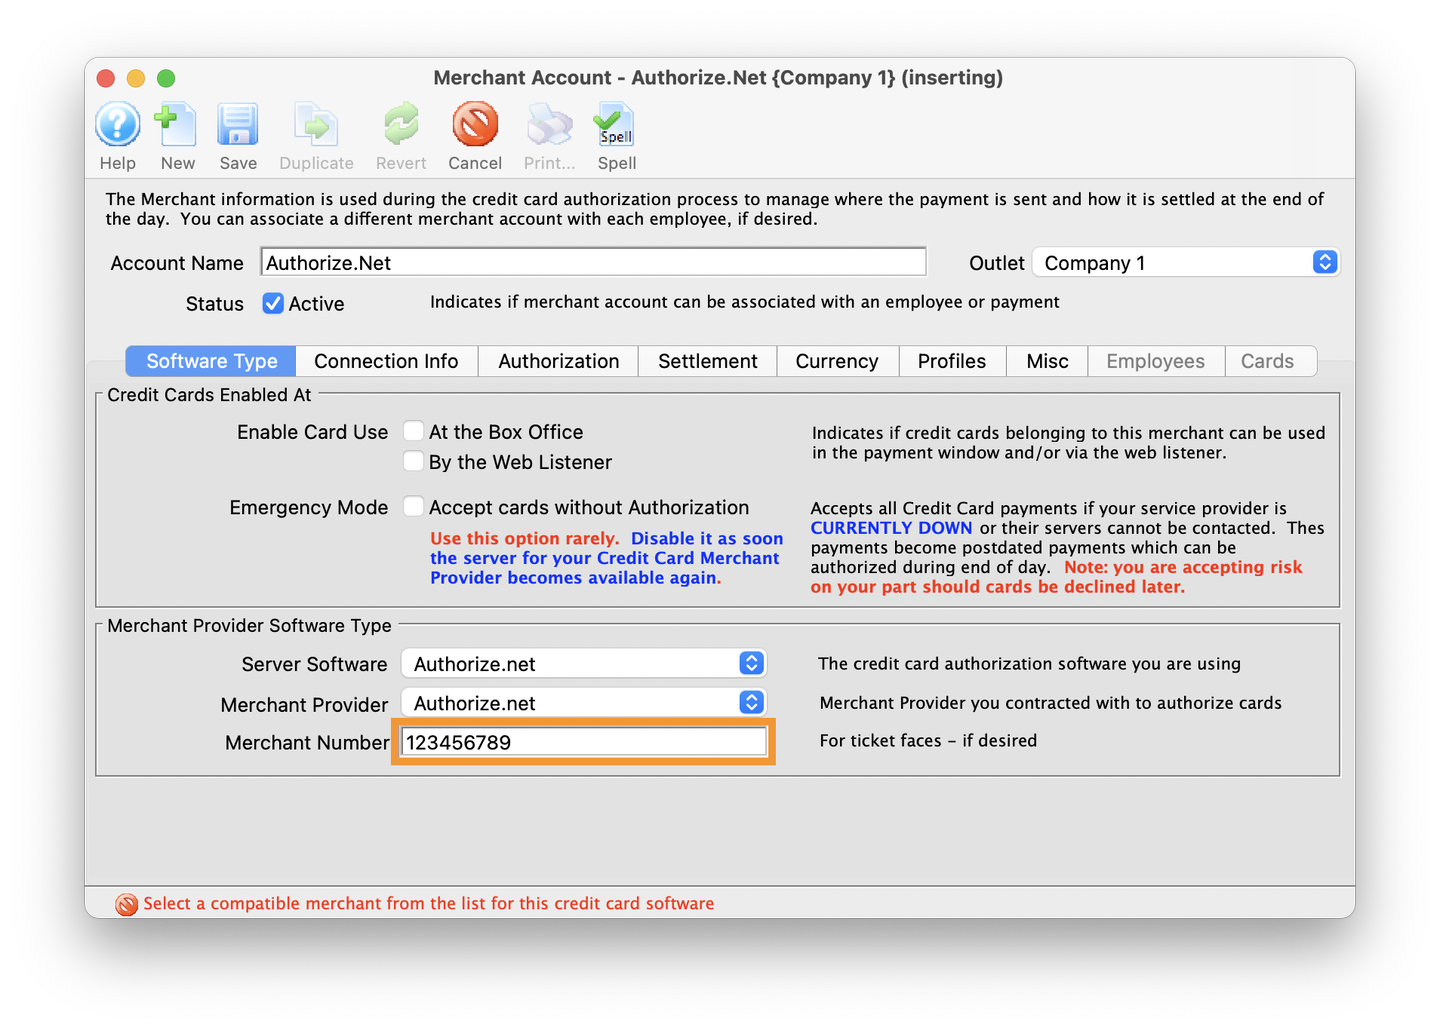
Merchant Number
Set Enable Card Use
- In the Credit Cards Enabled At section, check the options for:
- At the Box Office
- By the Web Listener
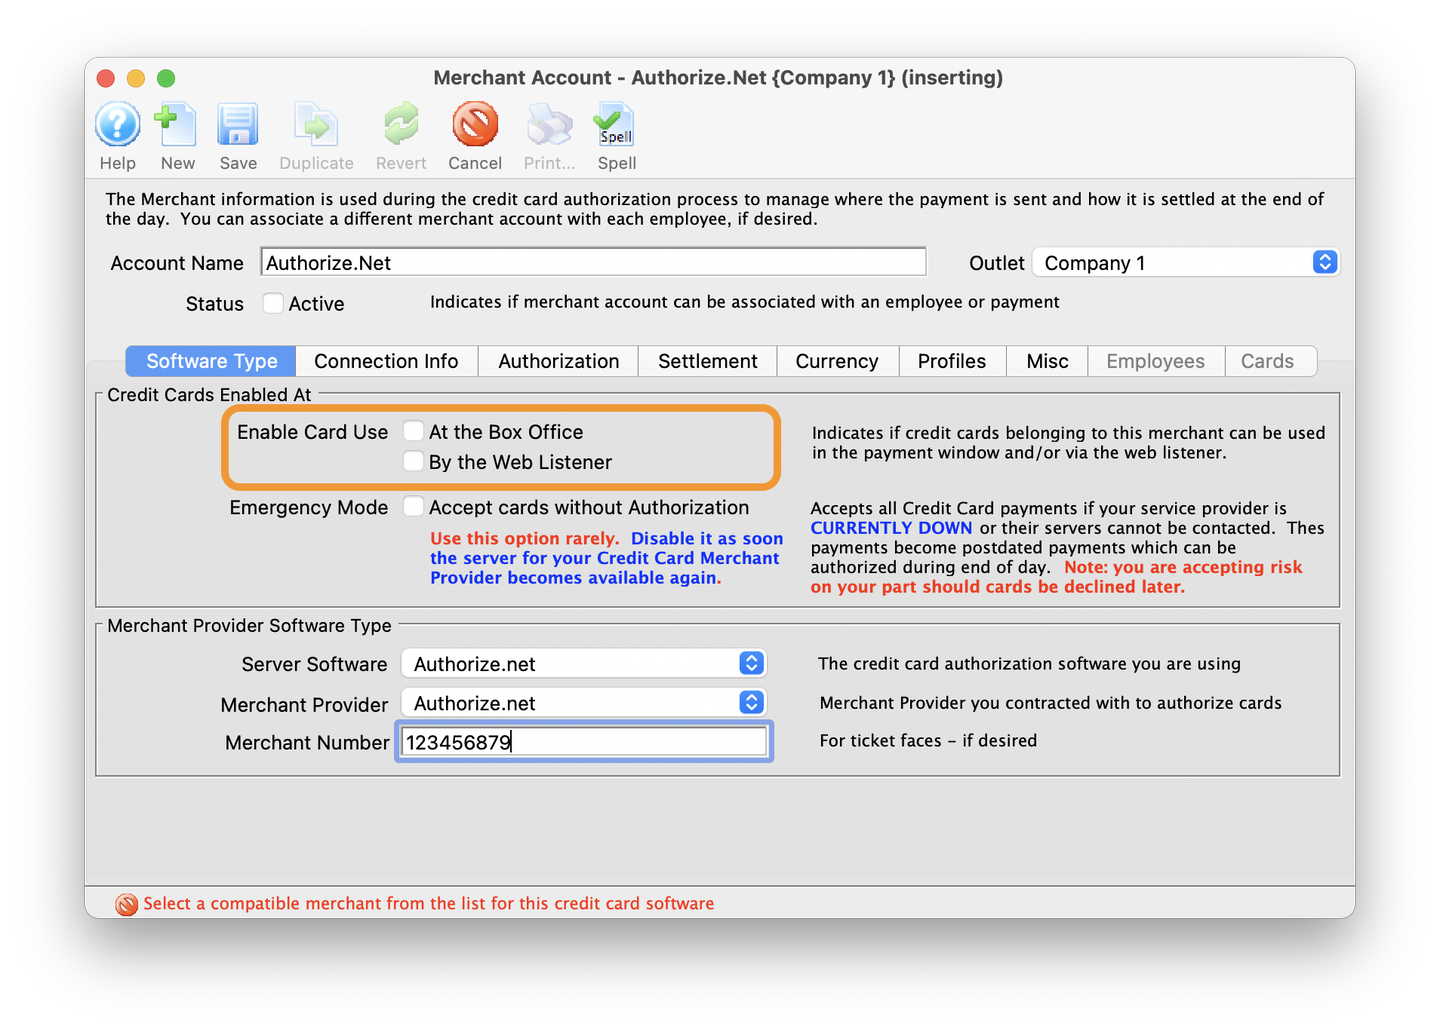
Enable Card Use
Enter Merchant Number
- Click on the Connection Info tab
- The Connection Info tab is where you define how Theatre Manager will access the credit card server. The fields that are available will change on this window, depending on the Merchant Provider chosen in the Software Type Tab
- Enter the Merchant Number or Client User ID for the Credit Card Server
- Enter the Password for the Merchant Number or Client User ID used for the Credit Card Server
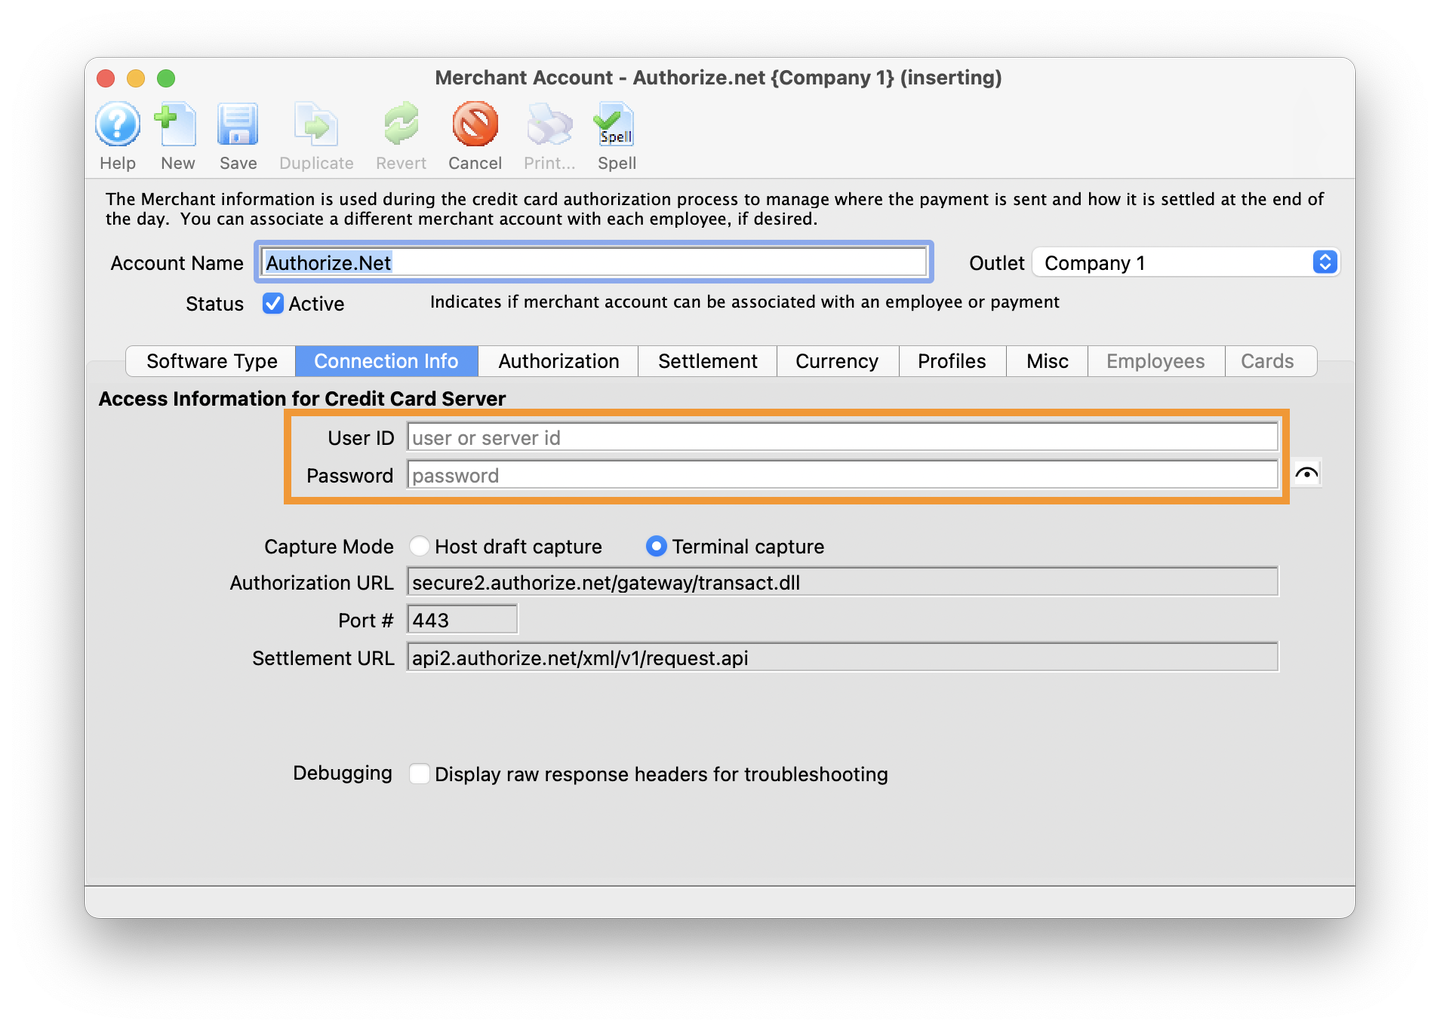
Merchant Number
Set to Terminal Capture
- Set the Capture Mode to Terminal Capture
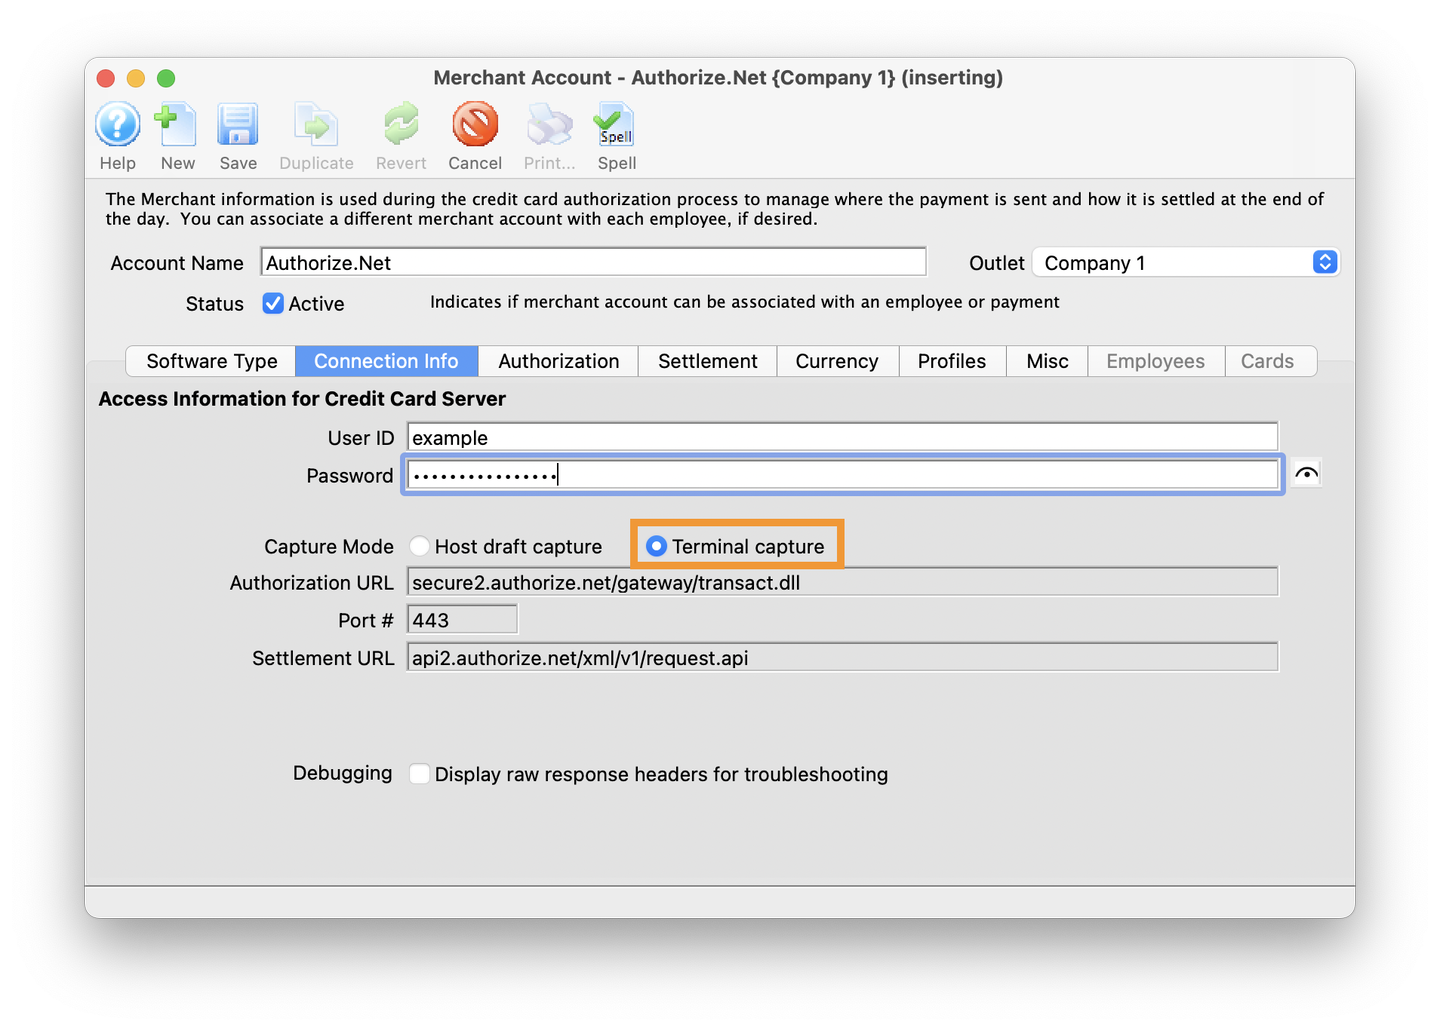
Capture Mode
Customize Authorization Settings
- Click on the Authorization tab
- The Authorization tab allows customization around how the credit card merchant handles authorizations and refunds
- The system will default to the most common settings when setting up a new Merchant Account
- The Authorization tab will have additional options for Moneris Accounts using Pin-Pads (not shown here)
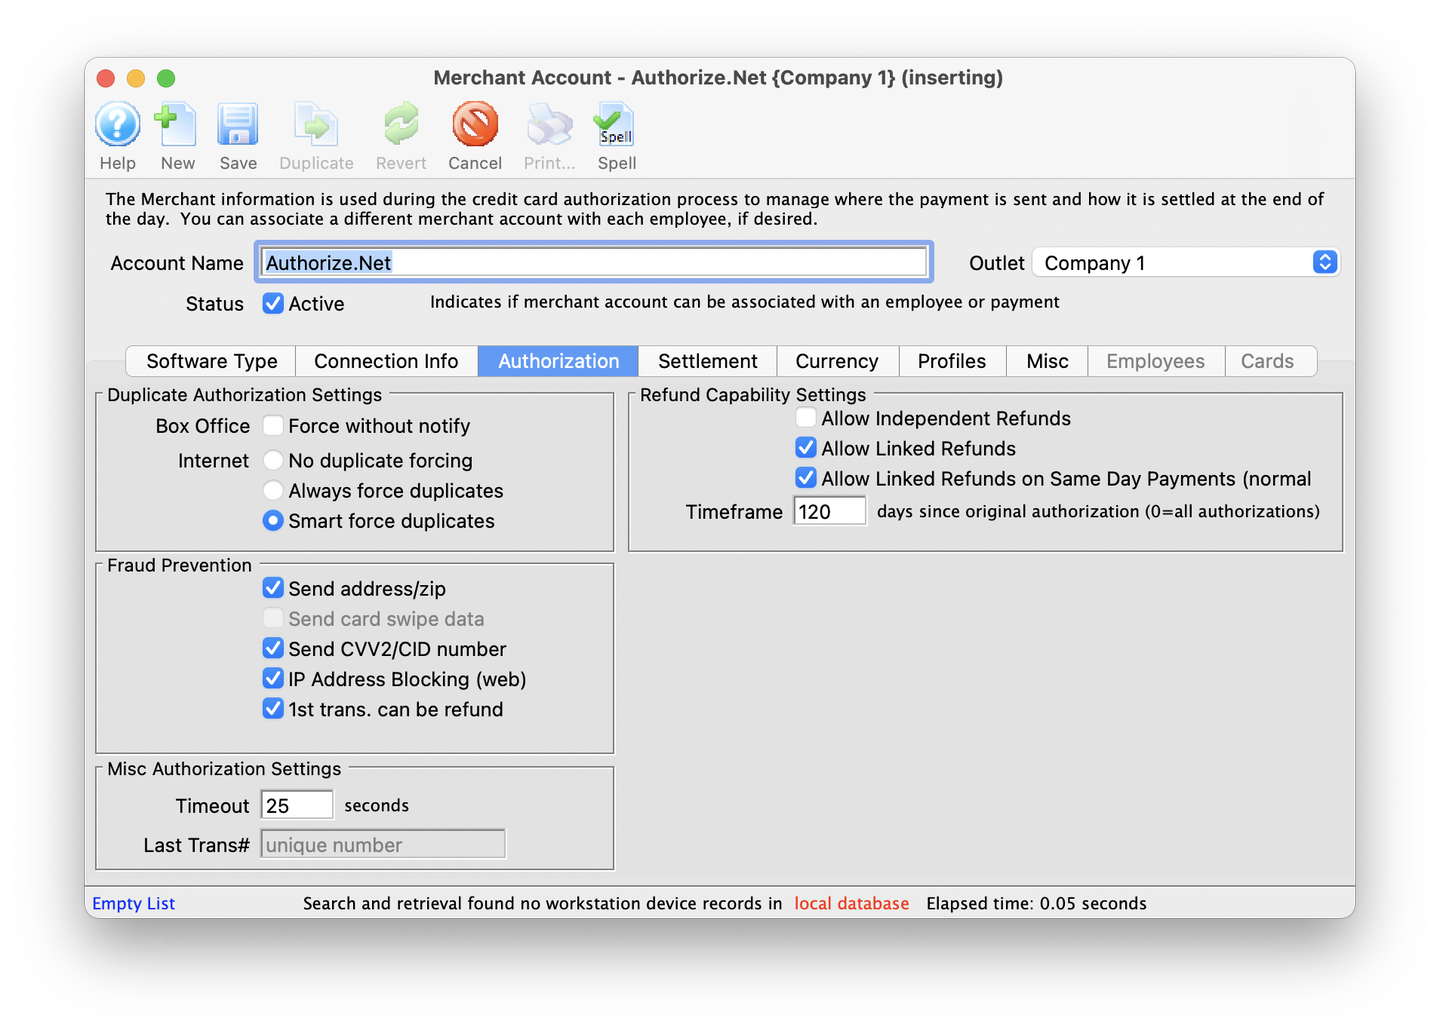
Authorization Tab
Review Settlement Settings
- Click on the Settlement tab
- The Settlement tab allows organizations to define specifics for the settlement process
- The system will default to the most common settings when setting up a new Merchant Account
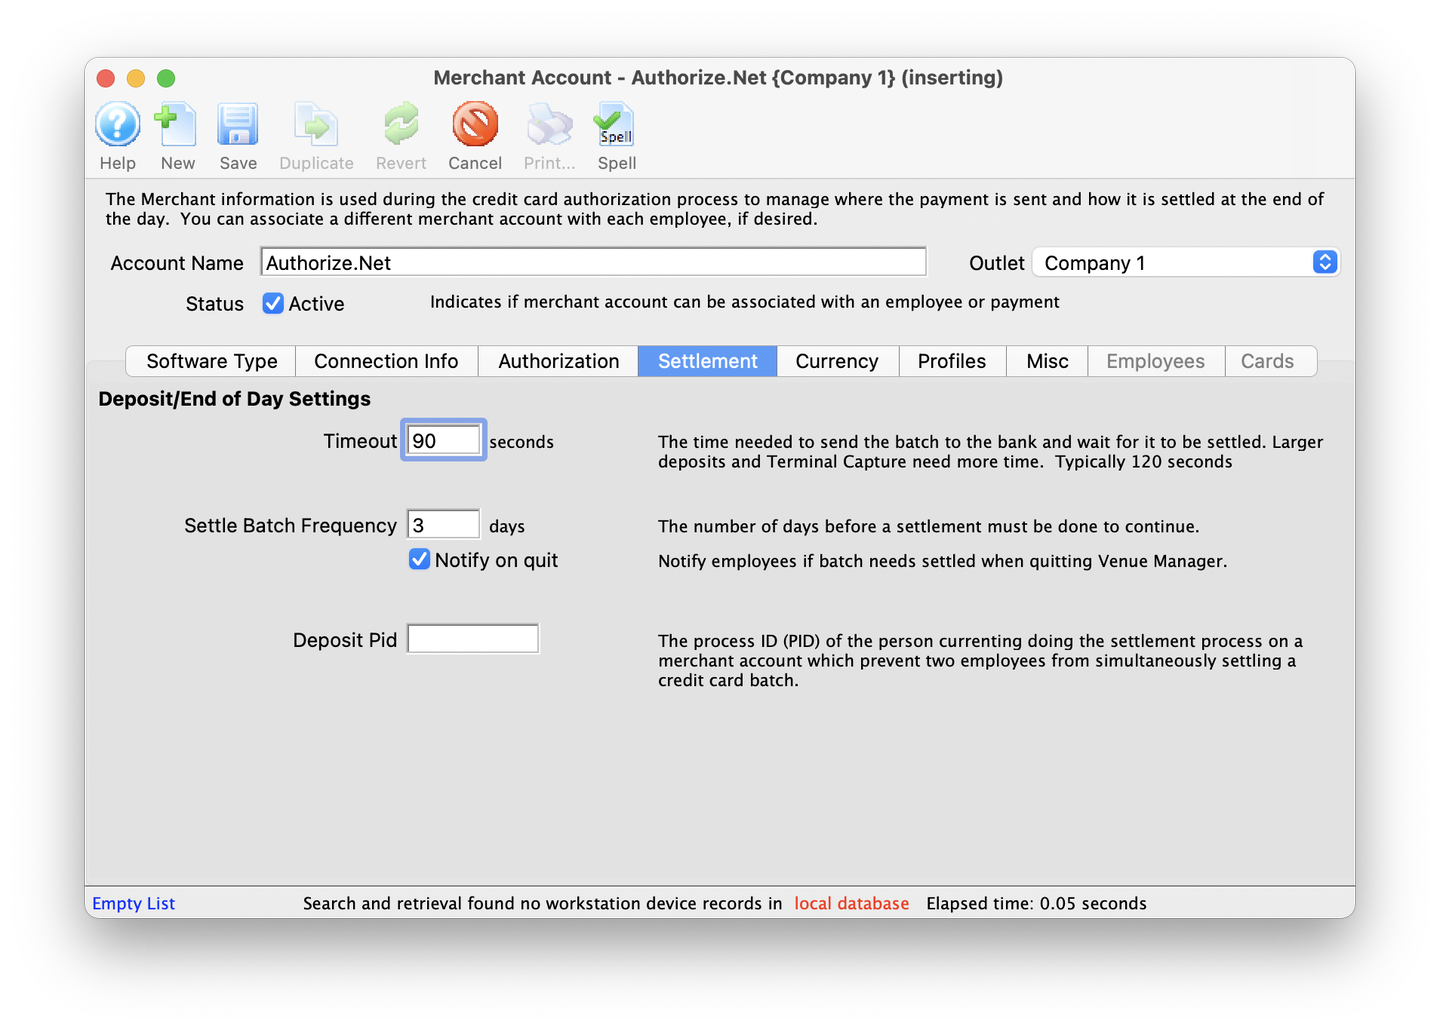
Settlement Tab
Review Currency Settings
- Click on the Currency tab
- Normally, credit card accounts are in the same currency for the country the organization resides in. If a company wishes to process credit cards in another currency, then the exchange currency needs to be defined.
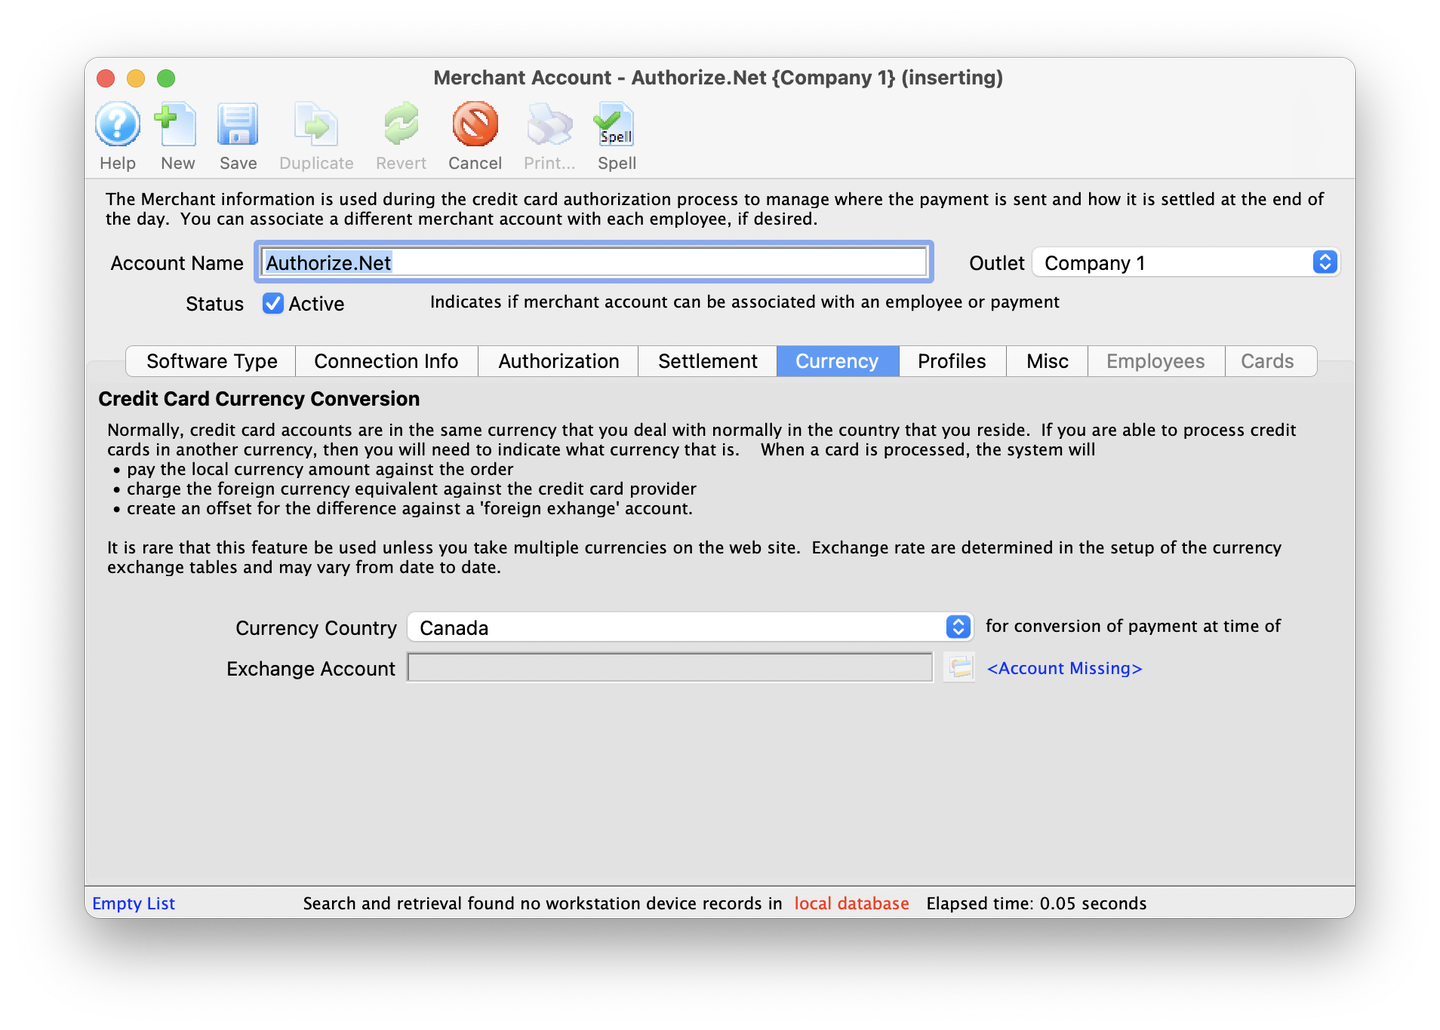
Currency Tab
Review Profile Settings
- Click on the Profiles tab
- Merchant Profiles are for organizations who are concerned with PCI compliance and wish (or are required to) maintain a PCI Schedule-C compliance within Theatre Manager.
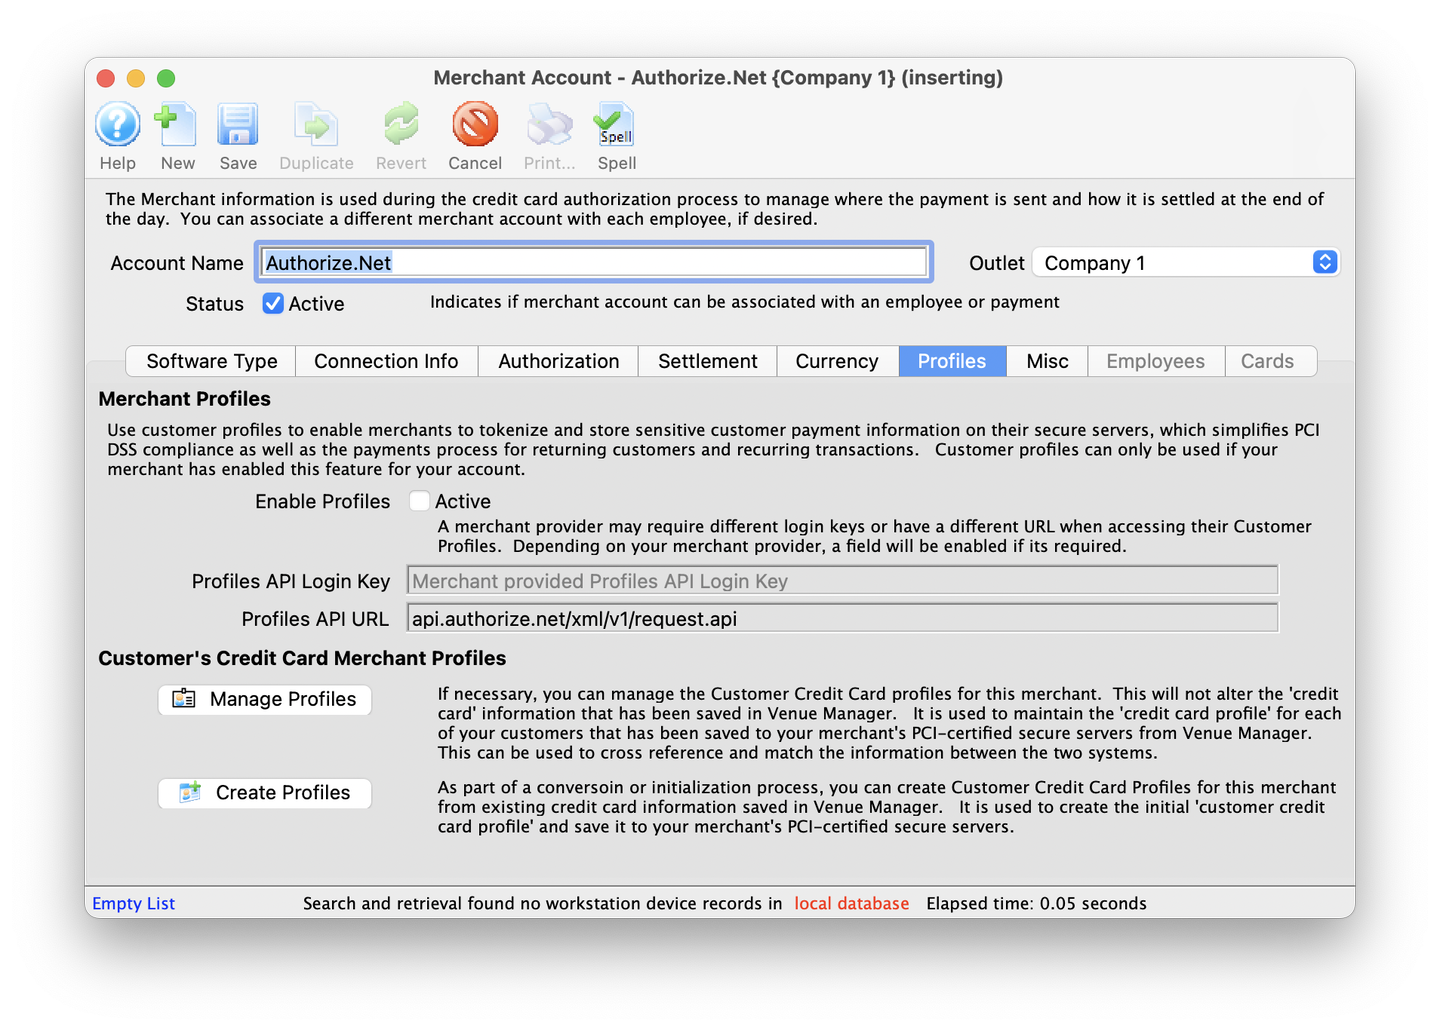
Profiles Tab
Enter Misc Settings
- Click on the Misc tab
- The miscellaneous tab is used to provide contact information for your merchant provider Enter the information for the Contact Person, Phone Number and E-Mail fields so that staff know who to contact in case of messages from the merchant provider like 'Hold Card' or 'Decline'
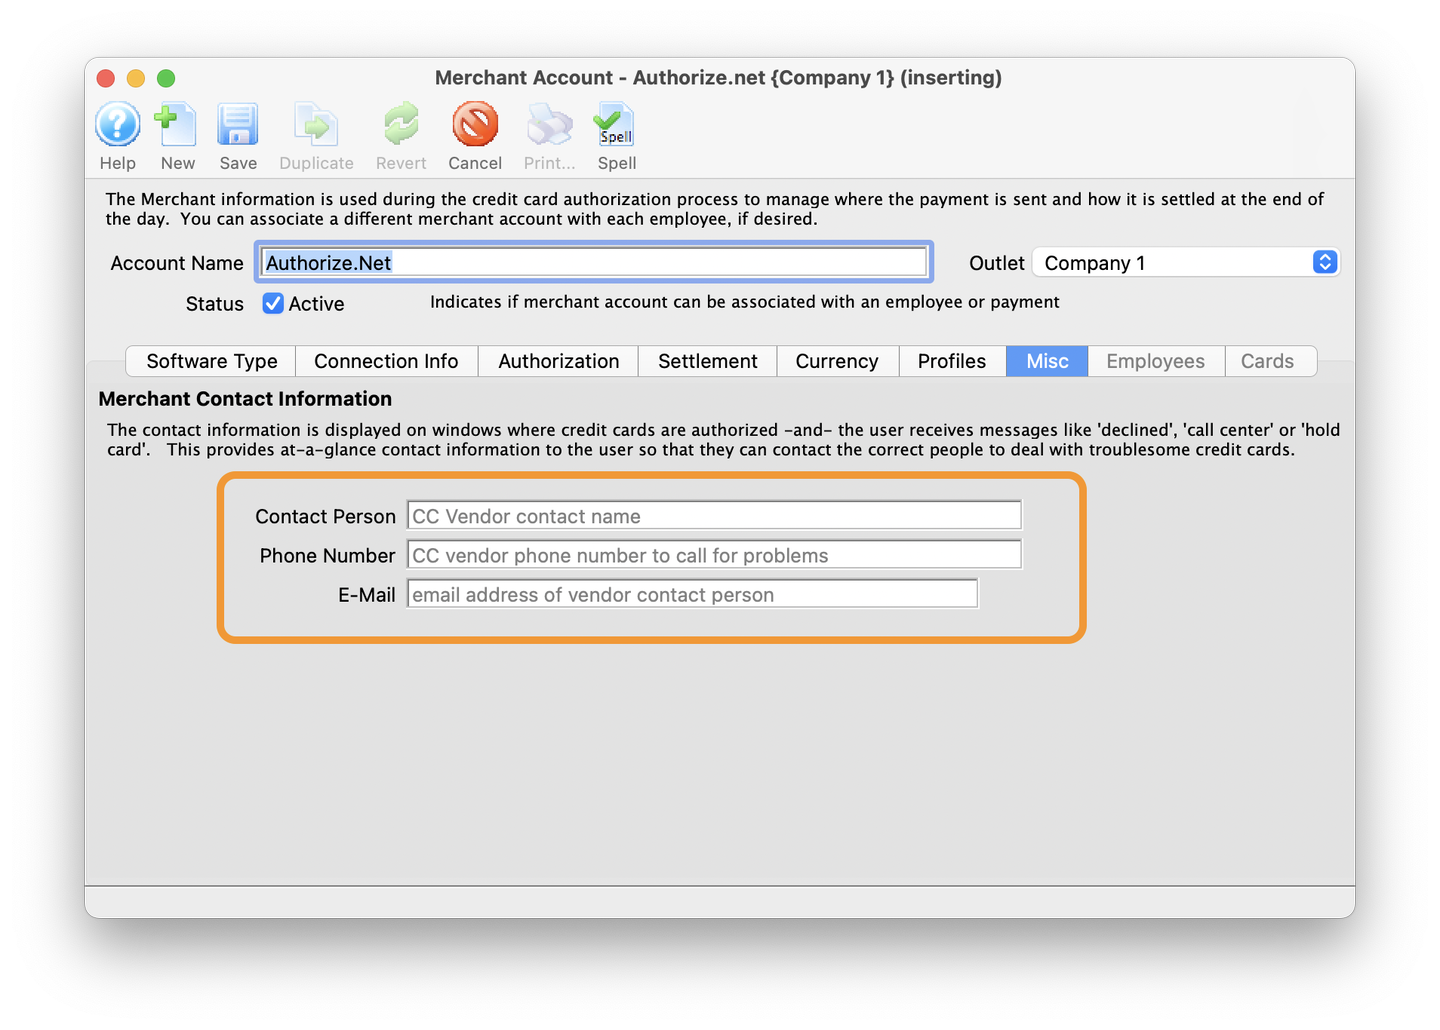
Misc Tab
Review Employees Tab
- Click on the Employees tab
- This is the list of employees that currently use this merchant account
- To add an employee, open up the Employee List window by going to Setup -> Users and Access -> Employee List. The drag and drop an employee from the Employee List window over to the Employees tab of the Merchant Account

Employees Tab
Review Cards Tab
- Click on the Cards tab
- The Cards tab displays the credit cards accepted by this merchant account
- If you have multiple merchant accounts (or are retiring an old merchant provider), you can open up the card window on both merchant providers (old and new) and drag the payment types from one merchant account to another. Any post-dated payments associated with the old merchant account will be transferred to the new merchant account so they can be authorized in the future.
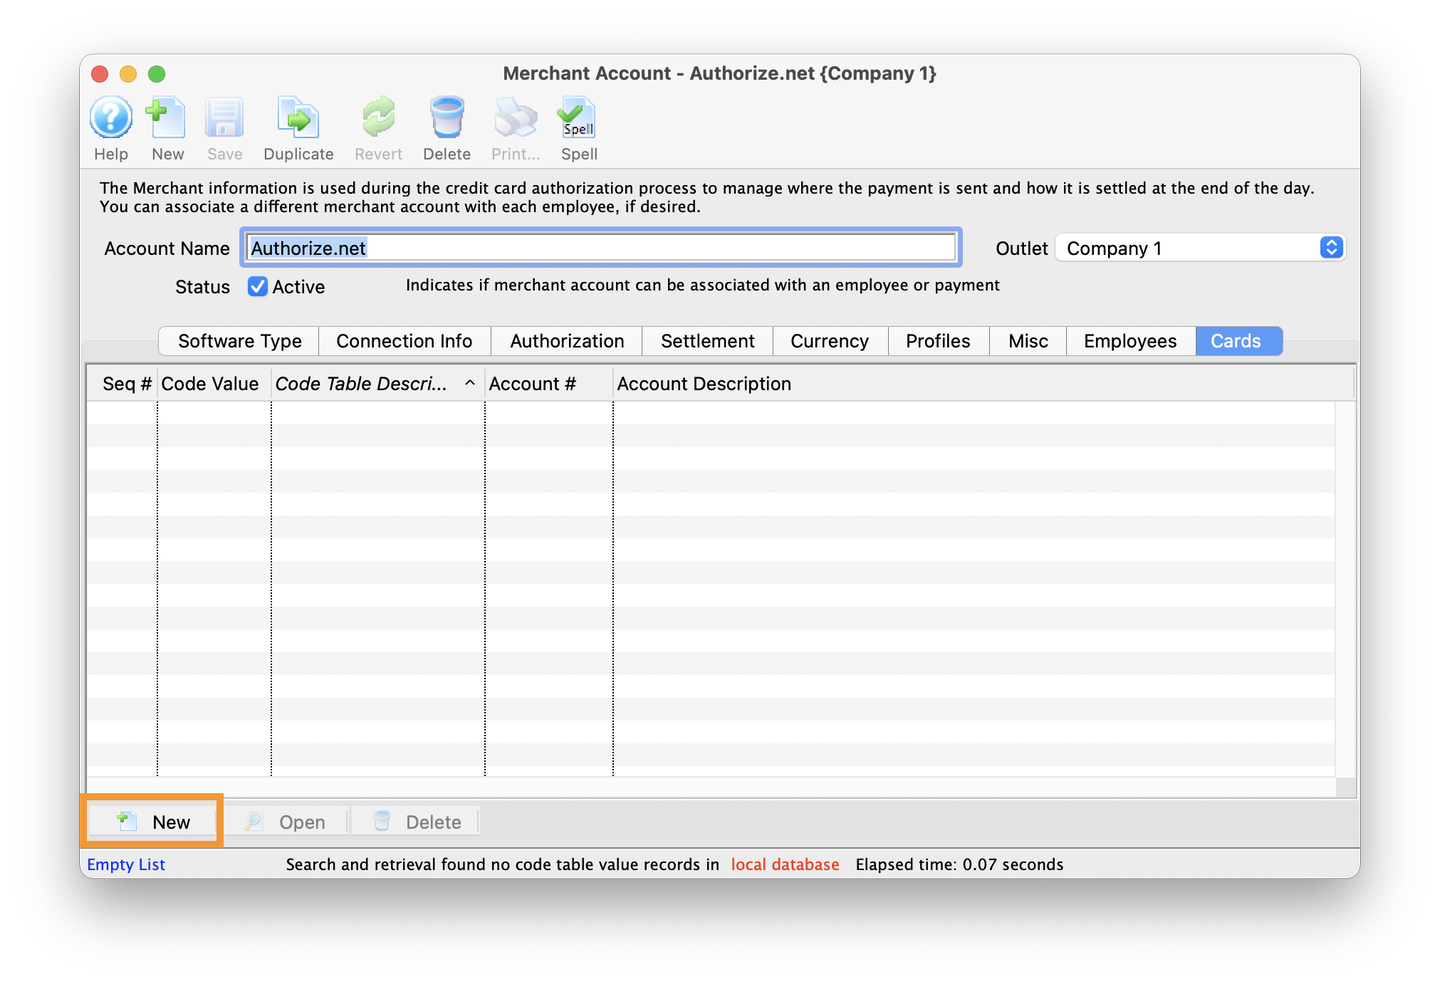
Cards Tab
Check Active to Enable Merchant Account
- Click on the Software Type tab
- Click the Active checkbox to enable the merchant account
- Click Save
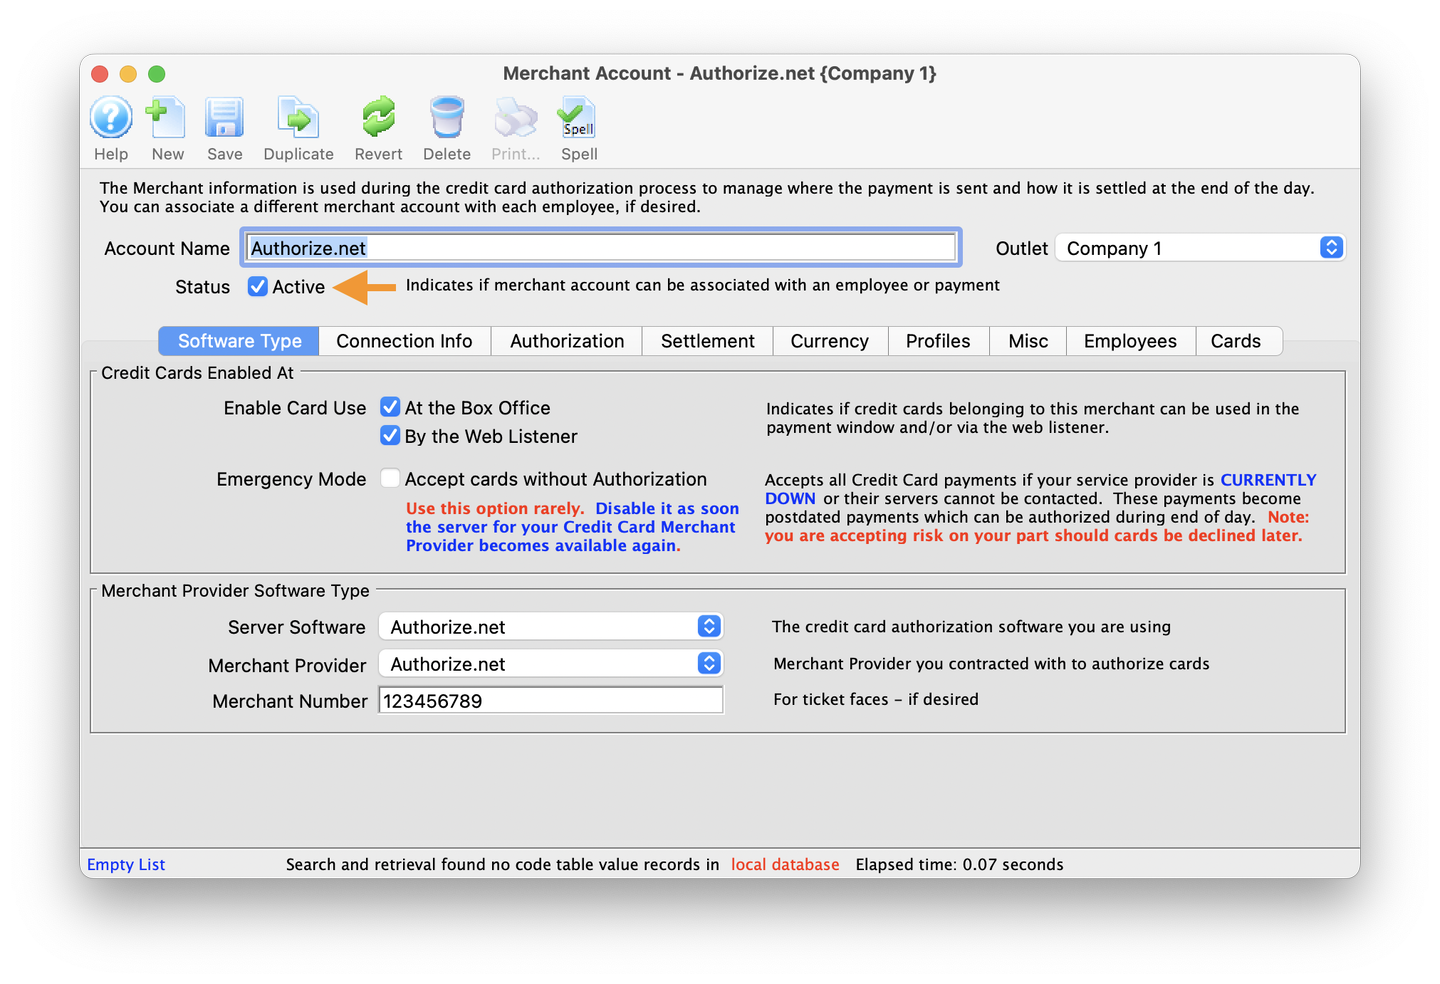
Active