Create a New Form Top
Click here to learn about forms.
Open the Forms list window
- Setup >> System Table >> Forms
- Forms list window opens
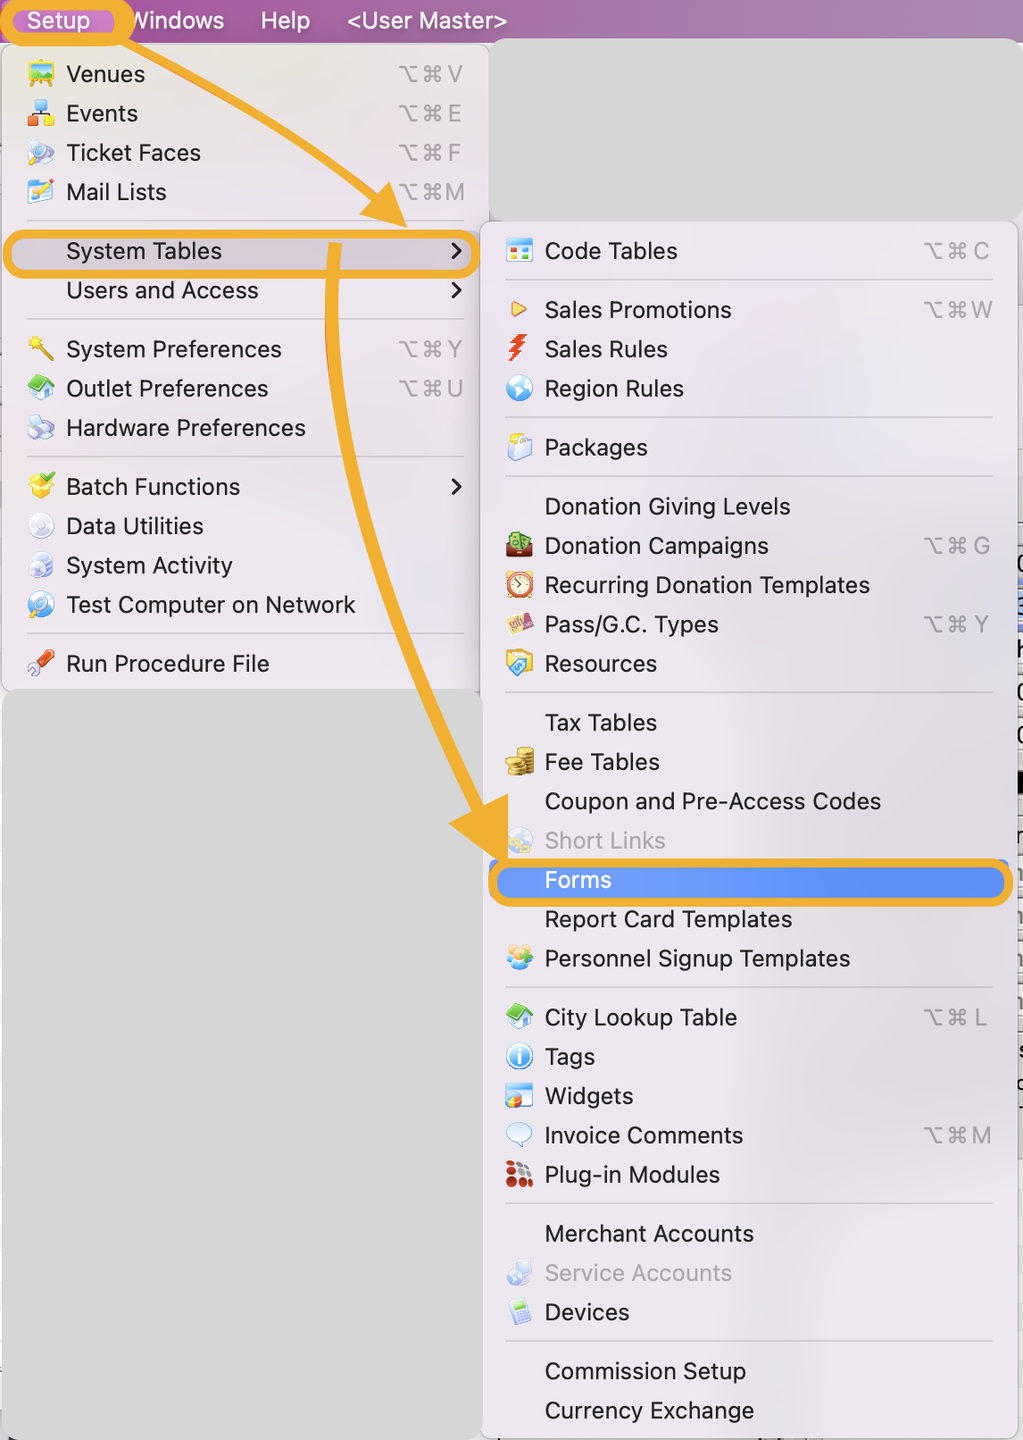
Locating Form Window

Click on the New Button
- The form detailed window opens

form window

Enter the Form details
- Enter the Internal Name
- Enter the External Name
- Enter the Purpose of the form
- Select the form type
- Select Expiry Type
- Ensure to mark the form as Active
- Enable on web and Visible on the web list (if applicable)
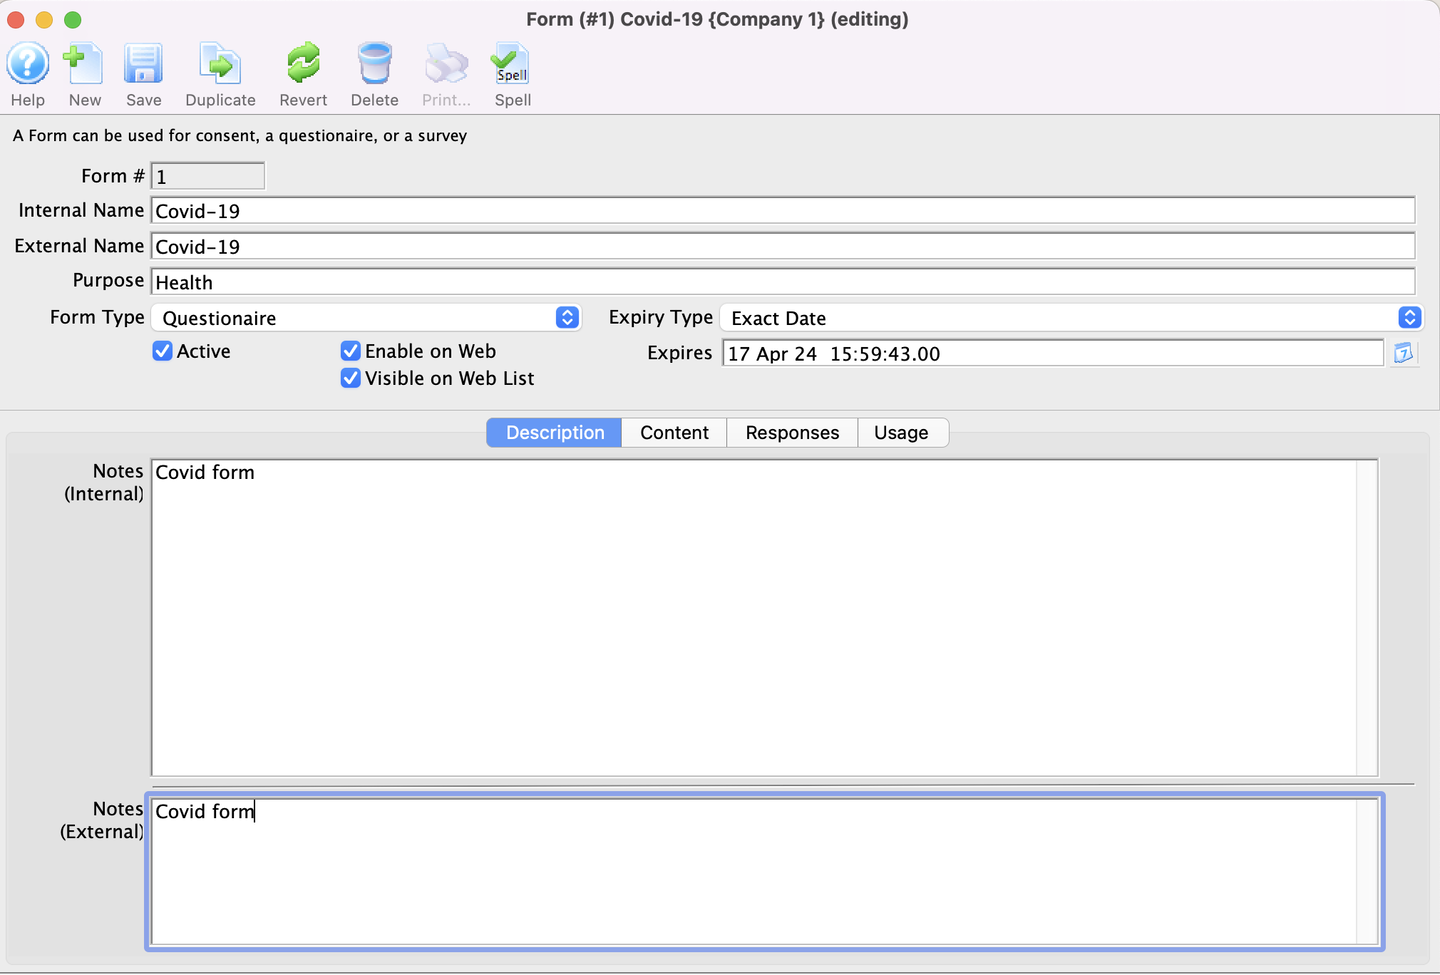
form detailed window

Select the Description tab and enter the details
-
Add external and internal notes (optional) and click on the save button.
-
More tabs become available (Content, Responses and Usage Tabs)
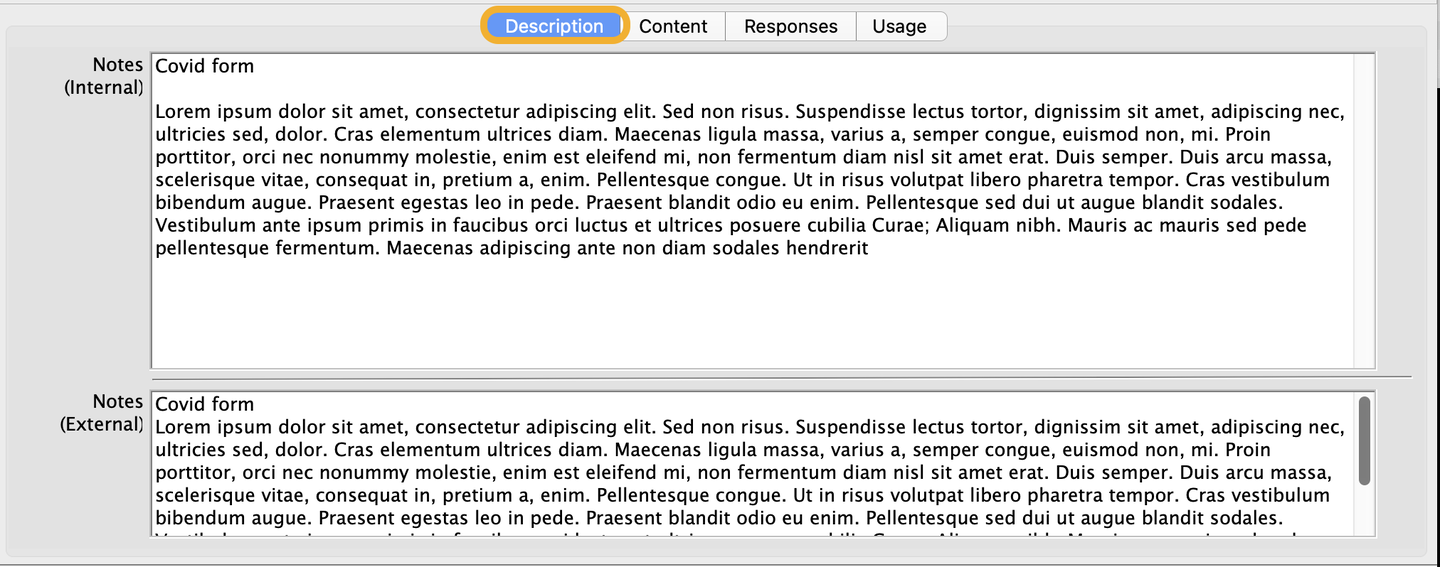
Description Tab

Enter the details on the Content tab
-
If you've selected Questionnaire as the form type, you need to use the Add buttons to add/create your questions.
-
More tabs become available (Content, Responses and Usage Tabs)
-
You can enable the the option to Allow Household Patrons to Sign (Optional)
-
If you selected Consent as the form type, you can simply enter the consent verbiage you want on the consent field. (The field is Markdown and HTML Friendly)
-
You can enable the Requires Acceptance (Optional)
-
You can enable the the option to Allow Household Patrons to Sign (Optional)
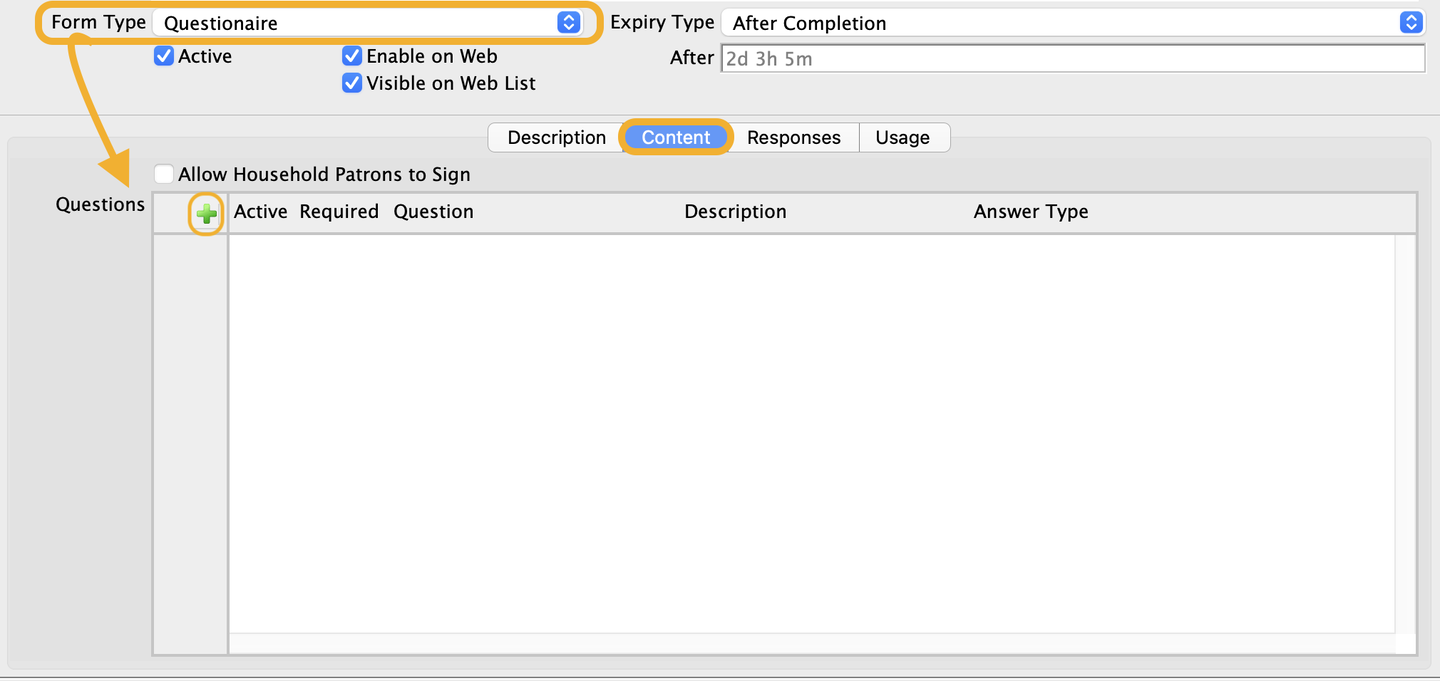
Content Tab

Attache the Form to an Event
- Event Tab >> Form Requirement Section, click on the Add add the form you want.
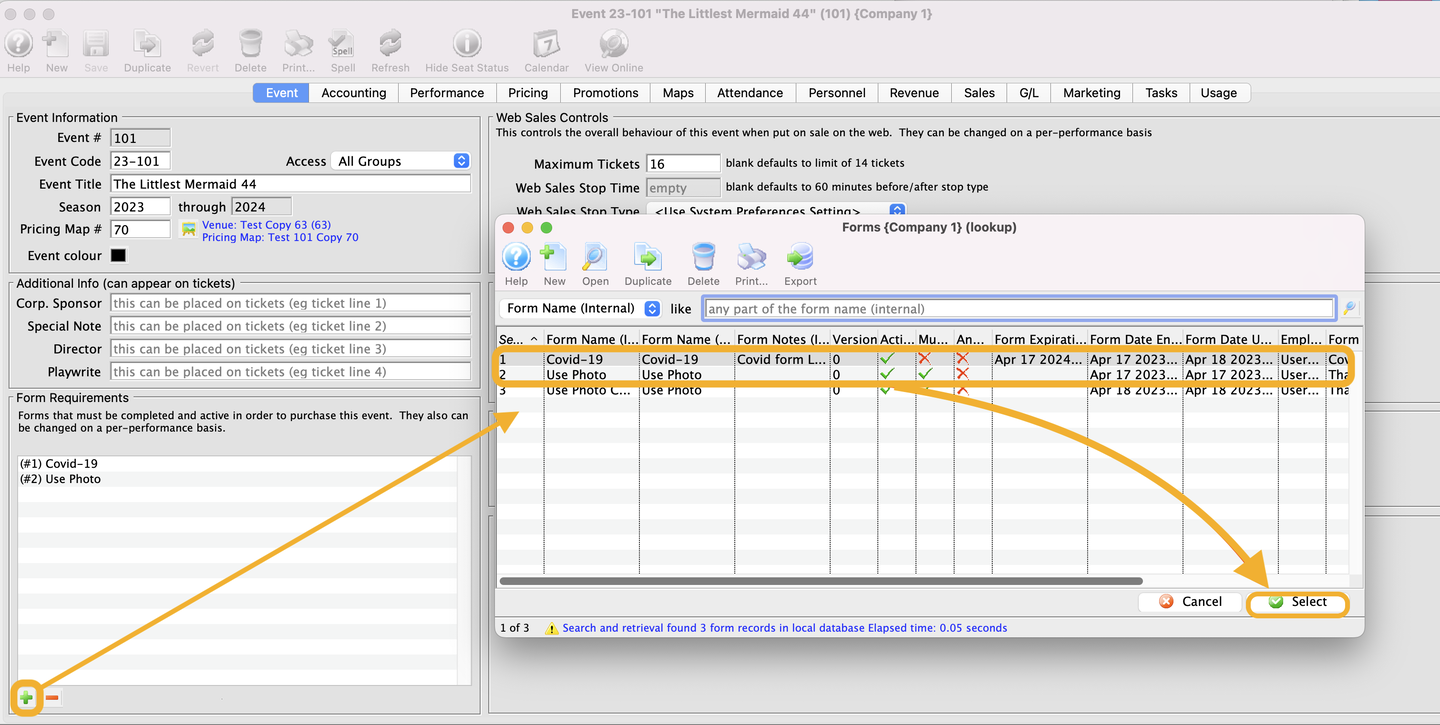
Event Tab
