Caution
Please review the tax receipt introduction and ensure you are aware of all necessary governmental requirements and system setup before proceeding.
You can print a tax receipt from three different starting places:
- Reports >> Donation Reports & Tax Receipts (using either the annual statement style or per payment style report)
- Setup >> Batch Functions (using either the Print Charitable Receipts for Donor or Print Annual Summary Charitable Receipts for Donor option)
- Donation Detail Window >> Receipt Tab
The steps are very similar from any of the above starting places, but using the Donation Detail Window limits the print results to just the selected receipts. As such, it is considered a manual receipt printing process whereas the other two options operate as a batch printing method.
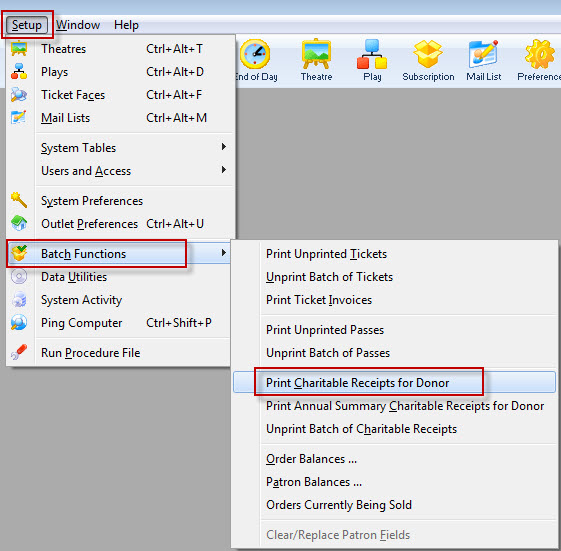
Batch Print Receipts Top
The following batch print steps can be started from either:
- Reports >> Donation Reports & Tax Receipts (using either the annual statement style or per payment style report)
- Setup >> Batch Functions (using either the Print Charitable Receipts for Donor or Print Annual Summary Charitable Receipts for Donor option)
Open the Print Receipts Wizard
- Go to Setup >> Batch Functions >> Print Charitable Receipts for Donor to print receipts attached to donations with the per payment receipt option selected
- Go to Setup >> Batch Functions >> Print Annual Summary of Charitable Receipts for Donor to print receipts attached to donations with the annual statement style receipt option selected
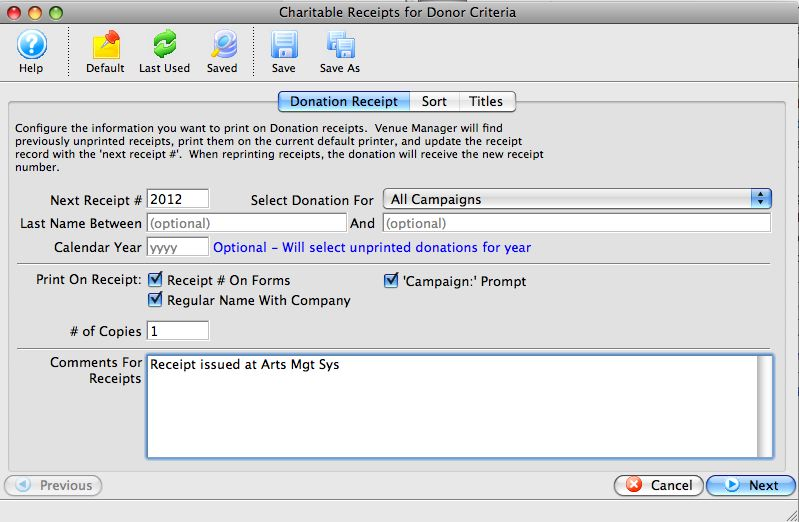
Adjust the Donation Receipt Tab Settings
On the top part of the Print Receipts Wizard >> Donation Receipt Tab, adjust the following as needed to limit which receipts to print:
- Next Receipt # (optional)
- Defaults to the next receipt number as setup in Company Preferences >> Donation Tab
- Updating it here will NOT affect the Next Available Receipt Number in Company Preferences
- Campaign (optional)
- Generally set to All Campaigns unless there's a specific reason to limit the results
- Calendar Year (mandatory for annual statement style receipts)
- Name Between (optional)
- Add the last name of patron(s) to limit receipt results
- Leave blank to pull all records
- Fiscal Year (optional)
On the bottom portion of this tab, adjust the following to control which items to display on each receipt:
- Print Receipt # on Forms
- Regular Name with Company
- Campaign: Prompt
- Number of Copies (this option will not appear for annual statement style receipts)
- Receipt Comments
Click the Next Button
- Alternatively, click the next tab in the wizard
- If you do not see a Next button, you have unchecked the Show Report Window as Steps option in your Employee Preferences >> Reports Tab

If necessary, adjust how the receipts should be sorted
- On the Print Receipts Wizard >> Sort Tab, make any necessary custom sort edits
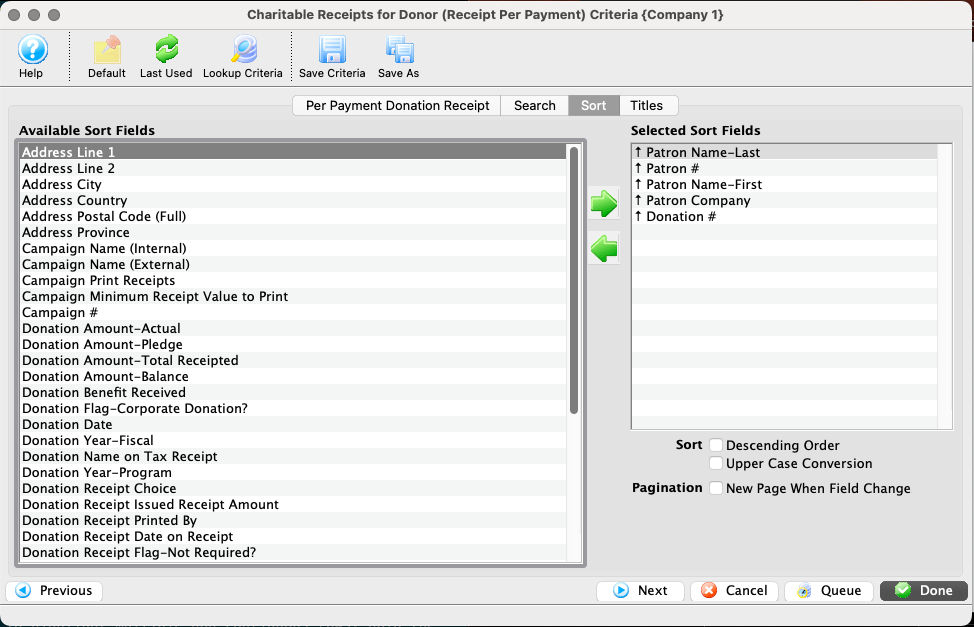
Click the Next button
- Alternatively, skip the next two steps and click Done if you do not want to enter a custom report title

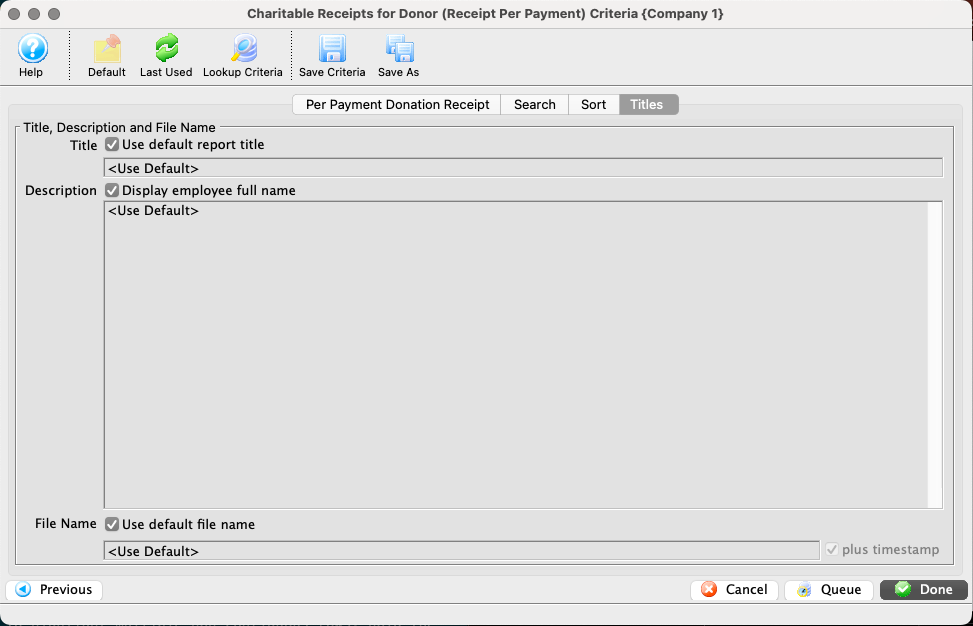
If necessary, adjust the custom title(s)
- On the Print Receipts Wizard >> Titles Tab, edit the default Report Title or Printed By options
Click the Done button
- Alternatively, click the Cancel button to stop the receipt printing process and close the wizard

Review the generated tax receipts
- On the Finished Report Window, review the receipt format
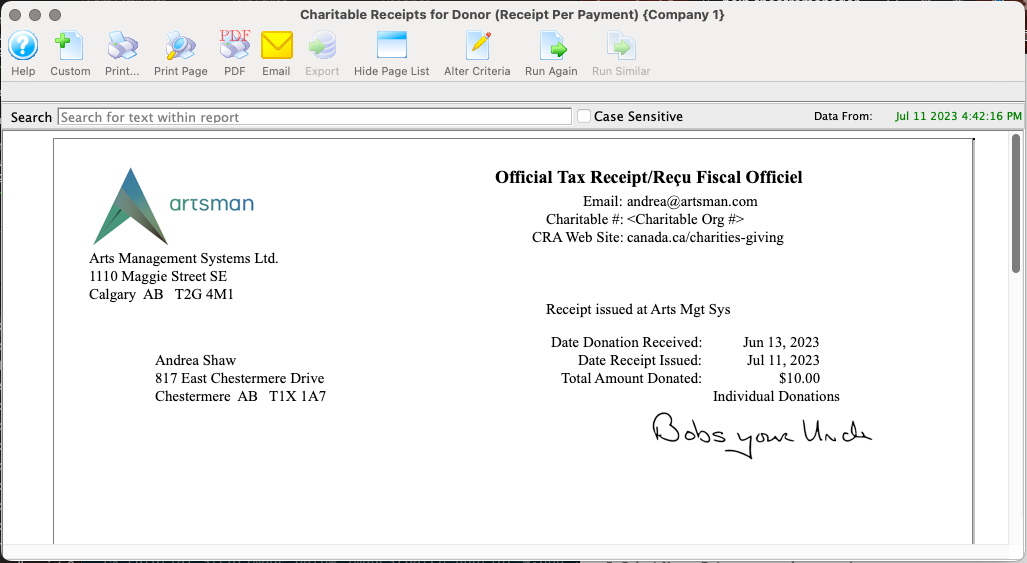
With the results generated to your screen, you can now print.
Manually Print a Receipt Top
This method of printing a receipt is very similar to the the batch printing method, but only prints the selected receipts rather than all receipts meeting the print criteria that also have 0 as their receipt number. Use the following steps to print only selected receipts for a donation with multiple payments:
Find the receipt to be printed
- On the Donation Detail Window, go to the Receipt Tab
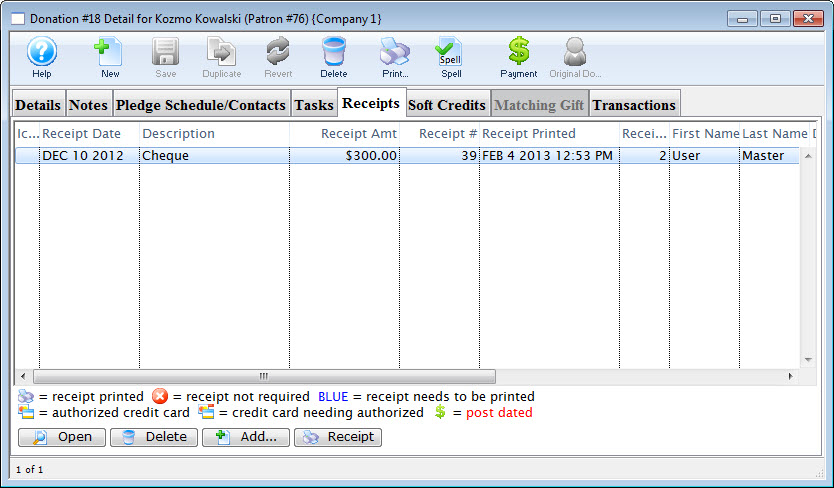
Select the receipt record
- Single-click to select the receipt to print

Click the Receipt button
- With the receipt you want to print selected, click the Receipt button

Adjust printing criteria as needed
- On the Print Receipts Wizard >> Donation Receipt Tab, adjust the Print on Receipt options
- If the donation is set for a per payment style receipt, enter the number of copies you want printed on the final report
- Add any Comments for the Receipts
- Unless you have a specific desire to change which receipts to print, you do NOT need to adjust the Next Receipt #, Campaign, Last Name Between, or Calendar Year.

Click the Done button
- If necessary, you can enter a custom title on the Titles Tab before clicking the Done button

The receipt will generate to your screen and you can now begin to print or to email it to the patron associated with the donation.