Existing donations that have already been paid can be either:
- Reduced in amount
- Useful when a donor decides after the initial transaction to apply their gift across multiple campaigns
- Useful when a gift is received as part of a subscription or ticket sale and a change in the tickets impacts the total gift amount
- Removed completely
- Useful when a mistake was made when the donation was first entered
Reduce or Split a Paid Donation Top
Caution
Donation amounts cannot be reduced until all associated tax receipts have been unprinted.
You can edit an existing donation without having to re-charge the patron's credit card or process a new payment of any kind. Splitting a donation consists of editing (e.g. reducing) the first donation amount and then adding another donation to the existing order. To reduce and/or split a donation, follow these steps:
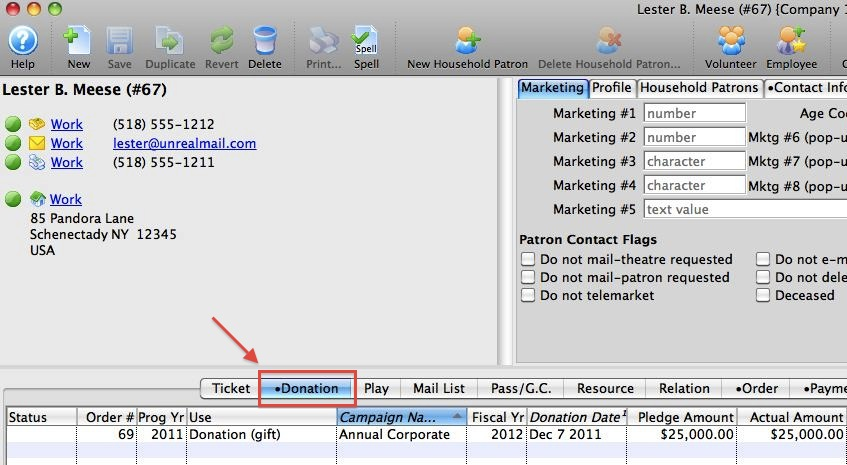
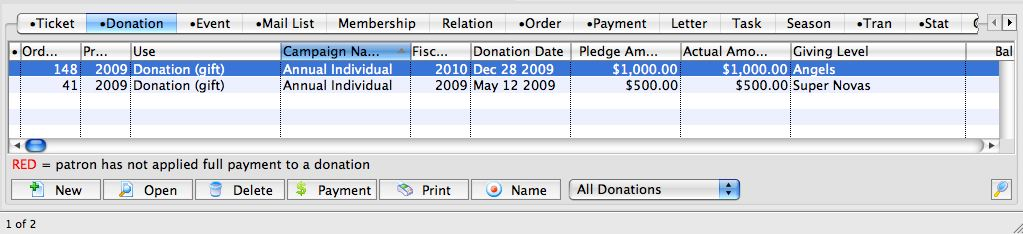
Find the donation to be reduced or split
- Go to the patron's Donation Tab
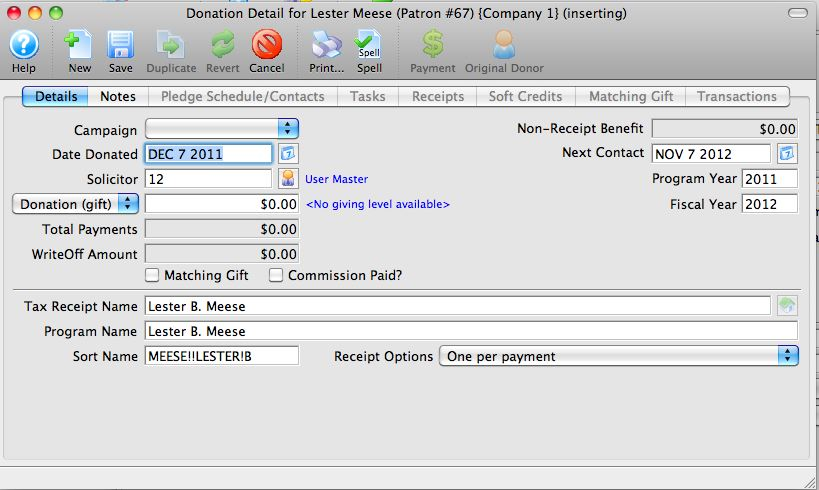
Edit the donation amount
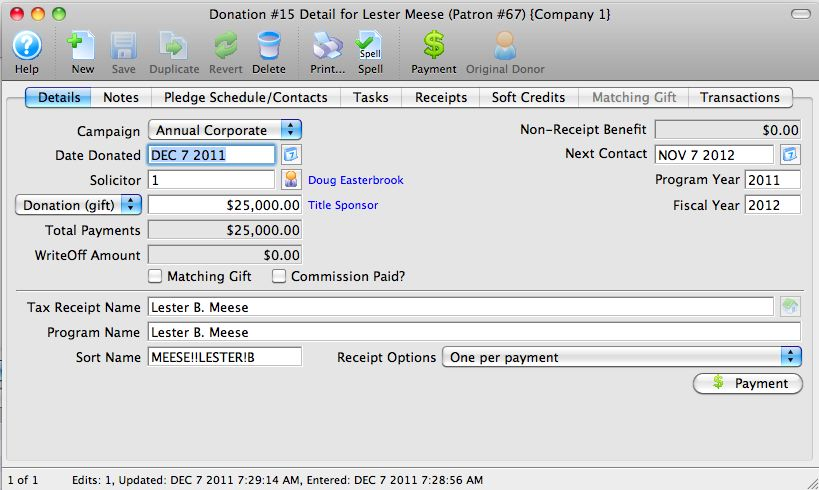
- Select and open the donation to be reduced (single-click and use the Open button or double-click the row)
- Change the Donation Amount to the correct lower amount
- If you plan to split the donation across multiple campaigns, the amount on this record should be exactly equal to the amount the patron wishes to allocate to the original campaign
- Click Save to save your changes
Review any reduction confirmation popup
- If the unprinted receipts amount allows a reduction (the total of the unprinted receipts is less than the new Donation Amount), then you'll see a message indicating it is ok to reduce the donation
- If too many receipts have already been printed (the total of the unprinted receipts is greater than the new Donation Amount), then you will need to unprint some before you can reduce the donation
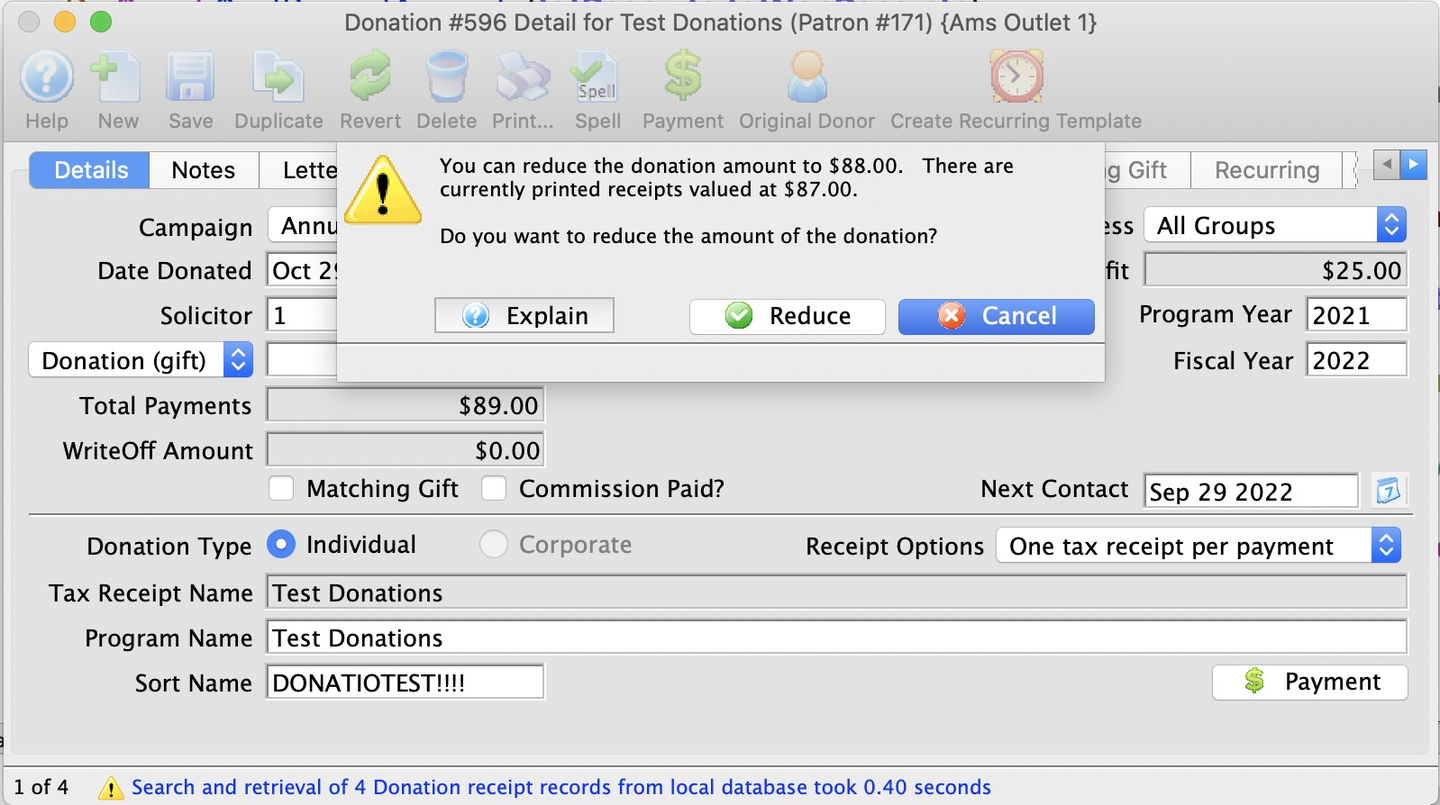
If prompted by the prior step, unprint previously printed receipts
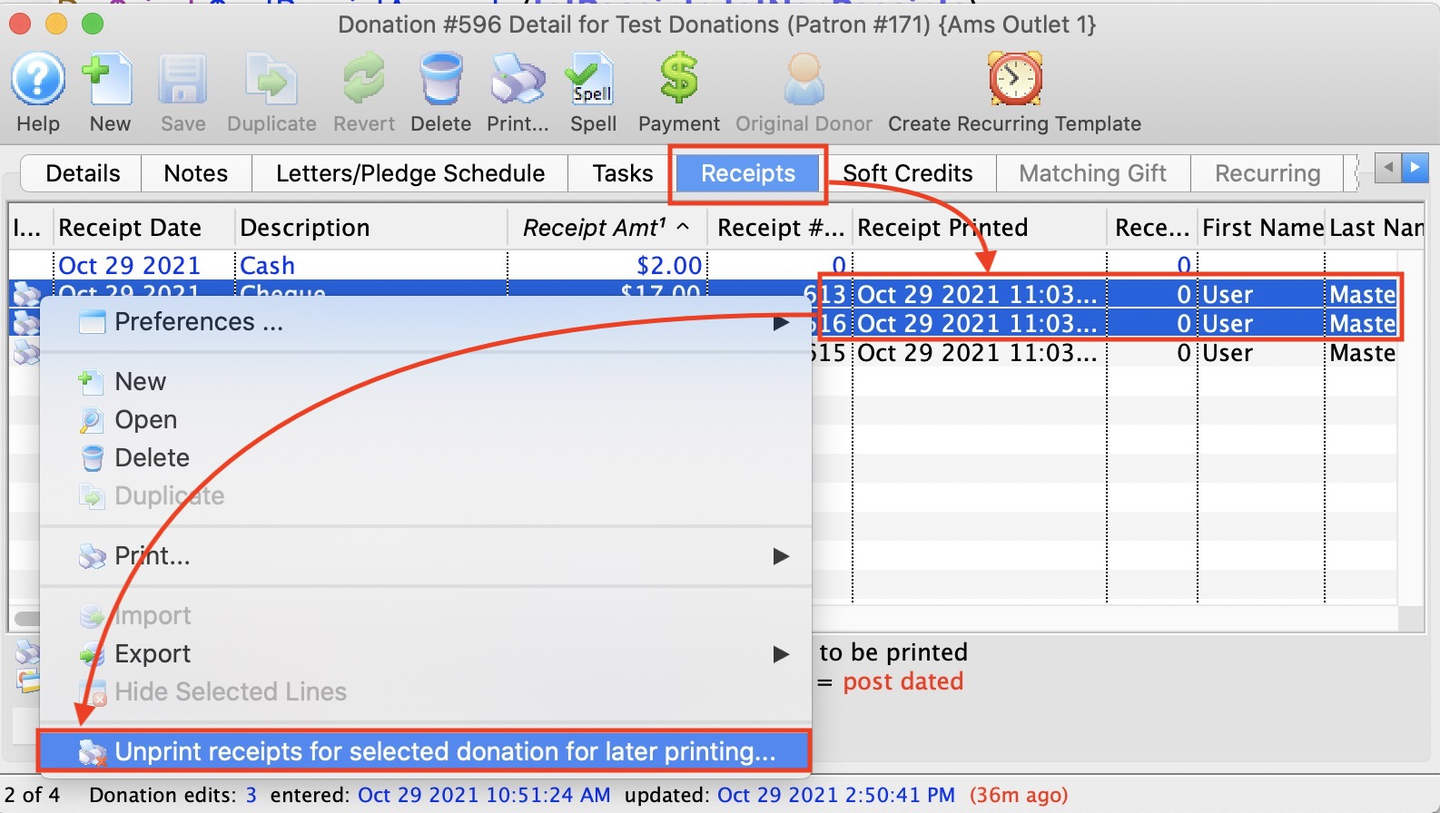
- Go to the Receipts Tab
- Single-click to select some receipts that have been printed previously (there may only be one)
- Right-click and select Unprint receipts for selected donation for later printing from the context menu
- Confirm any dialog popup that appears
- Repeat the prior steps to reduce the donation amount
Add a new donation to the same order
- To continue splitting a donation, click the New button from the toolbar on the original donation's Detail Window (this adds a new donation record to the same order)
- If you only need to reduce the donation and do not need to split it, stop here
- You may process a partial refund if necessary or leave any unpaid balance on account as the situation demands

Enter the pertinent donation details to allocate the remaining donation value
- Complete the new donation information as needed (see the how-to guide for adding a donation for more details)
- If you are splitting across more than two campaigns, repeat the last two steps to add as many new donations to the order as necessary, making sure that the amounts of the new donations total up to the amount that you reduced the original donation by
Save the new donation entry
- Click the Save button to finish adding the new donation(s)
- Close the new donation's Detail Window
- Close the original donation's Detail Window

The patron's Donation Tab now shows a separate record for the original and any newly created donations. The patron Order Tab retains the same order number used for the original donation and the same total donation amount. No new payments are required so long as the split donations makes up the difference for the old donation reduction.
Completely Remove a Paid Donation Top
Caution
Deleting a donation will NOT delete any associated matching gifts. If you require the matching gift to be deleted as well, repeat these removal steps for the matching gift donation record.
Caution
Donation records cannot be deleted until all associated payments have been removed and all associated tax receipts have been unprinted.
To completely remove a donation, you first delete or reverse payments and unprint prior tax receipts. Once these associated records have been cleared, you can modify or delete the donation record itself. Follow these steps to completely delete a donation:
Locate the donation to be edited on the patron record
- Go to the patron's Donation Tab
Open the donation to be refunded
- Single-click to select the donation record and click Open (or double-click the row)

Open the donation's order payment screen
- From the toolbar on the Donation Detail Window, click the Payment button

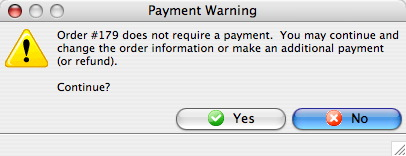
Confirm your choice to edit the order's payments
- If the donation as been paid in full, a popup appears indicating that there is no payment required for the order
- Click Yes to continue to the Order Payment Screen
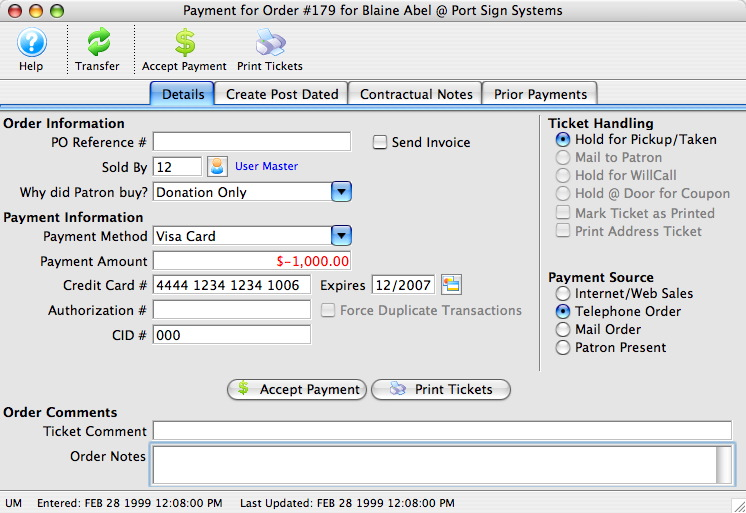
Find the payment method(s) used initially
- If necessary, go to Payment Screen >> Prior Payments Tab to review how the original payment was made

Make a reversing refund payment
- On the Payment Screen >> Details Tab, enter a negative payment for the full value of the donation (usually this is for the same payment type that the original positive value payment was made with)
- Click Accept Payment button
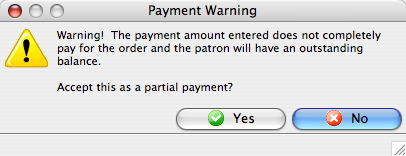
Confirm the refund payment
- On the Payment Warning Popup (warning you that the amount will result in an outstanding balance), click Yes to continue
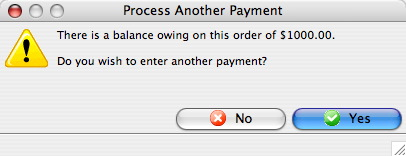
Leave the outstanding balance on the order and go back to the Donation Window
- On the Payment Warning Popup (asking you if you want to enter another payment to cover the new balancing owing), click No to close the Payment Screen and proceed
Find any previously printed receipts associated with the donation
- On the Donation Detail Window >> Receipts Tab, single-click to select any prior receipts marked as already printed
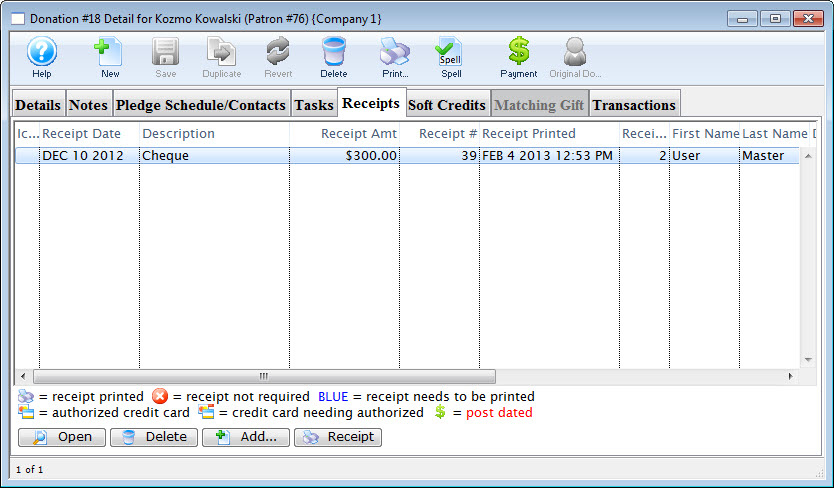
Open any previously printed receipts
- With a receipt selected, click the Open button

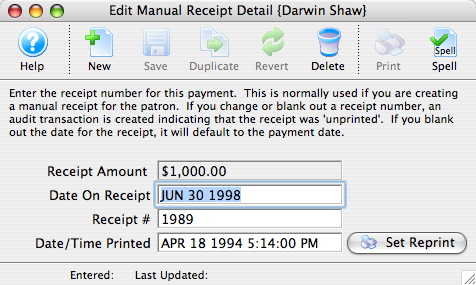
Unprint each receipt
- From the Receipt Detail Window for each receipt, delete the Receipt # and close the window
Delete each receipt
- Once each receipt has been unprinted, single-click to select it from the Donation Receipt Tab and click the Delete button

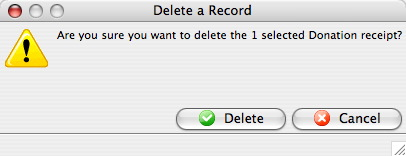
Confirm your receipt deletion
- On the Delete Record Confirmation Popup, click Delete to confirm your choice and remove the receipt from the donation
- Repeat for each receipt until there are no more receipts
- Close the Donation Detail Window
Delete the donation record
- From the patron's Donation Tab, select the donation you have just altered and click the Delete button

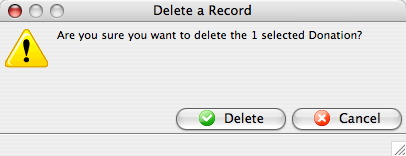
Confirm your donation deletion
- On the Delete Record Confirmation Popup, click Delete to confirm your choice and remove the donation from the patron record
The patron's Donation Tab tab no longer contains this donation, while the patron Order Tab retains the order number that used to contain the donation. This order will have a 0 donation amount, but will retain a complete transaction record for the donation, original payment, refund payment, and donation removal. The refund payment will also be accessible from the Payment Tab.