Print a Report Top
The print parameters must be setup on the machine (a default printer must be selected) in order to print reports, either to the screen or to actual paper. By default, Theatre Manager will print the report to the screen first, so you can verify that the final report is what you actually want, before committing paper to the output.
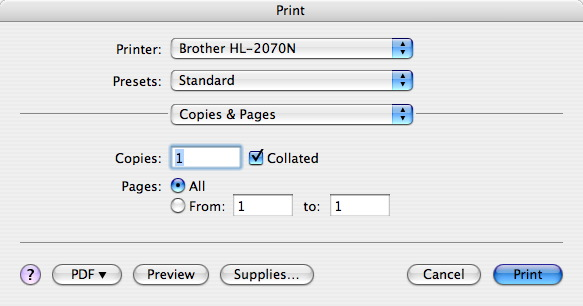
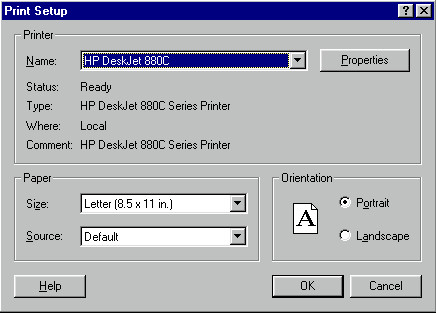
From the Finished Report Window, you can click the Print button to open your computer system's printer dialogue options:


- Select the correct printer.
- Select the number of copies and page range.
- Click the Print button.


- Select the Printer Name.
- Select the paper size and orientation.
- Click the OK button.
Email a Report Top
In order to email reports, you must globally enable invoice emailing in Company Preferences >> Box Office Tab. This feature is available for those clients currently using the web sales module of Theatre Manager. To enable sending from an employee's individual email address, the employee must have their SMTP setup correctly in Employee Preferences >> Email Tab.
To email a PDF version of the report, follow these steps:


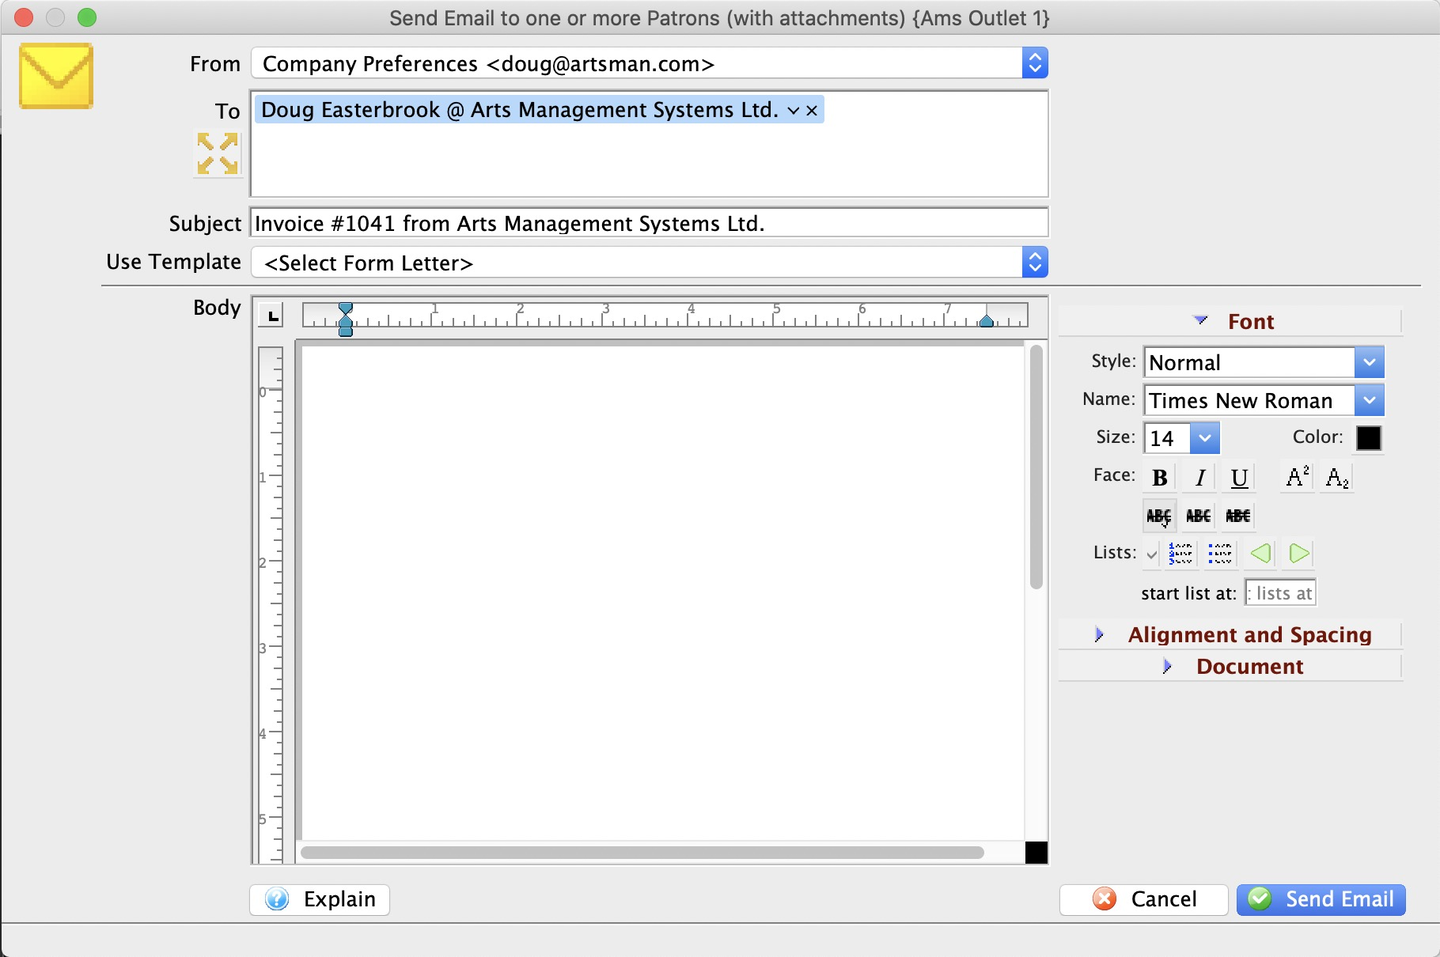
Click the Email button at the top of the Finished Report Window to open the Email Report to Patron Window.


Choose the Send From email address:
- The Web Server email address
- This is setup in Setup >> Company Preferences >> Company Tab.
- The email will be sent by the Web Listener.
- The current user's email address
- This is setup in Employee Preferences >> Email Tab.
- The email will be sent right away from the workstation.
Step 3
Select the Send To email address by either:
- Typing part of the patron name or company or
- Typing part of an email list name
In either case, if you pause typing for a short period, a selection list will pop up letting you pick somebody else to add to the email distribution list.
The Report will be sent to the primary email address pulled from the patrons record.
Step 4
Edit the Subject Line as desired.
Step 5
Enter any desired text in the Body Field below the subject. You can type something or select an option from the Use Template Dropdown, which shows template letters set up as a cover letter.


Click the Send Email button in the lower right of the window.
Queue a Report Top
Best Practice
Using relative date criteria like is in next or is in last may be helpful if you want to set up some queued reports that can be re-run on a daily basis.


To run a report in the background report server instead of immediately on your local machine, follow these steps:
- Open the Report Selection Window.
- Select a Report Category on the left side.
- Select a report on the right side that matches your needs.
- Click the Print button (or double-click on the report name).
- Follow each of the tabs in the Report Build Options Tabs, starting with the Search Tab to enter criteria to limit the data that will appear on the report.
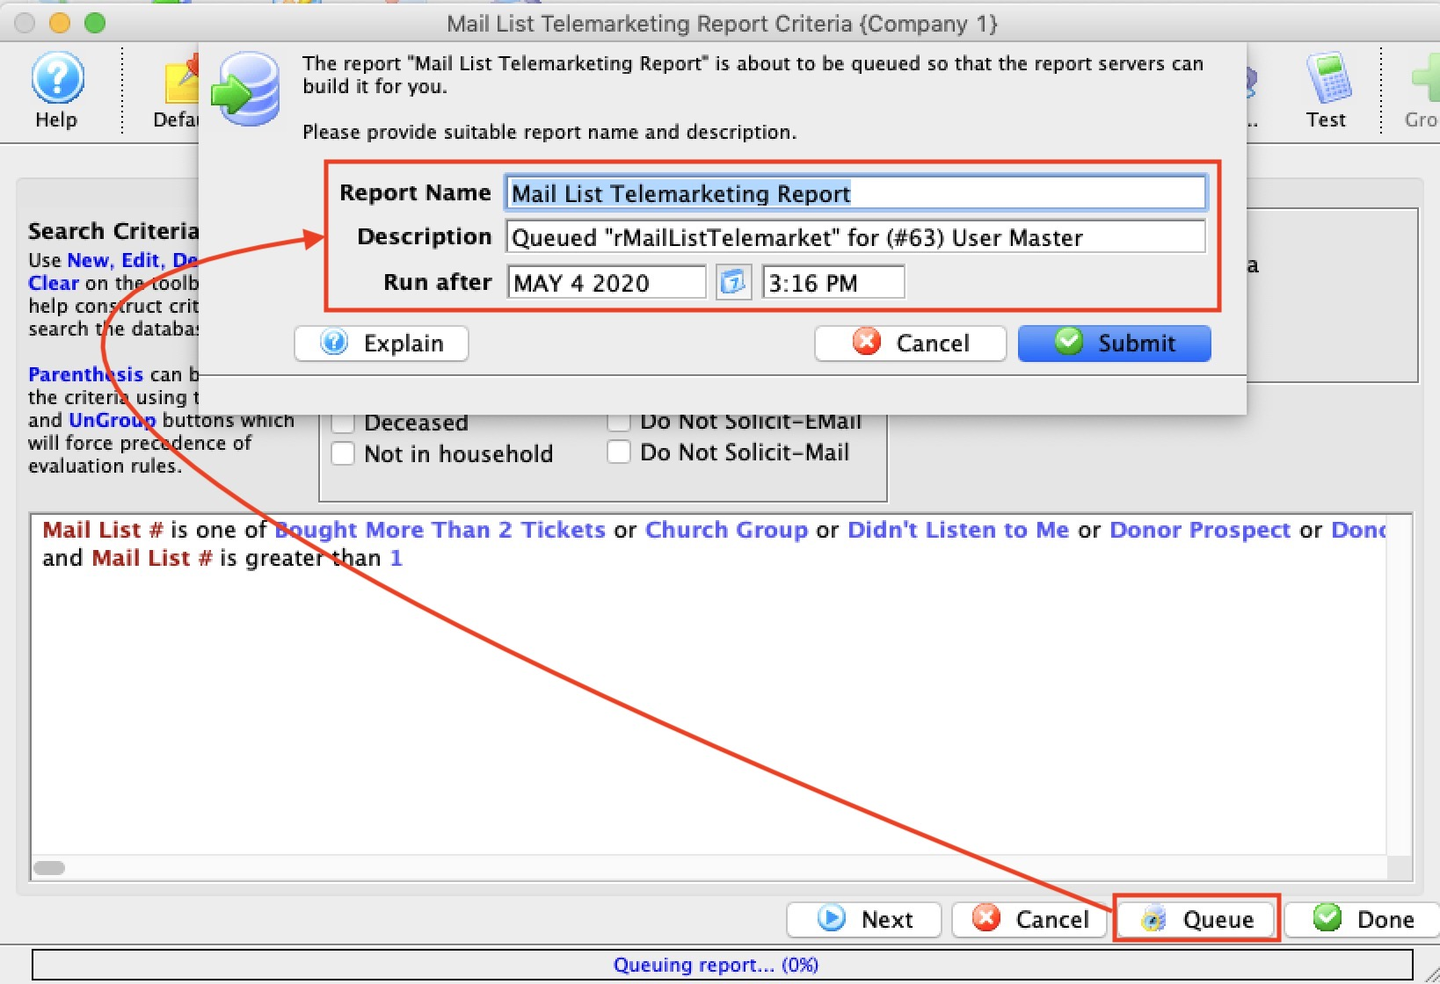
- Click Queue button (instead of the Done button), which opens a drop-down window where you can edit the following:
- Report Name (defaults to the system report name)
- Description (this should be changed to something that will let you recognize it later, e.g.
Year end financial statement) - Run After (defaults to current date and time, but can adjusted to pull the report in the future)
To view previously queued reports, see the Report Queue List Window.