Running and sending an order invoice follows the same steps of running any report. As a report dedicated to creating a confirmation or invoice for completed orders, the process can be started from several places, each of which is better suited to the type of invoice you need to pull:
- Creating invoices based on criteria
- Creating a single invoice
- Creating an invoice at the time of sale
The Invoice Build Options Tabs are the same regardless of where you start the invoice building process. Follow the single invoice step-by-step tutorial to see these steps in full.
Generate an Invoice From the Report Selection Window Top
Step 1
From the Report Selection Window, click the Ticket Printing, Invoicing and Inventory Analysis Category and then select the Print Invoices report. Double-click or click the Print button to open the Print Invoice Criteria Window.
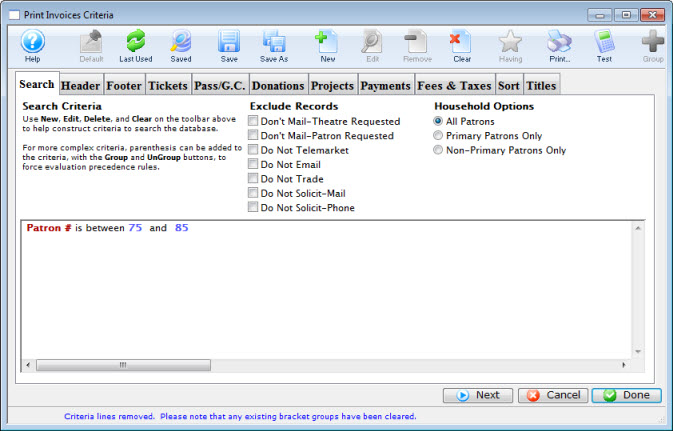
Enter the necessary criteria (Order # or Account # recommended) on the Search Tab.
Step 3
Adjust the remaining Build Options Tabs as needed, including the selecting of any custom invoice comments on the Footer tab. Click the Done button to display the invoice on screen.
Step 4
Generate an Invoice From the Payment Window Top
Step 1
From an order's Payment Tab, click the Invoice button. This will open the Print Invoice Criteria Window with a single line of criteria automatically added to specify the orders you selected.
If you have Email PDF confirmation of sale to patron selected in your Employee Preferences >> Box Office Tab, the invoice building process will begin automatically whenever you close an order window (e.g. clicking the Accept Payment, clicking the Print Tickets button, or clicking the close window option.)
Step 2
Adjust the Build Options Tabs as needed, including the selecting of any custom invoice comments on the Footer tab. Click the Done button to display the invoice on screen.
Step 3
Generate an Invoice From the Patron Window Top
After placing an order for a patron, an invoice for the order can be created and printed from the patron window.

Open the patron's record and click on the Order Tab.

Select the order(s) to be invoiced and click the Invoice button. This will open the Print Invoice Criteria Window with a single line of criteria automatically added to specify the orders you selected.

Adjust the Build Options Tabs as needed, including the selecting of any custom invoice comments on the Footer tab. Click the Done button to display the invoice on screen.

Generate an Invoice From the Batch Function Top
While taking the payment for an order it is easy to add an invoice to batch for printing in bulk at the end of the day.
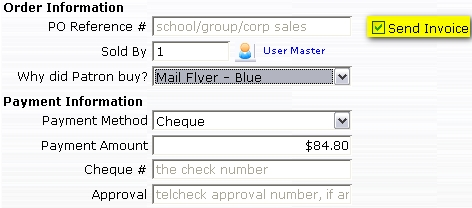
In the Payment Tab of the Order Window, check the Send Invoice Box. This places the invoice in the Print Ticket Invoices batch.
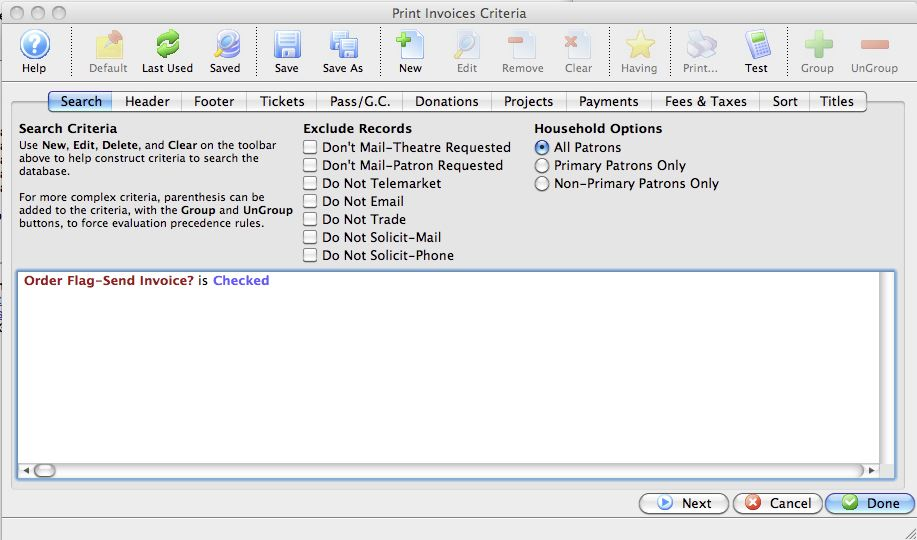
When a batch of invoices is ready to be printed, go to Setup >> Batch Functions >> Print Ticket Invoices. This will open the Print Invoice Criteria Window. Use the criteria Order Flag - Send Invoice equals Yes, which finds all unprinted invoices that have been listed as Send Invoice in the Payment Window.

Adjust the Build Options Tabs as needed, including the selecting of any custom invoice comments on the Footer tab. Click the Done button to display all invoices to be printed.

Click the Print button to print the invoices. The Email option will also be available if you select only one patron (it sends to the primary email address on file).