Build Custom Season Renewal Notice Top
Here are the basic steps for create a custom report, currently only available for the Season Ticket Renewal Notice.
Step 1
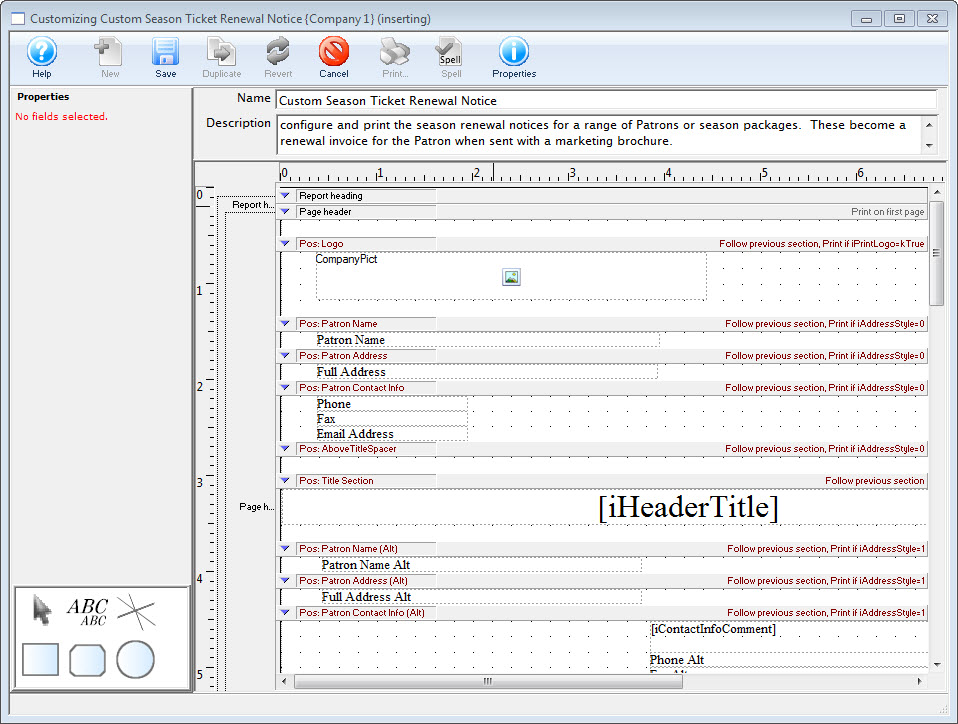
Open the Report Selection Window and single-click to select the Season Ticket Renewal Notice. With the report highlighted, click the Customize button to open the Report Customization Window.
Step 2
Click the blue toggle button on individual sections to expand them all.
Step 3A: Adjust Visible Field
The fields that are on the report are not editable. However, a field can be made invisible by selecting it and unchecking the visible option on the left hand side.
Step 3B: Adjust Page Layout
Use the Properties Dialogue to adjust margins and choose between portrait and landscape mode.
Step 3C: Add Text Boxes
To add additional text to the report, select the ABC icon from the customization Toolbox and draw a new text field on the report. Then double click on the new text field to edit the text. A text entry box will appear.
Step 3D: Adjust Text Box Location
Any of the text field boxes can be moved by dragging with the mouse. The position can then be fine tuned by using the Properties Dialogue section on the left hand side of the window.
Step 3E: Adjust Text Formatting
Selecting one field at a time, use the left-hand Properties pane to adjust font styling.
Step 3F: Adjust Section Sizing
Each section bar (the gray bar) can be moved up or down to decrease or increase the size allowed for a section. This is useful if the information when printed is cut off anywhere. Simply move the gray bar down to allow more space for the section.
Step 4: Enter a Filename & Description
At the top of the window, enter an appropriate report Name and Description.
Step 5: Save the File and Close the Window
Click the Save button. The custom report will be saved in the same category in the Report Selection Window with your custom filename. Close the Customization Window.
Build Custom Record Count Report Top
This report can take a little time to get used to setting up and should not be the first report you attempt to pull in Theatre Manager. Before proceeding, review how to adjust finished reports and where to find your Window Status Bar for error descriptions that will help you make necessary setup adjustments.
The Record Count Report allows extreme customization, particularly for demographic or geographic analysis of your data. Here are the basic steps to generate a custom report.

On the Report Selection Window, click on the Exporting, Labels & Record Counts category, then double-click on the Record Count report on the right-hand side of the screen. Alternatively, single-click to select the Record Count report and click the Print button.
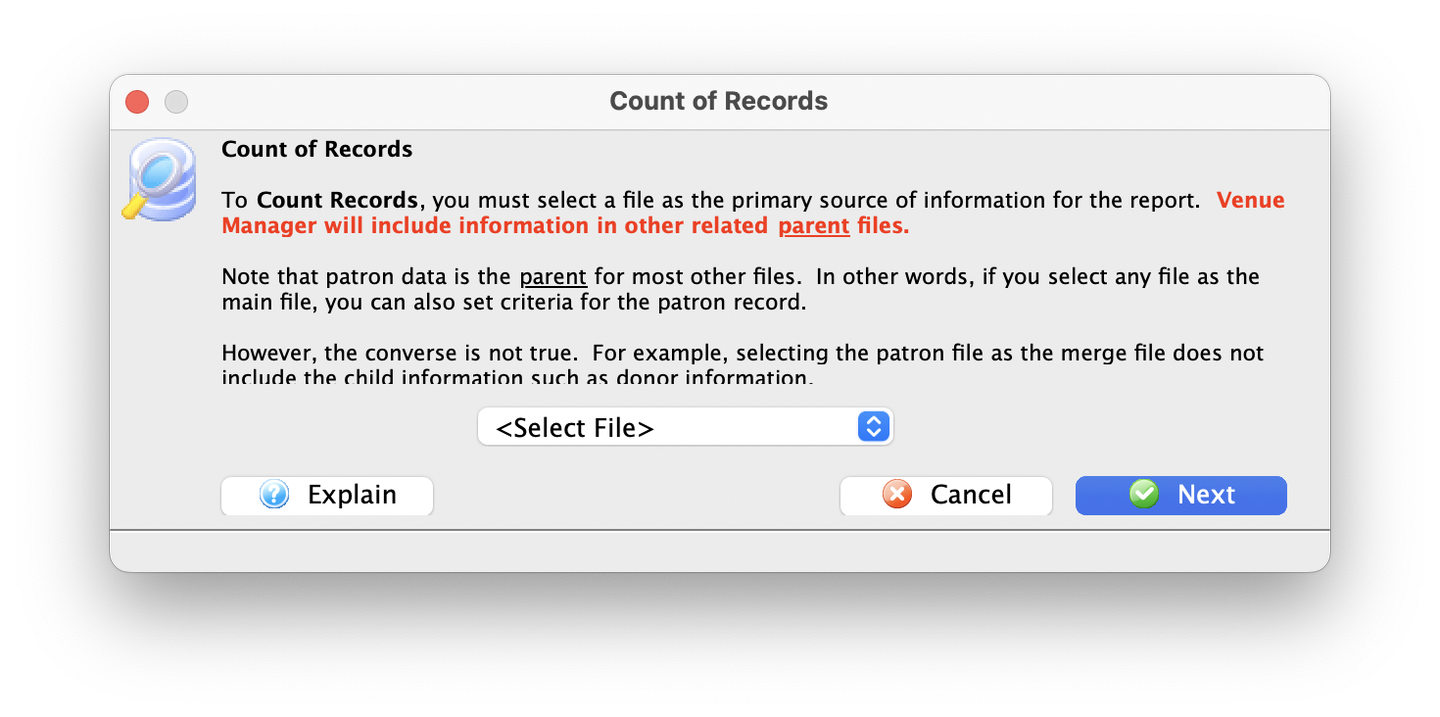
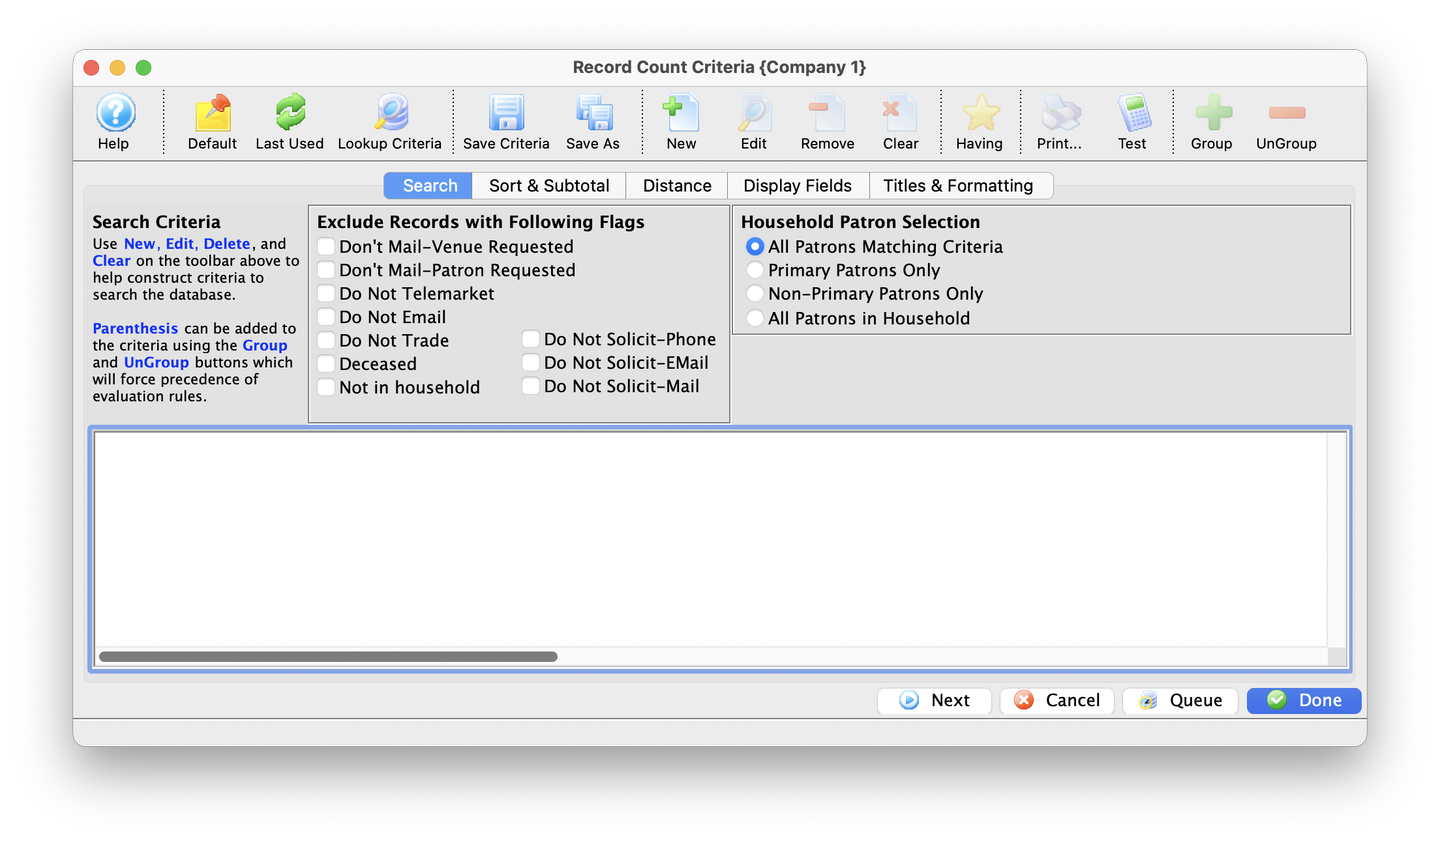
When the Build Options Window opens, add a database query to the Search Tab. When done, click the Next button.
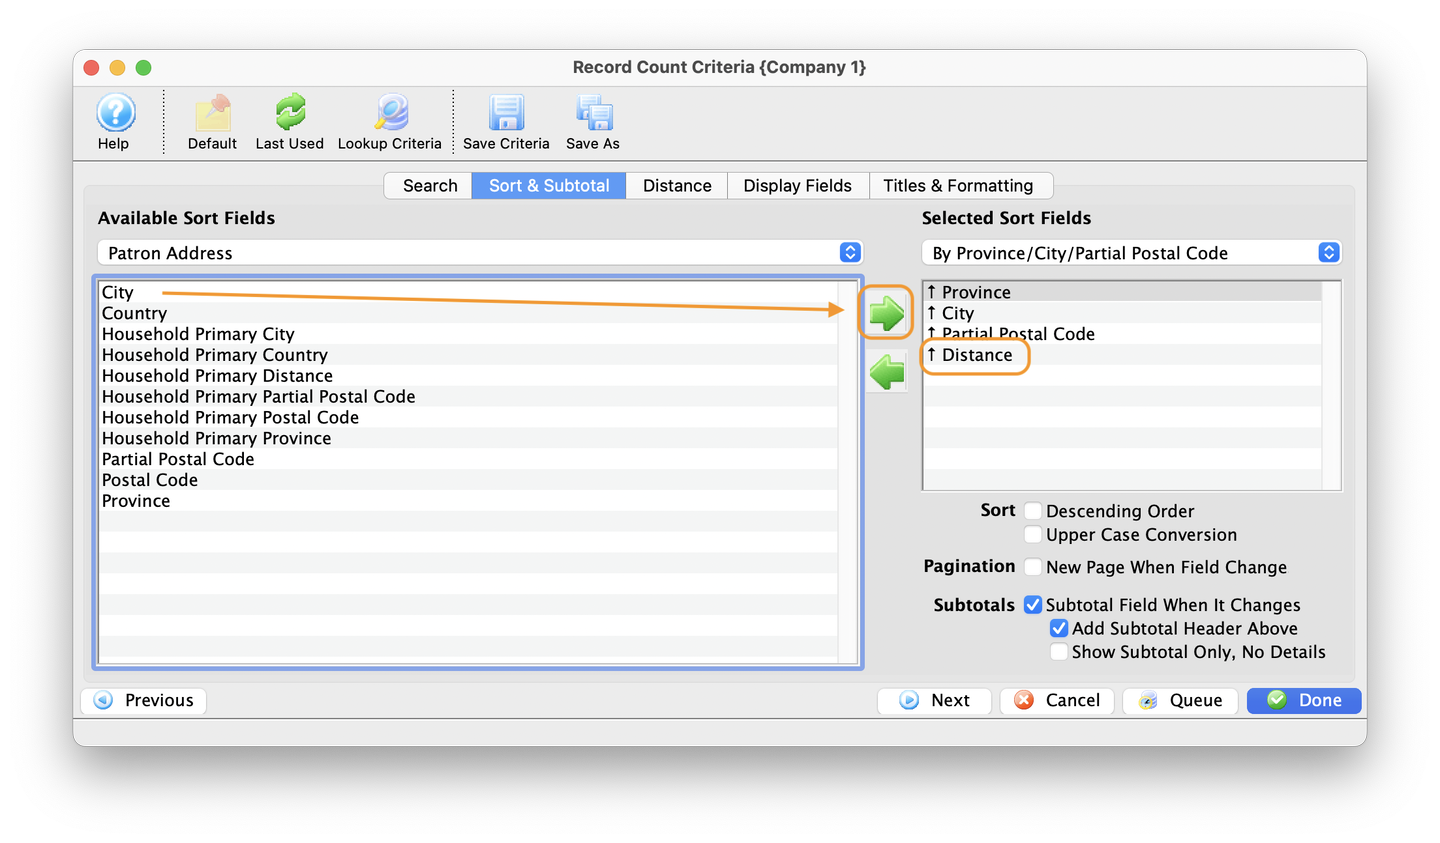
On the Sort & Subtotal Tab, select a preset sort option from the Selected Sort Fields Dropdown and/or add sort fields from the left-hand Available Sort Fields area.
To enable the Distance Tab, make sure to include either the Distance field or the Household Primary Distance field (under the Patron Address category) as a selected sort field.
Set your initial sort field adjustments as needed. The report requires at least one sort field set to Subtotal Field When it Changes. When ready, click Next.
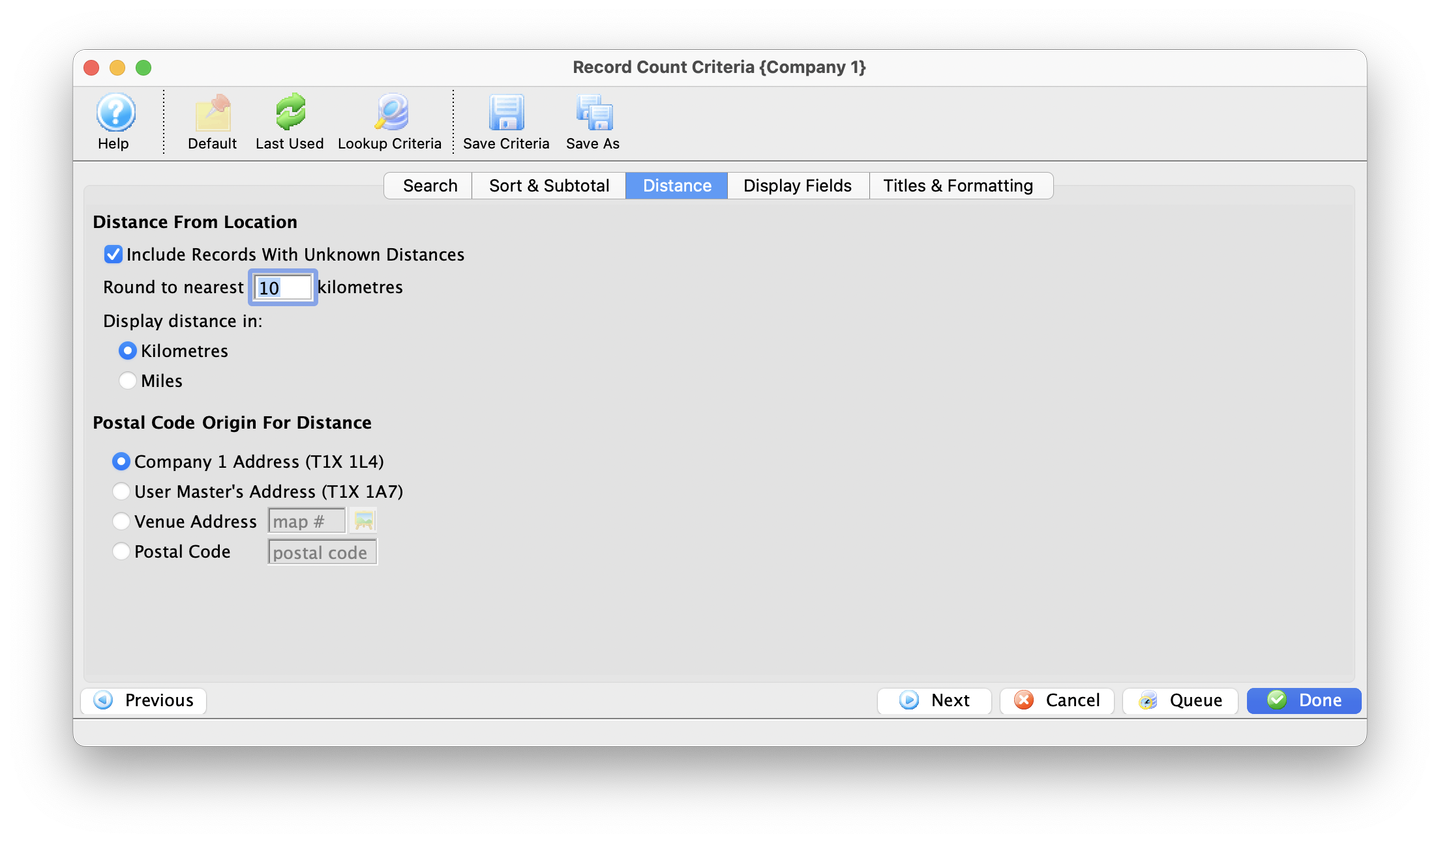
If you have a distance field included in the prior step, the Distance Tab opens. Make initial adjustments to the options on this tab and then click Next.
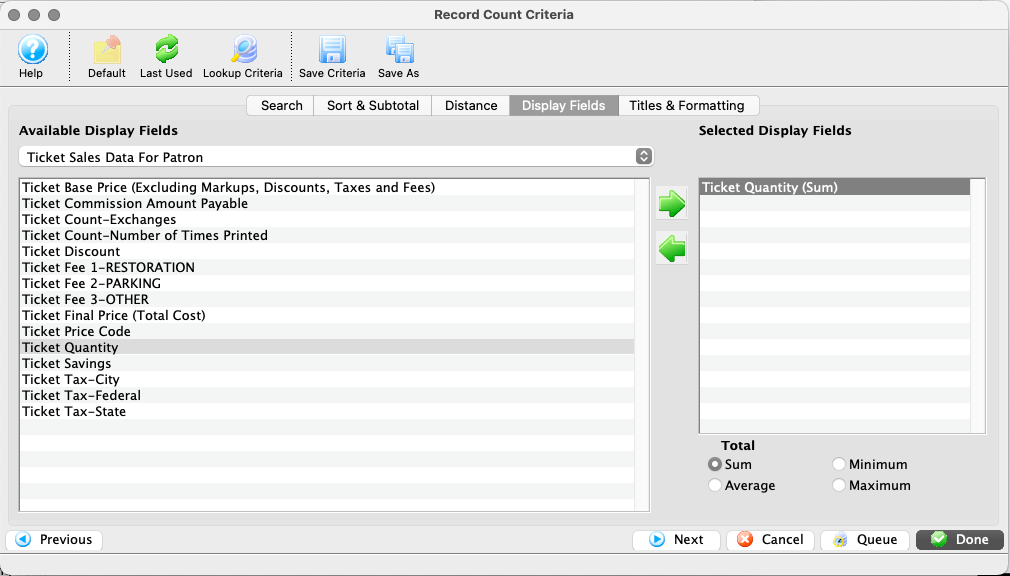
Unlike most other reports, the Display Fields Tab on the Record Count Report allows you to decide which data columns are displayed on the final report. Use the left-hand Available Display Fields area to find and add fields to the right-hand Selected Display Fields area. You can double-click on a field name to add or remove it from the Selected display Field list. Alternatively, single-click a field name and click on the green arrows to add or remove fields from the Selected Display Field area.
Single click to highlight a selected display field and choose an aggregation radio button (e.g. sum, minimum, maximum, average). Repeat for all selected display fields.
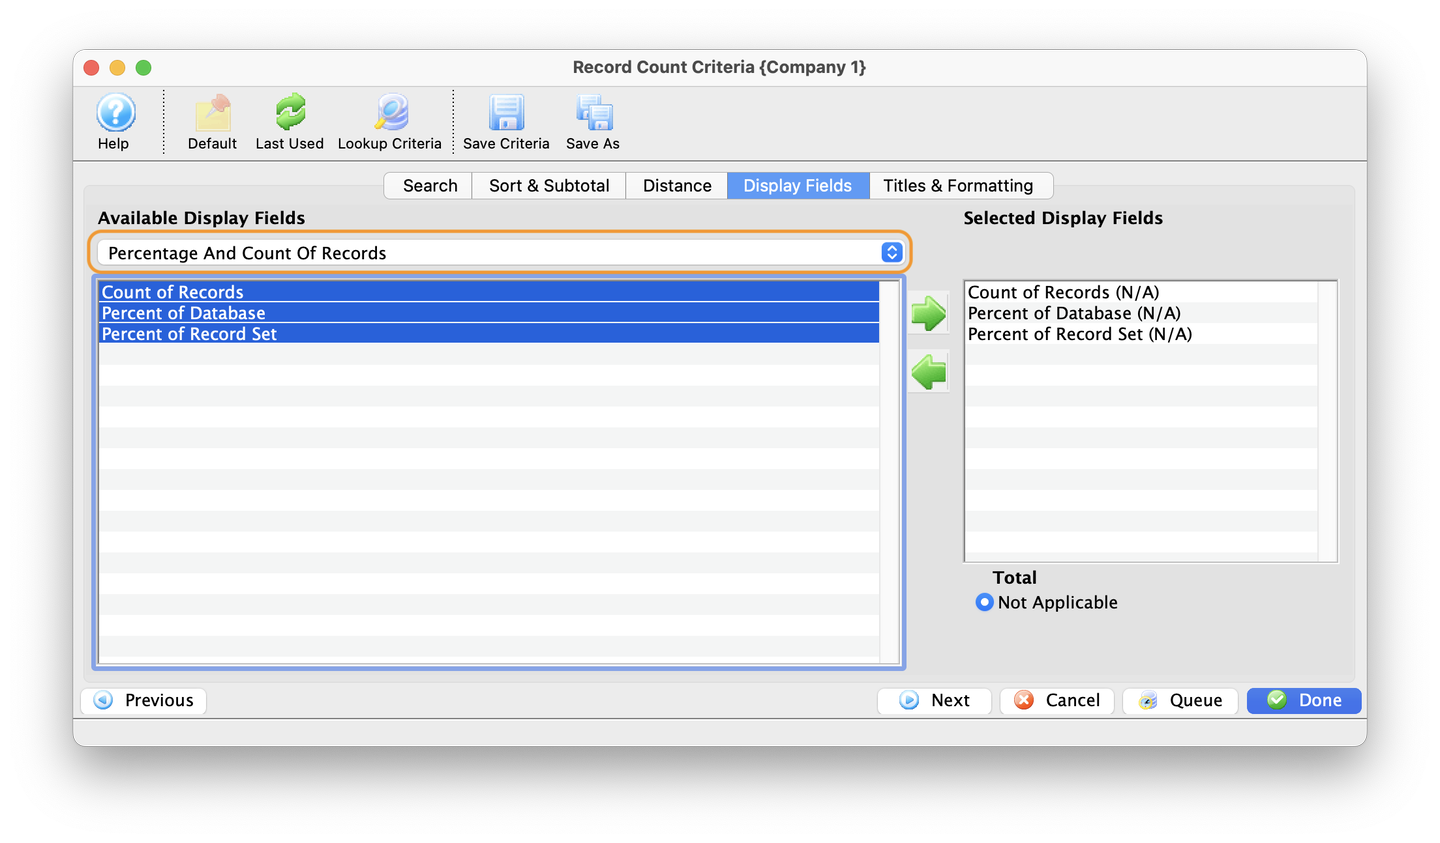
The category Percentage and Count of Records includes three commonly-required analysis aggregations:
- Count of Records
- lists the straight count of displayed query results
- Percentage of Database
- lists the count of displayed query results as a percentage of the records within the database
- Percentage of Record Set
- lists the count of each displayed query result as a percentage of the total displayed query results
If appropriate for your need, add one or more of these fields to the Selected Display Field area. When done, click Next.
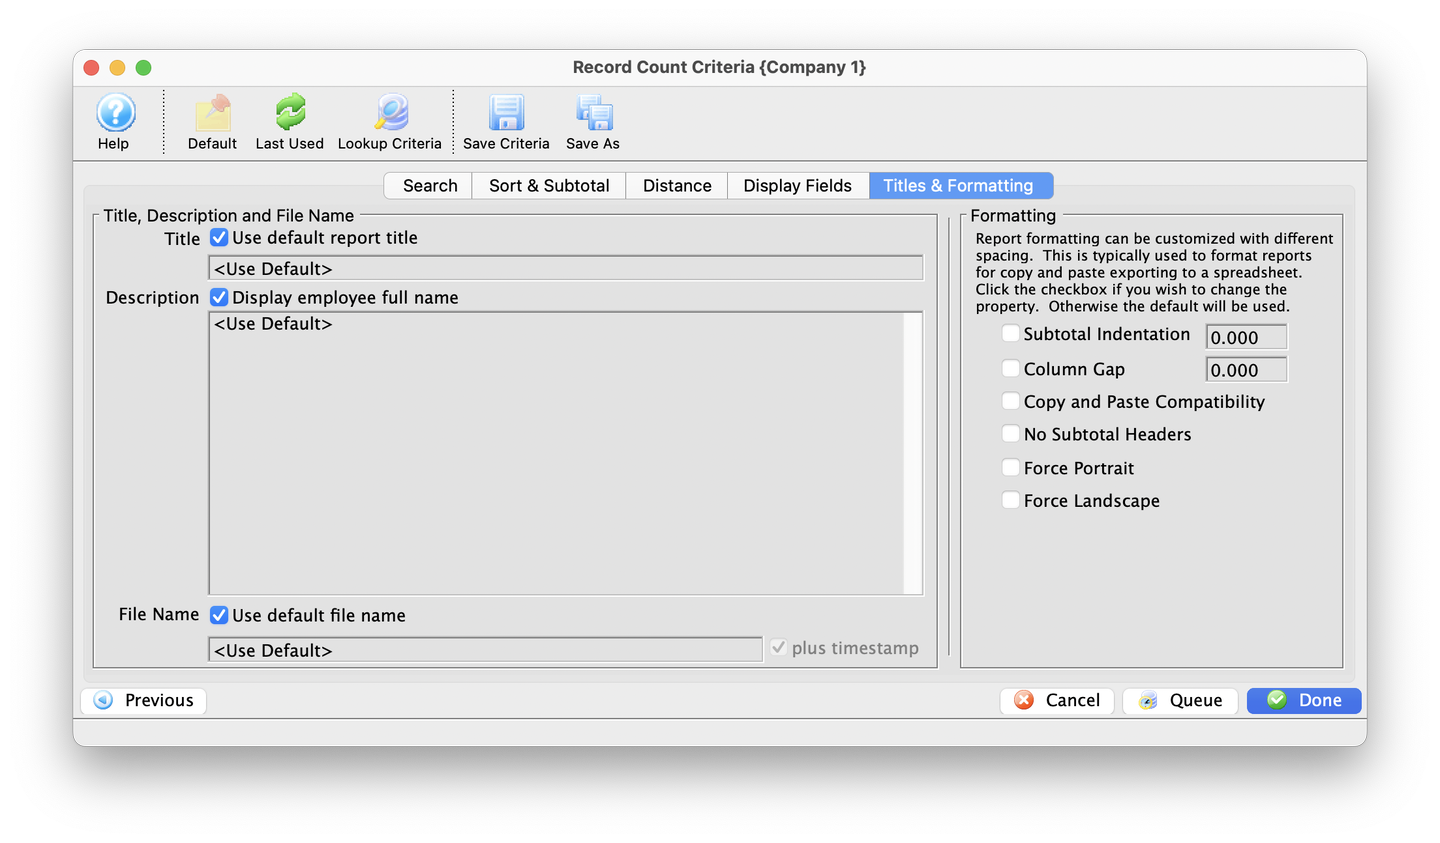
On the Titles & Formatting Tab, make necessary adjustments. A custom title and custom description may be especially useful if you plan to save or share the final report. When ready, click Done to generate the report.

The Finished Report Window opens. Review and use the Alter Criteria button to adjust the report settings until you are satisfied.