Adjust Criteria After Report Building Top
From a Finished Report Window, you can click the Alter Criteria button to open the current report's build window and adjust criteria or alter your selections on the Build Options Tabs. Clicking the done button will re-generate the current report with your adjustments.
Refresh Data in a Report Top
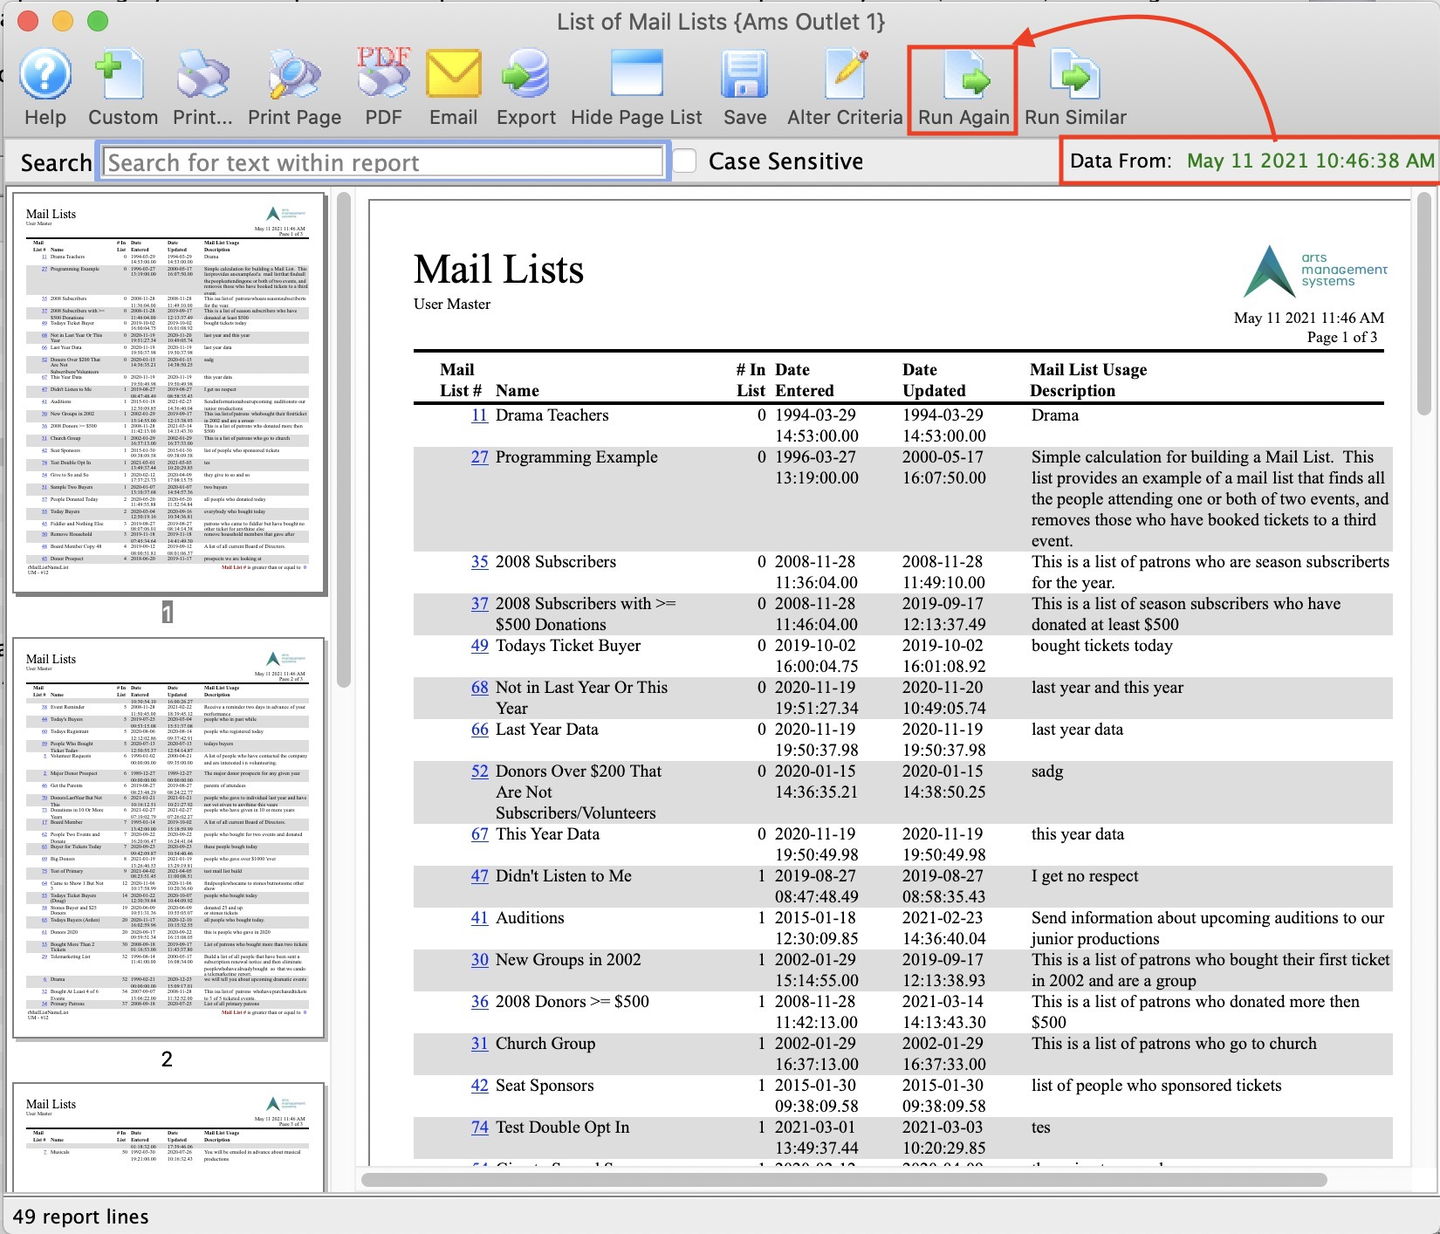
The left side of the Finished Report Window is a timestamp that indicates when the data for the report was retrieved from the database. The text is normally green. If it is red, then the data is from a report containing data retrieved more than 15 minutes prior.
If you close the report window and run the same report with the same criteria, the system may show the data from the prior time you ran this report and the timestamp will not change. To force the report to pull the latest data using the current criteria, click the Run Again button to refresh the data.
Adjust Report Layout Top
Select Sort Fields in a Report Top
On the report's Sort Tab or Sort & Subtotal Tab, adjust the selected sort fields with the following steps.
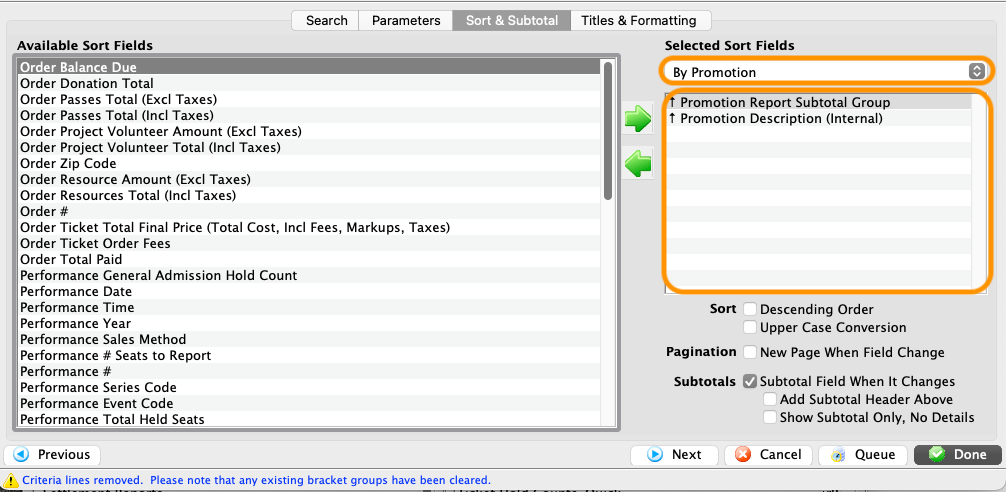

Use the Selected Sort Fields Dropdown to pick one of the report's preset sort options. For longer reports, you can add additional sort fields by selecting an item on the left-hand Available Sort Fields area and selecting the right-facing green arrow to add it to the Selected Sort Field area. Please note:
- You cannot remove sort fields from a preset option.
- Adding sort fields does NOT add the field as a visible output on the report.
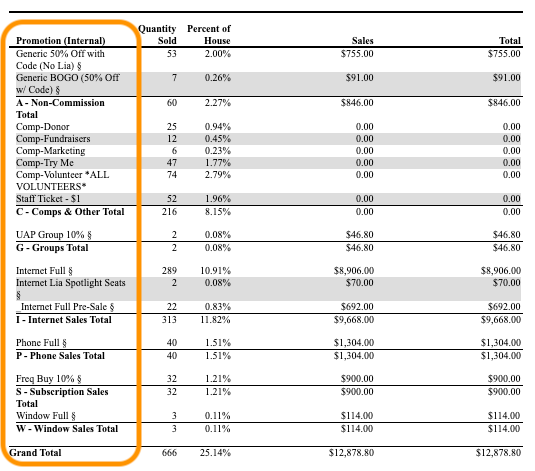

The selected sort fields control the order in which results appear on the Final Report Window.
Set Sort Field Order in a Report Top
On the report's Sort Tab or Sort & Subtotal Tab, set the sort field order with the following steps.
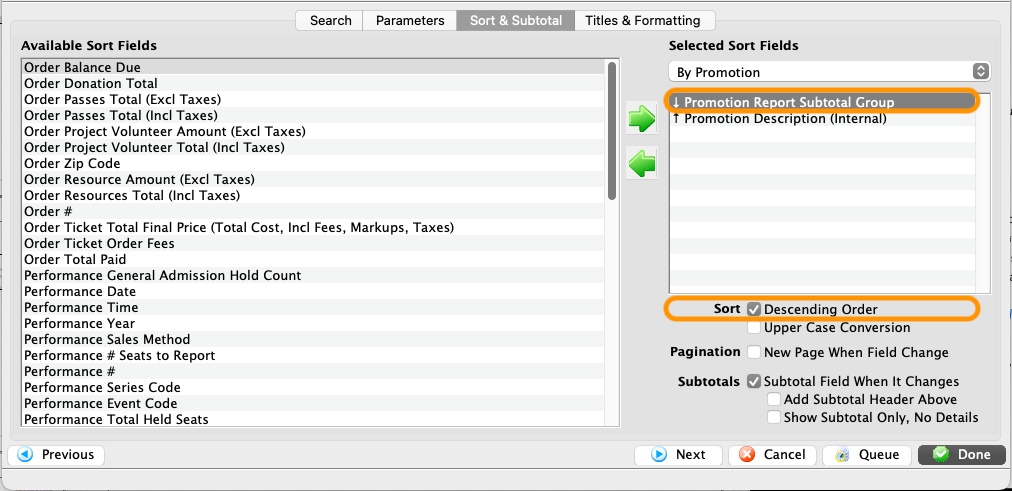

Single-click to select one of the fields in the Selected Sort Fields area. With one field selected, (un)check the Descending Order checkbox. Note that the little arrow icon located to the left of the field name adjusts accordingly.
Repeat as needed for every selected sort field.
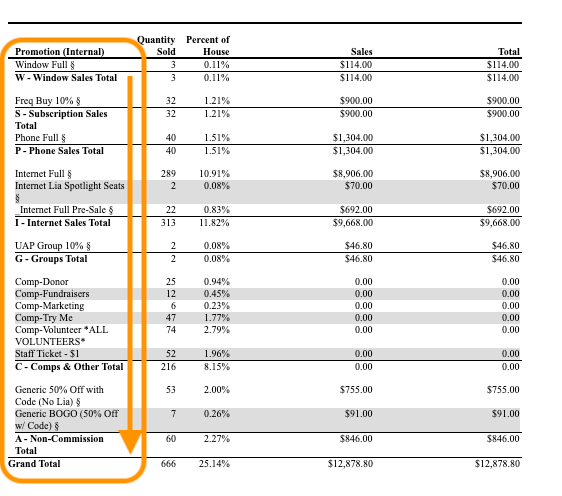

Sort field order adjusts the order that data appears in the Final Report Window. In this case, we changed the Promotion Report Subtotal Group field to appear on the report from Z to A instead of A to Z. The Promotion Description (internal) sort order was left in its default ascending sort order and thus the promotion names within each subtotal group category appear in A to Z order.
Set Subtotal Summary in a Report Top
On the report's Sort Tab or Sort & Subtotal Tab, set the subtotal field summary with the following steps.
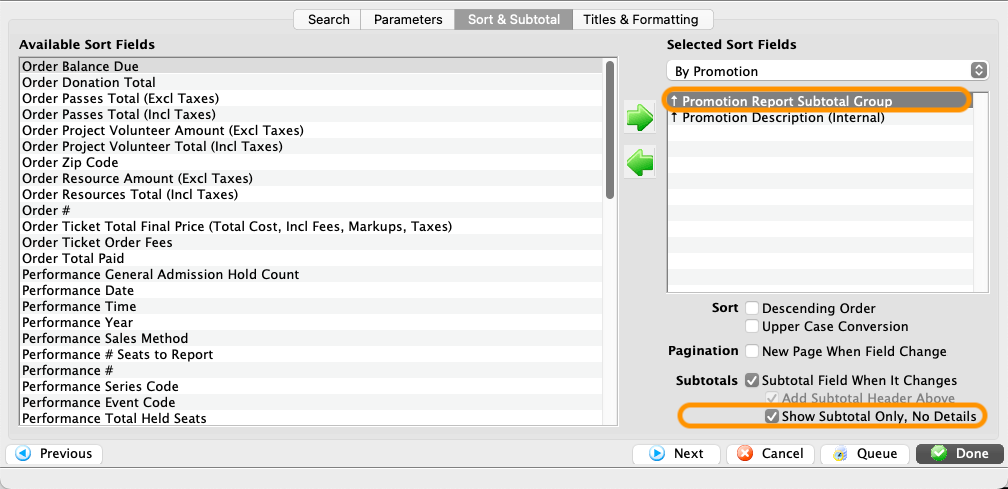

Single-click to select one of the fields in the Selected Sort Fields area. With one field selected, (un)check the Show Subtotal Only, No Details checkbox.
Repeat as needed for every selected sort field.
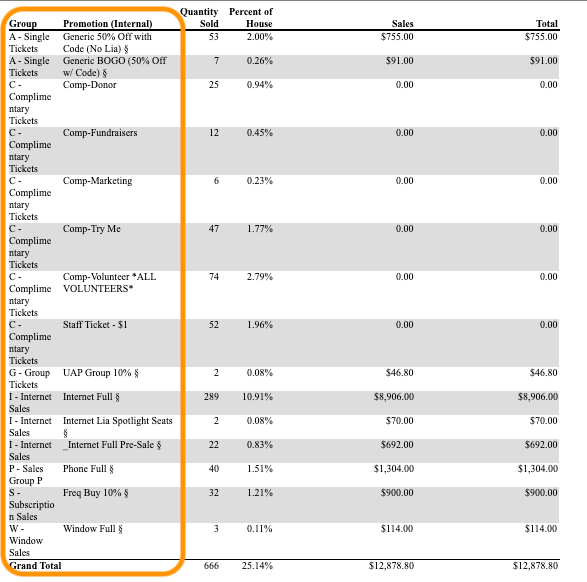

Show Subtotal Only, No Details, when checked, results in a data list without subtotaling. When unchecked for a field, the Final Report Window displays that field's data as a subtotal.
Set Subtotal Header in a Report Top
On the report's Sort Tab or Sort & Subtotal Tab, set the subtotal field header with the following steps.
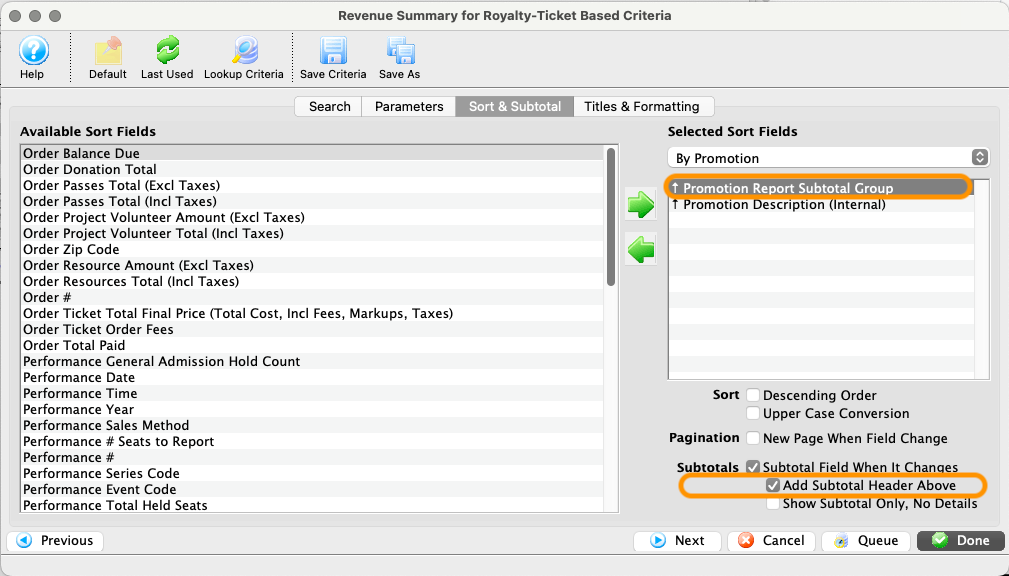

Single-click to select one of the fields in the Selected Sort Fields area. With one field selected, (un)check the Add Subtotal Header Above checkbox.
Repeat as needed for every selected sort field.
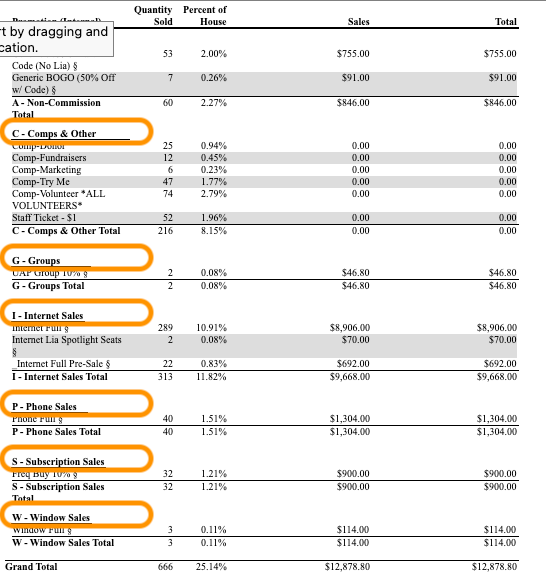

Add Subtotal Header Above, when checked, displays a subtotal category header in addition to the subtotaled value at the bottom of each category.
Set Pagination in a Report Top
On the report's Sort Tab or Sort & Subtotal Tab, set the pagination with the following steps.
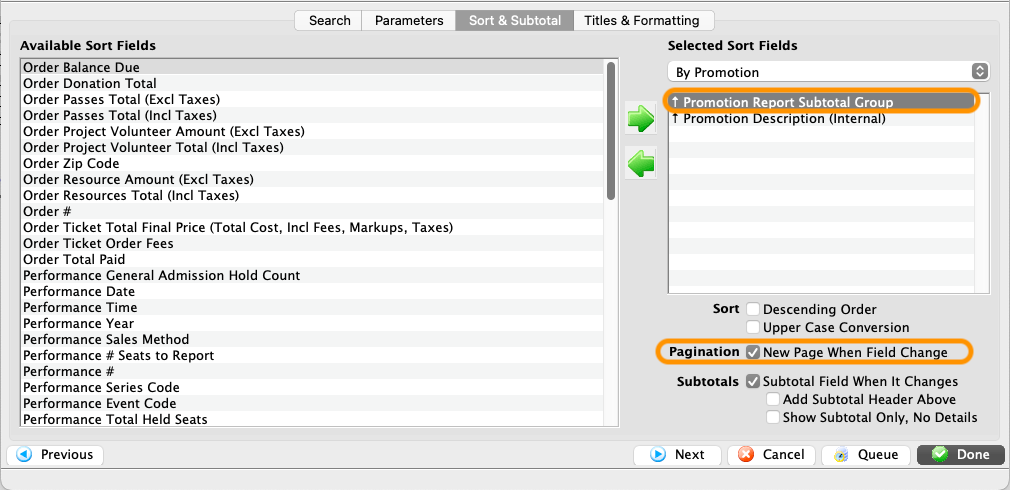

Single-click to select one of the fields in the Selected Sort Fields area. With one field selected, (un)check the New Page When Field Change checkbox.
Repeat as needed for every selected sort field.
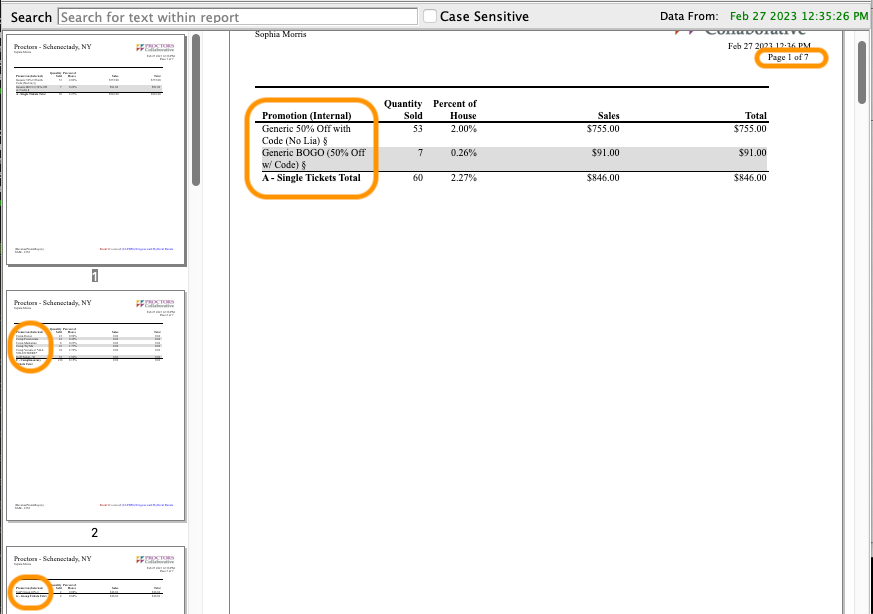

New Page When Field Change, when checked, displays each subtotal category on its own page of the Final Report Window.
Create Custom Titles on a Report Top
On the report's Titles Tab or Titles & Formatting Tab, set a custom title with the following steps.
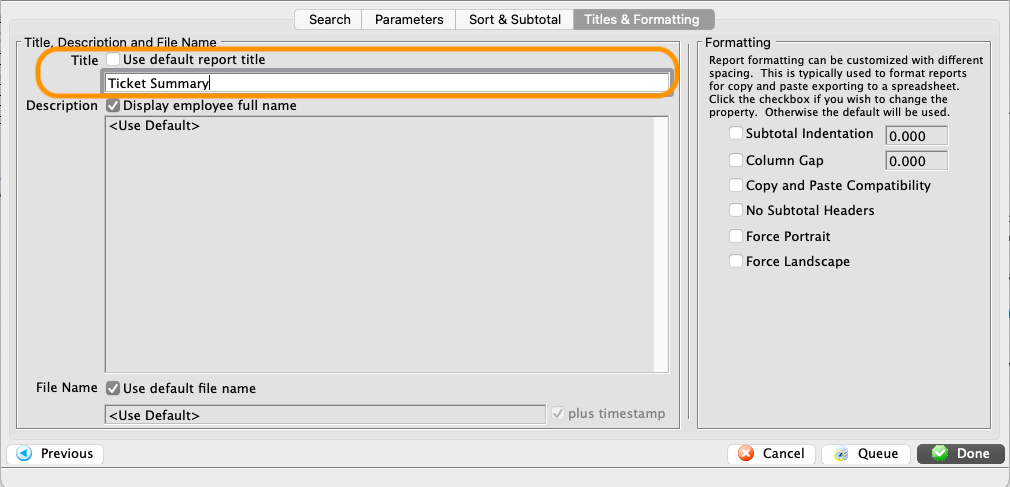

Uncheck the Use default report title checkbox. Enter a custom title in the textbox area.
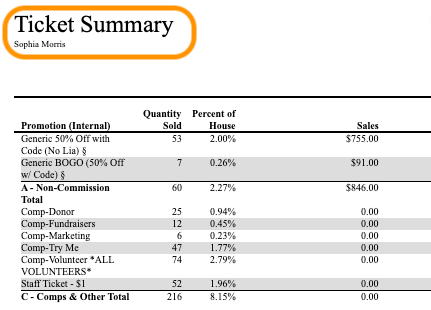

A custom title replaces the default title located on the upper left corner of the Final Report Window.
Create Custom Description on a Report Top
On the report's Titles Tab or Titles & Formatting Tab, set a custom description with the following steps.
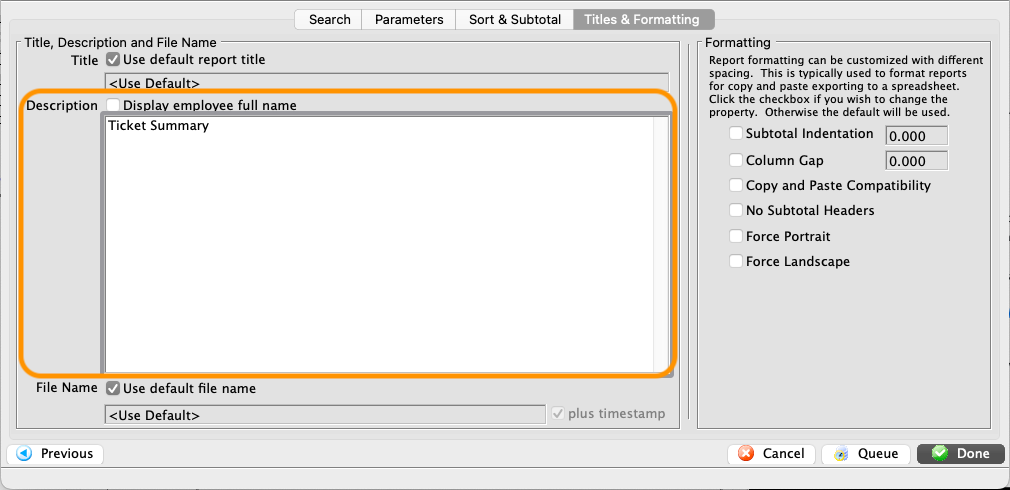

Uncheck the Display employee full name checkbox. Enter a custom description in the textbox area.
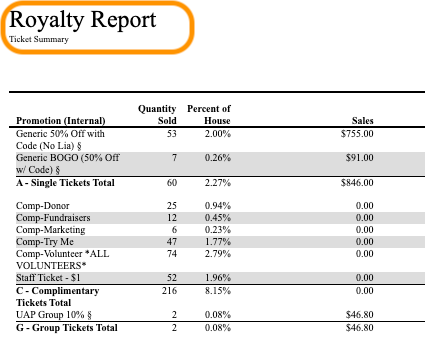

A custom description replaces the default subtitle located on the upper left corner of the Final Report Window under the title.
Create Custom File Name of a Report Top
On the report's Titles Tab or Titles & Formatting Tab, set a custom file name with the following steps.
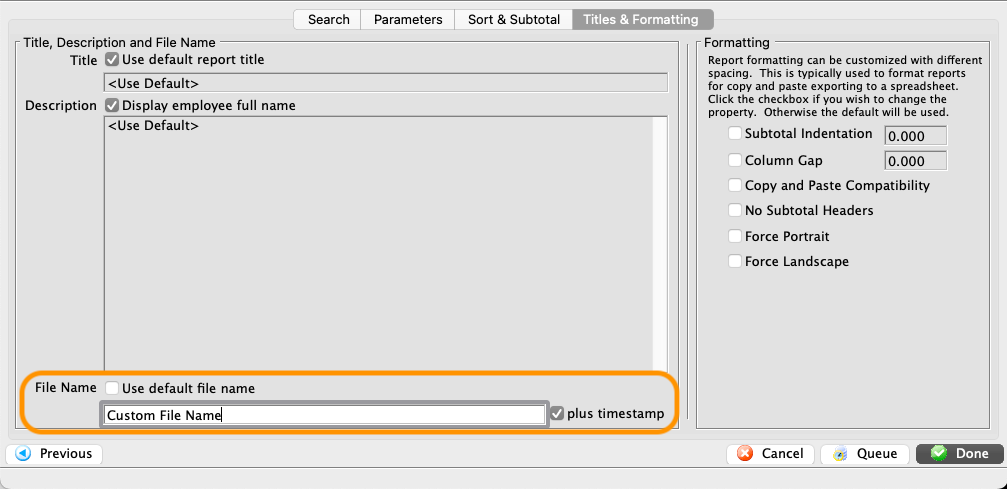

Uncheck the Use default file name checkbox. Enter a custom file name in the textbox area and (un)check the plus timestamp checkbox as desired.
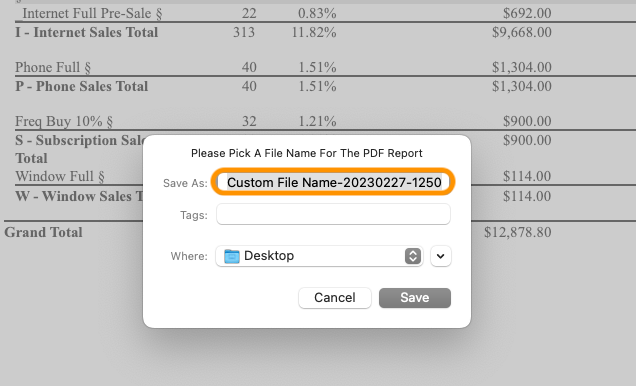

A custom file name replaces the default file name that Theatre Manager generates when you save or export the Final Report Window.
Set Layout of a Report Top
On the report's Titles Tab or Titles & Formatting Tab, you can force a specific layout with the following steps.
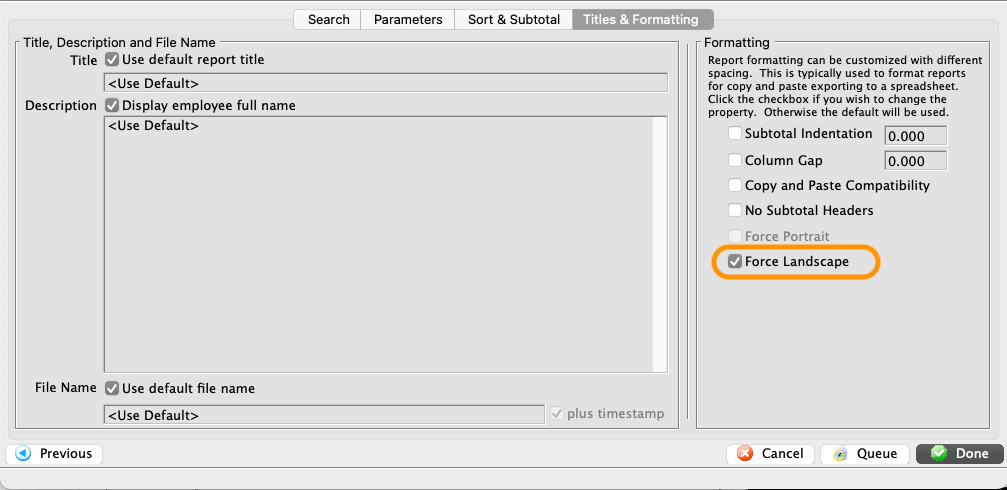

Check either the Force Landscape or Force Portrait checkbox.
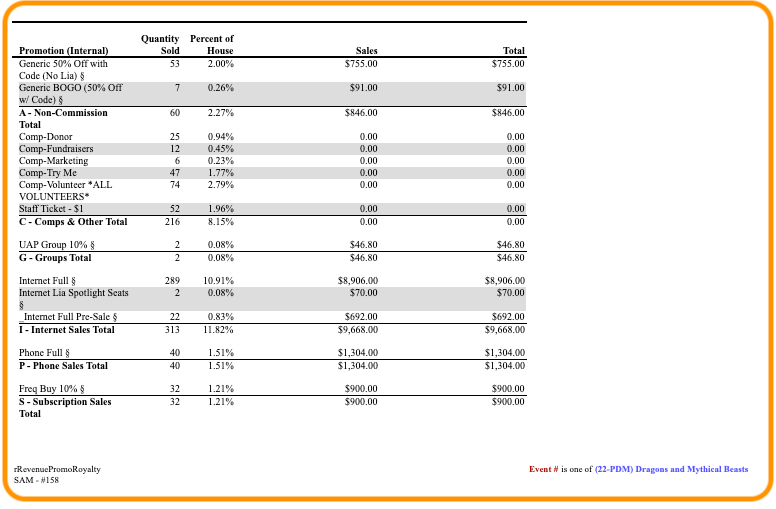

Forcing a specific orientation adjusts the report's default page layout of the Final Report Window.
Set Column Gap of a Report Top
On the report's Titles Tab or Titles & Formatting Tab, you can force a specific column gap with the following steps.
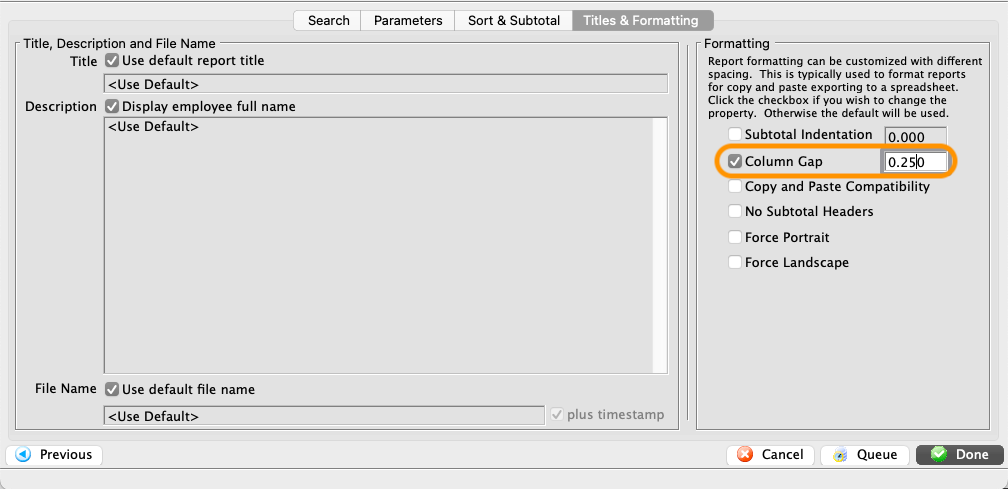

Check the Column Gap checkbox and enter desired spacing value.
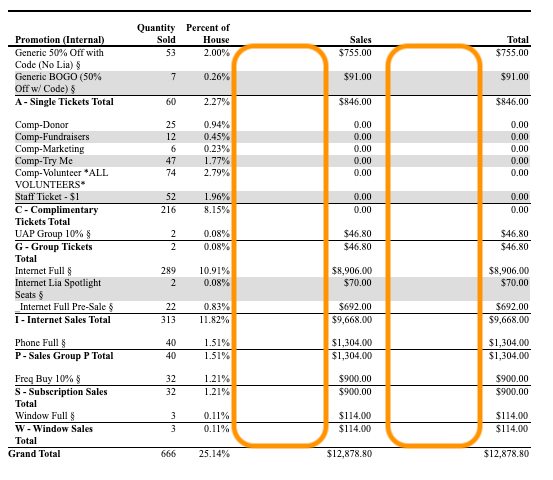

Forcing a specific column gap overrides the report's default spacing between columns on the Final Report Window.
Set Subtotal Indentation of a Report Top
On the report's Titles Tab or Titles & Formatting Tab, you can force a specific subtotal indentation with the following steps.
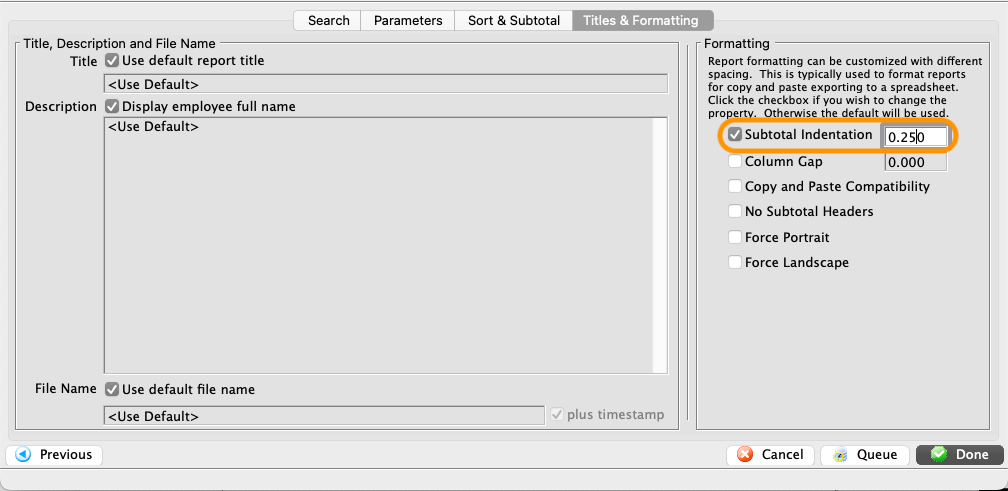

Check the Subtotal Indentation checkbox and enter desired indentation/margin value.
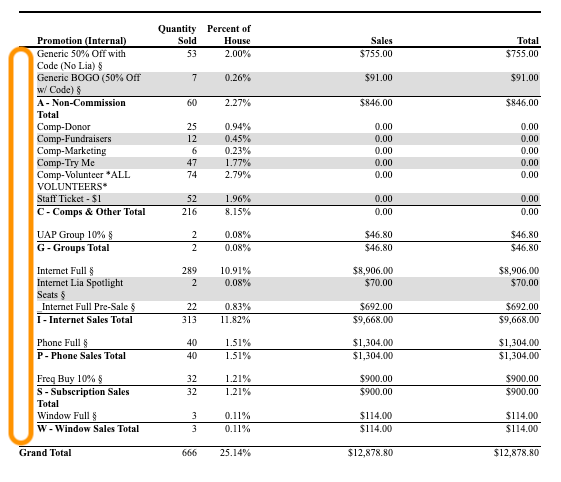

Forcing a specific subtotal indentation overrides the report's default subtotal field indentation on the Final Report Window.